
Intro to Enameling: Double-Sided Pendant 1
7 Minute Read
For the last couple years The W.W. Carpenter Enamel Foundation has held "Intro To Enameling" workshops that are designed to walk beginning enamel students through multiple procedures in a short amount of time. Three projects were developed where choice of color and design considerations were minimized so that the focus is on enamel procedures.
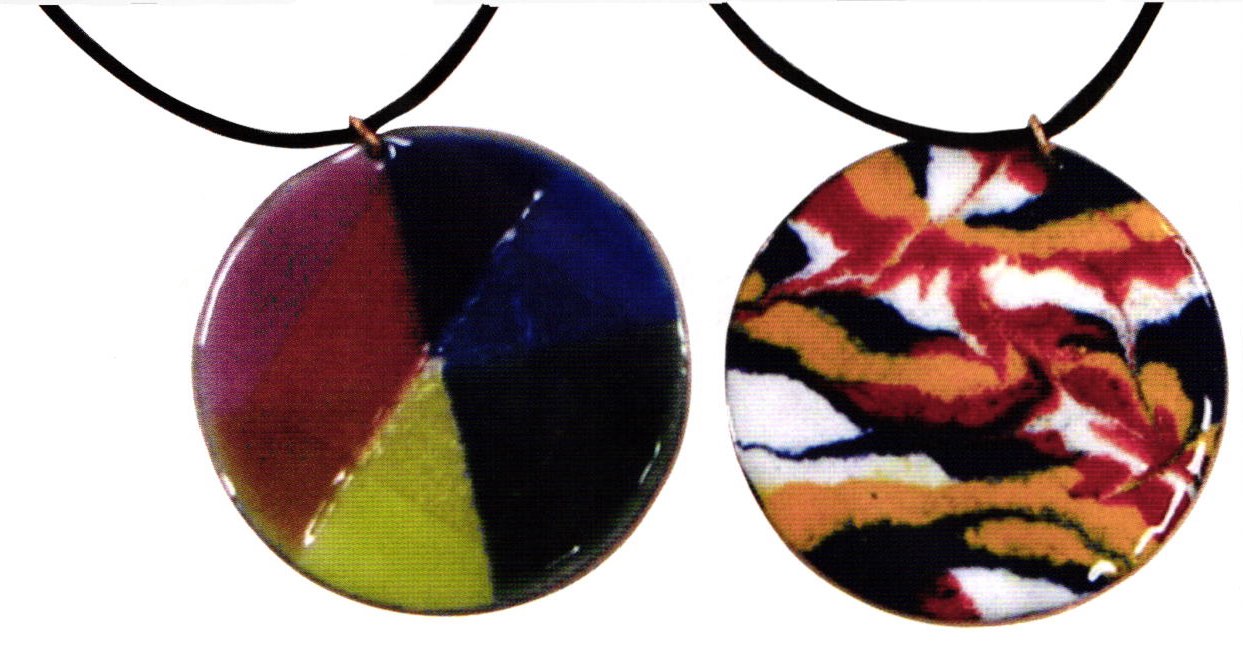
The first project is a double-sided pendant. Other projects will follow in subsequent Glass on Metal issues.
Objectives
- No metal preparation - No harmful chemicals
- Working with both opaque and transparent enamel
- Sifting procedure
- Wet Inlay procedure
- Moving or manipulating wet enamel (cold scrolling)
- Vibrating enamel to smooth surface
- Silver foil application
- Stencil procedures
- Transparent enamel layering to create different color
- Firing procedures/cleaning firescale off edge after firing
Materials
- 2 inch diameter copper circle with pre-drilled hole for jump ring. Copper is oxygen free, high conductivity, 0.040 inch (1mm)
- Opaque 80 mesh enamels for front side - 1870 Orient Red, 1685 Cobalt Blue, 1820 Goldenrod Yellow, 1030 Foundation White
- 1 1/4 inch silver foil square
- Opaque and Transparent 80 mesh enamels for back side -1030 Foundation White, 2020 Clear for Silver, 2836 Raspberry, 2660 Nitric Blue, 2230 Lime Yellow
- Klyr-fire
- Glass of Water
Tools
- Sifter
- Paper Towel
- Toothpick
- Inlay Spreader
- Inlay Spatula
- Brush
- Postcard
- 150 grit Alundum Stone
- Pedestal
- Old phone book
- Plastic Spoons
- Pipette
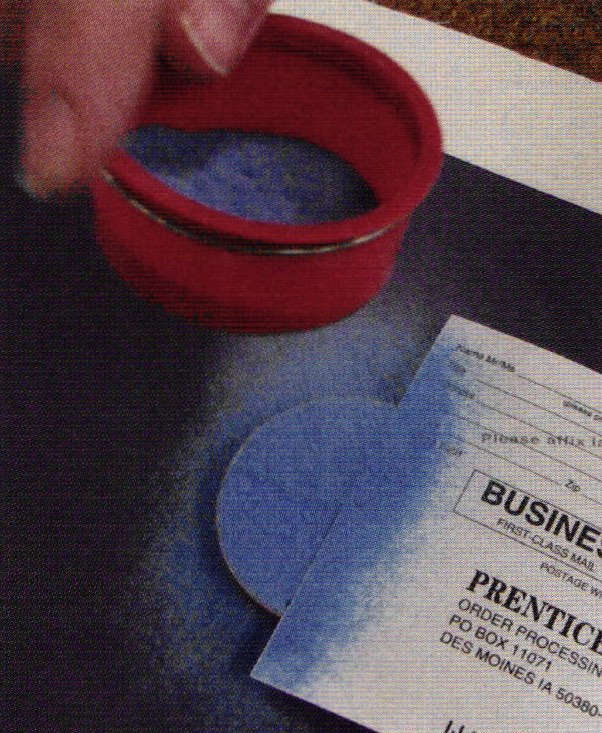
Coating Back Side with Opaque White - Sifting
Fill 2 inch dia. sifter 1/3 to 1/2 full with 1030 white. If less than X enamel will not sift evenly; if more than'l full - too much weight is on the screen and the enamel does not come through easily. In our workshops we recycle old phone book paper as "catch" paper. For viewing clarity we have used colored construction paper in this article. Place copper circle onto a pedestal on top of paper (pedestal could be anything that will elevate copper off paper, making it easier to pick up).
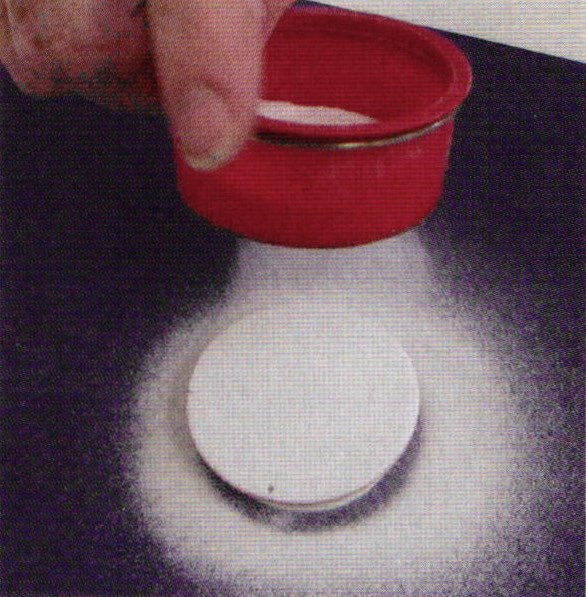
If desired, place dust mask on over mouth and nose when dry sifting enamel. Dry sift 1030 white on back side. There are several ways to use a sifter. Use the one that is most comfortable. These include: a. finger tap against top of sifter; b. tapping sifter against finger of other hand; c. finger tapping side of sifter; d. scratching the twisted wire handle; e. wrist throw; f. up and down.
The thickness of enamel application should be at least half the thickness of the copper, but no thicker than thickness of the metal. Sifting should be an even methodical routine that starts and flows without jerks and jolts. Look at pattern on the underlying paper. Note that there was no metal preparation; no harmful chemicals to use. Dry sifting can be done even if the metal is a little greasy. Using water in any way would create a problem. Some brush with a light oil, white Kerosene, Thinning Oil, etc. Clear hole of enamel with toothpick.
Fire at 1450 degrees F. Set timer for 2 1/2 minutes. Firing enamel is a time/temperature relationship. It is suggested student should hold the firing fork while their piece is being fired in the furnace. This reminds the student and everyone else in the class that tl.re furnace is in use.
The student has now successfully practiced the art of vitreous enameling which is the process of fusing glass to metal. If you think of a piece of window glass and then think of it being put into a hole in the wall, it is a window. If the glass is ground into a powder and applied to a clay body it is called a glaze. If the ground glass is applied to a metal base and fused it is called an enamel.
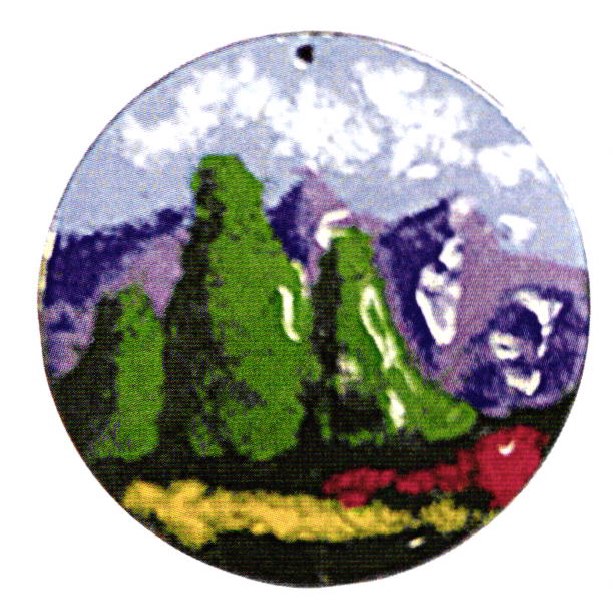
Applying Enamel to Front Side - Wet Inlay
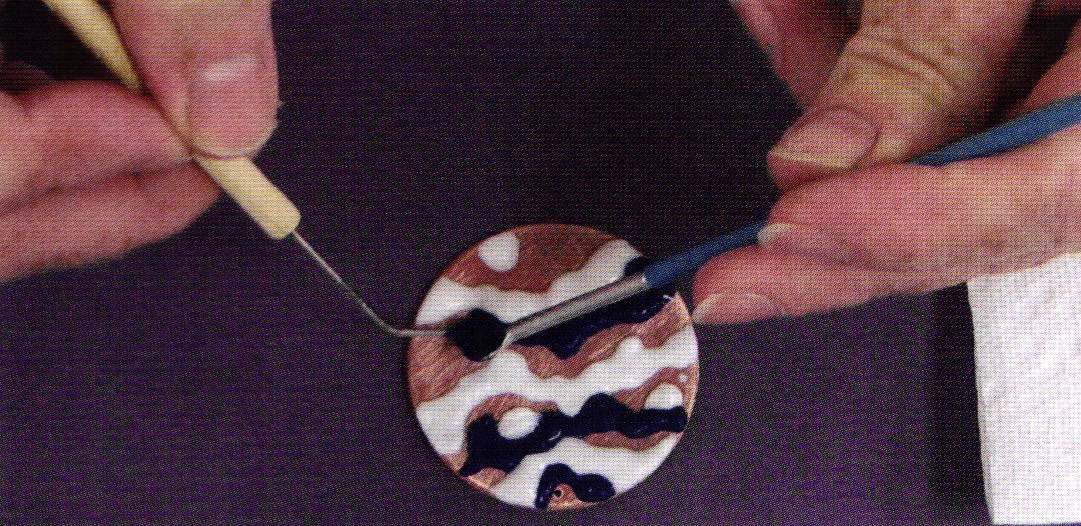
When cool, use an alundum stone on the copper surface and edges to ensure all loose firescale is removed. Wipe surface clean with paper towel. Note there is a slight dome due to expansion differences. Place a small amount of four opaque enamels (blue, red, yellow and white) into four plastic spoons. Add enough water to saturate the enamel powder. Place piece on pedestal, white enamel side down, exposed copper side up. With inlay spatula, drop wet enamel in random placement onto copper. Any grease or oil that may have been on copper has been burned out during firing. Wet enamel will easily coat surface of copper.
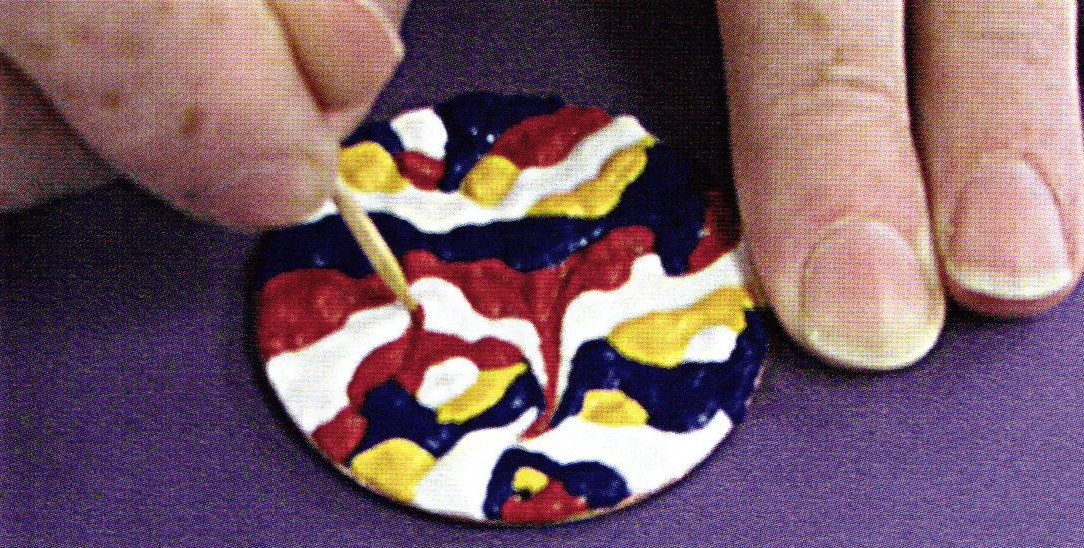
When copper has been covered with wet enamel, a toothpick can be used to draw through wet enamel moving one color into another. This can be considered a cold scrolling procedure.* Make sure adequate water is present in enamel, too little water and enamel becomes too dry to manipulate - too much water and enamel will flood one color into the next. Keep water at saturation point by adding water with a wet brush or removing water with paper towel.
When satisfied, pick piece up and use twisted wire handle of sifter and move it in a repeating downward motion against the edge of copper piece. This vibrates the enamel and makes the surface very smooth. Vibrating too many times may result in water flooding the surface, causing colors to flow into one another. To prevent this from happening, as water begins to appear on the surface, use a paper towel to wick off the water. The piece is then dried and fired at 1450′ F. for 2 1/2 minutes.
When cool, stone edge of piece to remove any loose fire scale. This will prevent black fire scale pieces from popping off the edge and flying into the enamel on a future firing. It is advisable to stone edge of copper after every firing until piece is finished.
Silver Foil Application to Back Side
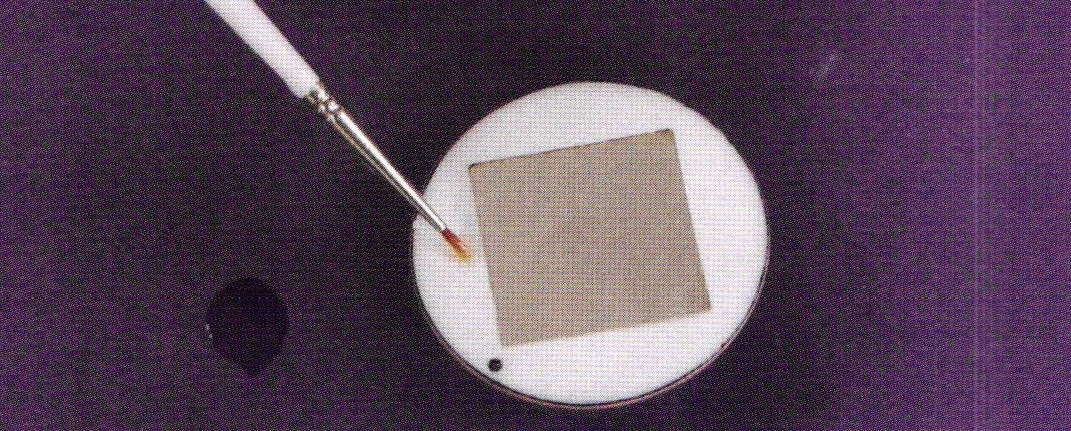
Place 1 1/4 inch silver foil square on pre-fired 1030 white enamel. Position foil square in center of circle, with one corner pointing to the hole in the copper (top). Using a small brush, add three drops water (one at a time) to one edge of the foil. This will remove air between foil and 1030 enamel surface. Smooth out with finger tip. Dry and fire at 1450 degrees F. for 1 ½ minutes. After removing from furnace, if any areas of foil are not seated, press with metal spatula and return to furnace for 1 ½ additional minutes. When cool, stone edge.
Dry sift 2020 clear for silver over entire surface of circle. Fire at 1450 degrees F. for 2 minutes. Stone edge when cool.
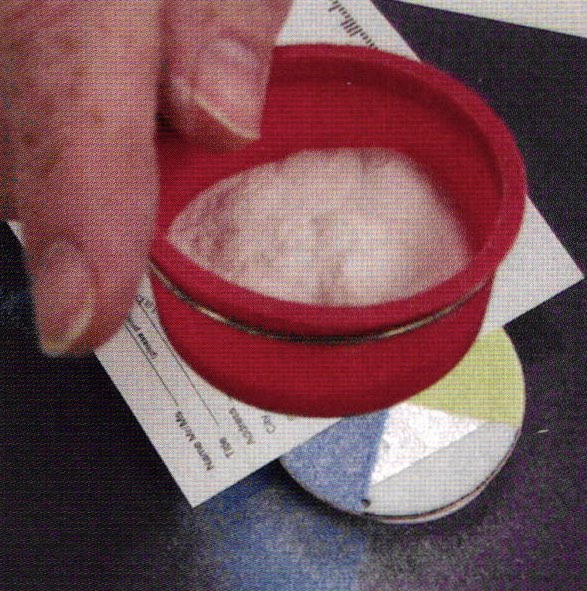
Transparent Enamel Application to Back Side Sifting
Place piece on top of pedestal, silver foil side up. Take a postcard and bend it slightly about 1/3 from short side edge of card. Lay the card edge on top of piece leaving bottom half exposed. Edge of card should line up with right and left corners of the silver foil.
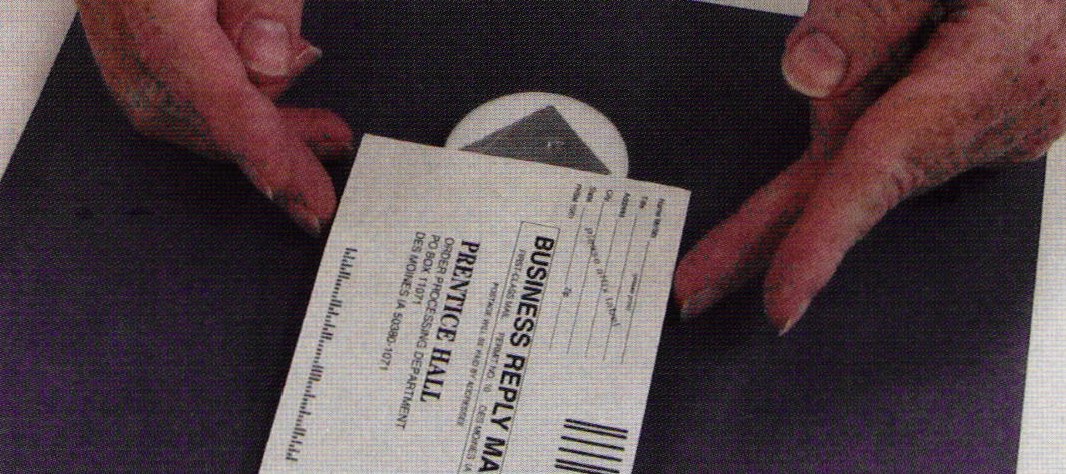
Sift on 2230 lime yellow over exposed area (lower half of foil). Pick up postcard by placing a finger on the far end of the postcard and carefully lift up end where enamel has sifted onto the piece.
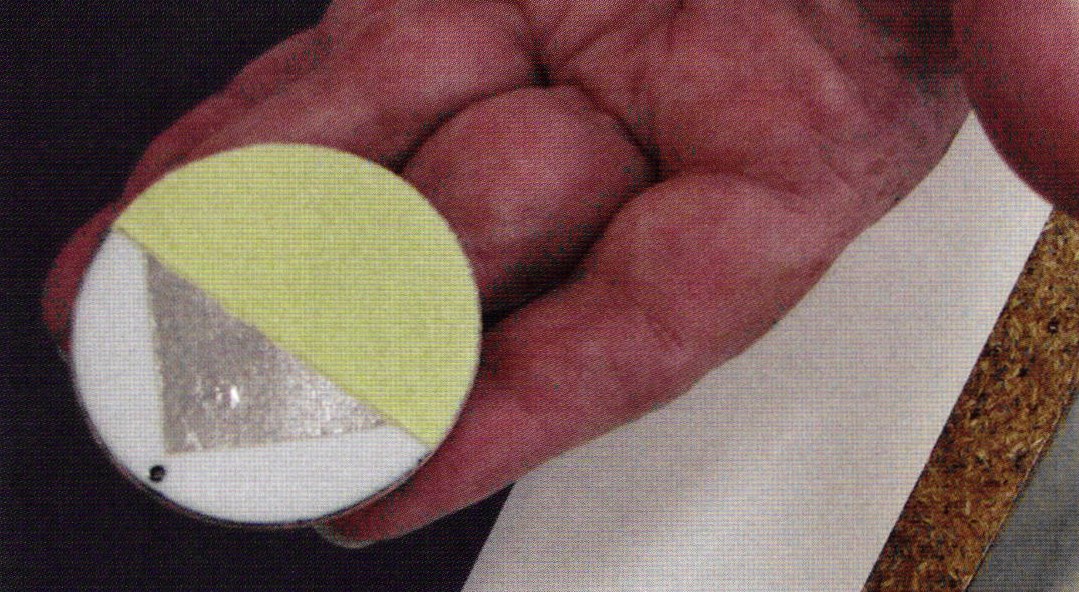
Repeat the above procedure but this time covering half the piece by placing card edge at top and bottom corners of the silver foil, leaving the right half of piece with the 223O lime yellow exposed, as well as some of the silver and opaque white. Sift 2660 over this area.
Pick up postcard as described above. Next lay the card edge at a 2 o'clock/8 o'clock position, leaving the upper portion (where the hole is located) exposed.
Sift 2836 over this area. Again, pick up postcard as described above. Clear hole of enamel with toothpick. Fire at 1450 degrees F. for 2 minutes.
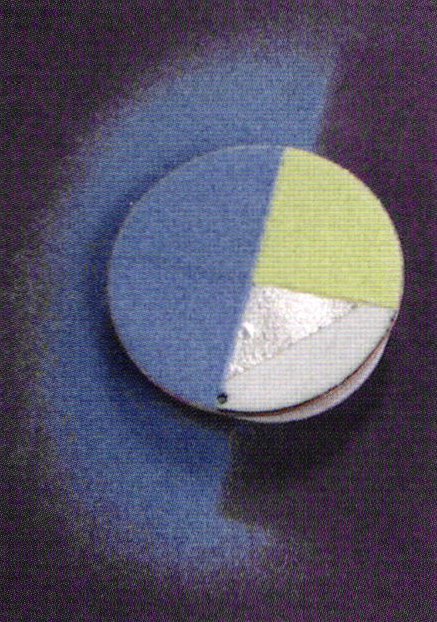
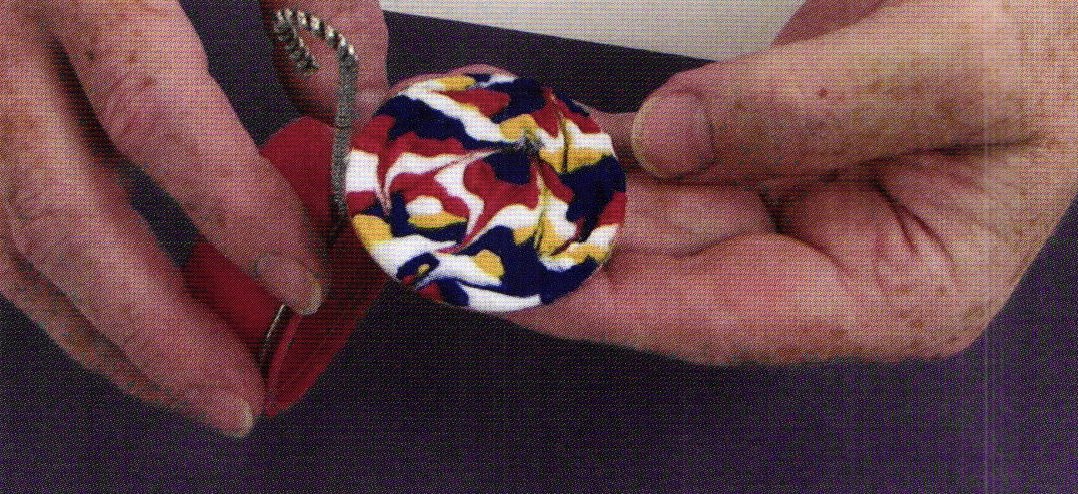
The piece should result in areas being the colors used directly over silver (yellow, blue and red) then blue overlapping yellow (will make blue-green area) and red overlapping blue (will make purple color) and red overlapping yellow (making an orange color) .
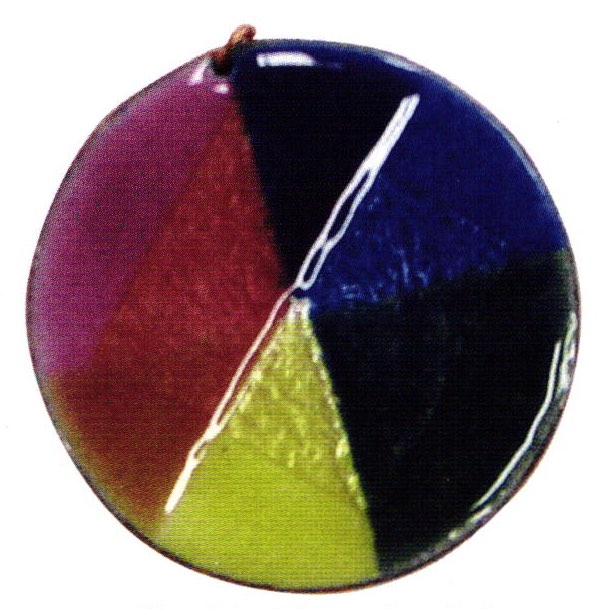
You will also see what the same transparent colors look like over the 1030 white compared with over silver foil.
Finishing Double Sided Pendant
When cool, file edge with medium jewelers file, then sand with 325 grit wet/dry emory paper and finally polish edge with 000 steel wool. A jump ring and cord can then be attached. Students now have a doubled sided pendant which made use of several enamel procedures.
* The wet pack or wet inlay procedure can also be used in a "painterly fashion," however, "wet inlay" with a wet paste would be the procedure used working with 80 mesh enamel. If workshop time permits, we make images.
Note: Traditional "painted enamels" use brush application (strokes, etc.) requiring a very fine mesh enamel mixed with a carrying medium.
Related Links:
Intro to Enameling Project 2 - Double-Sided Pendant
Intro to Enameling Project 3 - Cloisonne Pendant
W.W. Carpenter Enamel Foundation
650 Colfax Ave., Building 2, Bellevue, KY 41073
Phone: 859-291-3800
Email: info@glass-on-metal.com
Related Articles

Observations: Andrew Cooperman

Gudrun Meyer: Paper Stories

How to Make Hoop Earrings

A Metalsmith’s Guide to Germany


The All-In-One Jewelry Making Solution At Your Fingertips
When you join the Ganoksin community, you get the tools you need to take your work to the next level.
