
Intro to Enameling: Double-Sided Pendant 2
3 Minute Read
For the last couple years The W.W. Carpenter Enamel Foundation has held "Intro To Enameling" workshops that are designed to walk beginning enamel students through multiple procedures in a short amount of time. Three projects were developed where choice of color and design considerations were minimized so that the focus is on enamel procedures.
The second project is a double sided pendant. (The first project was featured in the August '09 issue of Glass on Metal; the 3rd project will be featured in the February '10 issue).
What You Will Learn
- Working on thin gauge copper (.0I0′ thick malleable copper)
- Cutting copper with ordinary scissors
- Removing oil or grease with Penny Brite
- Coating both sides with enamel for the first firing
- Using liquid brushable enamel
- Dry brush stencil technique
- Sgraffito (scratching through)
- Stencil texture
- Stencil blockout
Tools:
| Materials:
|
Steps on Making a Double-Sided Pendant Project 2 | |
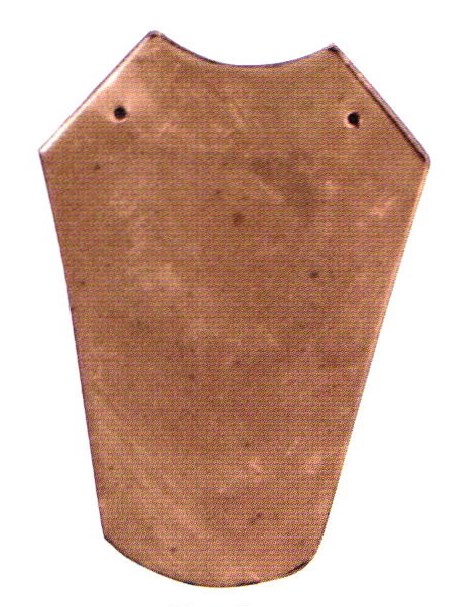 | Cut out copper shape and drill holes (Fig. 1) |
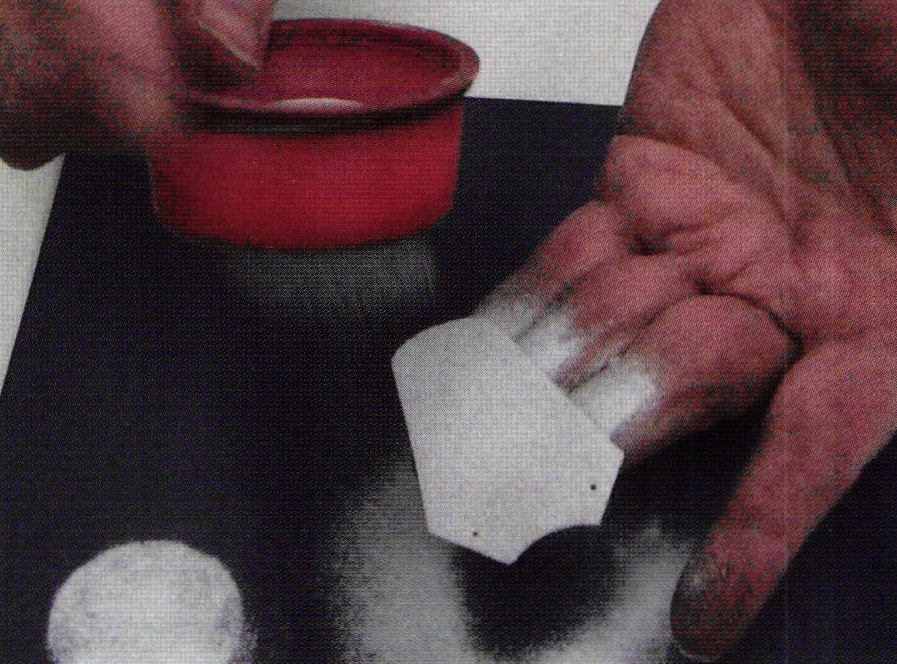
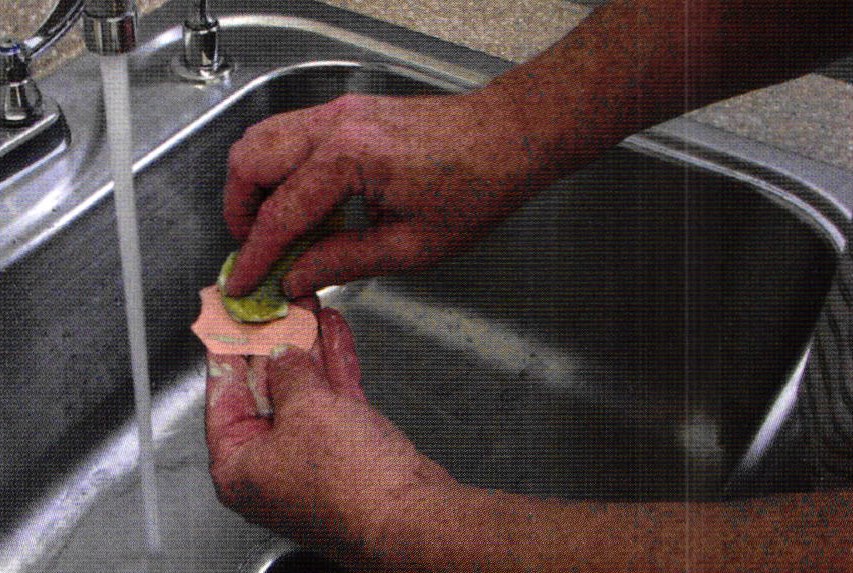 | Stone off any sharp points under water. Clean with Penny Brite and rinse thoroughly (Fig. 2) |
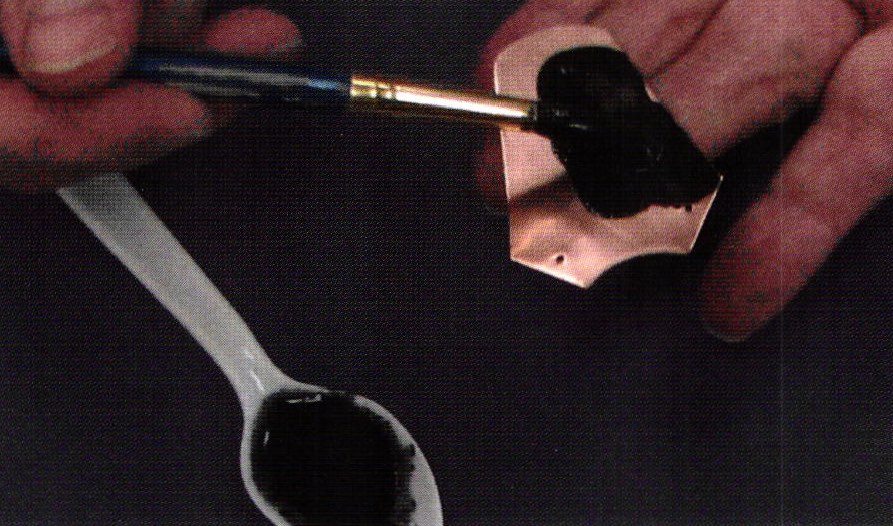 | Fig. 3 Place LCE-1 Black (powder form) in plastic spoon and add enough water to make a milky solution. Apply with brush using a dabbing motion. Apply as evenly as possible. Dry. |
 | Fig.4 Turn piece over to opposite side. Apply 3 parts water, one part Klyr-fire with brush. Sift on coat of 1030 over wet Kyr-fire (Fig. 4). Clear holes of enamel with toothpick. Dry. Fire for 2 minutes at 1450 degrees F. Let cool. Stone edge to remove copper oxide. |
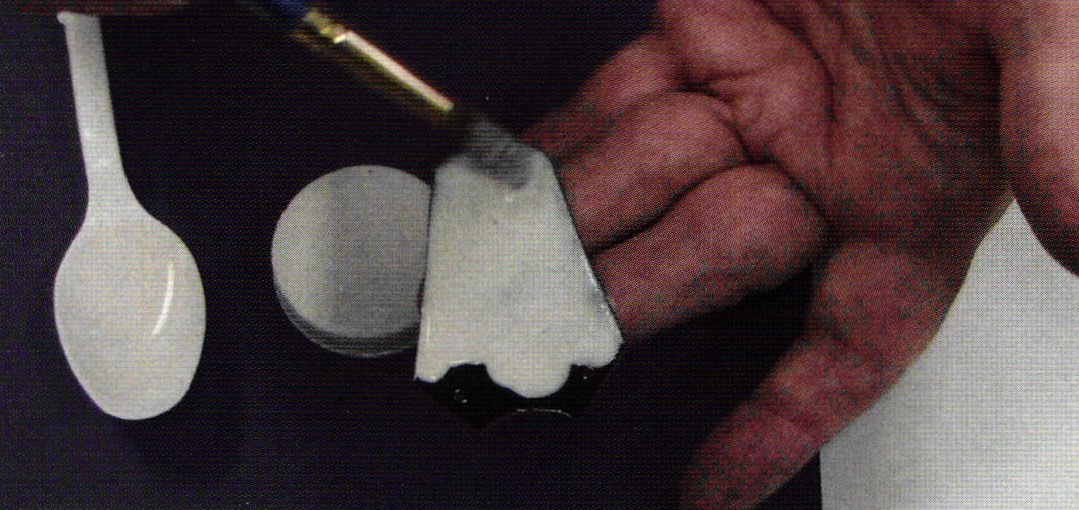 | Fig. 5 Place LCE-3 White (powder form) in a plastic spoon and add enough water to make a thin milky solution, make it thinner than the black. Apply with a brush to the fired black side of the piece . Make sure it is not applied too thickly Better on the thin side than the thick side. Dry. DO NOT FIRE YET. |
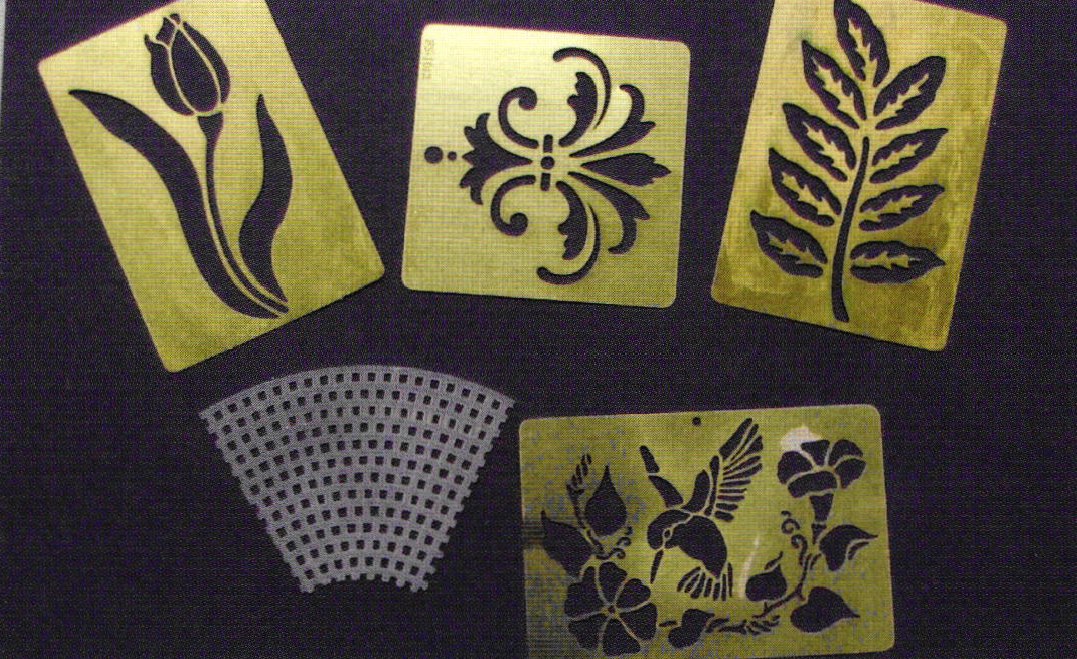  | Take a metal stencil (available at scrapbook sections in craft supply stores, Fig. 6) or make your own stencil out of plastic with an exacto knife and place stencil onto unfired but dry, LCE-3 White (Fig.7). |
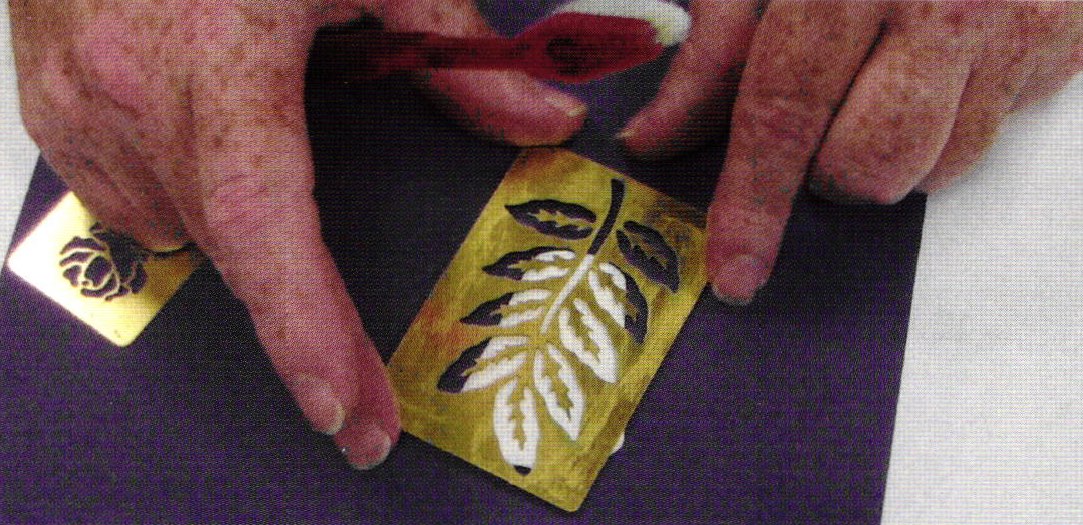
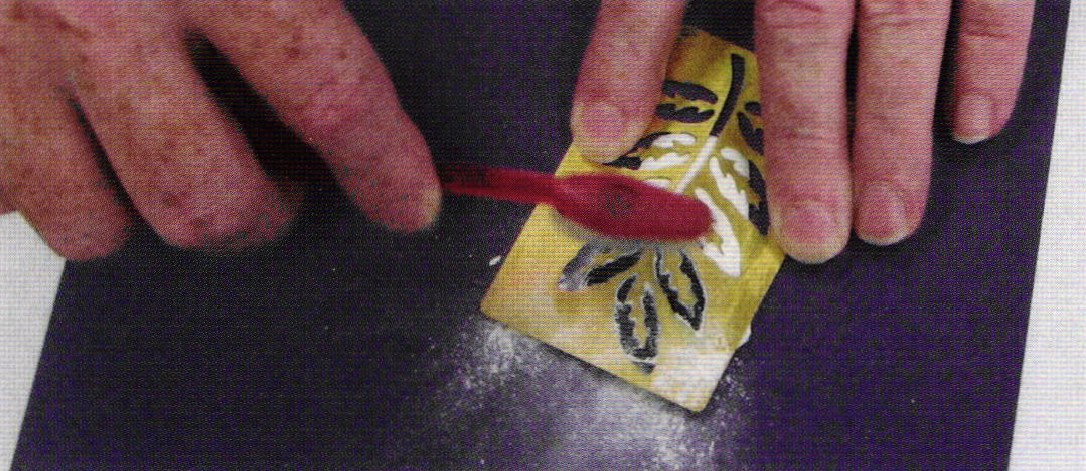 | Fig 8 Hold without slipping and take a toothbrush and brush away dry LCE-3 White from openings in stencil. |
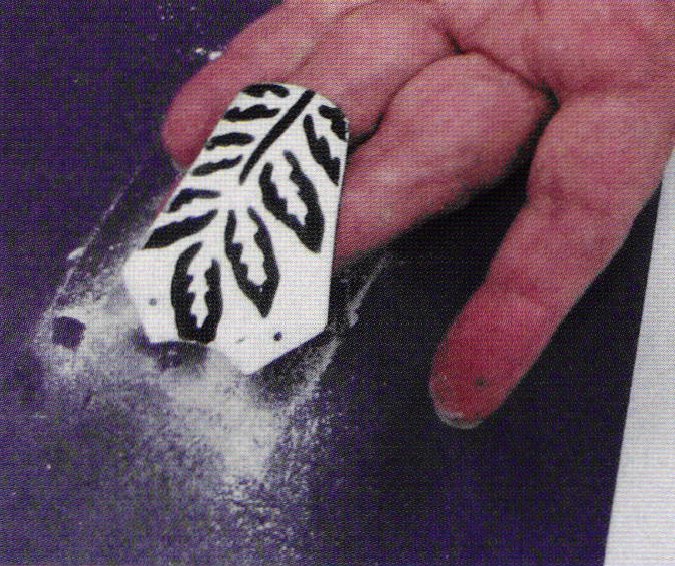 | Fig. 9 Carefully lift up and blow away excess white. |
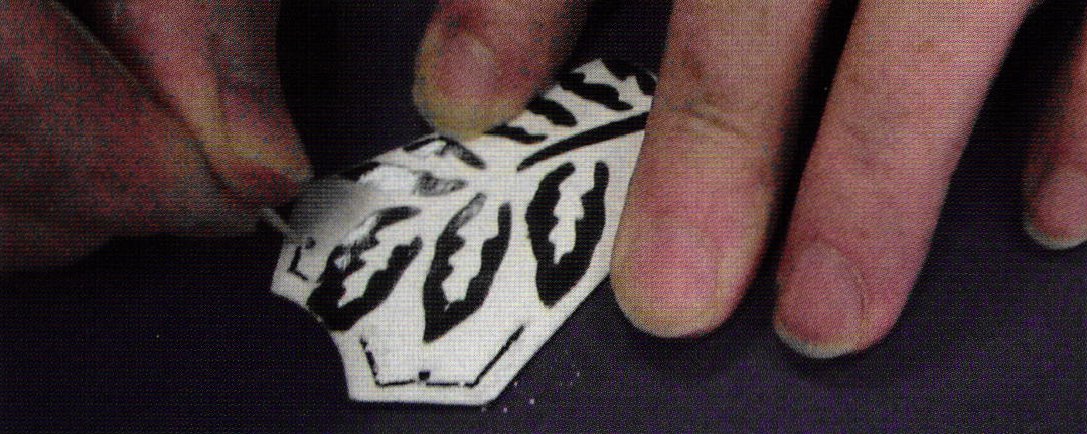 | Fig. 10 With a sharpened wooden point like a toothpick, draw through the white for any additional crosshatches, borders, lines etc. that you would like to add to the stencil pattern. Blow away excess white. |
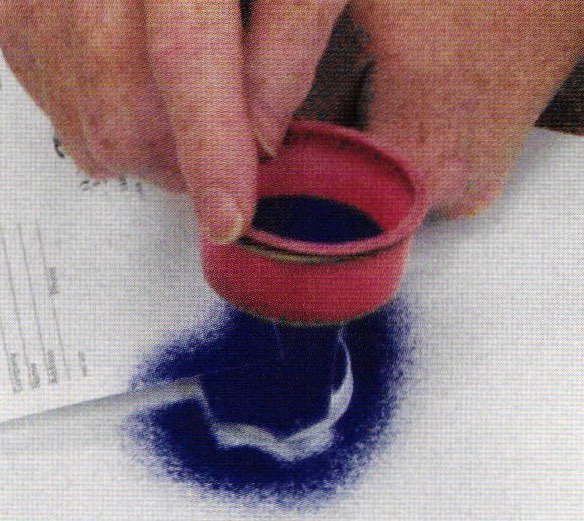  | Fig. 11 Turn piece over to other side and carefully place on pedestal. Take a postcard and slightly bend it so some of the postcard will lay on some part of the piece, acting as a block out material. Use a 100 or 150 mesh sifter to apply either blue red, or yellow lightly over postcard and onto piece. |
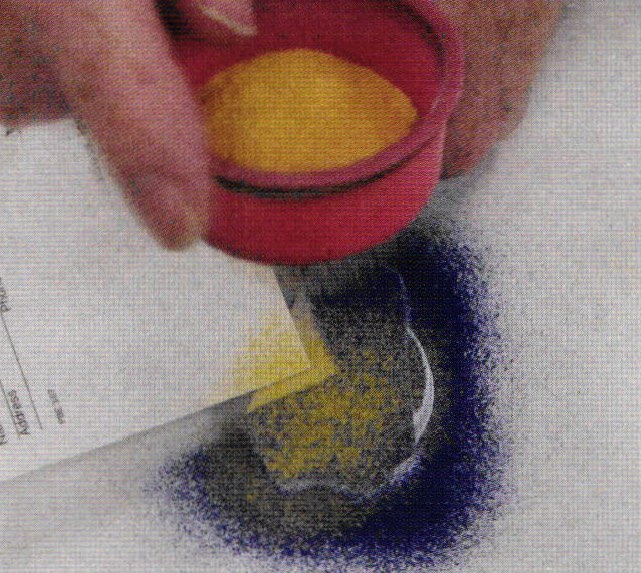  | Fig. 12 Place the postcard in a different position and apply a light sifting of a second color (in this case yellow) over the unfired blue. |
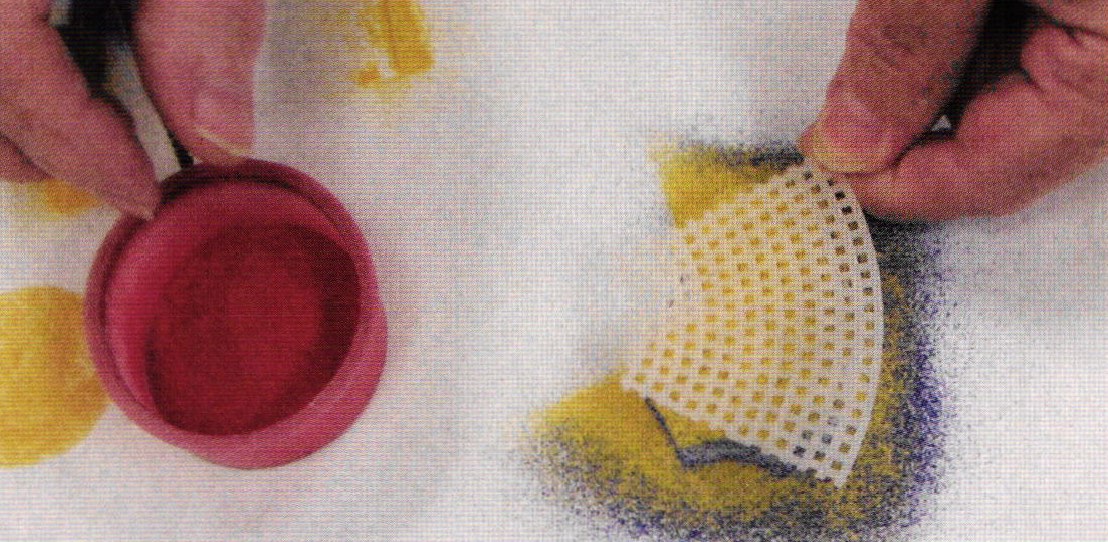
  | Fig. 13 Take another type stencil such as an embroiders mat and sift a contrasting color over the yellow. Sift very lightly as it is easy to over sift and lose detail. This results in a textured pattern. |
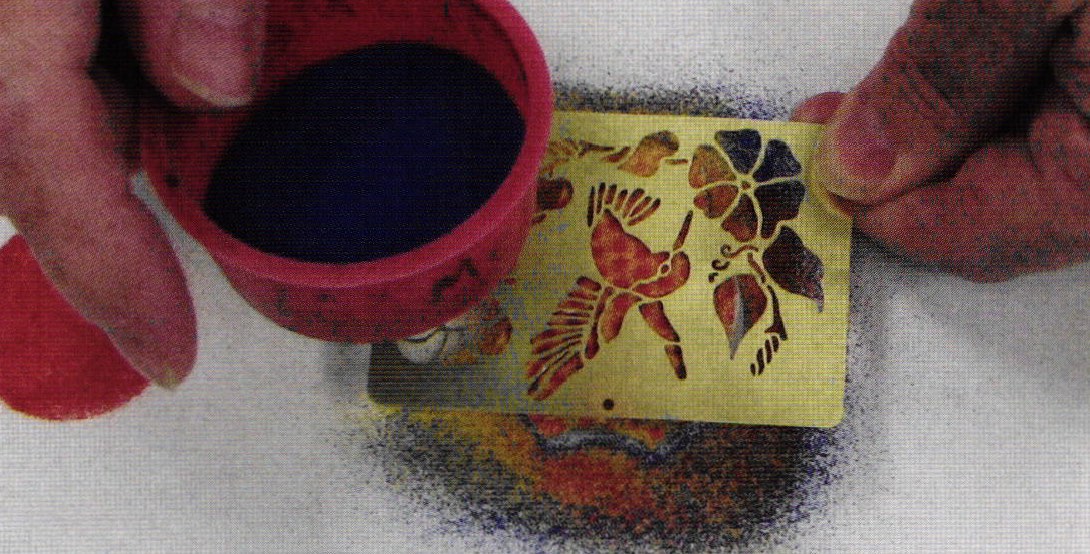 | Fig. 14 Take a metal or plastic stencil of an object, flower, bird etc, and sift again a contrasting color through the stencil and on top of the textured pattern. The finer 100 or 150 mesh screens will allow sharper enamel edges. |
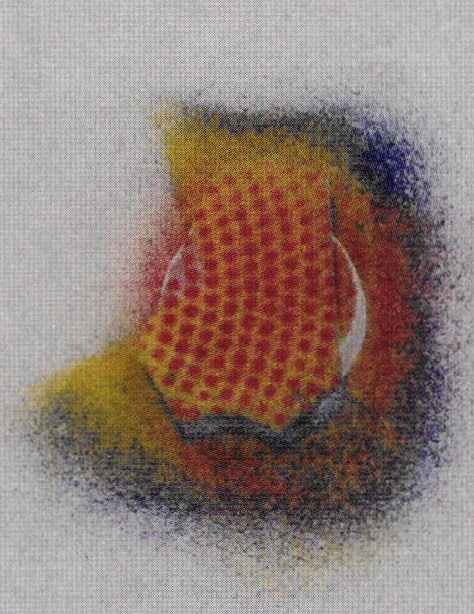
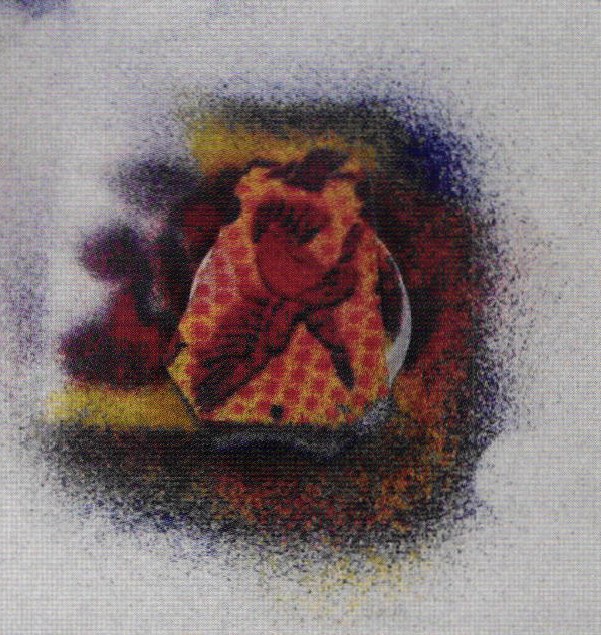 | Fig. 15 Carefully lift up stencil. Clear hole(s) of enamel with toothpick. |
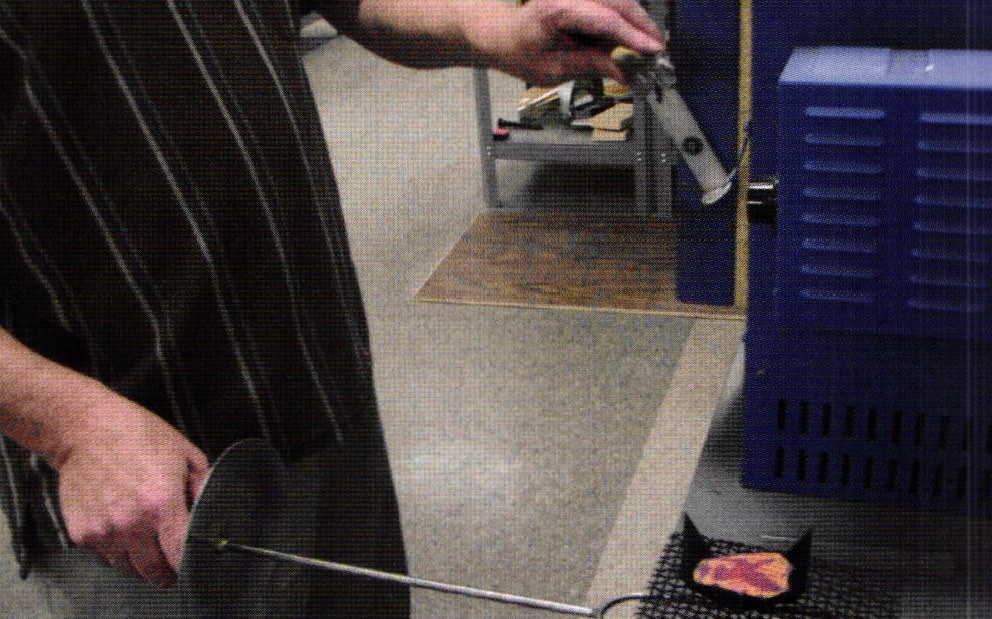 | Fig. 16 Pick up piece and place on trivet. Fire for 2 minutes at 450 degrees F. When cool, clean edges with medium jewelers file. Sand edges smooth with fine sand paper. Attach jump rings and cord and you have a pendant making use of many enamel procedures. |
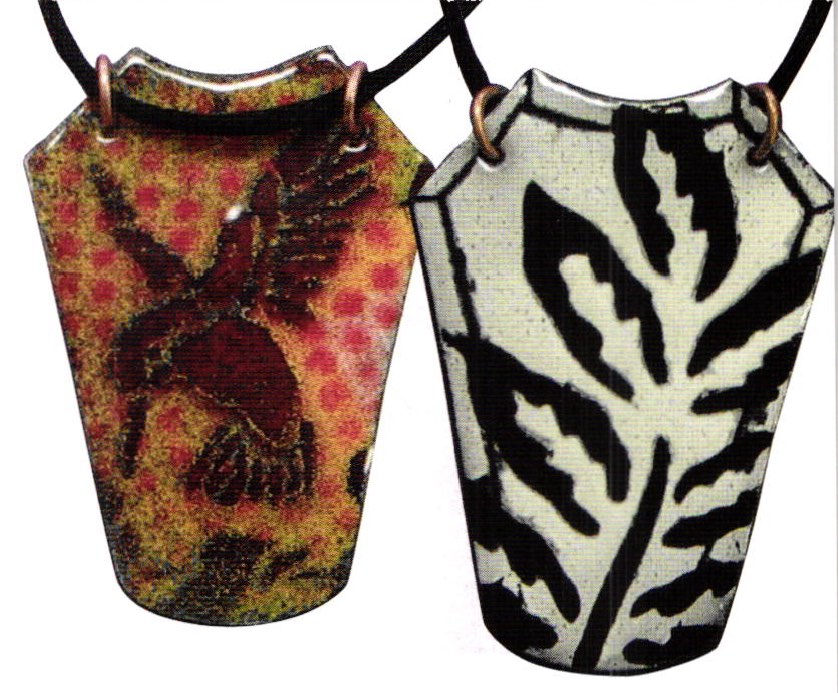
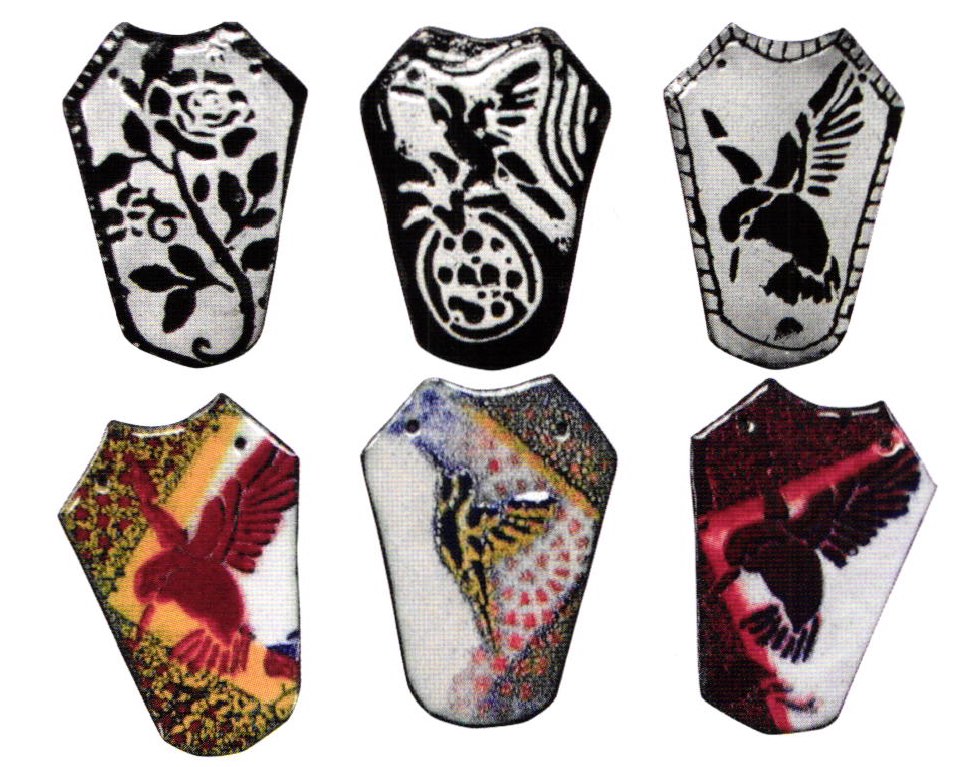 | Fig. 17 Variations of Project 2, front and back |
Related Links:
Intro to Enameling Project 1 - Double-Sided Pendant
Intro to Enameling Project 3 - Cloisonne Pendant
W.W. Carpenter Enamel Foundation
650 Colfax Ave., Building 2, Bellevue, KY 41073
Phone: 859-291-3800
Email: info@glass-on-metal.com
Related Articles

Enamel in Academic Jewelry

How to Quickly Dome Irregular Forms

Colorit: Tips for Beautiful Color Details

Expressive Art Enameling


The All-In-One Jewelry Making Solution At Your Fingertips
When you join the Ganoksin community, you get the tools you need to take your work to the next level.
