
Electric Kiln Fired Mokume Gane Part 2
8 Minute Read
In this article in the series we will go to billet forging and making a simple wedding band in a star pattern. See previous article (link below) for a short history of Mokume gane, prep work and trimming of billet forging.
Processing the Billet
There it sits in your hands, a gorgeous big hunk of different colored metals. Nothing feels quite like it! OK, let's stop dreaming and get to pounding on this thing and make some jewelry.
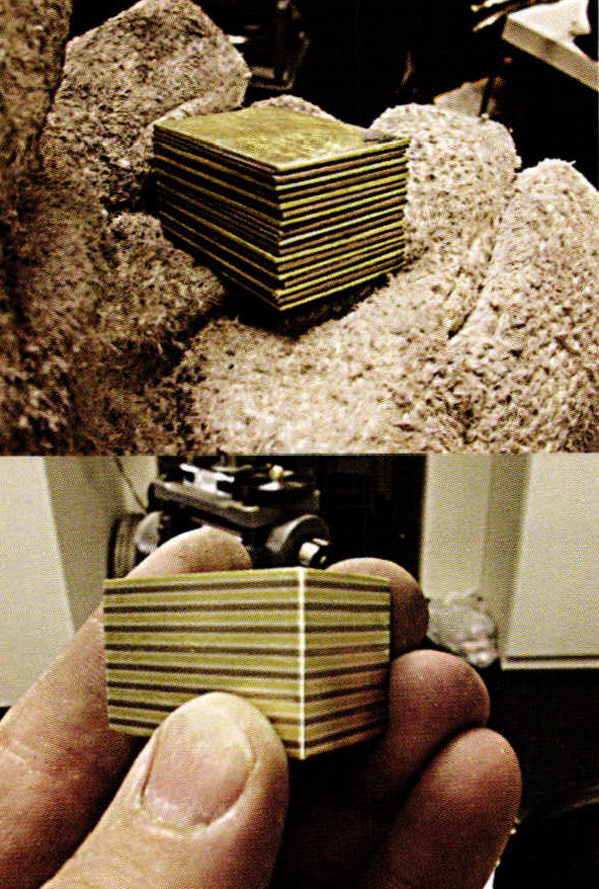
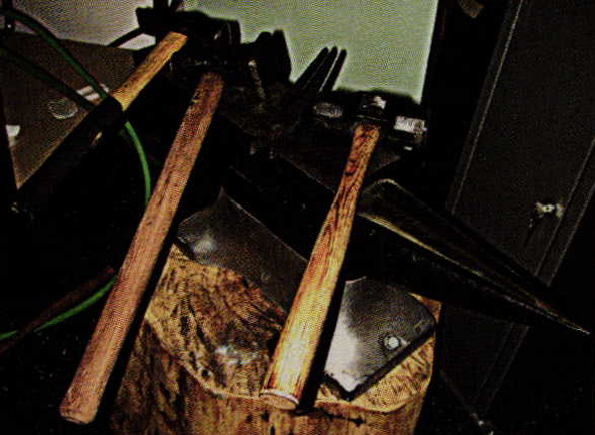
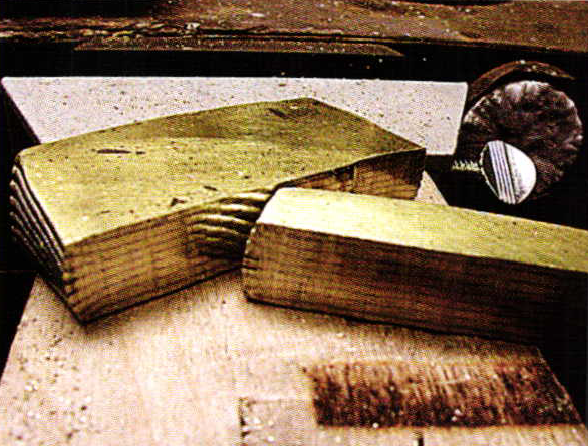
The last billet I made, in the first part of this article, was used before I could photograph the next process, so I've made another. The pictures here show the new billet that I made. This is a really thick billet as it consists of 30 sheets comprised of 18 kt. 18 ga. Palladium white gold, 18k green gold and 24 ga. Sterling silver between each of the gold sheets with a total weight of 200 dwt. This billet is 1 inch thick and must now be reduced by at least 1/3 or more before doing anything else. This is where you will need an anvil, some big hammers, and a pair of tongs. Pictured here is the anvil and the three hammers that I use. The one at the far left is a 3 lb. forging hammer on which I have polished the face. This will be used later. The hammer in the middle is called a flatter, and in the right of the picture is a small 5 lb. sledge.
I hot forge my billets, but it's really not necessary to do. You can cold forge, but it may take a bit longer to do. Hot forging, of course, has the inherent risk of burning yourself, as well as your floor.
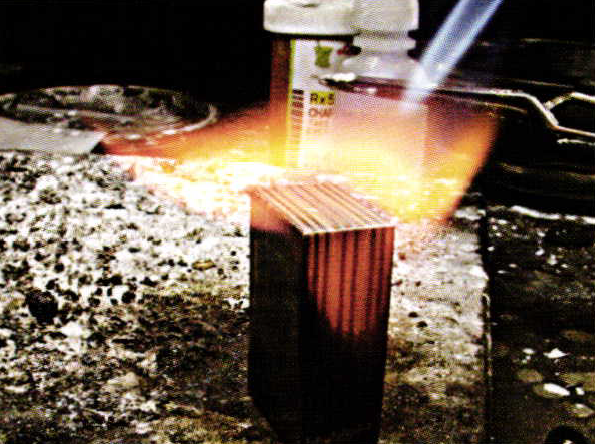
Heat your billet using a bushy flame and get the billet to a light red color. Be careful so as not to over heat. If you do over heat you cancause your eutectic alloy to become liquidous and your sheets will start floating. Now use the tongs to grab your metal and move it to the anvil for forging. You have to remember that we have sterling silver in the billet, so you don't want to start forging on it until all signs of glowing are gone.
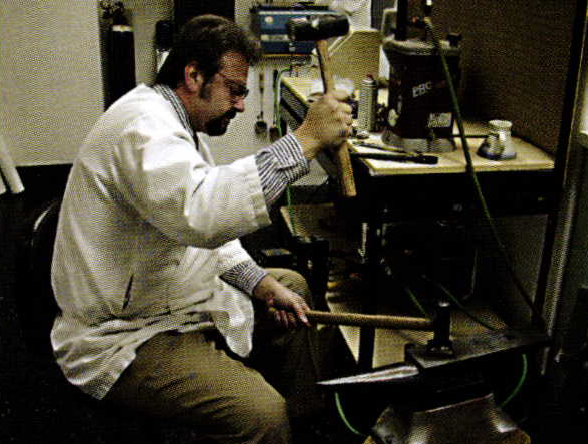
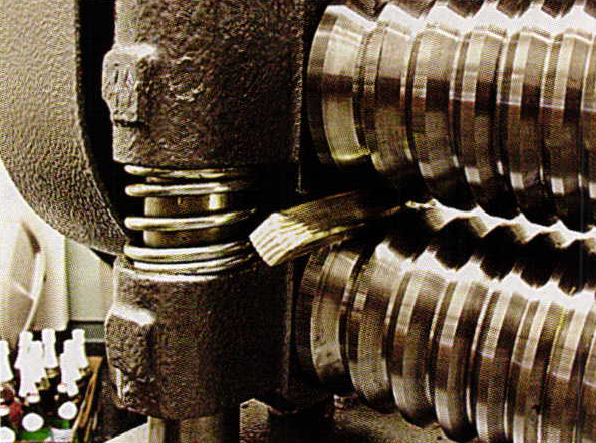
The flatter is set on top of the billet and the sledge hammer is used to hit the flatter. It's not necessary to use a flatter; a forging hammer can also do the job. I prefer the flatter because the billet is getting more of an even forging throughout. I will forge on the metal about 3 big swings. You can feel the metal get denser as you swing so that by the third (sometimes it's only the second) swing you feel like the hammer is just bouncing off.
I must say at this point that working in Mokume really makes you feel what you are doing. Anyone who has "work hardened" something knows what it feels like and this is what you must be aware of during the whole process. Just because you have laminated all these sheets together DOES NOT mean you have been completely successful. Overworking the metal at any point, but especially here, is very detrimental and you will end up with a failure if you try to rush.
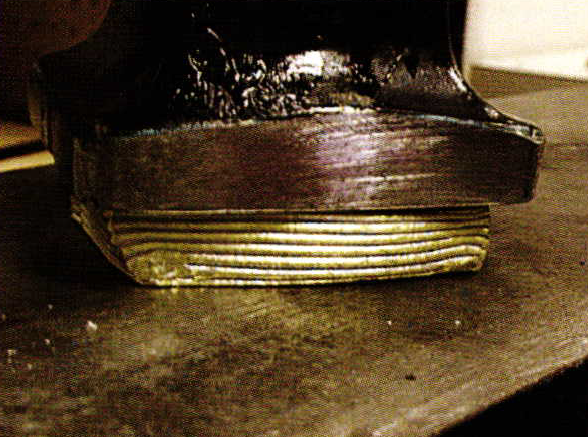
Go back and anneal again and repeat the steps as out_ lined above. This will take some time to do. This particular billet took me 2.5 hours to reduce. While this was much thicker than I normally do, you get the idea of the time involved. It involves a lot of annealing and forging and yes, my right arm is considerably larger than my left. The top photo shows the billet reducing. At first you don't think you are doing anything but you are. You must also keep in mind you are not working with one metal that has one property but with three (or howevermany different ones youuse) with different properties. The middle photoshows the billet reducedafter the last forging. I have brought this down to 15 mm thick. In the next picture you can see the edge of the billet and how all three metals worked differently. The palladium white is some really tough stuff and has deformed much less than the 18 kt green or the silver.
You may be asking yourself why did I reduce it more than 1/3? Well I don't know about yours, but my wire mill only opens to 15 mm and my flat is 6.5 mm. You don't have to use a rolling mill in this process (the Japanese didn't) but modern machinery was made to be used and this speeds the process. If you are making a large object like a bowl or vase then your only option is going to be to forge your sheet by hand. We are making a ring, so let's get on with it.
Let's cut a chunk off
You've reduced the billet, and now you need to anneal and quench it. This is the first time you will quench the metal. It's safe to do now that the metal has been worked, BUT let it air cool for a bit before doing so. We still do not want too much of a shock.
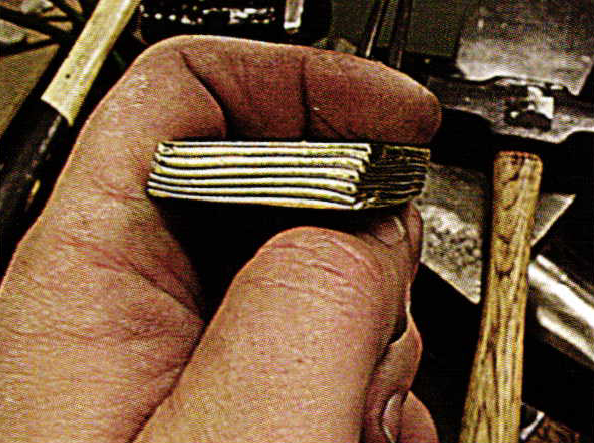
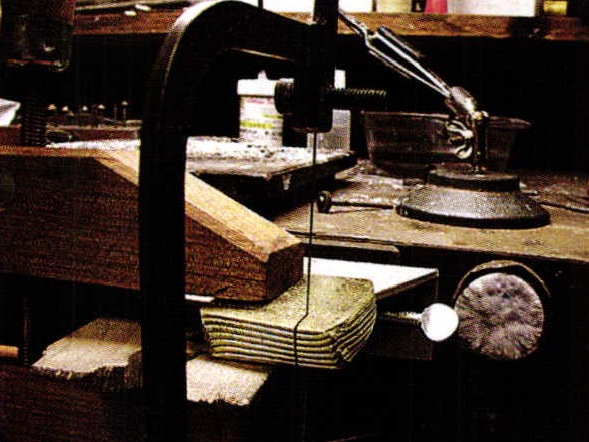
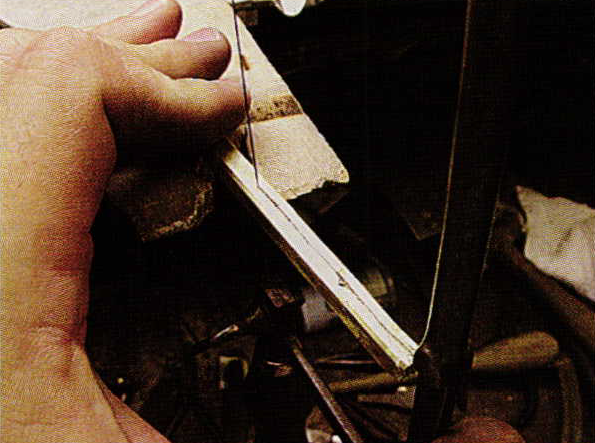
Once this is done you'll go to your bench and cut off approximately 1/3 of the billet. I use a #6 saw blade to do this and clamp the billet with a small wood vise.
Here is a little tip I learned from Jim Binnion for your saw blade. I have replaced the wing nuts on my saw frame to Allen head screws. This enables me to really tighten the saw blade in so it won't work its way out.
Now that you have your piece cut off you're going to roll it through the wire portion of the mill, but before that you can flow some silver solder on each end of the rod as a precaution from delaminating. My piece was approximately 15 mm square and I'm going to take it down to 8.5 mm for this project. Again I will reiterate that you need to feel the metal and what it's doing. You'll know when it's time to anneal and quench.
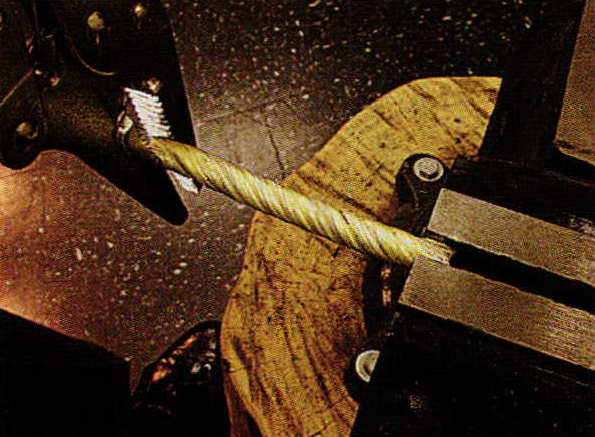
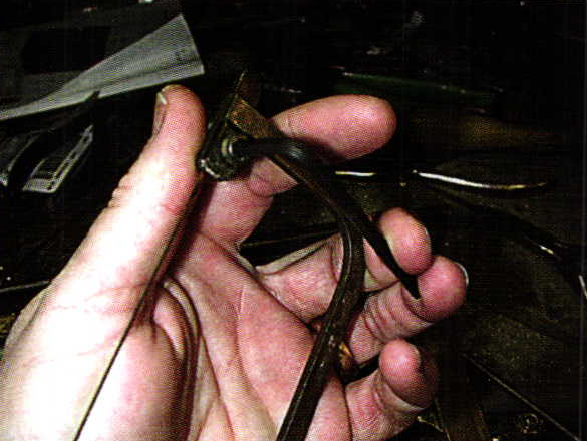
Take your rod and go back to the anvil. You are going to forge on the corners of the square rod to make it a round shape. Go slow and don't over hammer but take the corners down. You want to do this because in the next step you're going to twist this and leaving the corners sharp would just mean you would have them foldover. Anneal again but don't quench. Clamp one end of the rod into a vise and take a pair of vise grips and clamp the other. Start twisting the metal. You will feel the metal tighten up as you are twisting. DON'T force it. Stop and anneal. Keep doing this until you get at least 8-10 twists in the rod. After your last twist anneal, quench and pickle and then hold your new gold candy cane in your hands. Next it's back to rolling out the metal back into a square shape, You'll take this down to 6.5 mm. and know that you have a square candy cane. Anneal again!

Let's Open The Kracker Jack Box
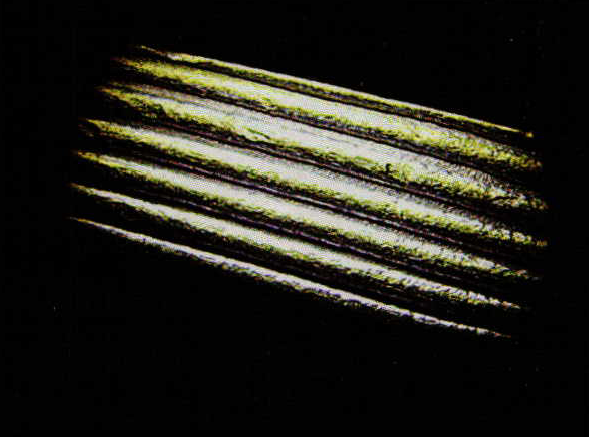
I refer to this part of the process as opening the Kracker Jack box because it is what I am doing. Inside this rodof gold is the prize solet's open it up. I usea 3/0 saw blade and cut down the middle of the rod.
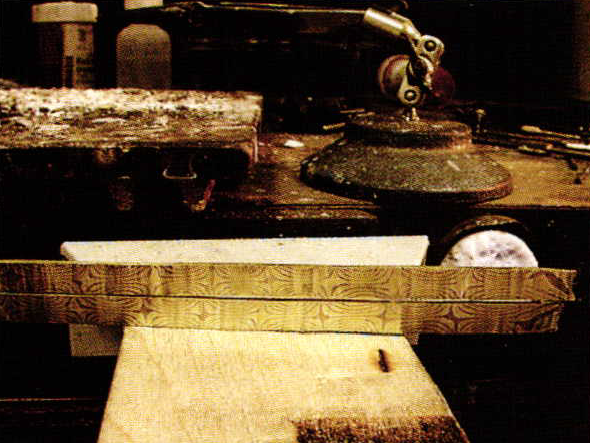
Be careful to cut as straight as possible. Now comes the exciting part. Open the two sides up and look at your prize. This is your pay off. There is the star pattern that we will use to make the band. This can now be rolled through the mill to make half round stock or flat stock.
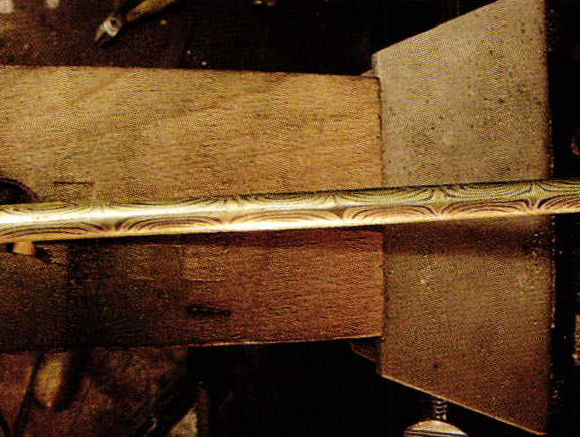
For this ring we will make a simple half round band with I mm rails on the outside. The metal now works very much like any other stock you may make. If you want comfort fit stock you can draw it out on a draw bench. In this photo you can see the stock after rolling it in the mill. Bend the material into a band the size you need, but here is the tricky part. You don't want to have a solder seam so line up your cut right in the middle of the star. To solder your ring is no different than soldering any other ring, but instead of hard solder use medium. The hard melts at too high a temperature and you will end up melting some of the metal.

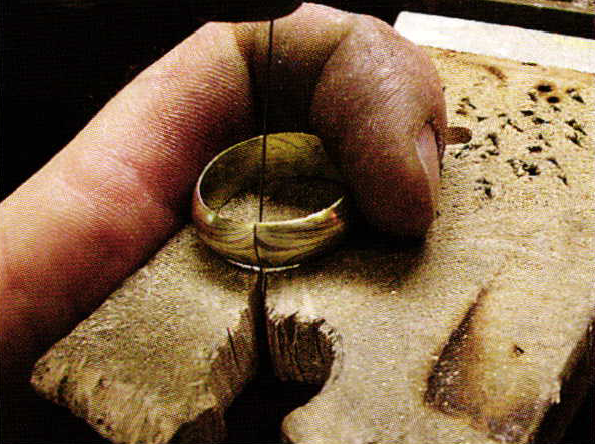
I use 1×2 mm flatstock to make the rails and use my laser to weld the bands so as not to have seams in the rails of the ring. I also file or grind the bands slightly to get a half rounded look to them. Align the rails to the Mokume band and solder using EZ solder. Use a nice bushy flame and put the solder on the inside of the ring and pull the solder around the entire rail. File or rubber wheel the inside and run a saw blade on the seam between the rail and the Mokume band to clean it up.
Finishing Your Ring
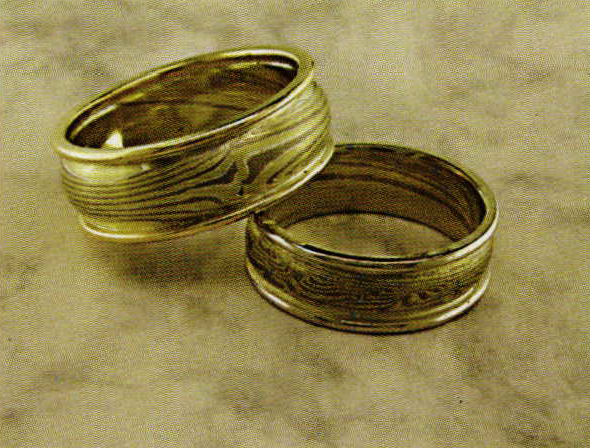
I will make sure the Mokume portion of the ring is smoot hand I'll polish the rails as I would any other piece. You need to add some type of finish to the Mokume portion to bring out the different colors. In this last photo are rings with a light satin finish, a sand blasted finish. One that is etched and sand blasted is shown on page 17 at the beginning of this article. Etching with nitric acid removes some of the sterling and you get a more dimensional feel to the piece. This is especially nice with the traditional wood grain pattern as it makes the ring look like weathered wood.
This is the end of chapter 2. In the next and last installment of these articles on Mokume Gane I will talk about the different patterning that can be done and the tools to use for them. I hope that I have been concise and straight forward with my explanations and I hope if you do try this process you find it as fulfilling as I have. Every ring I make is different and I get excited when the final finish is put on to reveal each pattern. I hope I never lose that excitement. As always if you have questions you can email me at heavymtl@pacbell.net.
See related articles:
Related Articles

Bi-Metal Casting to Titanium

Alloying Gold for Granulation

Metal Conversion Chart

Testing the X1 White Gold


The All-In-One Jewelry Making Solution At Your Fingertips
When you join the Ganoksin community, you get the tools you need to take your work to the next level.
