
Electric Kiln Fired Mokume Gane Part 1
9 Minute Read
This is the first part of a series on Electric Kiln Fired Mokume Gane. Here we will focus on a short history of Mokume gane, prep eration work and trimming of billet forging.
The first time I laid my eyes on a Mokume Gane piece I was hooked on learning the process involved to make such a beautiful and unique pattern of different colored metals. Can you look at these pendants and not be fascinated at the colors and pattern?

A Short History on Mokume Gane
Mokume Gane translated from Japanese to English roughly means "Wood grain in Metal". This of course is just one of the patterns that can be achieved with this process. The first objects that were found made with the Mokume Gane process date back to the 16th century in feudal Japan. Traditionally the "Tsuba" or the hand guard of a Samurai sword was fabricated with the Mokume process. The art has been passed down over the years from the master to the student. Mokume Gane, put simply, is the process of diffusion bonding of numerous sheets of metal ranging from as little as eight sheets to as many as one might want to bond.
Due to space limitations in this article I will skip the metallurgy class, but, simply put, we will be heating these sheets under great pressure and heat to get the sheets to exchange atoms and make a weld. We now usually bond from l8 to 30 sheets of metal into what is called a billet. As to what kinds of metal are joined depends on the purpose of your finished product. Most of the billets I do will be of precious metals such as 18k green and red gold and palladium white, platinum and sterling silver.
There are also numerous Japanese alloys such as Shakudo, which is copper and 3-5% pure gold. This achieves a beautiful dark purplish black oxidation when it comes in contact with the salts in your skin. You must keep in mind the characteristics of each individual metal as some are much harder than others and will cause you trouble when forging and rolling because the soft deforms much easier. These billets are then made into jewelry of different kinds.
Many times I will make billets of nickel, copper and brass in different combination simply to do R&D of patterns and color combinations. It is much less expensive to screw up these metals than the precious ones. All you will lose essentially is hours of labor. Did I happen to mention the hours involved? This is a very labor, intensive process and not for those without patience. One more thing I want to mention before we delve into this step by step. Rule #1. There are no shortcuts!!! Keep this in mind always.
The Prep Work
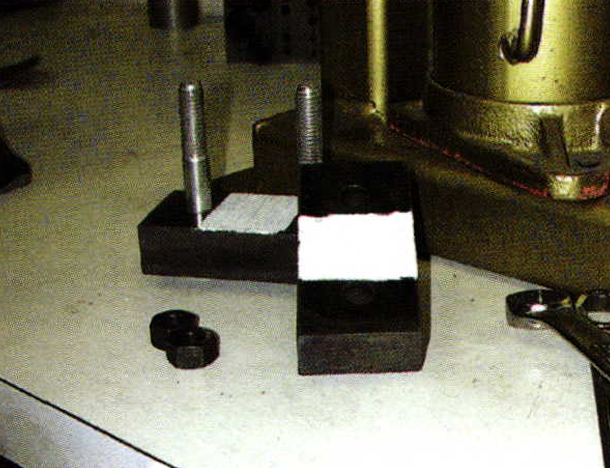
You want to make sure that you have everything needed before you start. You will also need to prepare a few things before you begin. Let's start with the torque plates that we will need. These should be made from 1.5″ 304 stainless steel but you can use any steel plates. You will find that you won't be able to reuse thinner or lesser grade plates as often. 304 is a low creep stainless which means it will not bend as easily with the tremendous pressure and heat that they will be put under. Make sure the plates are as flat as possible, if not mill them or use a disc sander, and then sand them on a hard flat surface with some 280 grit wet/dry sandpaper. Test fit the nuts and bolts. On one side of the plates you will want to paint some whiteout on them where your stack of metal is to be placed. This is to ensure that your billet once fired will not be stuck to the torque plates.
Make a bag similar to a small lunch bag with the stainless steel tool wrap. This is what the plates and metal stack will be placed into with the charcoal. Let's also, at this point, pre-heat our kiln to the proper temperature. What temperature you ask? Well this is where you need to do some homework. You need to find out what the temperature is of lowest melting alloy of two sheets that come in contact with each other. Our kiln will be heated to just under the liquidus temperature of these alloys. A university library is a good source for books on phase diagrams. For the purpose of this billet, which is gold, silver and copper alloy approximately 1400 is what we will set the kiln at. This is where the digital controller is extremely valuable. We don't want a puddle of metal at the bottom of our stainless steel bag. Now that we have done the prep work let's move on to the cleaning.
Let's Start the Cleaning
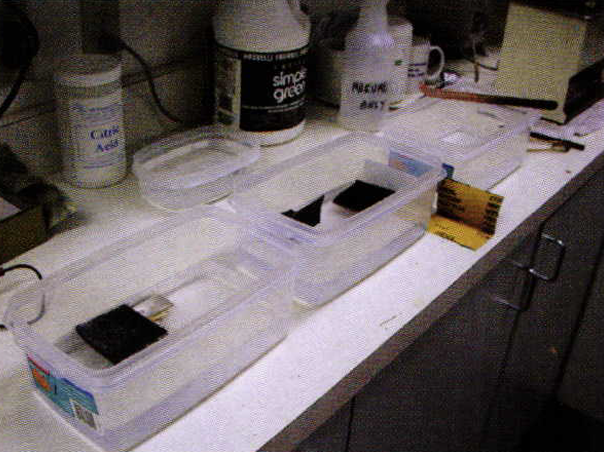
One of the most important steps is the cleaning of the metal sheets. I normally start with 18-18ga that are cut into 1″ wide by 1.5″ long. You may use thicker metal as well as thinner. That's where the R&D comes in. You will need 3 containers large enough to get both of your hands in to clean your sheets and one smaller as a holding area for the sheets until the next step. You will also need a new pair of copper tongs that have not been used for anything else, an empty never used spray bottle, a piece of 3M abrasive pads, some 280 grit wet/dry sand paper, a gallon of distilled water and lastly a liquid cleaner. The liquid cleaner should be one without perfumes and be able to rinse off fairly easily. I have used a product called Crystal Simple Green on the recommendation of Jim Binnion who taught me this process.
Divide the distilled water between the three larger containers, the spray bottle, and save enough for the smaller container so the water will cover your stack as you put your sheets into it for holding. I also will add a small amount of citric acid to this holding container to prevent the metal from oxidizing. Now that I have mentioned oxidation you must treat it and grease as your enemy. Add a small amount of the cleaner to the first container. Wash your hands very well and remember if you scratch your nose or wipe your forehead you have just put oils on your hands and you will need to rewash them.
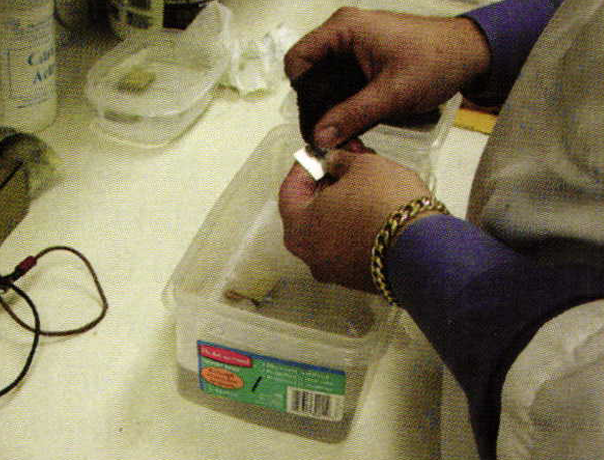
Now the tedious task of cleaning starts. Clean the sheet lengthwise and then across the width of the piece as well as the edge. If you think you have cleaned your sheet enough do a break test. If you pass the test take your sheet to the next container and do what you just did again with another piece of the 3M abrasive pads. Now while you are still in the second container take the sandpaper and cut a Florentine type finish on the metal. Again you will do a break test and if your sheet passes drop it in the third container.

At this point don't put your hands in the water of the last container but use those new copper tongs you just got. Pick the sheet up and spray it with the new spray bottle you have filled with the distilled water all the while looking to make sure the water does not break the surface of the metal. Lastly put that sheet into the holding tank and guess what? Yes you only have l7 more sheets to go. Your first time doing this should take about 1.5 to 2 hours.
Remember rule #1.
Time to Stack and Jack
Pull your metal from your holding tank and remember to hold it by the edges. Don't even think about drying it out, just leave it wet. Arrange the stack in the middle of the torque plates between were the bolts would go. Put the other torque plate on and screw down the nuts. Now let's put all of this in the hydraulic press and jack it up between 6000 and 8000 lbs. You will see that whatever residual water was there is squeezed out. Now is the time to finish tightening the bolts as tight as humanly possible.
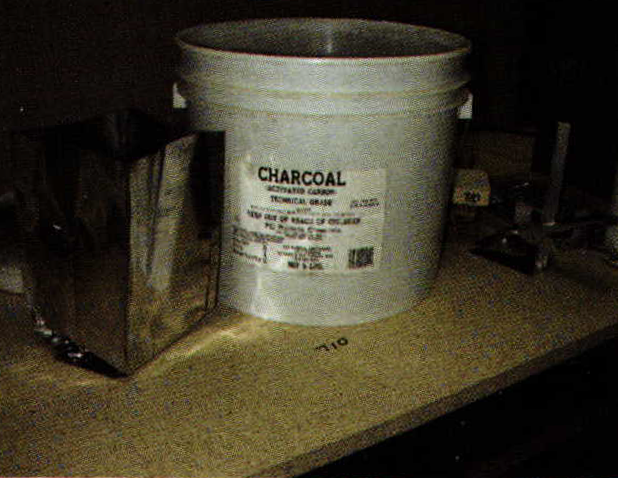
Release the press and take this mass of metal and get ready to put it in the stainless bag that you made. Cover the bottom of the bag with charcoal, put your plates in and cover them with the charcoal. What is the purpose of the charcoal you may be asking yourself? Well, we need a reducing or oxygen free atmosphere. This goes back to oxidation, we can't have any for the sheets to properly bond together. The bag is closed up tight and put into our pre-heated kiln at the correct temperature.

This is left in the oven for 10 hours at which time the kiln is shut down and the bag is left to cool. With great anticipation and sweaty palms you come in to the shop in the morning ready to open your bag with the prize inside. Be careful when opening the bag. You have hot charcoal in there and you want to dump it into a metal container to cool and then reuse for you next billet.
Unbolt your torque plates. You may end up needing to use a hacksaw to cut the bolts, as many times they will fuse with the nuts. Your billet is still hot so let it cool until you can touch it. Hold it in your hands and marvel at what you have accomplished.
Trimming of Billet Forging
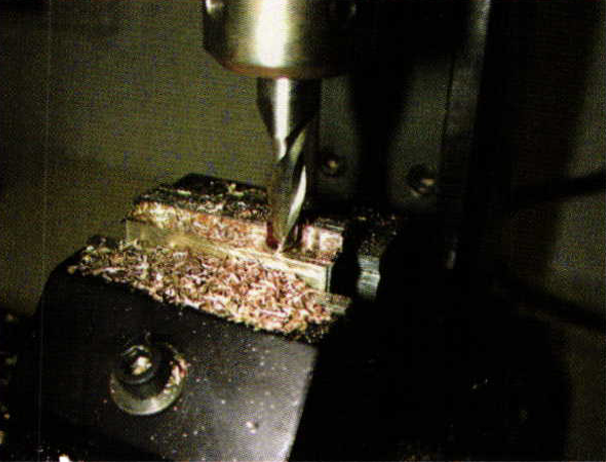
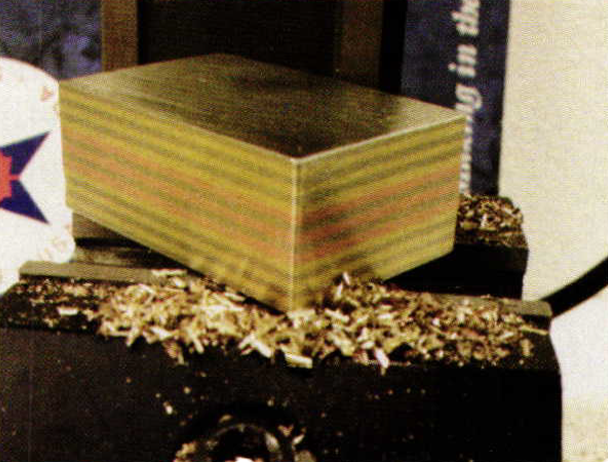
Our next step is to trim the edges of your billet. This is the time I need to tell you that there is a tremendous amount of waste involved in making Mokume Gane. As just an example a billet made with l8kt green gold, l4kt rose and sterling silver will weigh approximately 160 dwt. Be prepared to loose as much as 50% of the original weight you started your billet at. I use a small Shereline vertical milling machine to accomplish the trimming. I will mill away approximately 3mm off of each edge. The reason this is done is to prevent any shearing or delamination of the metal as we forge. At this step if you don't have a mill you can use your jewelers saw frame with a #6 saw blade and do the trimming or even a hacksaw. Some of the edges may not have bonded and this process will remove that. As you can see in after milling the individual colors are visible and no separation is showing. This means "we done good."
In the next article in the series we will go to forging of the billet and making a simple wedding band in a star pattern. I hope I have peaked your interest in this process as well as been as concise as possible. If you have question concerning the process you can email me at heavymtl@pacbell.net
See related articles:
Related Articles

Richard Reinhardt: Discontinuous Continuity
Gold Jewellery Tarnishing
Platinum Consideration Factors

Metal Conversion Chart


The All-In-One Jewelry Making Solution At Your Fingertips
When you join the Ganoksin community, you get the tools you need to take your work to the next level.
