
Buffer System & Ultrasonic Basket Replacement
3 Minute Read
Buffer System & Ultrasonic Basket Replacement
When we replaced our vacuum tubes for the buffer system I chose to run PVC again. The PVC is easy to acquire and assemble and the smooth sides promote air flow. Most fittings are cemented but a few strategic points are just tight press fits to allow access in case items are sucked in.
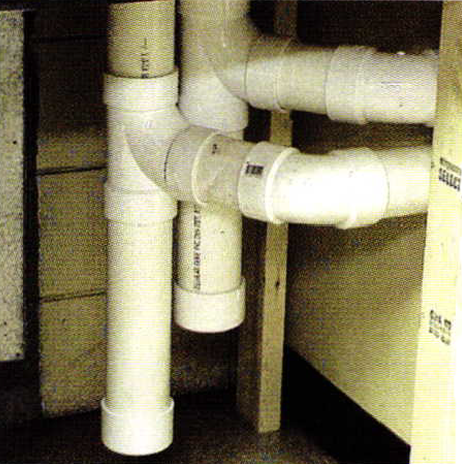
We are using a Handler 1250 CFM suction unit with 4 stations so each has at least 300 CFM well over the suggested minimum of 200 CFM. When installing the system I wanted to use only 45 deg. elbows to maintain flow speed.

A sharp 90 deg. bend and a vertical drop were used just prior to entering the filter area to catch large particles and help make the filters last longer. It also simplifies retrieving items accidentally sucked into the intakes. The two extensions below the T- couplings are just press fit and pull down for cleaning out.
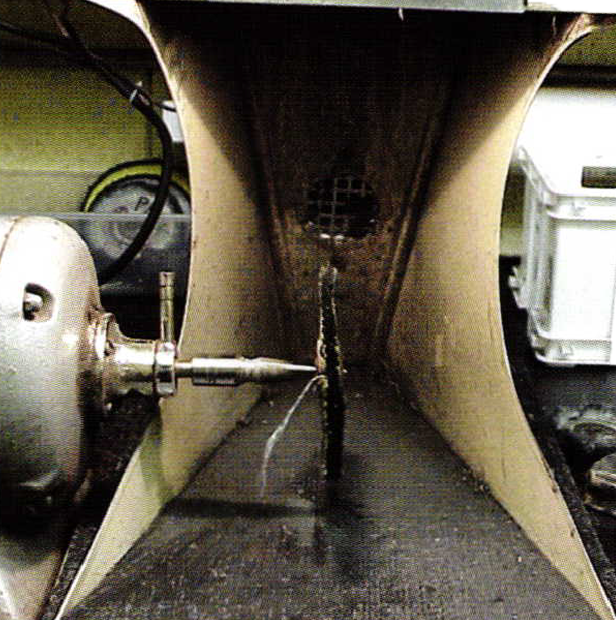
We needed to solve the problem of small items being sucked into the exhaust system. All of our hoods were fitted bottom feed vacuum outlets. This allowed any stones or small parts to be thrown by the wheel to the back of the hood and sucked down the tube, which involved hours a month in disassembly to find items. I moved the vacuum outlets to the back of the hoods about 3 inches from the bottom and since installation not one item has been sucked in by accident.
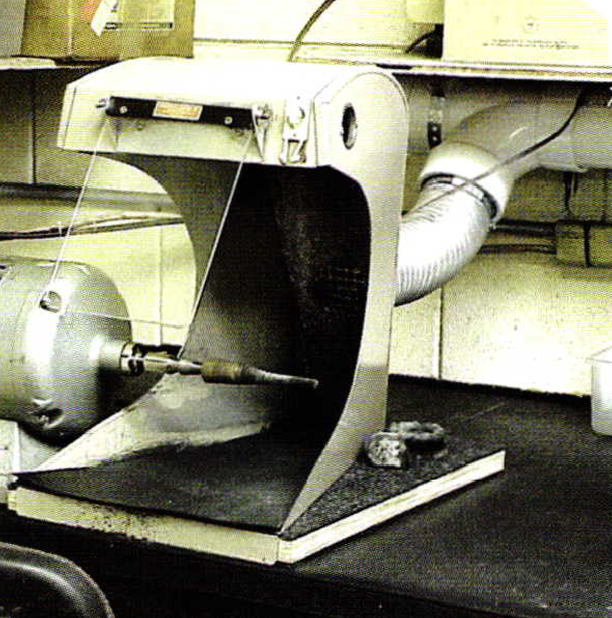
This view shows the short piece of flex tube connecting the hoods to the PVC pipes. In case small items are thrown down and bounce up through the protective grate the tubing curves up to act as a trap and slow it down so it never makes it into the PVC pipes.
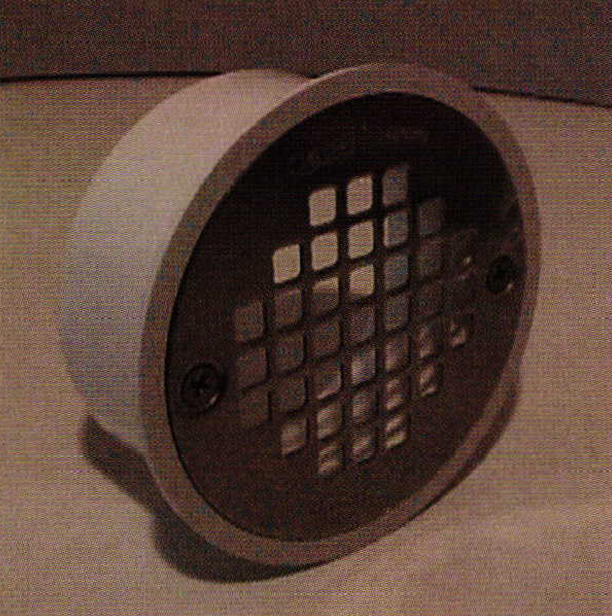
This is a simple 4 in. PVC snap-in drain. Remove the grate and place it on the back of the exhaust hood and trace around the inside diameter for a cutting template. After cutting the hole place the cover on the back and mark the cover screw holes and drill them. Now remove the screws, place the cover up to the cut hole from the outside, and screw through the hood into the pre tapped holes to attach the collar. Then you can attach your flex tubing.
Ultrasonic Basket Replacement | |
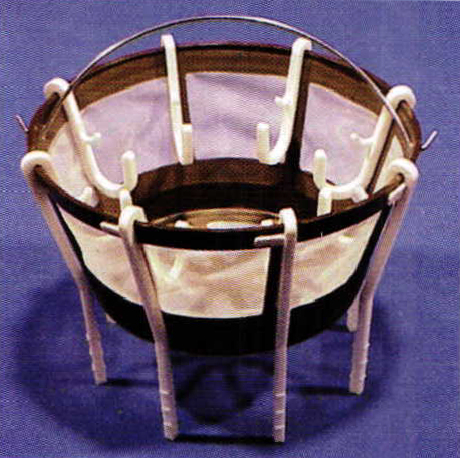 | These ultrasonic baskets seem to last about 3 months under continuous heavy use. The baskets are a great time saving tool when loose stones fall out in the ultrasonic. However, heavy pieces that are left to vibrate loose on the bottom will soon wear through the screen on the bottom ofthe basket. |
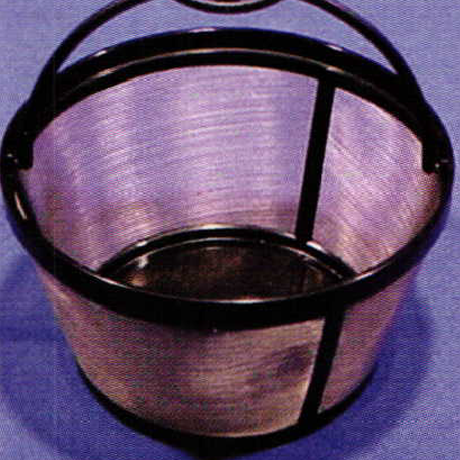 | A stainless steal basket coffee filter makes an excellent replacement. |
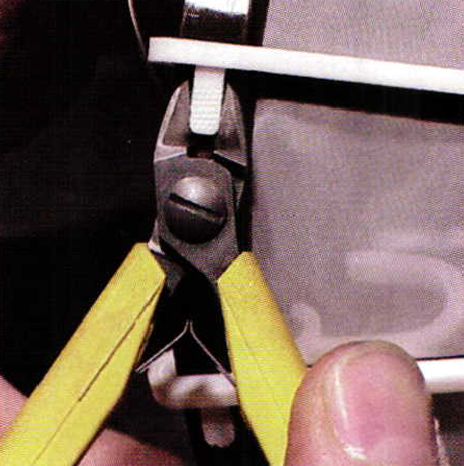 | Once your old basket has holes worn in it, use a small flush cut wire cutter and snip between the white plastic of the leg lug and the brown housing of the frame. This will break the weld where the leg is attached and leave enough material to re-weld it on the new basket. |
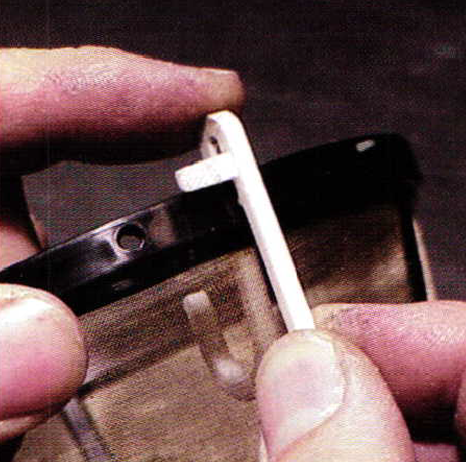 | Snap the old leg over the new basket. Warm up a small soldering iron. (I run mine out of a waxing pen controller.) Gently melt and fuse the white lug attached to the leg to the new basket. |
 | Remove the black plastic handle from the top of the new basket and use it as extra plastic welding material to weld the other side of the leg to the new basket. This particular type of plastic will weld as well as the white plastic the legs are made of. |
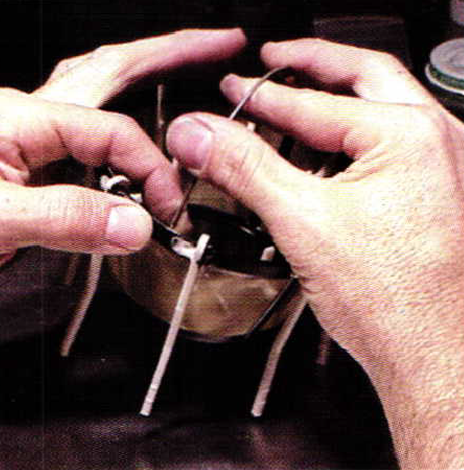 | Position and weld the legs one at a time to make sure they are all positioned correctly. After they are all securely welded, remove the stainless steel wire from the old basket and attach it to the new basket. |
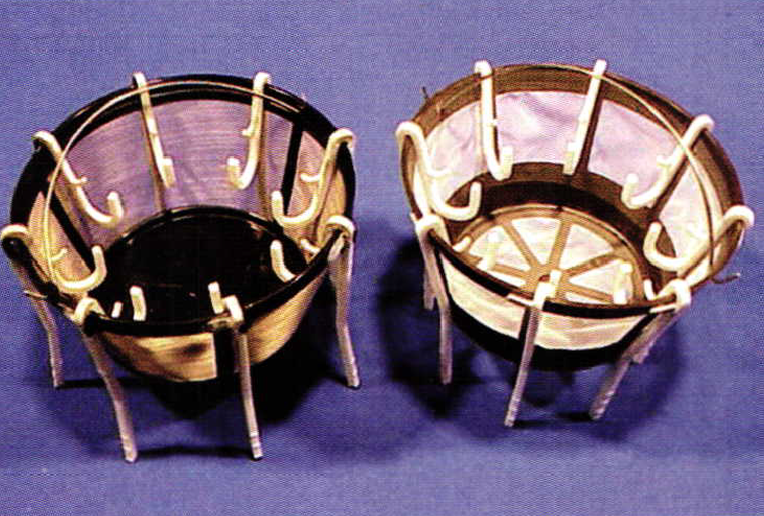 | Pictures of a new basket with mesh bottom on right, and the replacement stainless steal basket with solid bottom on the left. |
Related Articles
Rules for Tools

Customized Ultrasonic Sediment Bucket

How to Make a Riffle File
Modified Split Mandrel for Finishing Round Bezels


The All-In-One Jewelry Making Solution At Your Fingertips
When you join the Ganoksin community, you get the tools you need to take your work to the next level.
