
Restoring a Jewellers Vulcanising Press
This vulcaniser came to me in a poor condition. It would not heat up and had seized because of corrosion. The bodywork around the base was also badly corroded and needed treatment. Having decided this would be a worthwhile restoration, I began researching the makers and identified them as.
2 Minute Read
This vulcaniser came to me in a poor condition. It would not heat up and had seized because of corrosion. The bodywork around the base was also badly corroded and needed treatment. Having decided this would be a worthwhile restoration, I began researching the makers and identified them as Hispana De Maquinaria in Barcelona, Spain.
Having established the makers name I obtained their telephone number via the Internet and contacted them directly. This proved rewarding as they were able to direct me to an agent in Birmingham, U.K. A Michael E. Williams Ltd. Tel: 0121 5549021. Contacting this company resulted in confirmation that spares were still available. With this information I began work on restoring the vulcaniser.
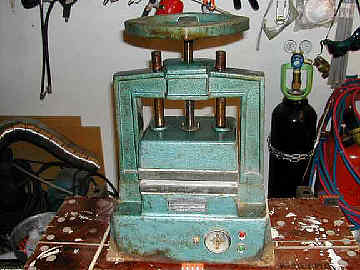 |
| Condition on Receipt |
Vulcaniser Dismantling
Firstly I applied a releasing oil to all moving parts which was allowed to soak overnight. The large screw thread wheel to the top of the vulcaniser spun freely because of a missing keyway key. A replacement was made on the lathe and fitted to the keyway and wheel.
The heating elements were removed along with heating plates which were secured by four Allen screws on each corner. The elements were then tested and both were found to be faulty. Next the thermostat, main on/off switch and LED lights were tested and proved to be serviceable, so these were cleaned and re-used. The rear cable protector was removed and all wiring tested for continuity and removed as required in preparation for anti-corrosive treatment and painting. When dismantled the vulcaniser body was wire brushed using an electric drill and rotating wire brushes. When all corrosion was removed an anti-corrosive paint was applied and allowed to dry for a day.
Facts to note: The upper element is rated at 300 watts and the lower element 360 watts.
The following is a small selection of photographs taking during the restoration.
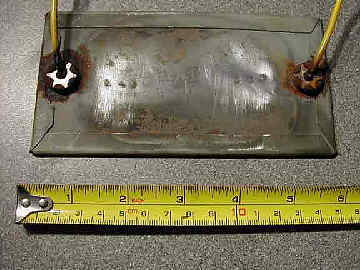 |
| Old Heating Element |
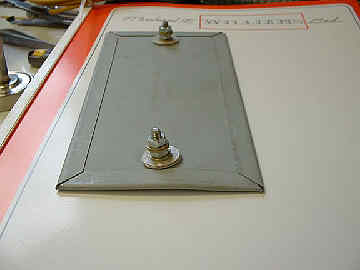 |
| New Heating Element |
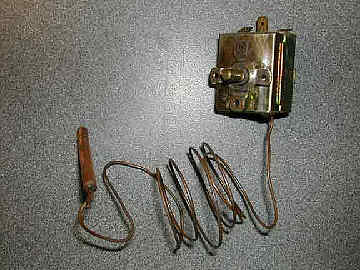 |
| Thermostatic control |
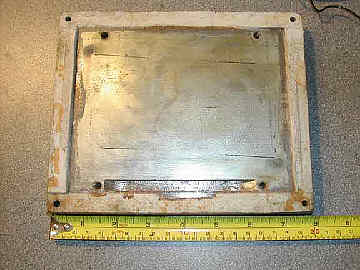 |
| Heating plates with thermostatic bulb recess |
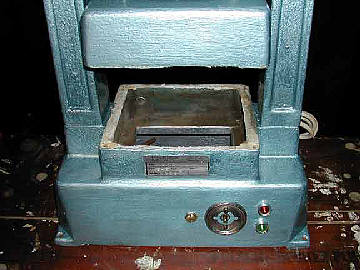 |
| Vulcaniser showing heating plates and elements removed. |
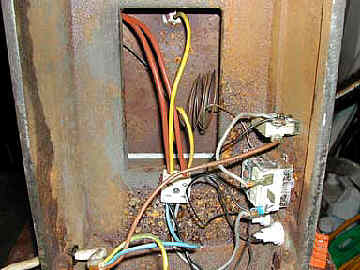 |
| Corrosion in vulcaniser base and also showing wiring system |
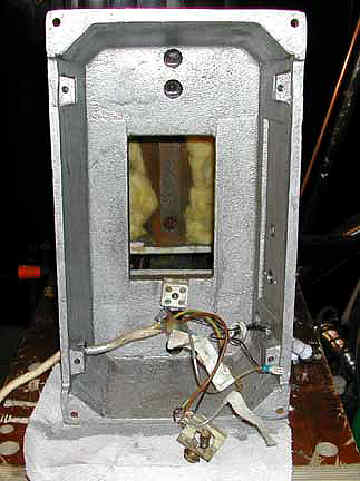 |
| Vulcaniser base following rust removal and anti-corrosive treatment. |
Vulcaniser Assembly
The elements were replaced as a pair and new heat resistant wiring was used. The new elements came with cable connecting studs unlike the older version which were wired directly into the element. These studs are two long for safe fitting to the upper heating plate, so it is necessary to shortened them by cutting them level with the nut, a jewellers saw is ideal for this purpose. Failure to do this will create an electrical short between the vulcaniser case and element contacts. The elements are held behind the main heating contact plates and are secured by a steel plate with four Allen screws at each corner. The thermostatic bulb at the end of the sensing coil is located in a channel cut into the underside of the lower heating plate. Four separate white silicon based insulating strip are placed between the heating plates and the vulcaniser body on upper and lower units whilst assembling to reduce heat transfer to the casing. Some of the old insulation strips can be seen in the image above. A replacement thermostatic control knob and thermometer were fitted and to complete the project, a support stand was constructed using spare material found in the workshop which was bolted together and painted to match the vulcaniser.
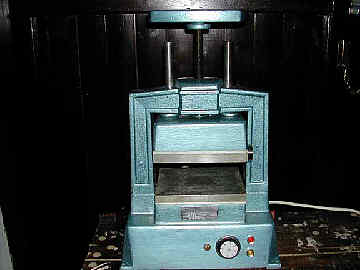 |
| The Completed Restoration |
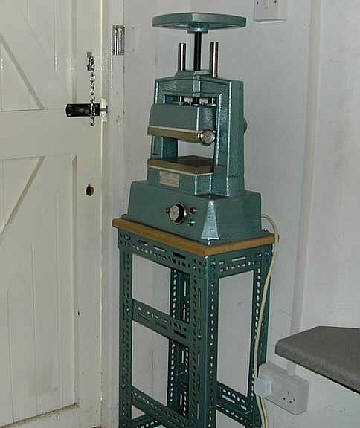 |
| The Completed Restoration |
Related Articles

How to Make a Tumbler

Making Wooden Raising Stakes

Customized Turntable Tool Rack

How to Make a Wax Injector


The All-In-One Jewelry Making Solution At Your Fingertips
When you join the Ganoksin community, you get the tools you need to take your work to the next level.
