
Customized Peg Head Holder & Stone Holder
2 Minute Read
Steve Satow shares his procedure on customized bench tools such as 3 prong or peg head holder & wax stone holder used for stone setting and prong works.
3 Prong or Peg Head Holder
Many times I have needed a way to hold a 3 prong earring or peg head that wasn't soldered to a ring. This modified pinvise seems to do the job well.
This is a ¾ down view so you can see the way the collar was widened to accommodate the extra width of the head with the added wires. I took the largest vise in the four vise set to make the holder with. Take off the tip, so the 4 tips are exposed. Take some 18 ga. carbon steel wire and anneal it.

Then groove between two of the prongs with a separating disc (make sure you wear safety glasses) until ½ of the wire is counter-sunk. Weld it in place with the laser with the wire following the exact outer contour of the 2 prongs. These can be silver soldered but you must keep the middle of the pin vise cool to keep from losing temper in the 4 prongs or the prongs won't spring open. This can be done with a strip of wet paper towel wired in place with binding wire keeping it wet. This first wire is the reference for lining up the other two wires. They must be lined up by eye since you have no reference points; then mark them with a fine tipped sharpie marker. Groove them to the same depth with a separating disc and weld them the same way.
Now you need to bend the 3 new wire tips that extend past the old 4 tips to be parallel and line up with the inside edge of the old jaws. Once they are all straight wrap the bottom with Bounty again as above and heat the tips cherry red and quench them. Then sand blast them so you can see the metals color clearly and anneal them to a pale straw color. You want them as stiff as possible but not too brittle.
Once tempered and annealed, sand or bead blast them to your taste in appearance. Take the tip you removedin step one and use a large ball bur to round the inside edge at the top so it is as smooth as possible, so it wears into the new wires as little as possible, as you tighten it down. Screw it on a few times till it is smoothed down perfectly, oil it lightly, then enjoy your new tool.
Wax Stone Holder
I was tired of my wax stone holder always rolling of my bench or into a dusty tray. The wax was always losing its tackiness from dust or rouge fingerprints.
This tool takes advantage of all those old toothbrush handles, especially all those cool rubber grip ones it seemed like a shame to throw out.
Cut the head off a large nail or for more gripping power for the wax use a thumbtack.
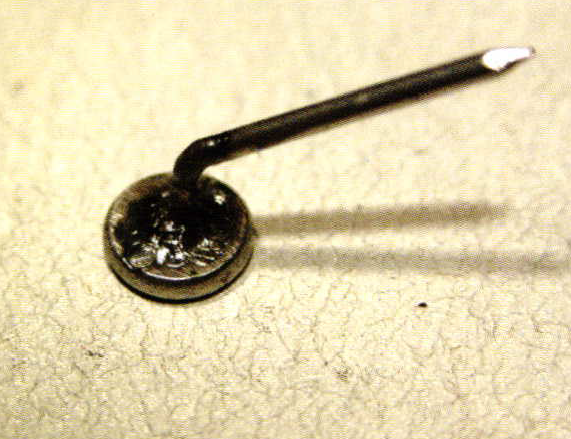
Solder a 2D nail to the tack or nail head and bend it to a 45 degree angle.
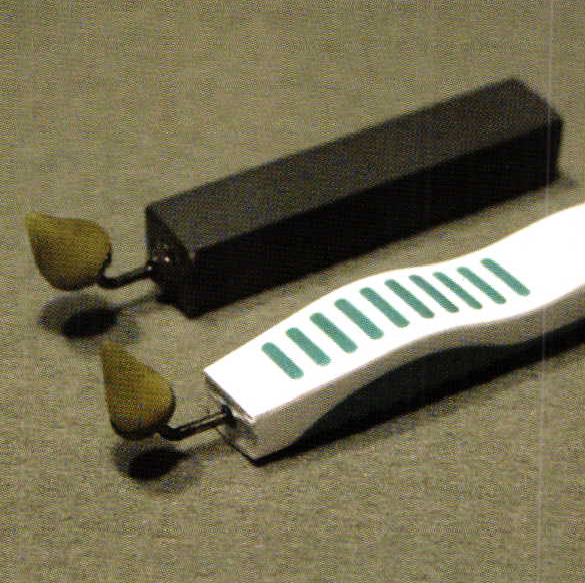
Cut down your handle of choice to a comfortable length for you. Warm up the nail and push the hot nail into the handle. Let cool and pull it out then epoxy it back intight. Shape your wax tip and apply it to the tools tip. The thumbtack tip is concave and the post helps center and hold the wax better.
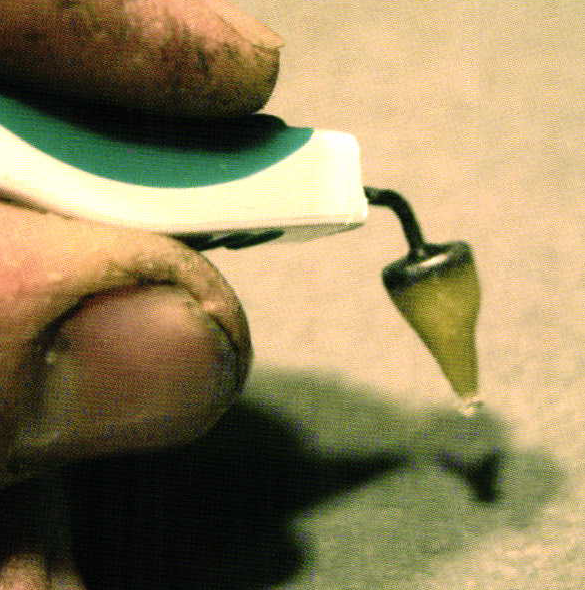
Your new tool loaded with melee and in use.
Related Articles

How to Customize Short Insulated Tweezers

Polishing and Finishing Aids

Basic Chasing Tools

How to Make a Chasing or Forming Tool


The All-In-One Jewelry Making Solution At Your Fingertips
When you join the Ganoksin community, you get the tools you need to take your work to the next level.
