
Bead and Bright Setting
7 Minute Read
In the last issue of Bench Magazine I demonstrated how I would go about wax model carving for this unusual mother's ring design.
Bead and Bright Setting: The Four Bead Method
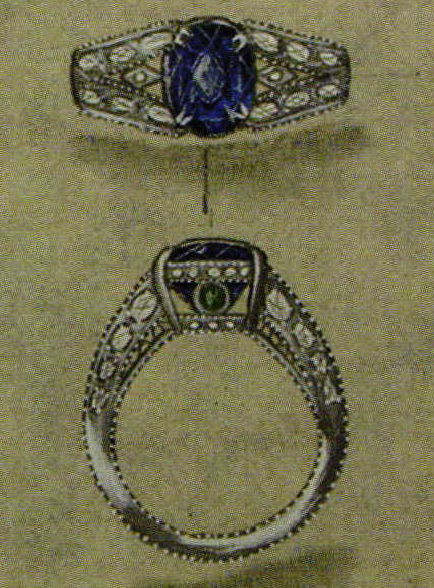
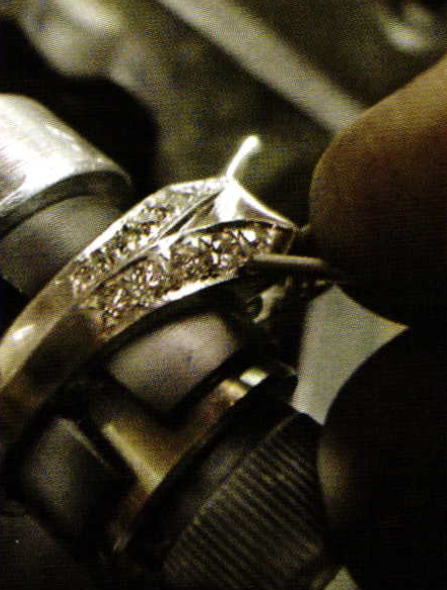
The wax model has now been cast into Platinum with a 10% iridium alloy. As You can see from the design the detail elements have not been added to the casting yet. The bezels for the side colored stones and the kite shapes between the shanks will be fabricated and added later.
One good rule of thumb that I try to abide by is to always set my diamonds first and heat sensitive stones last. The advent of laser technology is diminishing the importance of this rule because repair work or fabricated elements can be added without damaging heat sensitive stones, even in platinum.
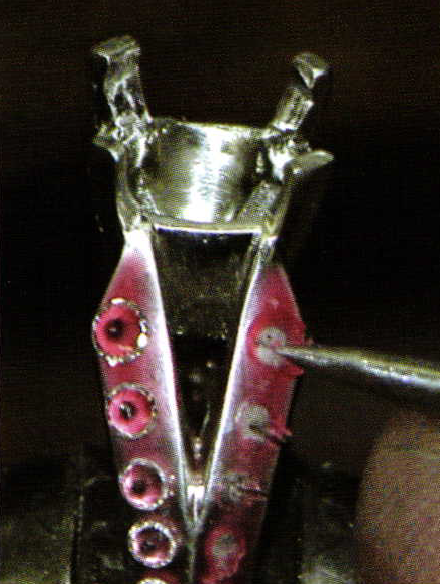
One of the tricks I like to use is to apply a coating of sticky wax to the metal surface. This trick allows me to stick the melee onto the ring so that I can make sure stones are right where I want them to be. You can see in the picture that by pulling the melee from the metal leaves a space in the wax. I then mark the stones positions using a sharp tool and clean the remaining wax off with a steamer.
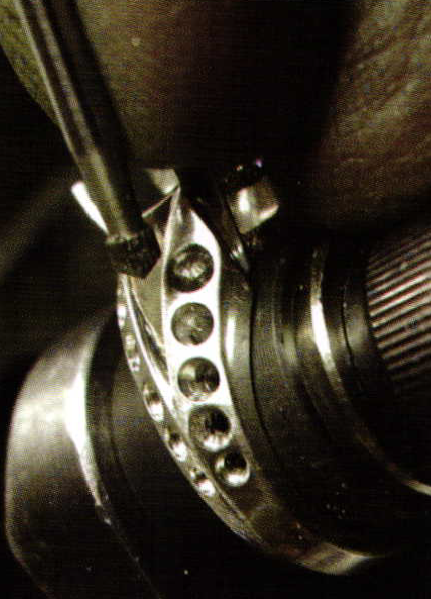
I like to use a spring loaded center punch, available at most automotive stores, to make an indentation in the metal. This small depression helps to keep my drill bits from wandering when I drill the pilot holes.
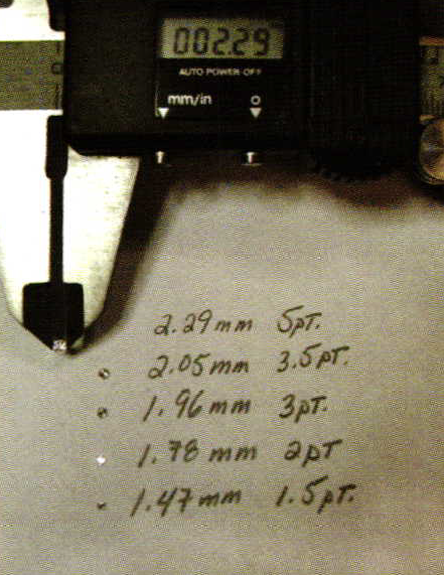
I feel that digital calipers are very important if you want to achieve high quality stone settings. I start a project by measuring each melee and recording its diameter. You'll see why I think this is so important in the next few pictures.
Another of my many rules pertains to drilling the Pilot holes. I like to use a drill bit that is 5070 of the diameter of the melee. I start with a small pilot hole and then work up to larger bits for larger holes. Doing this saves wear and tear on my burs, especially when I'm working with a gummy metal like Platinum.
Next I need to "open" the pilot hole. For this task I use an "aggressive bur" such as a ball or bud bur. These burs have widely spaced cutting flutes and spiraling rake angles that allow the bur to dig quickly into the metal without overheating. These burs act very similarly to the way a drill bit cuts.
To open the hole I use a bur that is 90% of the diameter of the stone.
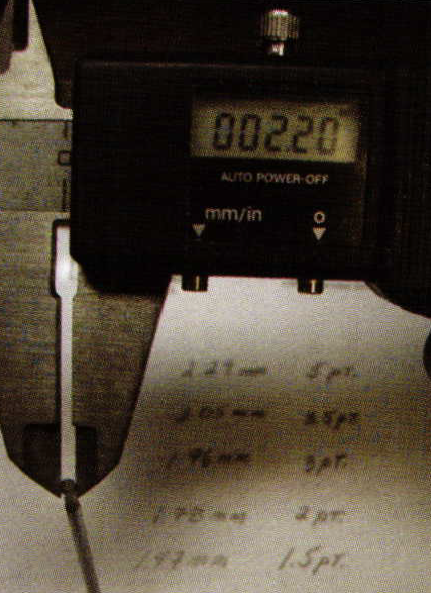
The size of the setting bur you use is very important. Always choose a bur that is slightly smaller than the melee you are setting. This bur is .09 mm smaller than my first stone. It's much better to wiggle a bur as it cuts to get the correct seat diameter than it is to over-cut the seat with a bur that is too large. The most frequent error made by inexperienced stone setters is to over-cut the seat. Inexpensive slide calipers are not accurate enough to use in quality stone setting work and the $50.00 that a good digital caliper costs will more than pay for itself in saved time.
This picture shows a vanadium steel setting bur. The burhas tightly spaced cutting flutes and no rake angle (no spiral). This bur is nor aggressive but it will cut a very clean seat. The bur will also overheat and dull quickly if operated at high speeds. If you choose vanadium burs just be sure to clean them frequently, keep them lubricated and run them at slow RPMs. Please notice that I like to leave about 1/2 mm of space between the edge of the seat and the side of the ring.
Now another rule: Melee less than 3mm in diameter should be seated to a depth so that the table facet is flush with the surface of the metal. Stones over 3mm are seated less deep so the table facet will be slightly above the metal surface.
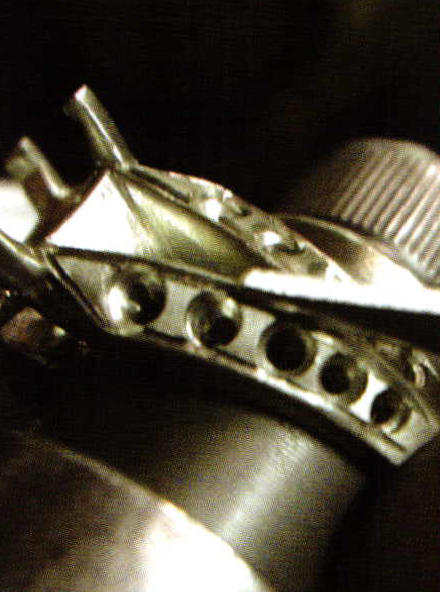
After all the seats have been cut and checked using the actual stone, it's time to cut the "frame lines". Frame lines do just what their name implies;they frame in the area that you will be setting stones in. I use either a small onglette (4/0) or a knife (K-0) graver to cur the frame lines. This graver needs to be very sharp but not necessarily polished. I'd like to add that I recently fell in love with the GRS brand of high speed tool steel gravers; they are the best I've tried so for. You can see in the picture that the frame line cuts into the seat. The frame line is beveled out toward the edge of the ring and it goes down to the same depth as the seat.
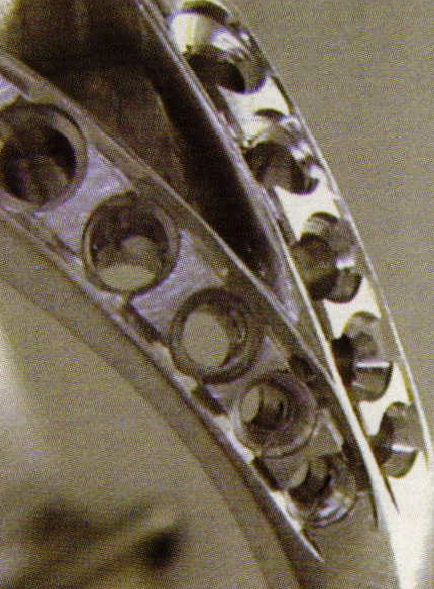
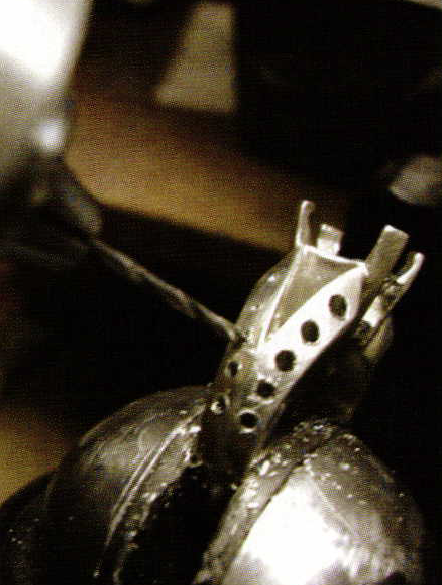
This close-up picture shows what your seats should look like after the frame lines have been cut. Please notice that the shape between each seat looks like a tiny hour glass.
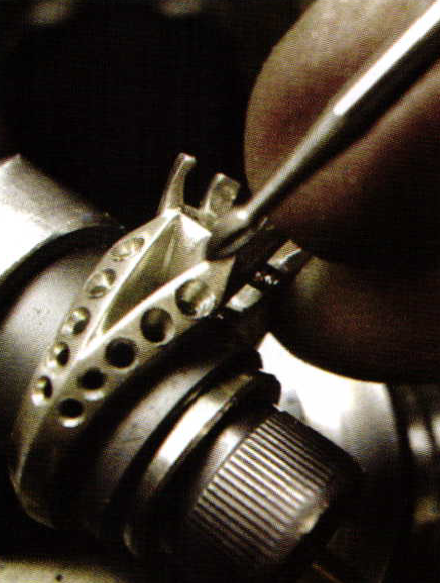
In this picture I am using my onglette graver to "isolate" the beads. Each of the small hourglass shapes is to be divided into four triangular beads and a center kite shaped element. To do this you begin the cut in the middle, outer edge of the hourglass and cut diagonally in toward the seat. It's fine to make several shallow passes, in order to get the cut to the proper depth. As you cut you should angle the graver in toward the center kite shape so as to preserve as much metal in the bead as is possible.
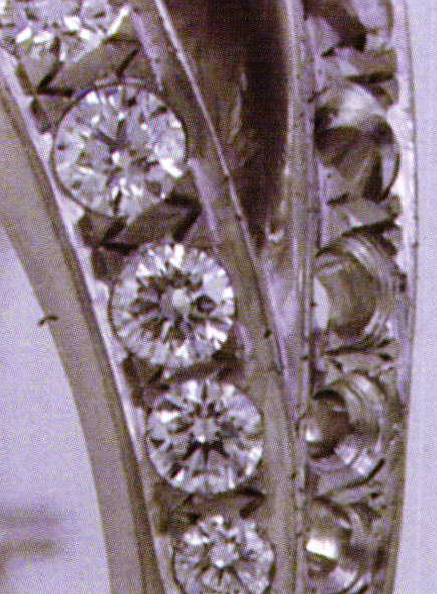
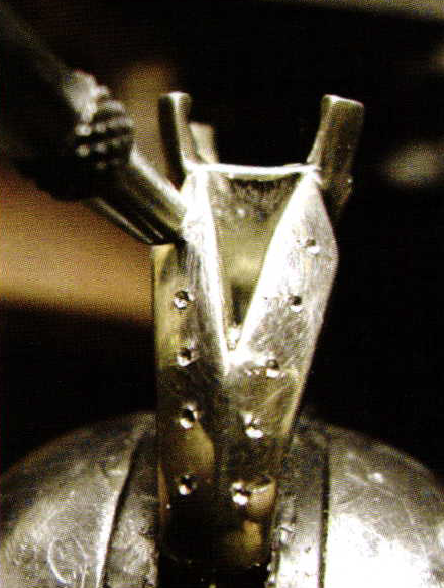
Here's another close up so you can see the detail in the cutting. I also want you to notice how tightly the melee are seated. The stones are sitting down in their seats and there is no gapping between the melee's edges and the beads. These beads will barely need to be rolled over the stones for them to be set.
In this picture I am using a tiny round (51) graver to roll the beads onto melee. I'm using the term "role the beads" for a reason. There are several errors made by inexperienced stones setters and pushing the beads onto the stones is wrong. I have often seen jewelers use too much pressure to push abead toward the stone and the setter ends up snapping the bead off the setting.
If your seats are well cut then all you need to do is set the graver tip at the base ofthe bead and roll the face of the graver into the bead then over and onto the stone. The bead does not even need to be all the way down on the stone;the beading tool will take care of rounding the bead down onto the stone.
Here I am using the beading tool to round off the bead tips. I do have a few comments to say about beading.
Personally I don't like to use beading blocks to sharpen these tools. I prefer to use very small carbide ball burs to grind out the beading tips when they are worn. Carbide burs are now available in many supply catalogs. One advantage to this method is you do not need to soften the tool in order to sharpen it.
As you rotate the beading tool please do not allow the beading tool to touch the diamonds. Diamonds will dull your tool and the tool can damage your diamond.
Don't overuse the beading tool. Over working the beads will just cause flashing around the beads and this will be difficult to remove.
Any flashing around the beads can be easily cleaned up using your onglette graver. Be sure and work away from the diamonds so that you won't dull your graver if you slip.
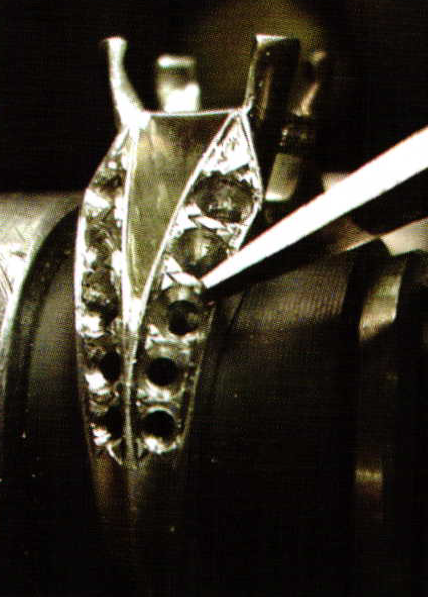
This is where the bright in bead and bright comes from.To bright cut your setting work use a highly polished and very sharp flat graver. This graver should have a very small face. I sometimes like to bevel the sides of this graver in toward its top so the side of the graver will not nick up my work. I am using a number 40 flat graver in this picture.
First use the graver to bevel the kite shapes between the stones. Be careful and work away from the diamonds.
Next use the graver to work around the frame lines, cleaning any nicks or scratches left by the other gravers.
There are many bench myths spoken in dusty bars about old-timers who neveruse rubber wheels or have to polish their settings after bright cutting. This is a bunch of bunk! I will say that the better you are at bright cutting the less polishing you'll need to do.
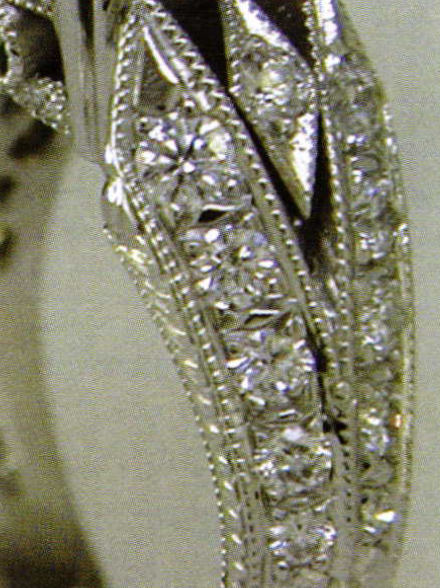
This close-up shows the final setting after some light rubber wheeling and a good polish. You can see that the detail elements have been added and the frame lines have been millgrained.
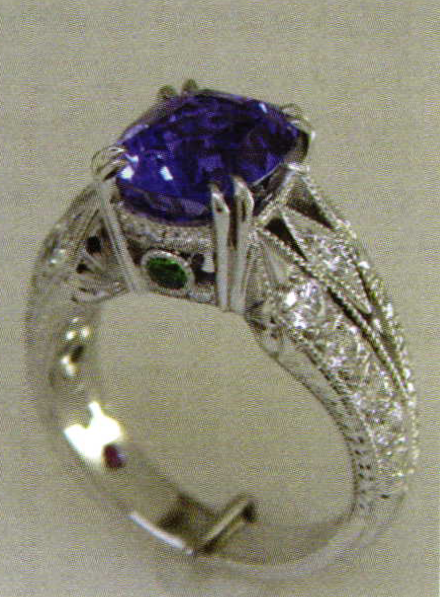
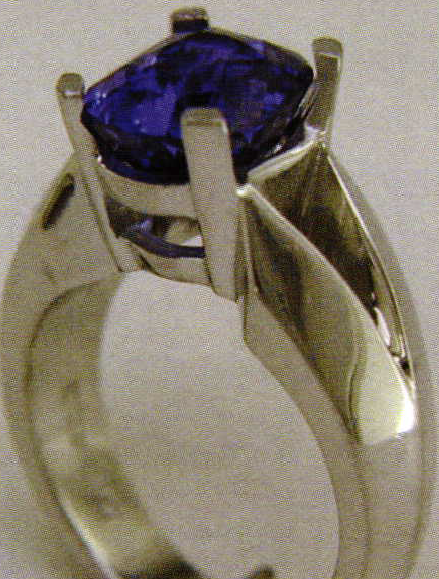
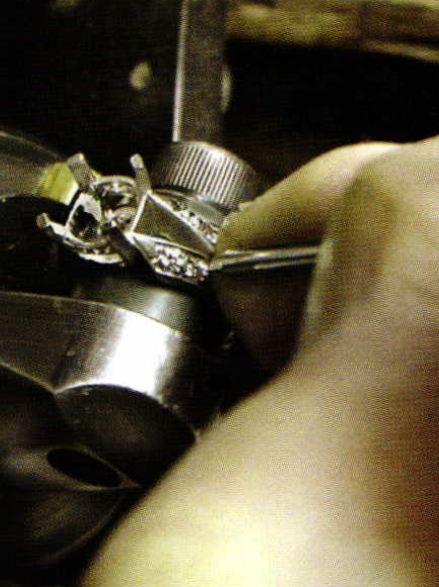
The finished mother's ring has had all the stones set. I mentioned in the first article that this 3.56 carat sapphire was magnificent and the platinum really al- lows the blue color to explode. The side stones, an emerald and a peridot, representing two children, were tube set on a lathe and added using a laser welder. A small ruby was flush set inside the shank to represent the father. Finally, the entire ring was hand engraved. This ring required 32 hours of labor to complete. I hope you enjoyed the two articles written on how this ring was made.
Related Articles

Creative Reorientation From Poland

Albert Paley

Custom Antique Coin Pendant

Hollow Carat Gold Jewelry


The All-In-One Jewelry Making Solution At Your Fingertips
When you join the Ganoksin community, you get the tools you need to take your work to the next level.
