
Wax Model Carving
6 Minute Read
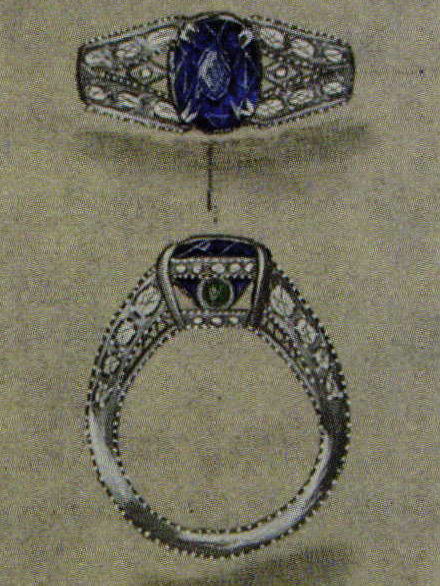
Recently a customer requested that we make her an unusual mother's ring. She chose a magnificent 3.56 ct. oval blue sapphire as her center stone and this design was made for her ring. The two bezel set side stones, one an emerald, the other a peridot, represent the woman's two children. The ideal cut side diamonds are there for glitz only.
This ring is being made in platinum. I thought you might like to follow along as I carve the wax model for this ring and in the next issue of Bench Magazine I will show how I bead and bright set the side melee.
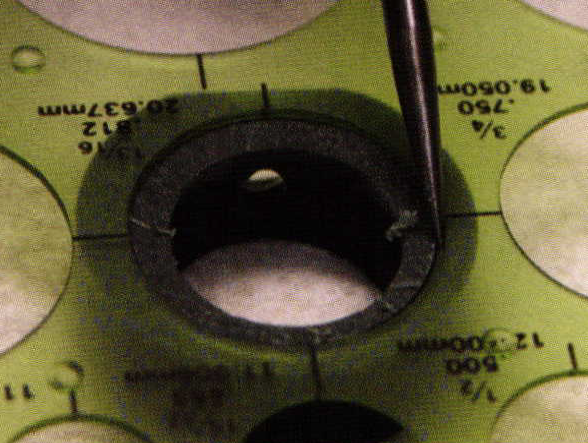
To start this carving project I roughly cut a blank of wax about 3mm wider than I needed. I sized the wax blank using a Mattä ring tube sizer. I always like to get my center stone in the proper position and seated before I begin carving the wax. If I am working with a durable stone then I will use heat to sink the stone into the wax to the proper depth. If the stone is fragile then I have to laboriously carve out the seat.
My blank wax is now what I call "blocked out". For me, blocking out means that the wax blank is the correct width and the sides are squared up. In order to compensate for shrinkage and for metal lost during finishing I carve my wax to be 5 Vo larger than I want the finished ring. You will also notice that I flattened off the top of the wax down to the level of where I want the upper gallery support of the crown to be. As I get close to finishing the wax model I will add back the wax for the prongs. At this point, prong wax would be too fragile to leave in place.
For the next step in carving this wax model I use various circle and oval templates to help me scribe indicator lines in the side of the wax blank. These lines will help carve away the thickness of the wax blank. I take the time to scribe the lines on both sides of the wax so that I can carve the wax squarely.

Next I fill the indicator lines with white paint. After the paint has dried I like to lightly sand the surface to remove the excess paint.
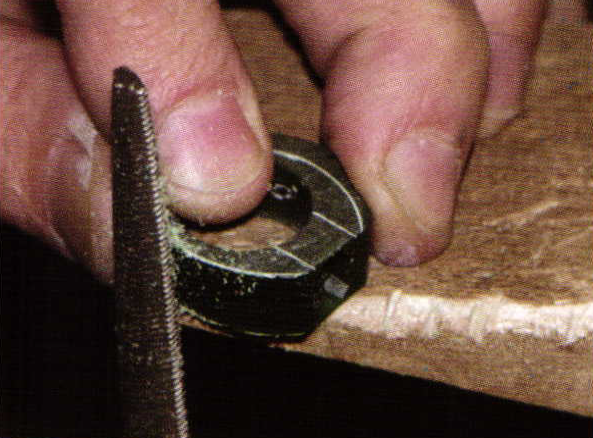
Here I'm carefully filing away the excess wax. You can barely see on the lower edge of the wax where the white line is showing through. If I take my time in laying out my indicator lines then I can file right to them and be confident that my wax will turn out well. You can also see that I've roughly scribed in the lines where I will carve out the prongs for the center sapphire.
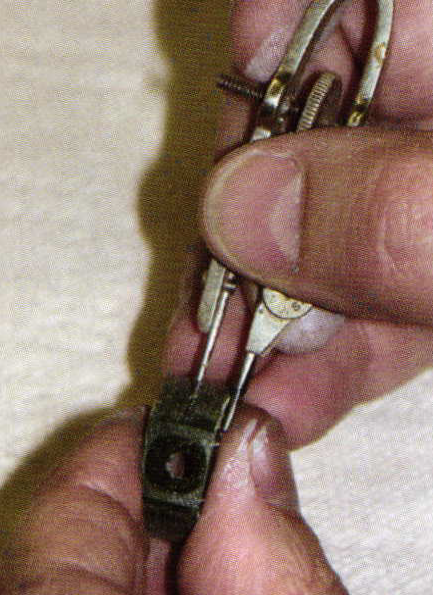
After the wax has been carved to the correct profile it's time to reduce the width of the blank. In order to carve a proper taper in my wax model I again scribe a series of lines into the blank. Here I'm using a favorite set of dividers to scribe the lines. These dividers have one a favorite set of dividers to scribe the lines. These dividers have one pointed side and the other is flat with an adjustable depth. This allows me to set the exact width I want and scribe the line right down the center of the blank.
A total of three lines have been scribed into this wax blank. The outer two represent the width of the wax at the bottom of the shank and help guide me to carving a perfect taper. The center line will be used later when I have to notch the center to form a split shank.
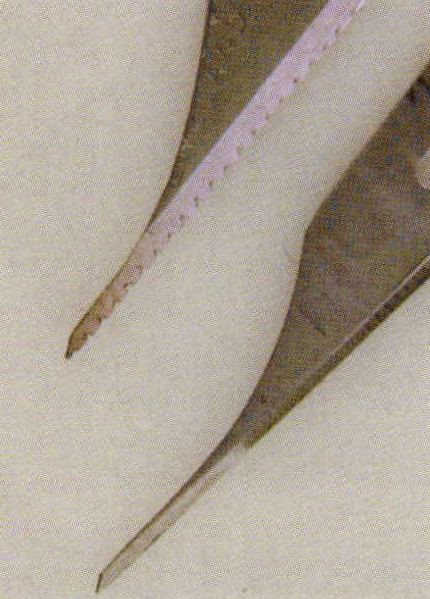
At this point I would like to show you two of my favorite wax carving tools. These are common number 11 scalpel blades that are now too dull to cut rubber molds but are still great for wax carving. The top blade was first hammered into a rough cut file. The files teeth have left a saw like pattern in the blade. Both blades have been ground down using a Mizzy wheel. The blades are now about the height of a 210 saw blade. As you might guess the top blade is good for sawing wax, while the bottom is meant to shave wax away. Both of these blades are tiny enough to get into really tight places.
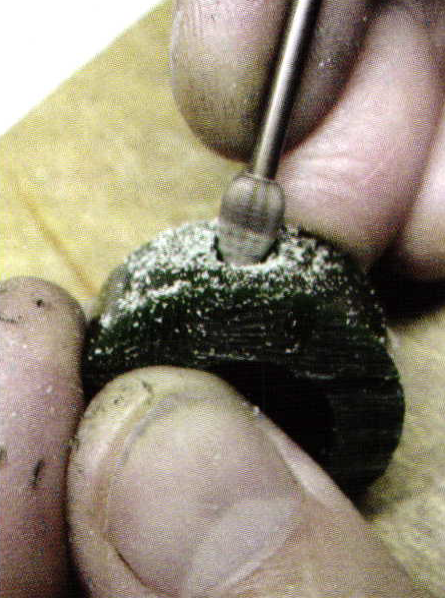
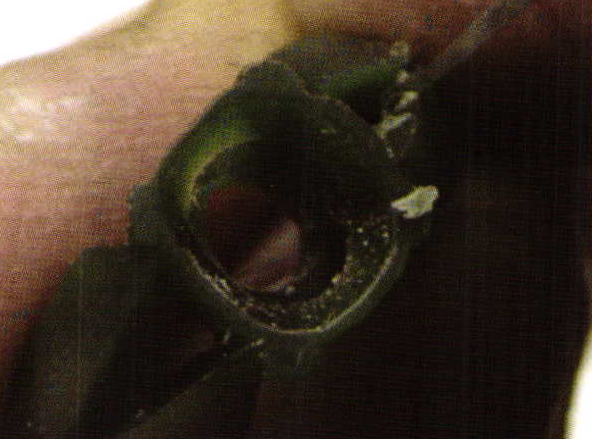
Now that allof the rough cutting has been done it's time to tum my attention to the detail work. One of the reasons I love to carve waxes is that the work is so fast and the tools needed are very common. In order to carve out the gallery space I first used my saw scalpel to cut the rough hole and now I'm cleaning up the area with my smooth scalpel bade.
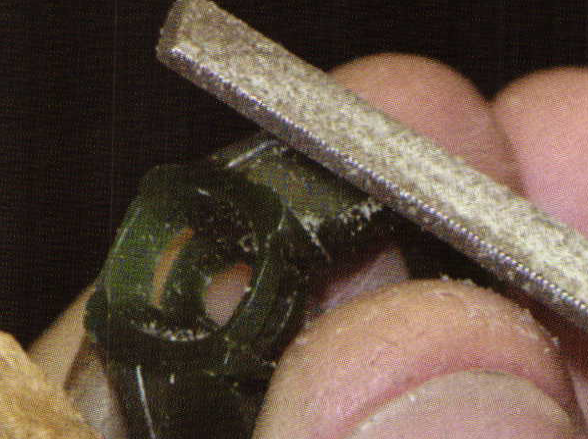
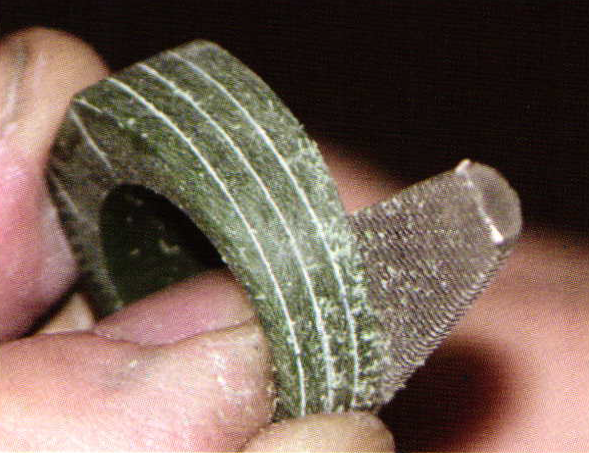
In this picture it's a bit tricky to see what is happening. This ring is to have a split shank and each side of the shank is supposed to be beveled toward the outside edge. I'm using a fairly rough, flat, needle file to shape the side of my wax model. In the picture you can still see my white guidelines and they do help me to determine how much wax to remove. You can also see that the center crown is taking shape. The bases for the prongs are in place and the upper and lower gallery supports are roughed in.
To help carve the space between the split shanks I went back to my scalpel blades. These blades are so thin and durable that they allow me to get into very tight spaces and either cut or scrape away tiny amounts of wax. I think scalpel blades have to rank among the best things ever invented.
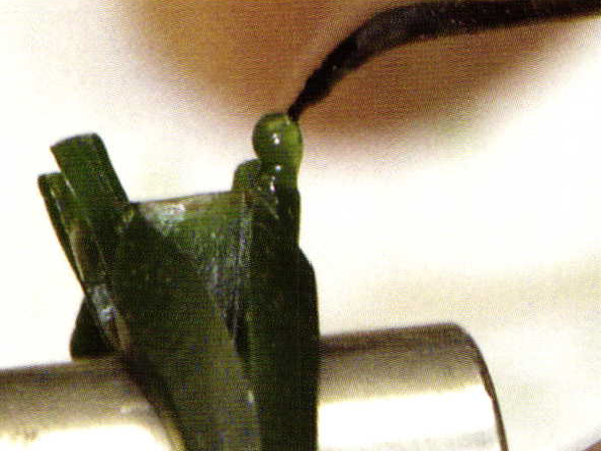
Except for some very fine detail work and a final polish, my wax model is nearly completed. It's time to add wax to the model for the prongs. I like to use an electric heating pen (available in all tool supply catalogs) to add the wax back onto the model. I used to use an alcohol lamp and a needle fort his task but the electric pen is a lot faster and doesn't deposit carbon in the wax.
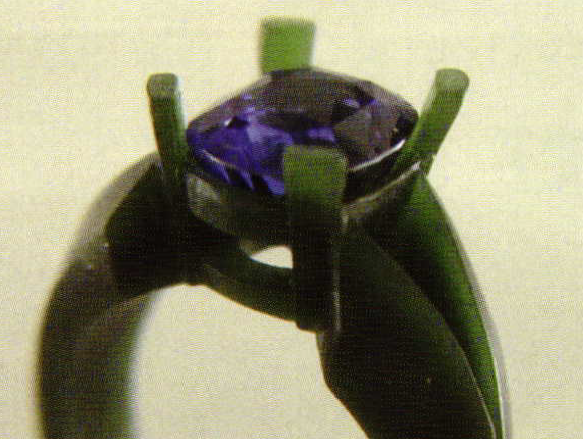
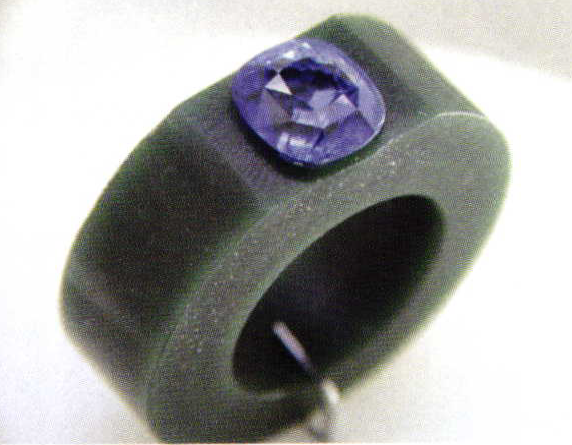
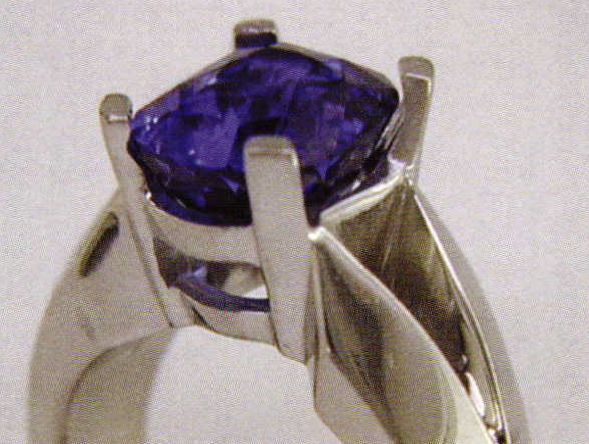
This picture shows my completed wax with that beautiful sapphire in place. The wax has been polished and is ready to be shipped off to the platinum caster. Please notice how the sapphire sits in this wax model compared to the cast ring. You can see that the stone is elevated in the metalring.This is due to the 3-5 % shrinkage factor. You must always plan for this variation in your models.
If you'll check back to the first picture of the design for this ring you'll notice that several detail elements have been left out of the model. The bezels for the side stones and the elements that go between the split shanks will be fabricated and added to the metal ring.
I hope you enjoyed this article on wax model carving. In the next issue on Bench Magazine I'll show you how I bead and bright set the diamonds in the sides of the shank.
Related Articles

Locating Dead Center on Ring Blanks

Custom Designed Wax Carving

Testing the CAD/CAM LMR Mold Compound

Etype Automated Wax Injection System


The All-In-One Jewelry Making Solution At Your Fingertips
When you join the Ganoksin community, you get the tools you need to take your work to the next level.
