Stone Setting Techniques
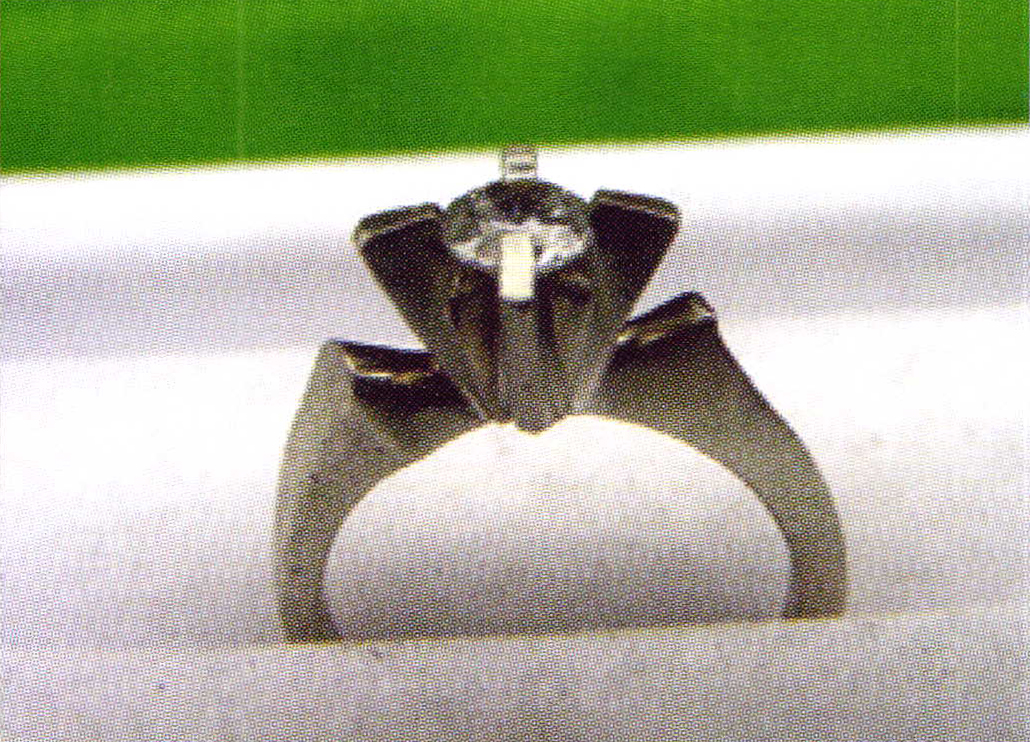
Flat Topped Solitaire Setting
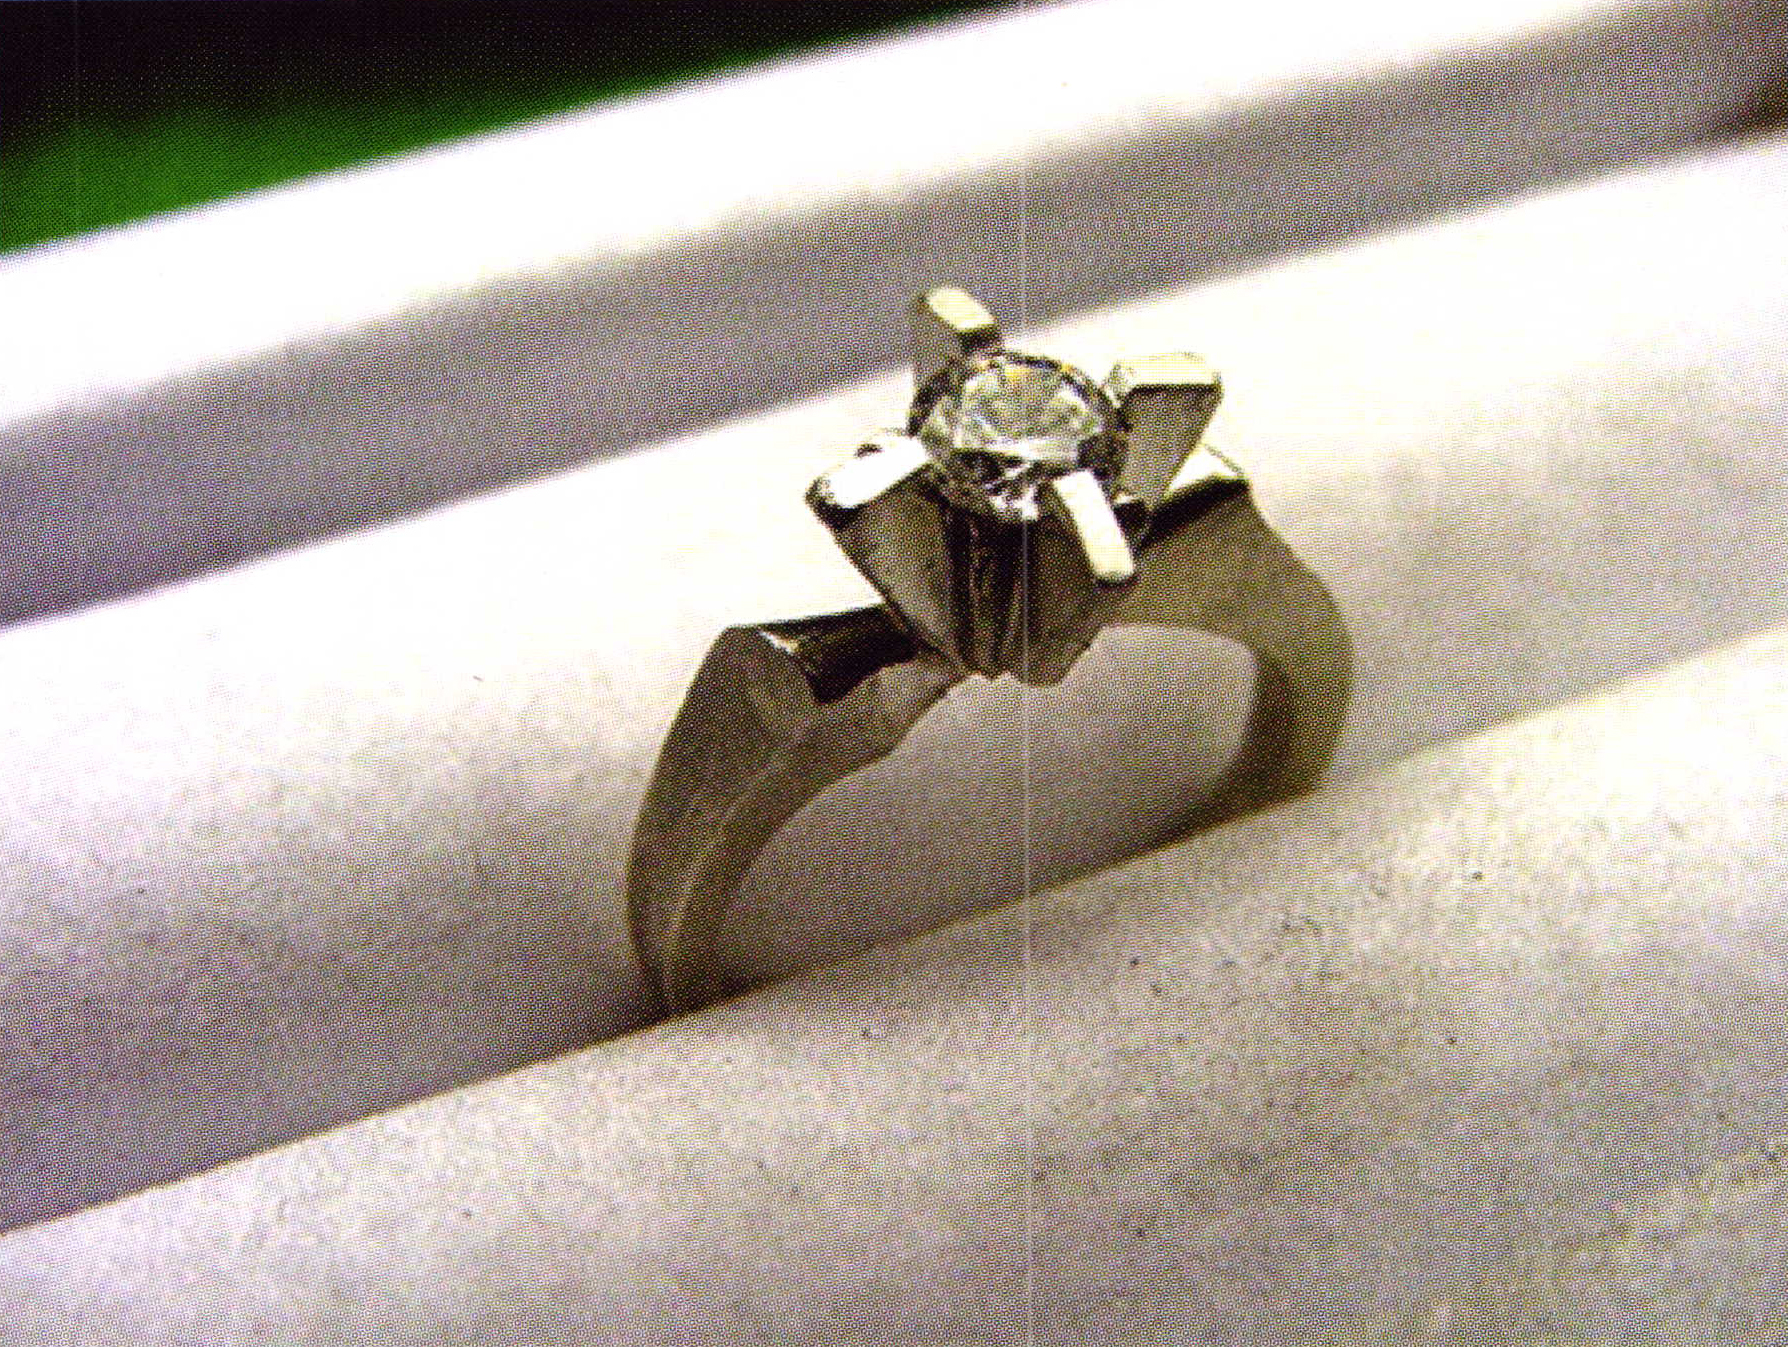
The Flat Topped Solitaire Setting is a popular style setting that is slightly more complicated to set than the standard solitaire mounting. I prefer this ring design as it makes the smaller stone app ear slightly larger in its overall appearance.
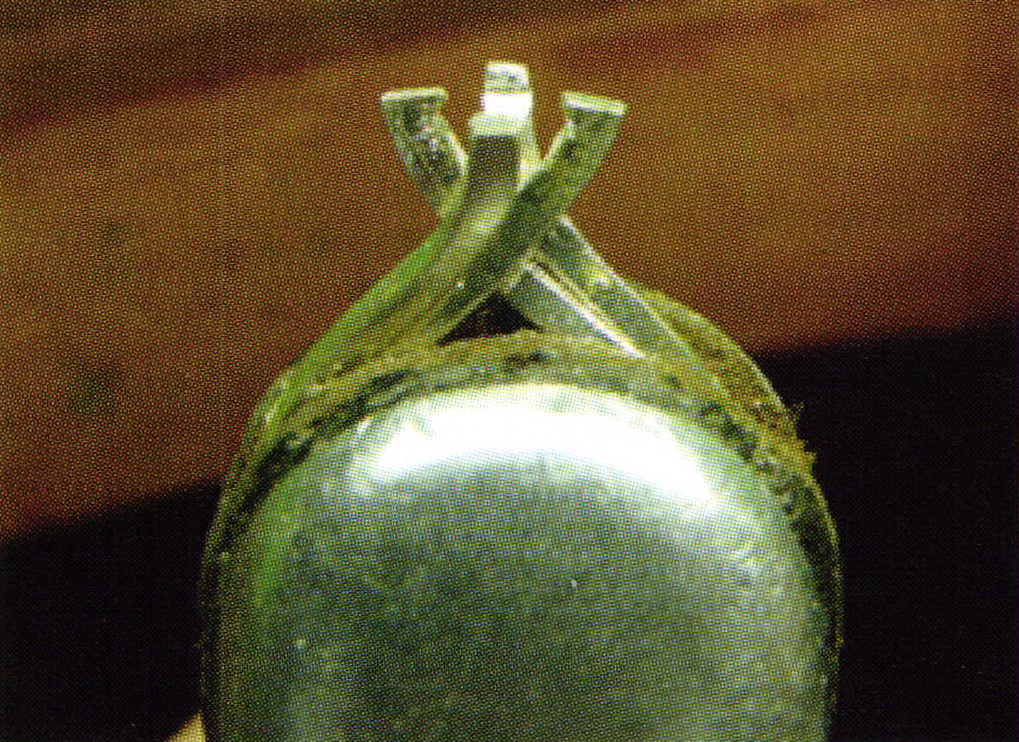
The very first thing to do is to examine all of the claws near the area to be set, looking for the following: Are the claws of the same height? Are there any casting irregularities? Is the area to be set free of any marks on, or beside, the claws? Has the ring been stamped with the appropriate trademarks and karat stamps? Is the ring the correct size?
It is far better to correct any of these problems now rather than after the diamond is in the mounting.
Using your awl spread the four major claws. This provides easier accessibility to the claws in general and also to prepare the setting to take the diamond. Please make sure that there are no marks on the awl. Any marks on it will be transferred to the inside of the claws. If there are any, these marks will be rather difficult to remove during the setting process. We must keep all of the claws as clean as possible, before and after the setting process.
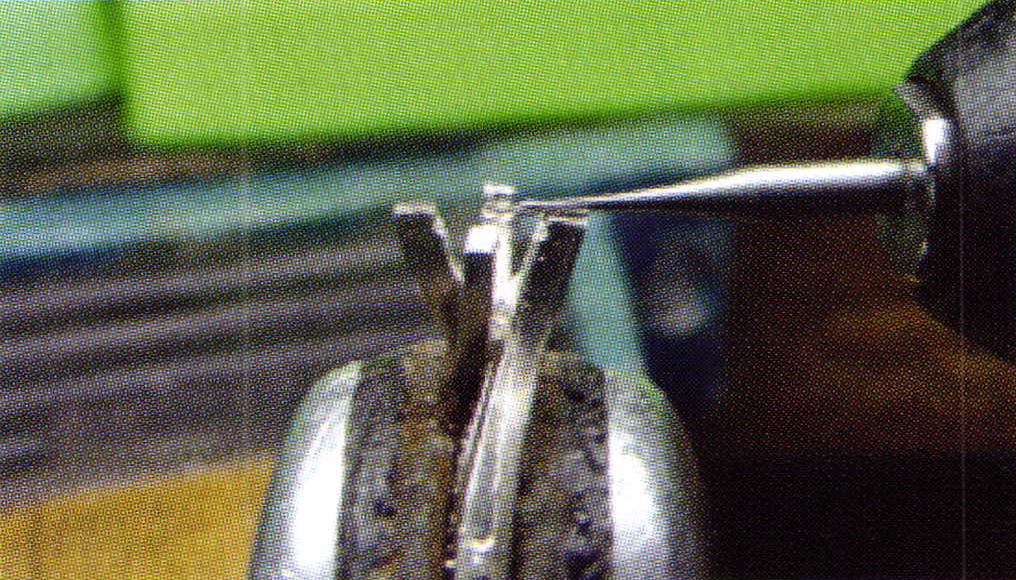
Next use your #006 bud bur. Use this bur to make a small little mark or groove, into the metal to break the surface.
Once the bud bur has made its indentation at about 1/3 below the top of the claw, you can use your 156C hart bur and start preparing the seat for the diamond to sit on. Use a high speed steel bur at this time to angle the bearing cut. This action allows the pavilion to sit against the metal. Draw the bur in an up and down movement, watching that you don't take too much metal away on each draw. Cut on the claw that is nearest to you because in this way you have more control over the rotating bur head. After every few cuts inspect your cutting with your 10x power triplet loupe.
If everything is in order, continue on with the remaining claws. What are you watching for? Is the Pavilion angle the same as it is on the claw? Is the girdle-bearing groove sharp and with no noticeable double girdle cuts? (If you have this problem, use a fine #006 bud bur to clean out this cutting). Is the girdle groove lying horizontal against the claw? You want the stone to sit straight and flat! Lastly, is the girdle-cut no more than 33 % into the metal of the claw? If it's more, then your claw will be made too weak to stand up to constant wearing.
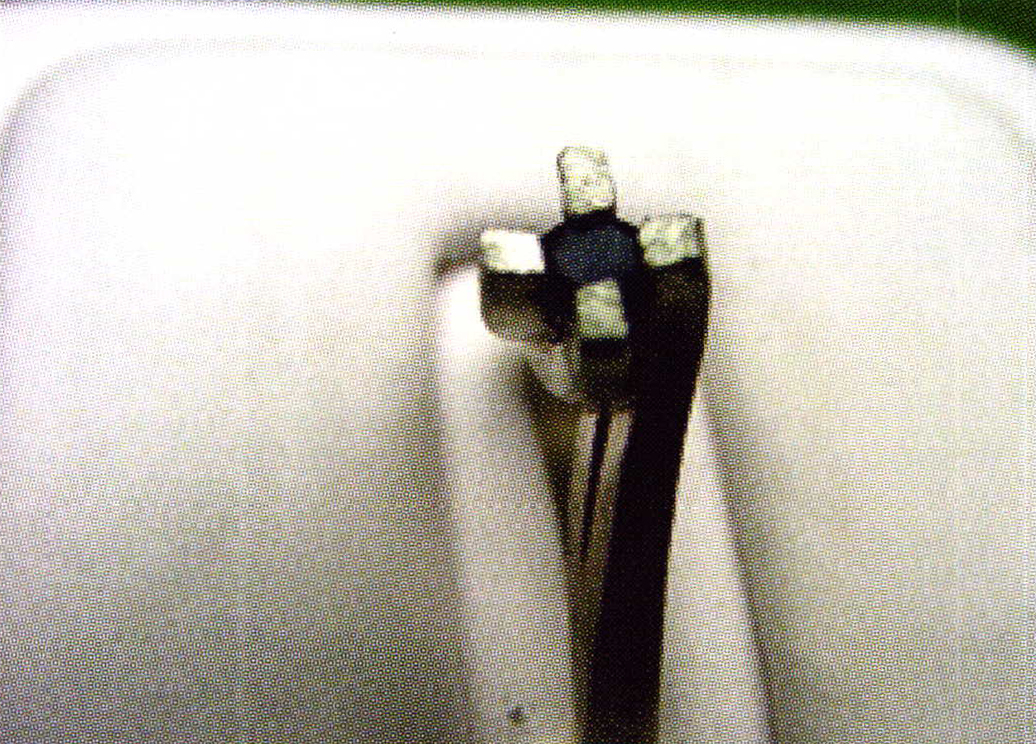
Next use a round bur and clean out the very bottom of the setting. This way the culet will not touch the metal when the claws are pushed over the stone.
Now proceed to inset the diamond into its new home and check the diamond using your 10x power loupe. Is the diamond sitting flat and not leaning to one side? Is the stone sitting against the girdle cuts? Is the diamond girdle in the space allotted for it? Is the culet left without touching any metal? Are the noticeable inclusions in the diamond being covered by the claws? Are any lasered inscriptions on the girdle visible and not covered by a claw? Are the claws in the correct position and in alignment to each other? If everything looks correct remove the stone as you have one last thing to do before the actual setting.
Use your #40 flat graver to do some detailing that no file can ever achieve and that is to remove any flash cutting from each of the four claws. If you use a file you will leave a serrated edge and that is very difficult to remove. The always sharp cutting edge of the graver will clean, as well as leave a shiny cut on the metal. Do not dig in as you cut!
I use a method of letting the graver edge slide itself down from the girdle cut right down to the bottom of the claw. I start my cutting right at the girdle indentation and with one cut; it cleans as its shines. The flash metal only occurs on one side of the claw, never on both sides. This is caused by the rotating bur removing metal as it is cutting.
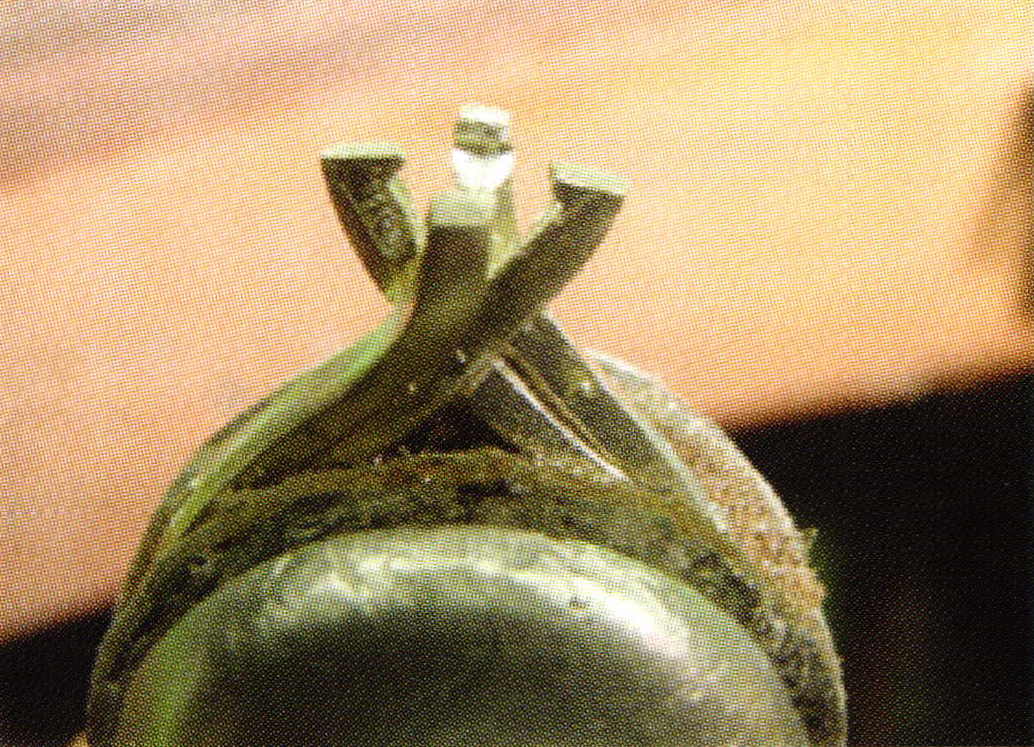
Now place your diamond back into the setting as you are now ready to secure the stone into its new home. Are all of the claws in alignment?
I prefer to use my #2 cut pillar file to remove some of the metal off of the tip of the claw. Leave about a 20 degree angle in a backward slope.
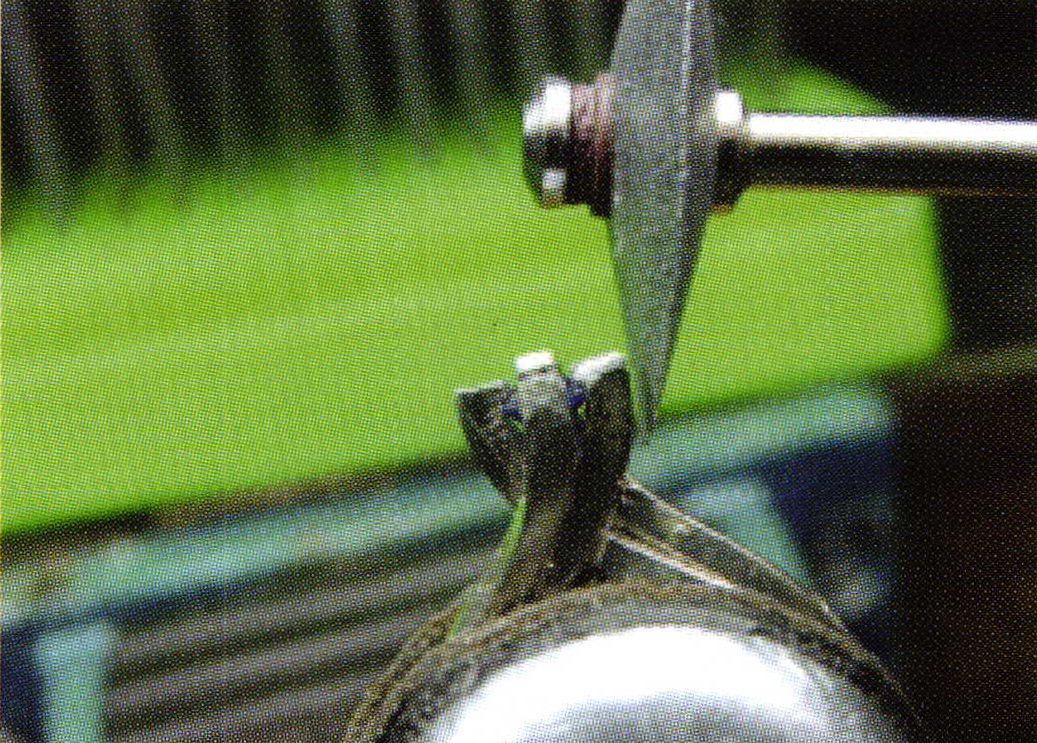
Next use a pair of pliers to bring in the four claws. The method is to squeeze the prongs in from the 12 o'clock and 6 o'clock positions and then turn and squeeze in from the 3 o'clock and 9 o'clock positions. You will not completely tighten the diamond with the pliers. You are just bringing the prongs in to make contact between the diamond girdle and the seat in the claws. The final tightening of the claws is done with your metal serrated pusher.
Use your metal serrated pusher and press down gently moving the claw tip onto the diamond. Make sure at this point that all of the metal is touching the kite shaped facets of the diamond. The serrated face of the pusher prevents any slippage off the metal at this tender process; if it were a polished face it might slide off and damage the diamond. Again using your 10x power loupe examine closely that all of the metal is on the diamond. Use a copper hand-pusher to see if the stone is loose or sliding sideways. If so, you need to very carefully tighten the prong tips down.
Now use your trusty little #4 cut triangular needle file. You are going to make a nice clean deliberate little front facet on the edge of the claw, the part that is over the kite shaped facet. By holding your finger pad on a flat part of the file you will assume a 60 degree angle while filing. This takes only one or two deliberate cuts, nothing more.
Using yow #2 cut pillar file, file the top section of the claw until it is free of any markings left by the metal pusher. Try and file this section flat. Next file with either the pillar or triangular file and shape all of the claw sides equally and examine all four claws to see that they are proportional to each other. Try not to file along the lower side of these claws. We are only filing the very top areas. Try and maintain the same thickness all around the tips of these four claws as uniformity is very important here.
Now with your pumice wheel go over all of the areas filed and make all of the corners nice and smooth and very carefully semi-polish the front edge of each claw. This will prevent any sharp edges that might cut a women's fingers, or her clothes.

The All-In-One Jewelry Making Solution At Your Fingertips
When you join the Ganoksin community, you get the tools you need to take your work to the next level.
