Stone Setting Techniques
Article: Step by Step Guide to Fishtail Settings
Updated on
One of the most popular setting styles today, fishtail settings are one of the few setting methods that show off melee really well. It gets its name from the fact that when viewed from the side, the prongs flare out into two sections that resemble a fishtail. It's very simple in appearance, and when done right, is one of the most beautiful setting styles.
Skill Level: Advanced | |
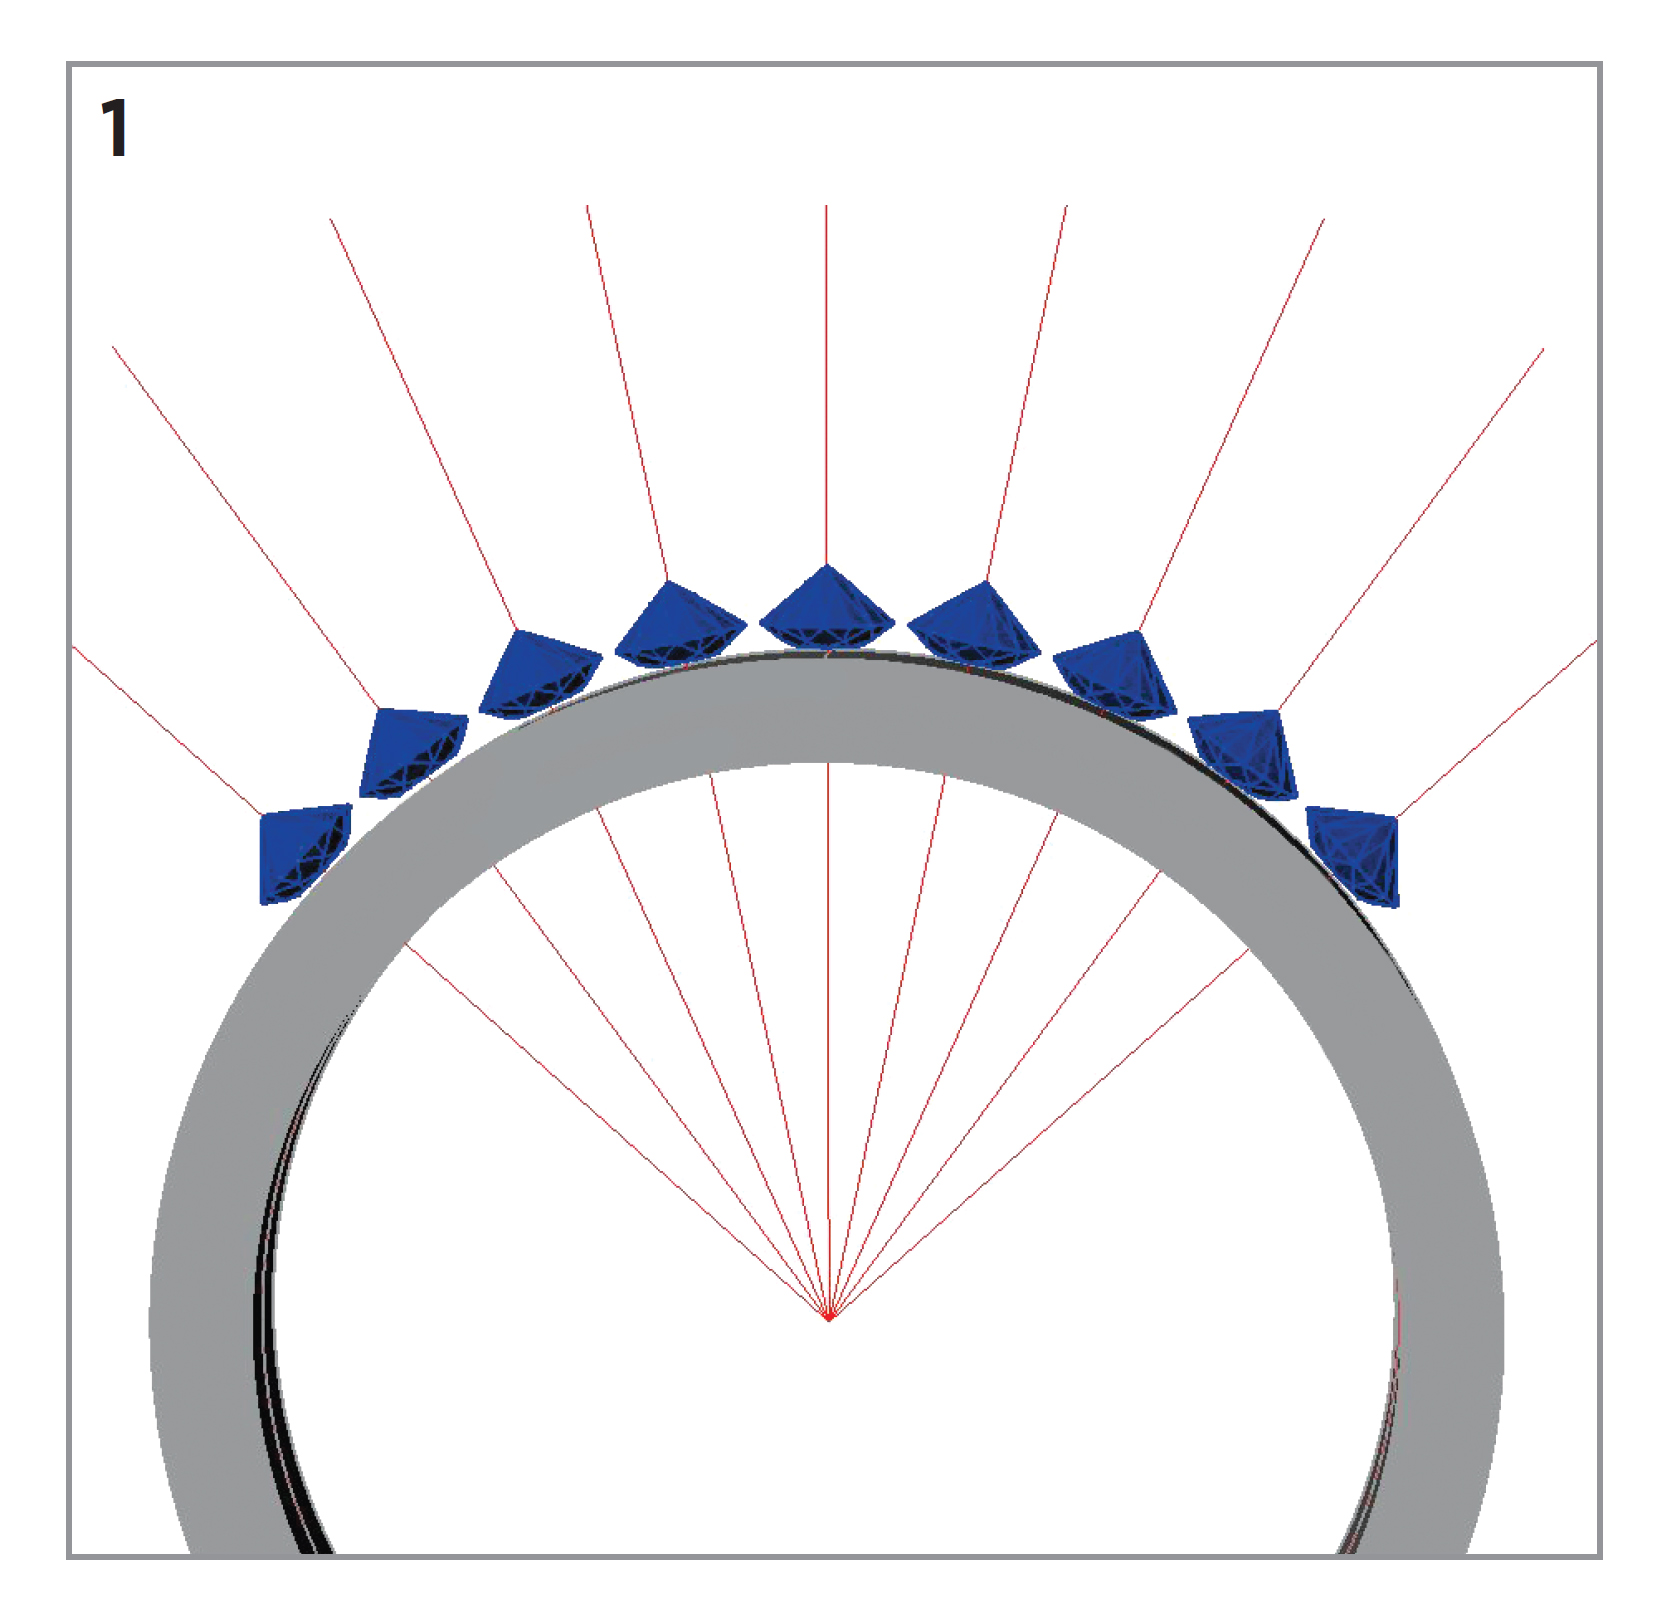 | To create a simple band ring with fishtail-set stones, make sure the band is just slightly wider (about 0.5 mm) than the stones you will be setting, as well as deep enough to clear the stone culets. Spread a layer of beeswax across the top of the ring and place the stones table down along the top. Be sure to leave a little extra clearance as the stones will get closer as they are set into the ring. |
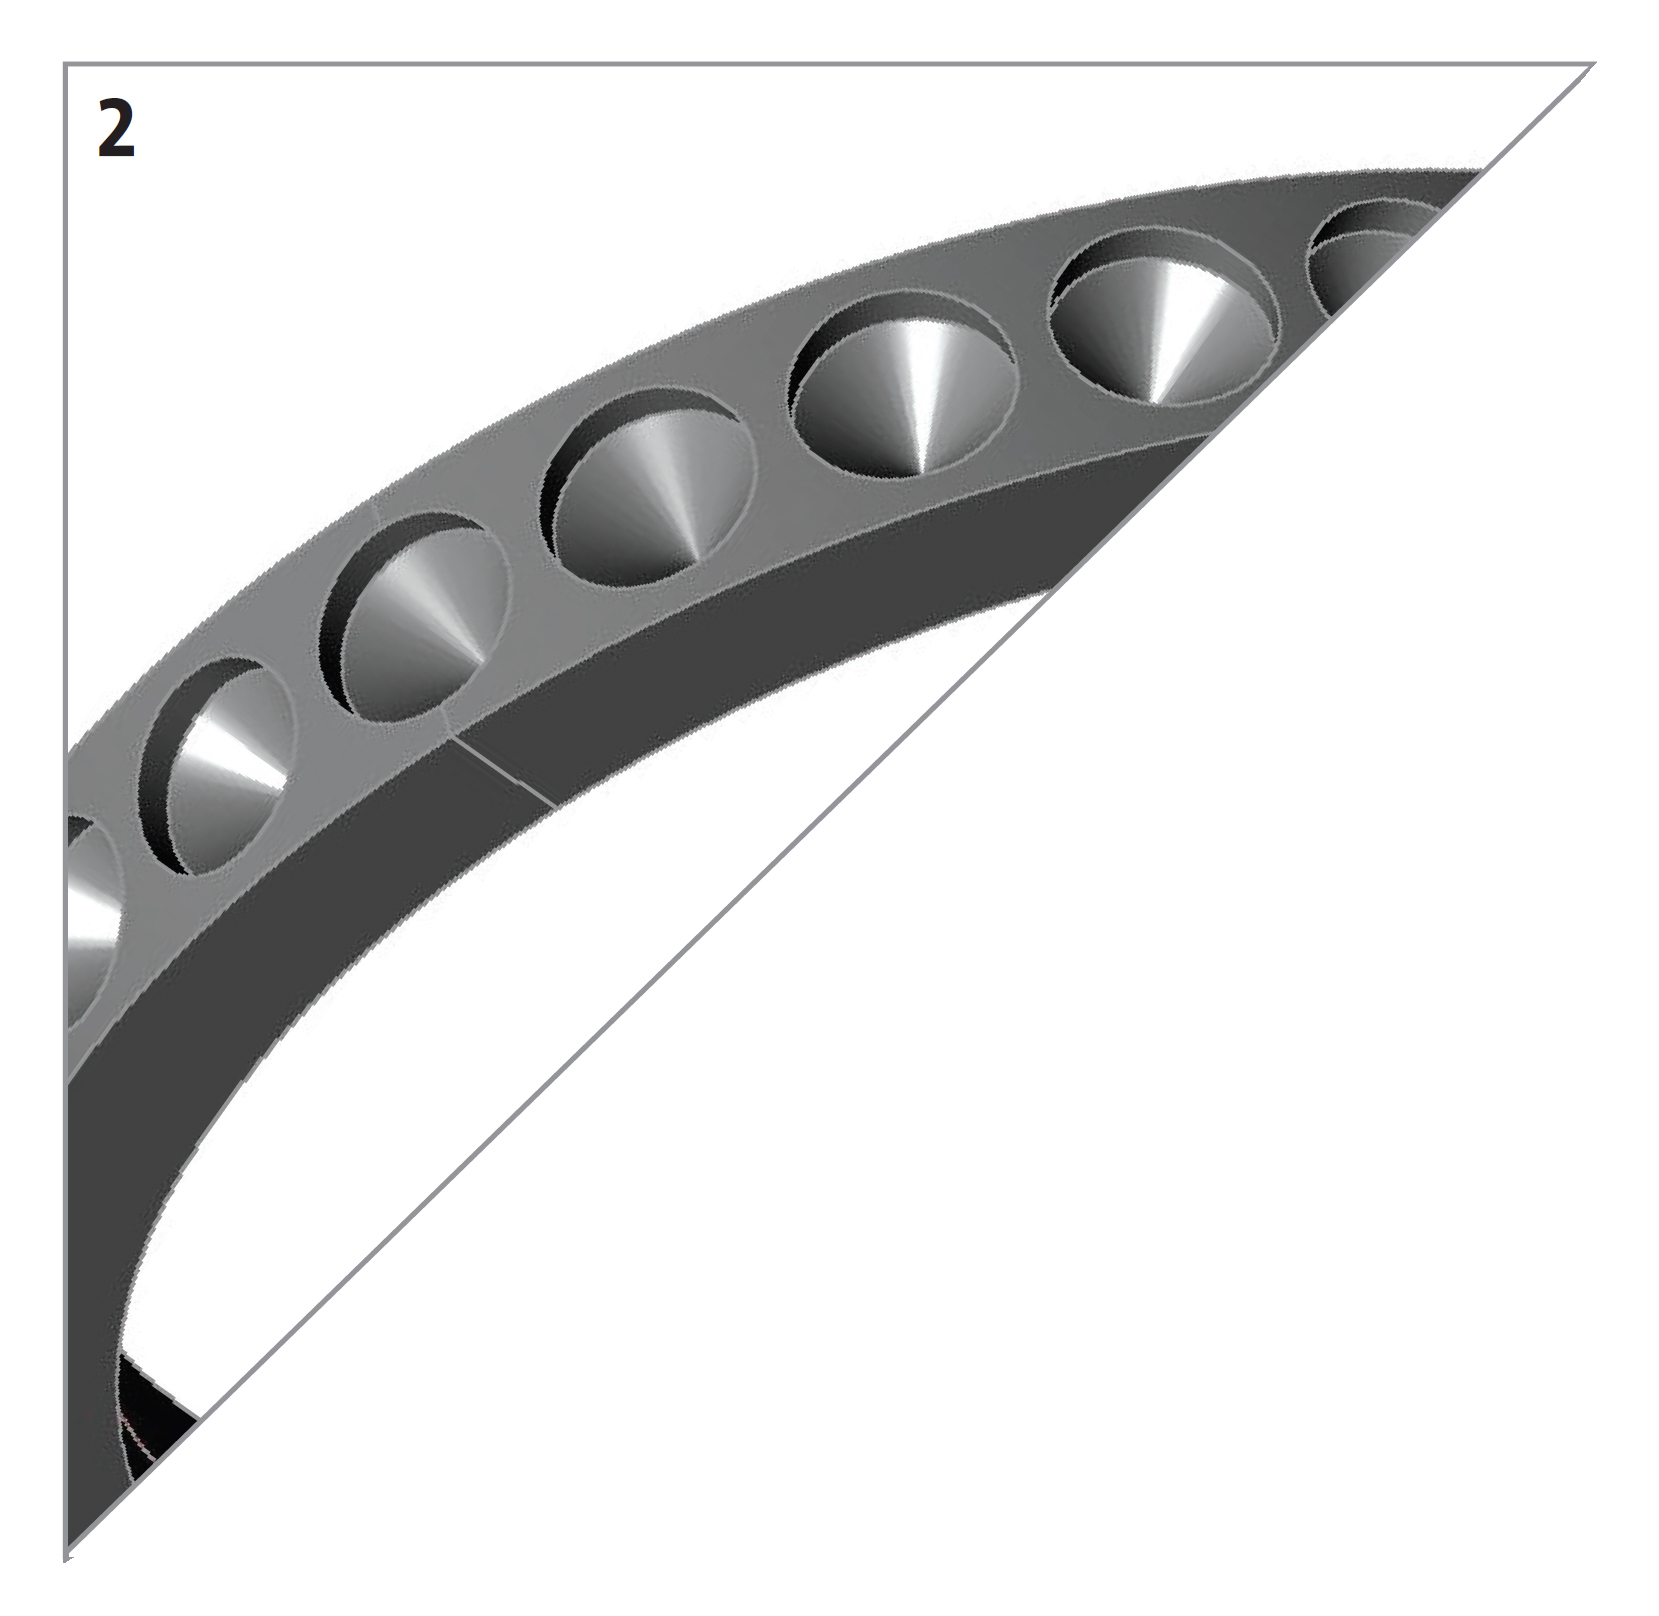 | Remove the stones from the bees wax and use a setting bur to drill pilot holes where the stones will be set. If you're setting stones smaller than 2 mm, you can start by creating relief holes with a small ball bur. Then with a setting bur that is 90 percent the size of the stones, cut the seats focusing on the seat depth. You want the table of the stones to be level with the top of the ring. |
 | Using a 52 round bottom graver, make the center cut. Cut from seat to seat and then just past the end stones. This cut should be just a bit deeper than the floor of the seat cut. |
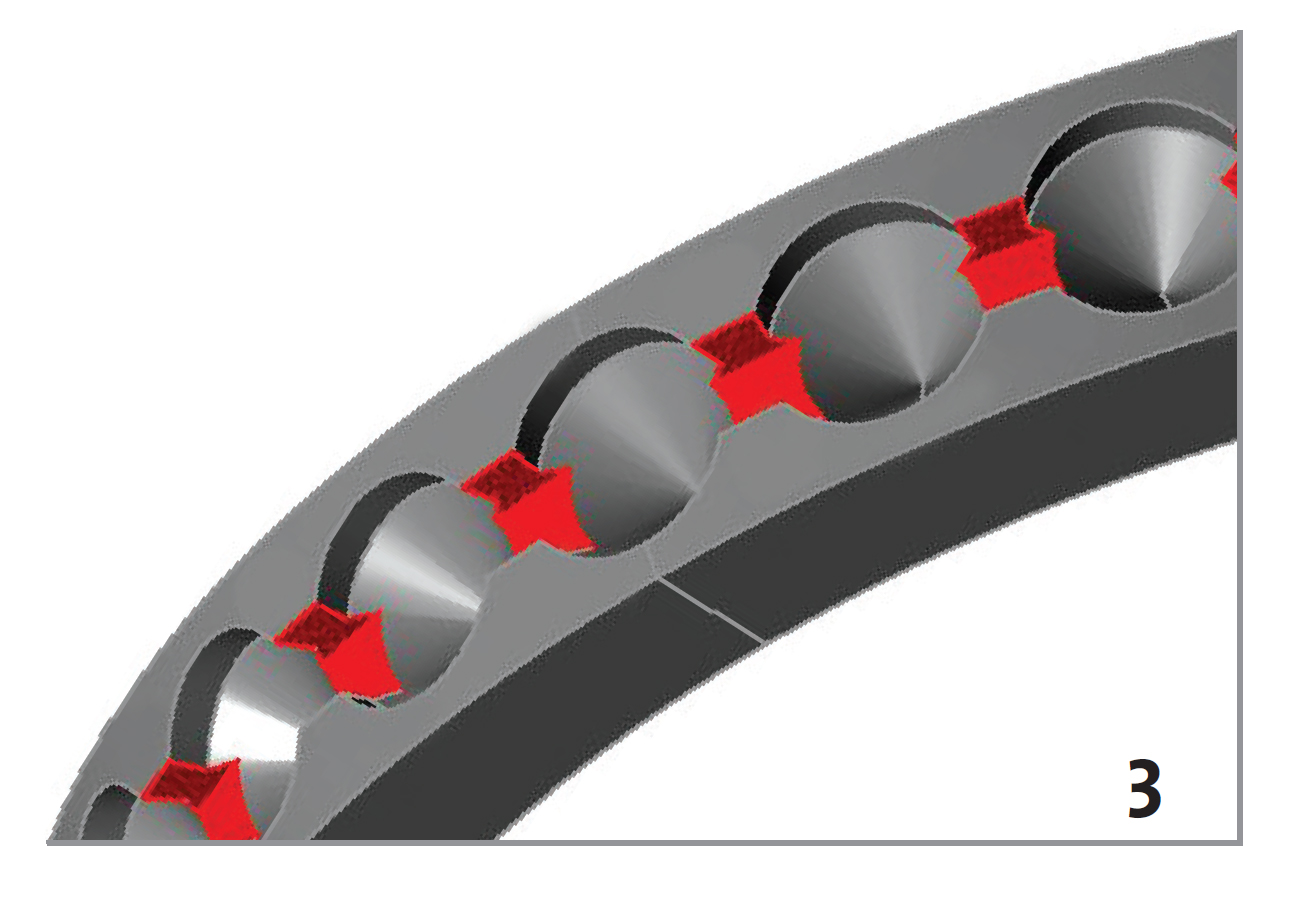
 | With the same 52 round bottom graver, make the cross cuts between the edges of the band. Cut to just above the girdle line; these cuts should not be as deep as the seat or center cuts. |
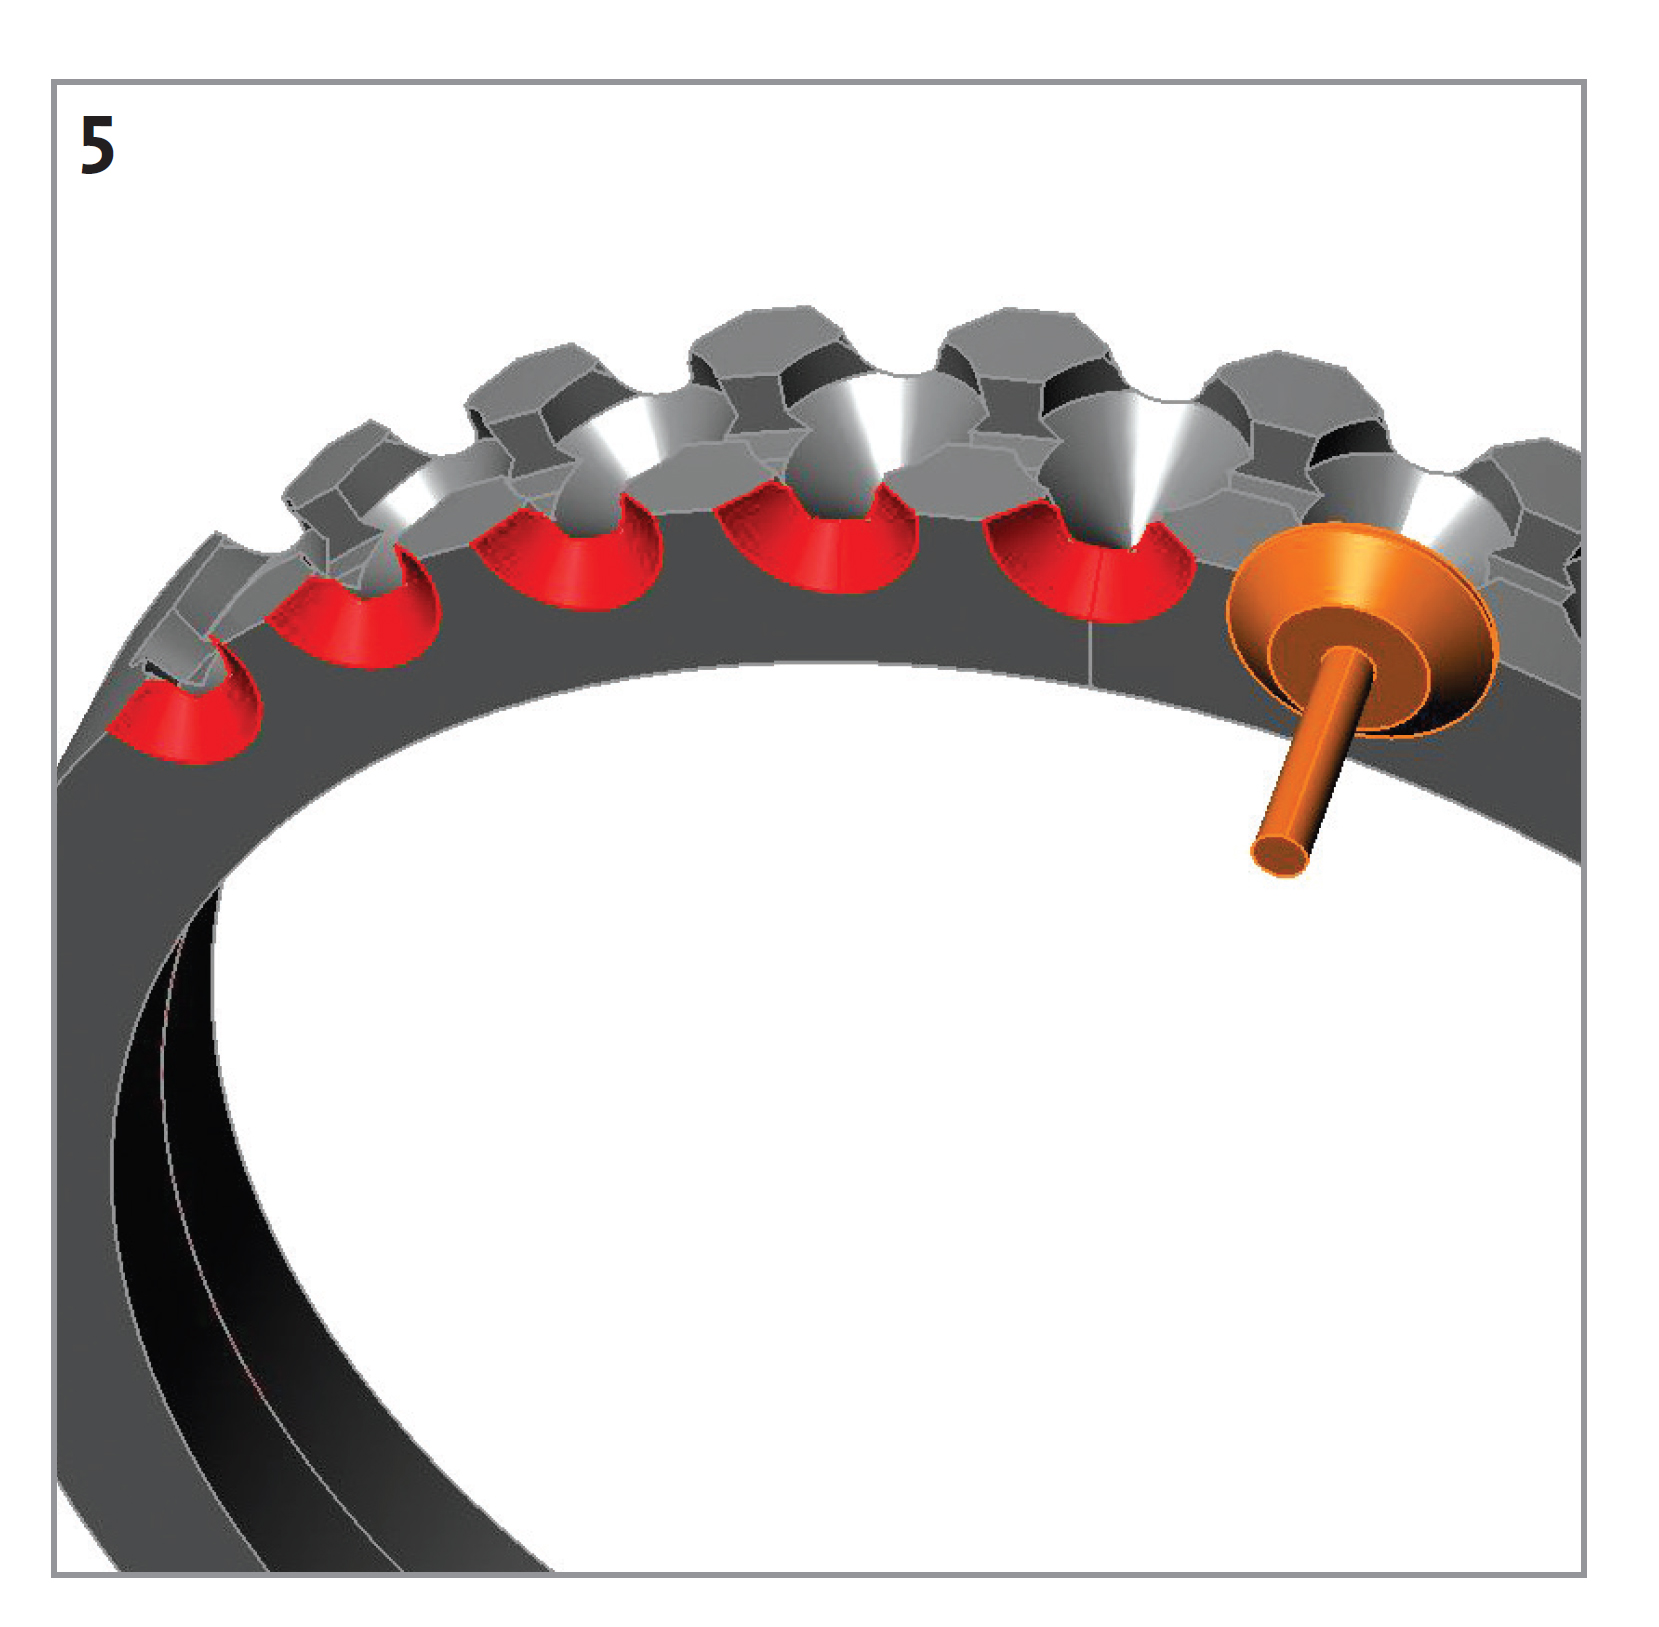 | Now it's time to cut the side reliefs. For this task, use a heart bur that is the same size as the stones that you are setting. Rest the bur in a cross cut and slowly cut the relief detail. Make sure to stay centered and make all the cuts evenly, as this will be part of the final detail. |
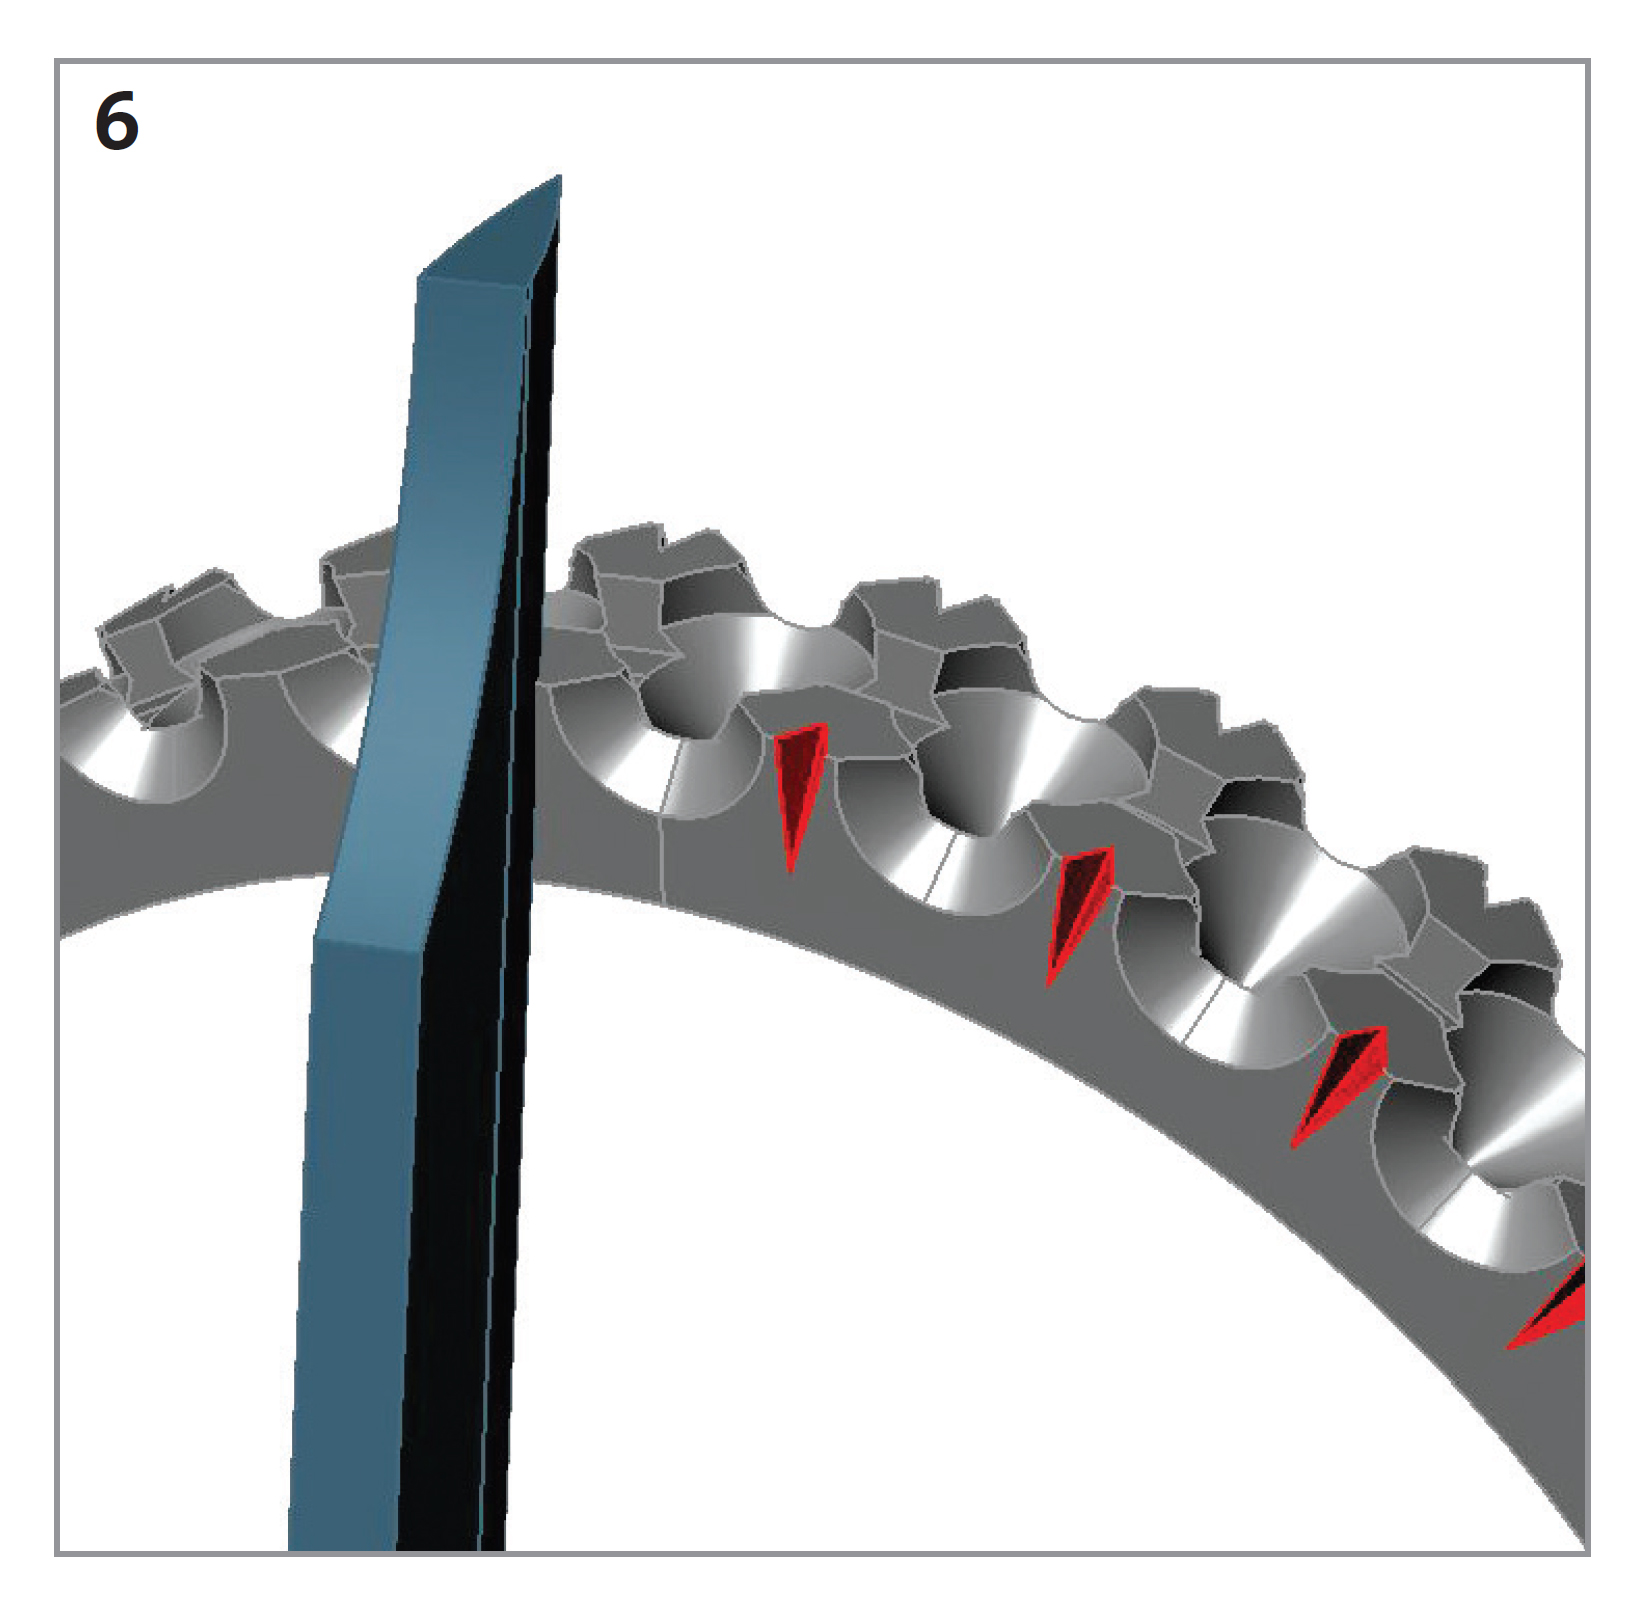 | Use a knife-edge graver to make detail cuts between the side reliefs. Start the cuts about one-third of the distance from the ring rail and cut toward the top of the ring. Deepen and widen the cut as you go. |
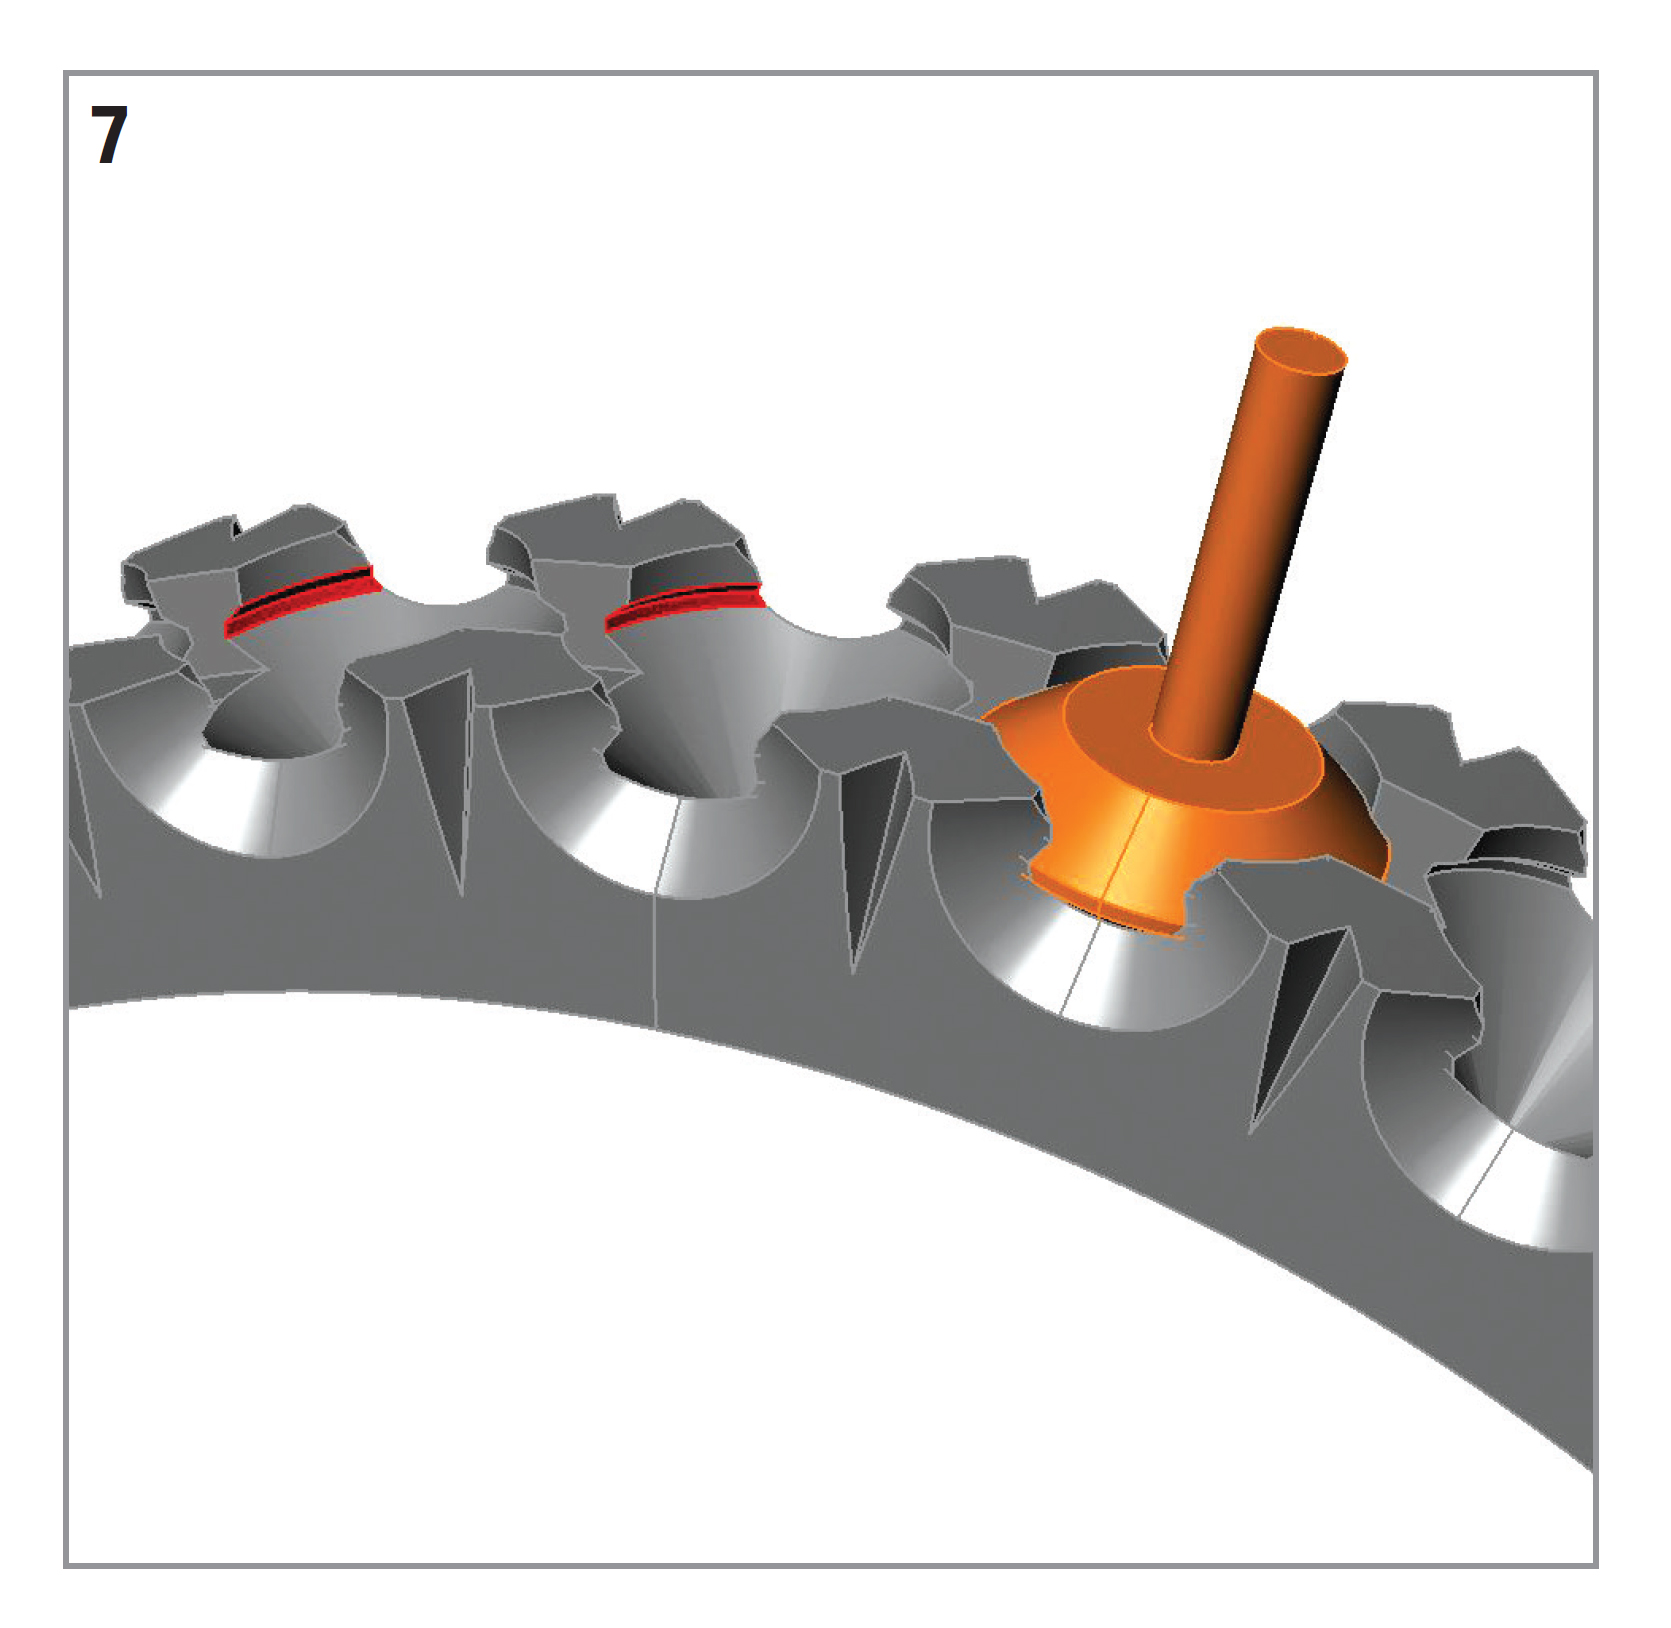 | Once you're satisfied with all of the detail cuts, you can finish cutting the seats using the same heart bur as in step 5. It's important to make all your cuts in order because once the stones are set, it will be almost impossible to make any adjustments to the detail cuts. You will be creating a bit of an undercut. |
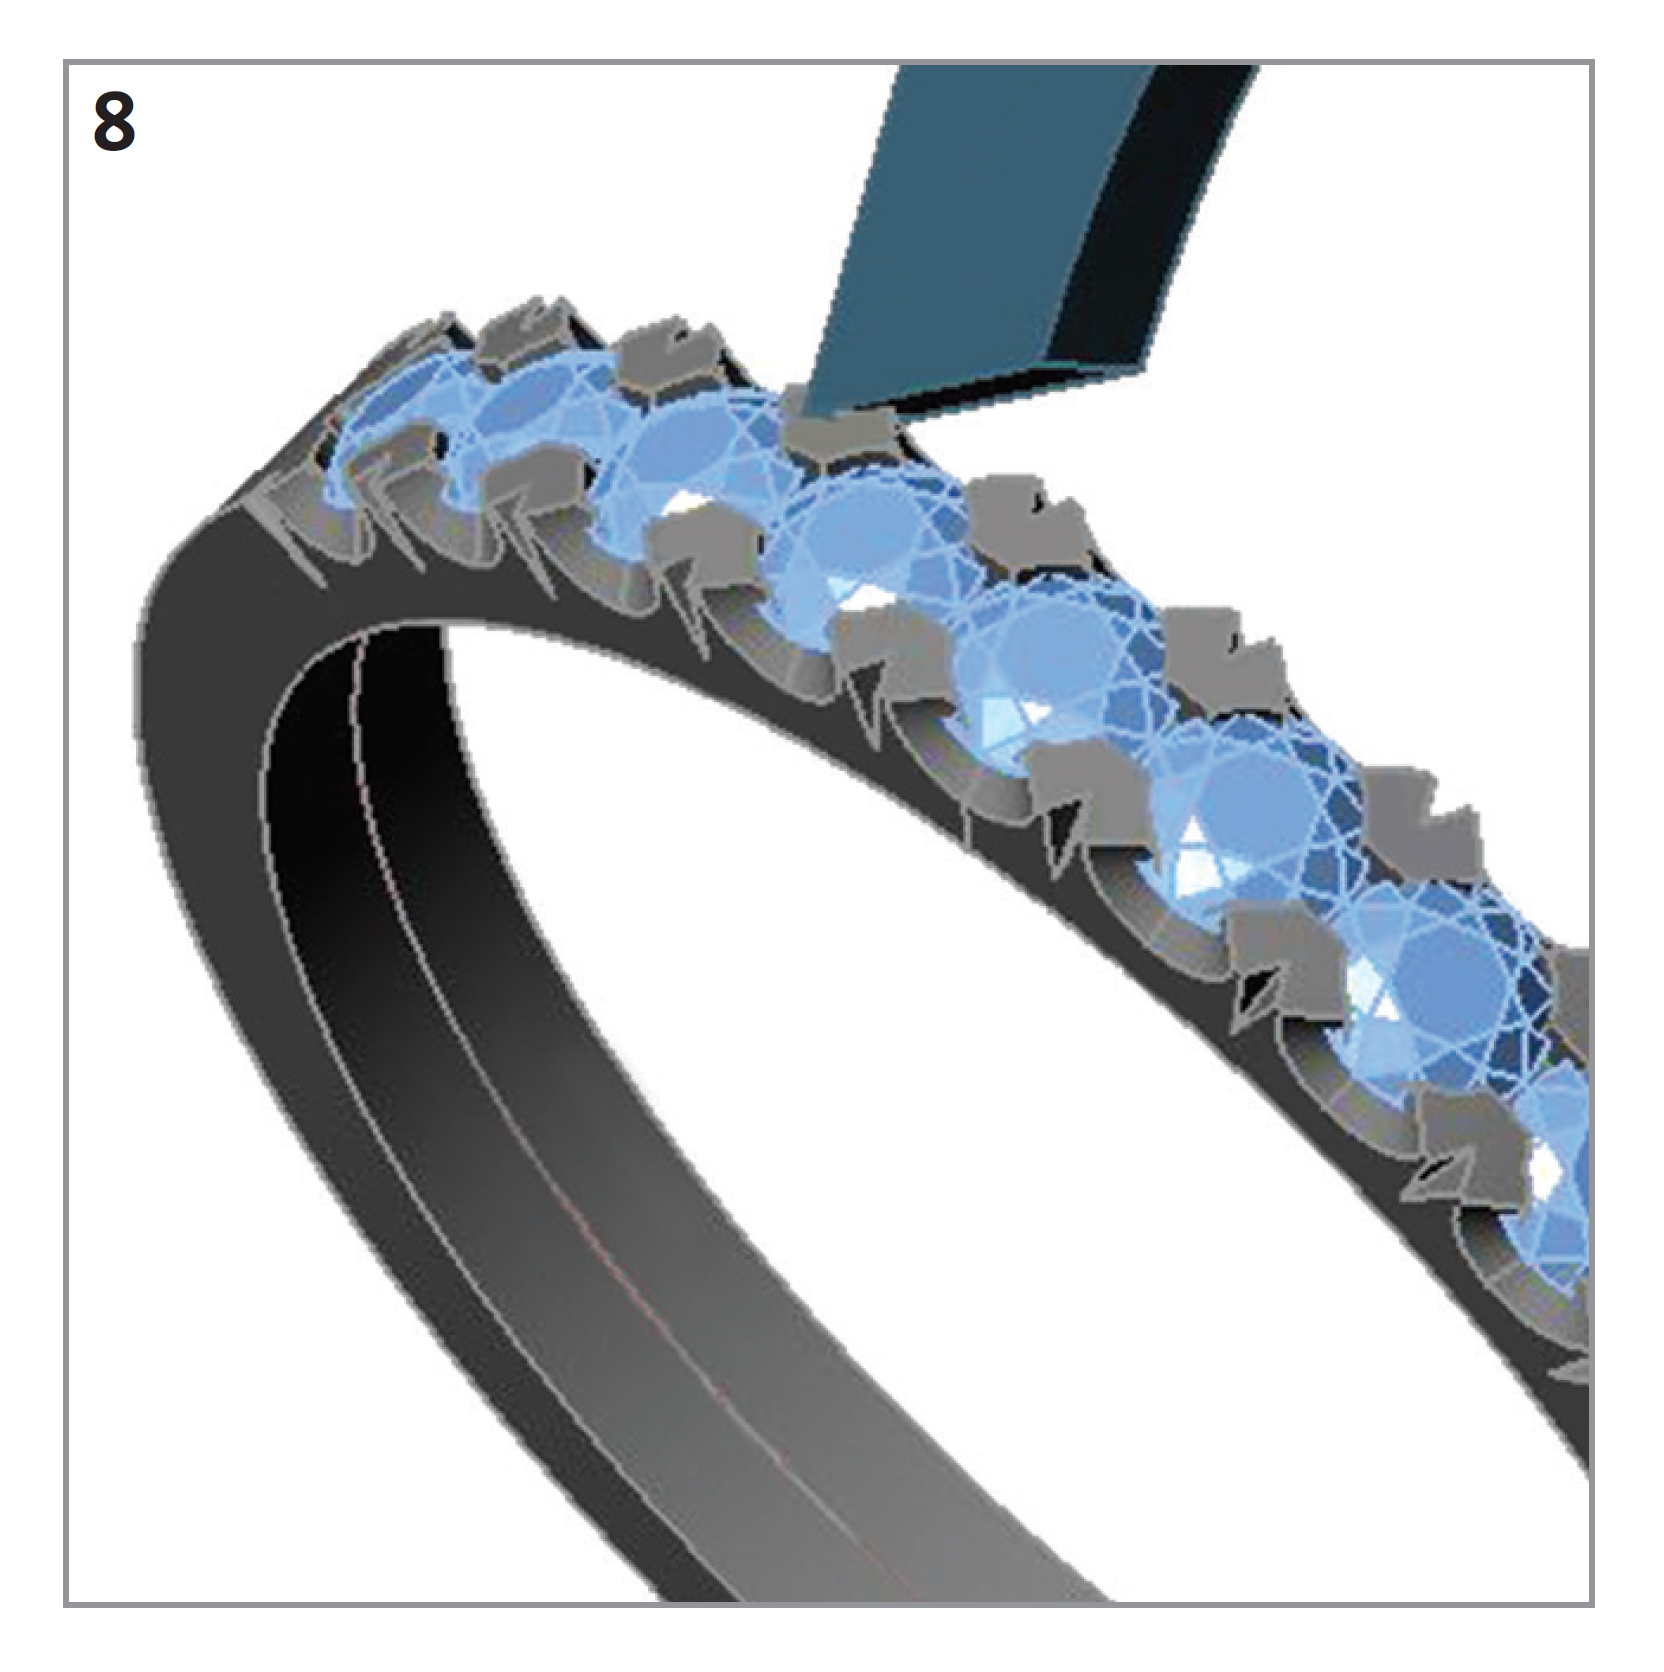 | If the seats are cut to the right size, you should be able to pop the stones in using a brass pusher. To tighten the stones, place a fl at graver in the detail cut and rock it back and forth, widening the V shaped space until the stones are snug. If this doesn't secure the stones, you may have overcut the seats. To adjust for this, tap the top of the prongs with a punch, which should help tighten the stones. |
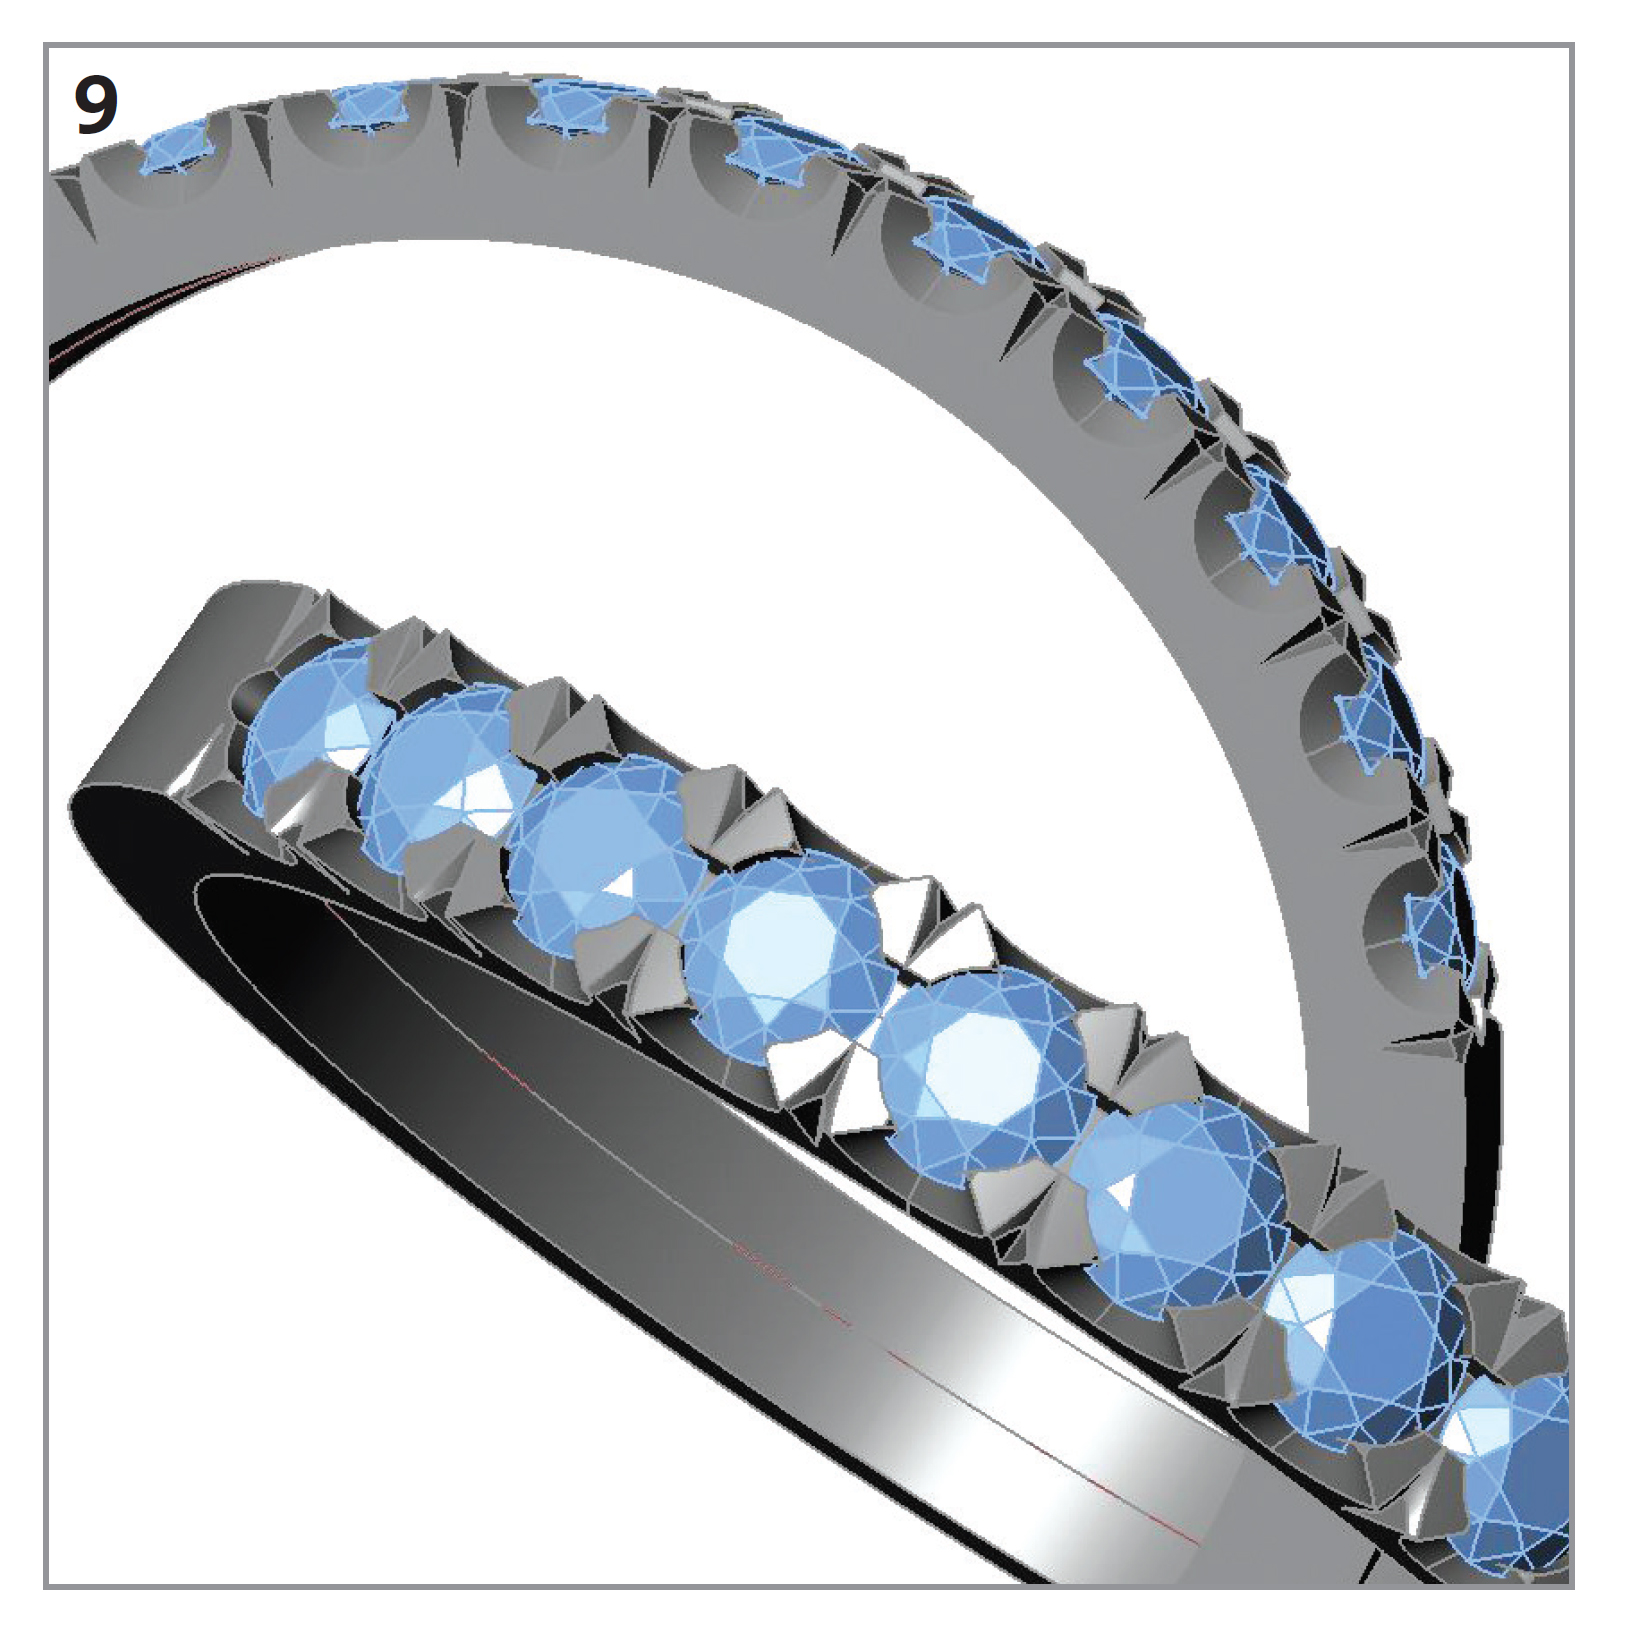 | The finished ring. |
Joel McFadden is a third-generation jeweler who learned the trade from his grandfather and other old-time jewelers in Charleston, South Carolina. He currently is the owner of The Art of Jewelry by Joel McFadden, a custom design jewelry boutique in Red Bank, New Jersey.


The All-In-One Jewelry Making Solution At Your Fingertips
When you join the Ganoksin community, you get the tools you need to take your work to the next level.

