
Virtual Engraving in Matrix
4 Minute Read
When using CAD/CAM products like Gemvision's Matrix, there are a number of "virtual" techniques to achieve renderings that more closely resemble the finished model. Of these, virtual engraving is a more advanced technique that can either be milled into the model for precision results or created solely for a render. In either case, it is possible to create realistic-looking "virtual engraving" in Matrix in order to present to your customer a render that more accurately previews the completed piece.
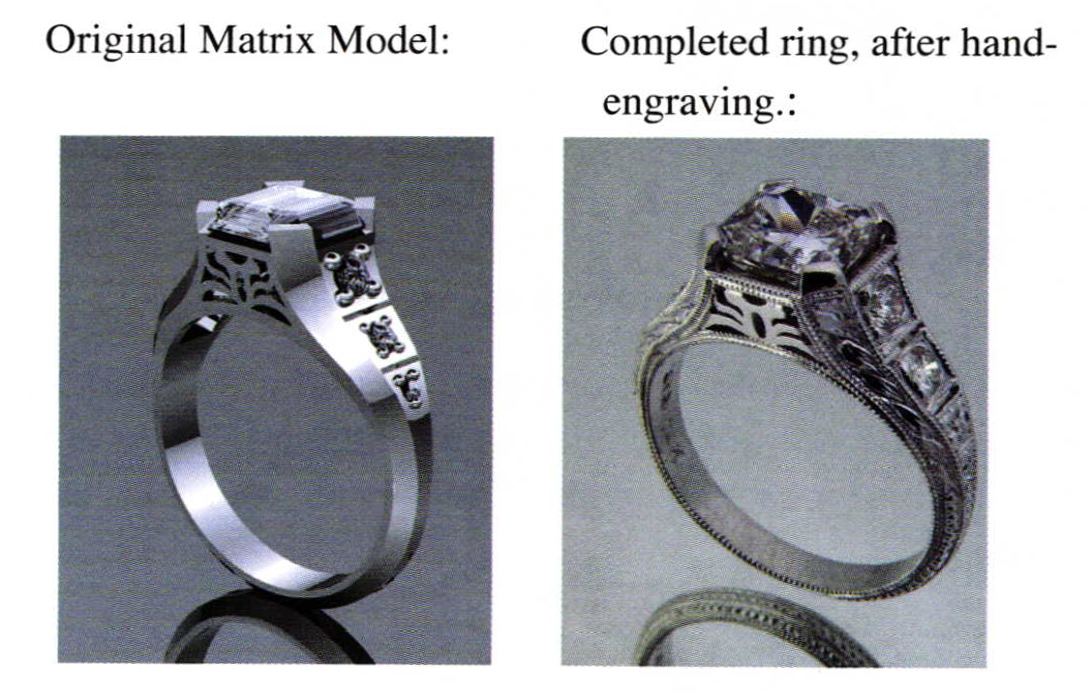
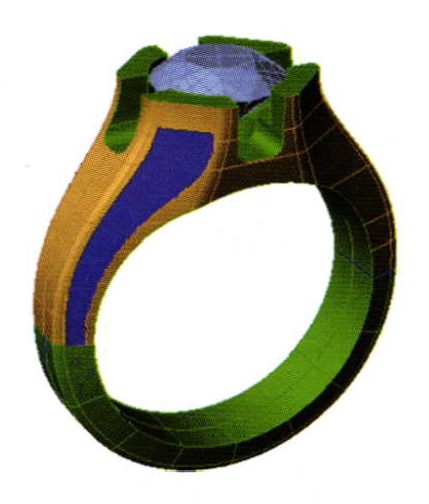
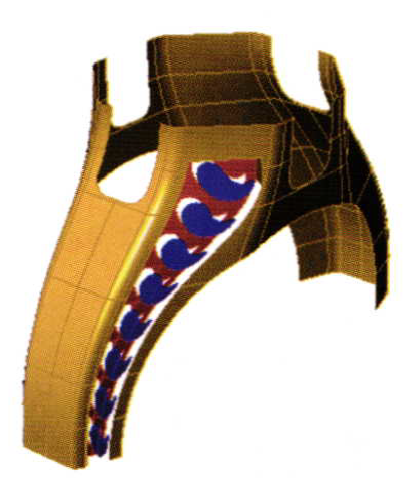
As demonstrated in the first pair of illustrations, the difference between the Matrix model that will be produced on a growing machine or mill and the final, hand-engraved piece can be dramatic. To help your customer better visualize an engraved finish, use the technique demonstrated below on a similar model to reproduce this effect virtually. The results can be milled or grown; or simply save the production version of the model first, and then use this method to alter it for presentation to the customer.
Virtual engraving uses the Curve menu command "Create UV Curves" to virtually "unroll" a surface of any shape and contour. Then the user draws the design to be engraved and uses the command "Apply UV Curves" to fit the new curves back onto the original surface of the model. The new curves will match both the taper and the contour of the original surface. Simply follow a few simple rules when using these commands to achieve a "virtual engraving" effect for presentation or production:
Use a closed curve to split a single surface on the existing model.
When engraving a model that is ready for production, save the model first. Then, use the existing model to create a new surface on which to engrave. Start by splitting away a part of the model in the shape of the engraved area. In this case, a planar (flat) curve was drawn in the shape and position of the engraved design. This curve must always be closed. Then, use a tool such as "Project" to apply this curve to the surface of the ring.
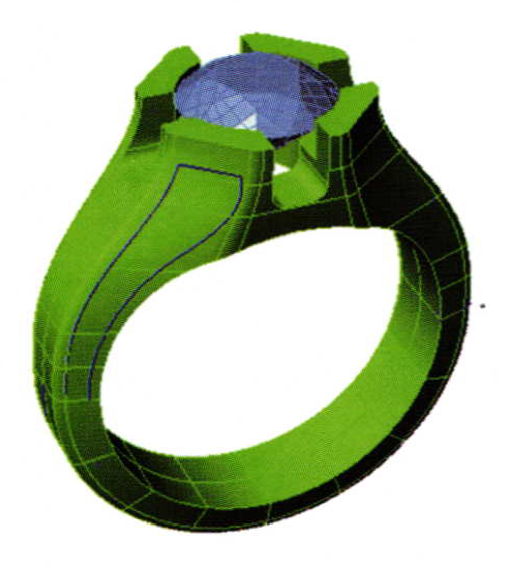
"Split" the surface with the curve. In this case, because the ring was already nearly complete, it has more than one surface (it is a poly surface).
Therefore, the "Extract Surface" command was first used to extract or separate the parts of the ring from one another so that a single surface could be split with the curve. (The new surface is yellow, below.) Delete the section inside the curve, leaving a "hole" in the model.
Create a new single surface for the "top cap" of the engraved design and an identical, sunken-in surface, for the "back wall" of the design.
To create the new surface for the engraved design, "Explode" the curve that was used to split the ring so that four pieces remain. Then, use "Sweep 2" to sweep the two smaller profiles along the two longer rails. A single new surface must result for this technique to work properly.
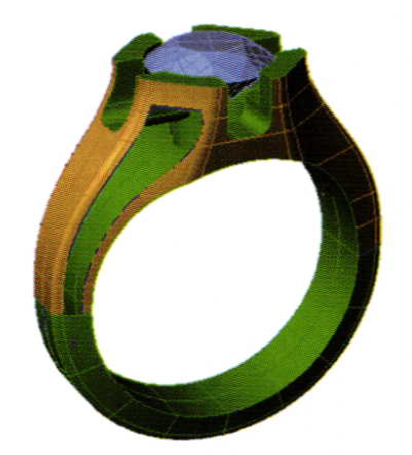
Before proceeding, select the new blue surface and "Duplicate" it. Move the copy of the surface back in space the desired distance for the depth of the engraving (0.5 mm to 0.75 mm). Now, there are two surfaces in place: one for the top of the engraved surface and one for the back or lower, sunken-in portion of the engraving. (New surface is red, below.)
Draw only closed, flat curves in the "Create UV Curves" box.
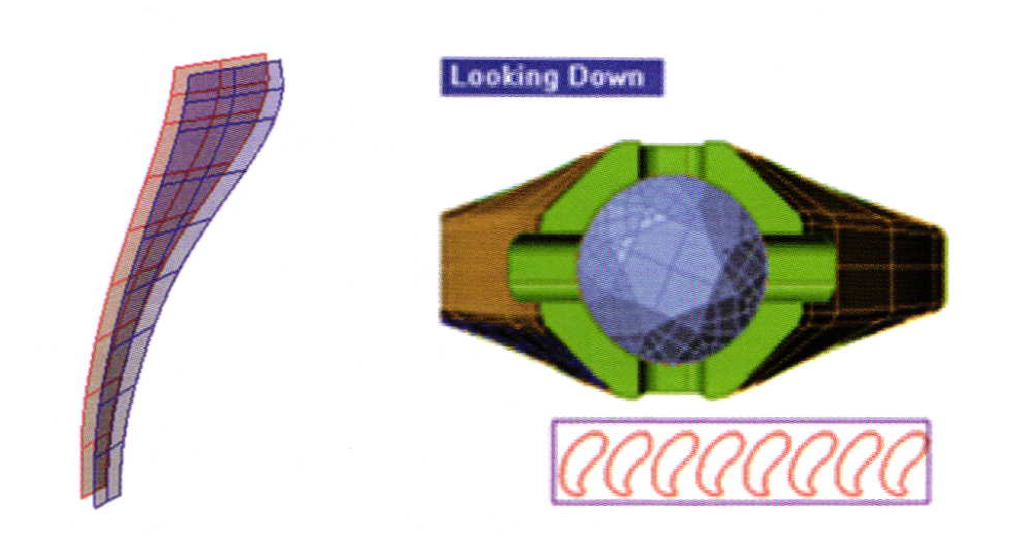
Select the blue outer surface and click on the "Create W Curves" command. This places a rectangle in the "Looking Down" view port that represents how this surface would look if it were "unrolled" and "flattened" into a rectangle. Any curves drawn in this box may now be applied back up onto the surface as the engraving pattern. These curves must be planar (flat) in this viewport, and they must also be closed. For best results, they should be "Rebuilt" into single, closed curves.
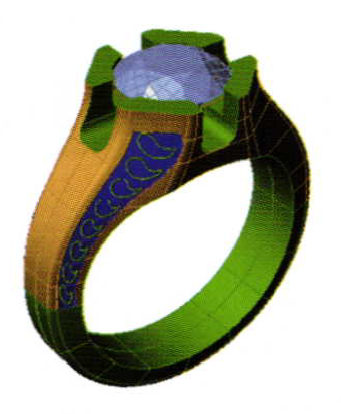
Now, select the curves and the box and click on the "Apply UV Curves" command. The curves will appear on the new surface of the ring.
Loft between the "back" and 'front" of engraved design and Join all surfaces together.
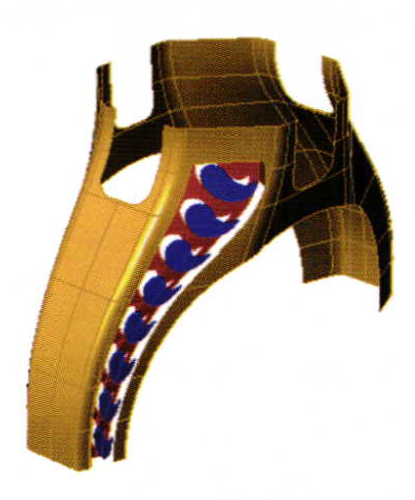
With everything else hidden for clarity, repeat the "Apply UV Curves" command on the copied surface. Then, Split both surfaces with the curves. On the surface at the back, delete all of the material inside the curves: or everything except the "negative space" in the design (red, below). On the surface in front, leave the "positive space" or "caps" of the design (blue);
To finish, "Loft" between all of the corresponding edges on the blue and red surfaces to create "walls" on each side of the engraved pattern. Finally, "Loft" between the edge of the red surface and the corresponding edge of the yellow surface to create the walls of the border around the engraving. Join the entire model together. To create the same pattern on all four sides of the model, use the Quad Flip builder. Then, Join the model together again to create a solid, closed design.
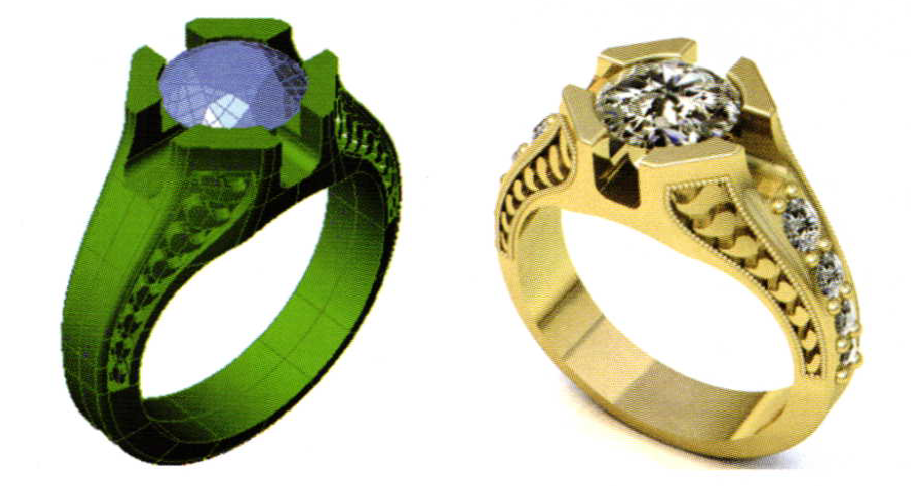
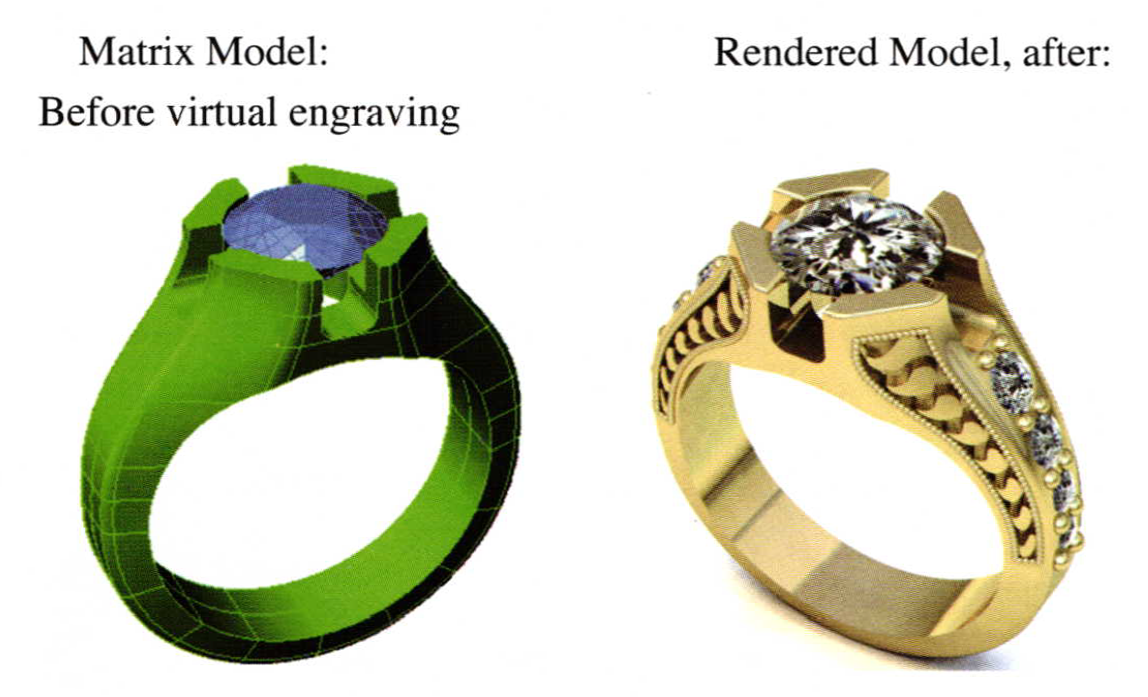
Now, simply complete the piece and render it! This versatile technique can be used on a model that will be produced as-is for a machine-tooled engraving, or as simply a virtual representation of the hand-engraving work you'll be doing in post-production. Either way, your customer can enjoy a render that more closely matches the look and feel of the finished piece.
Related Articles

Galleries: Concepts Gallery

Cybernetic Jewelry: A Systems Approach

Metalsmith ’90 Spring: Exhibition Reviews

Hydraulic Die Forming for the Artist/Metalsmith


The All-In-One Jewelry Making Solution At Your Fingertips
When you join the Ganoksin community, you get the tools you need to take your work to the next level.
