
Jewelry Designs: Athena Pendant
8 Minute Read
This gemstone-encrusted shield is named in honor of Athena, the Greek goddess of wisdom and warfare who was worshiped as a patroness of the arts and crafts. She is always shown with her magic shield.
Welcome to Stacey Rhodes Jewelry Designs, where we will detail all of the steps involved in adding a new piece of jewelry to our line. We'll take you through every phase of production, from the idea to the showcase. The design we are working with today is called "Athena".
The Idea
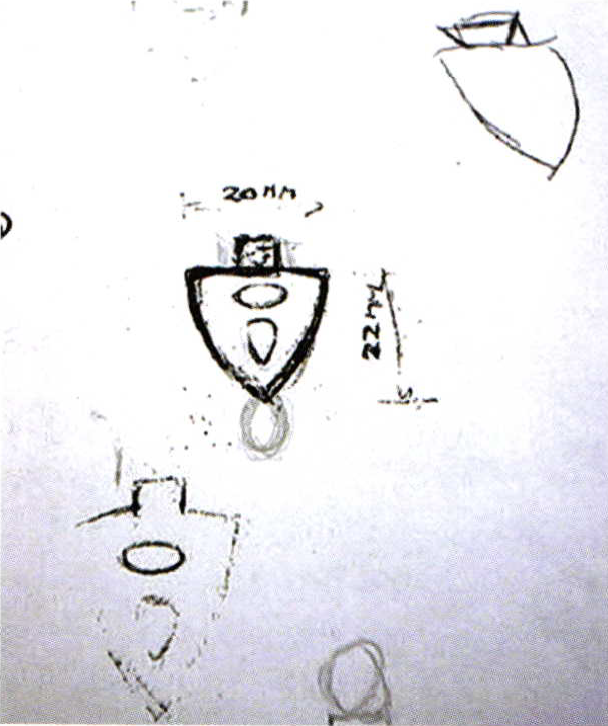
We'll start just as we always do, with a rough sketch and a general idea. Stacey wants to be able to put a large chain, or possibly a black silk cord, on this piece. That means either a large hole, or a large bail for the chain to pass through. She also envisions a gemstone suspended and dangling on the bottom. As a bench jeweler, I see two different shaped stones that are to be set in raised bezels. That should not be too difficult. But I don't have a clue yet how I am going to suspend the gemstone at the bottom, or pass a large chain through the piece.
One point to keep in mind about custom jewelry is that you are always making something that does not exist so don't be surprised or upset ifyou don't have a plan in the beginning for how to proceed. Sometimes you just have to start somewhere and let it lead you, instead of you leading it. That's what I am going to do here.
Let's Carve a Wax
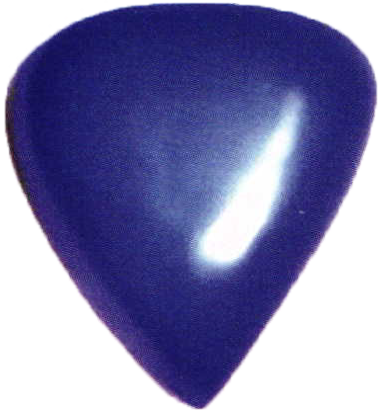
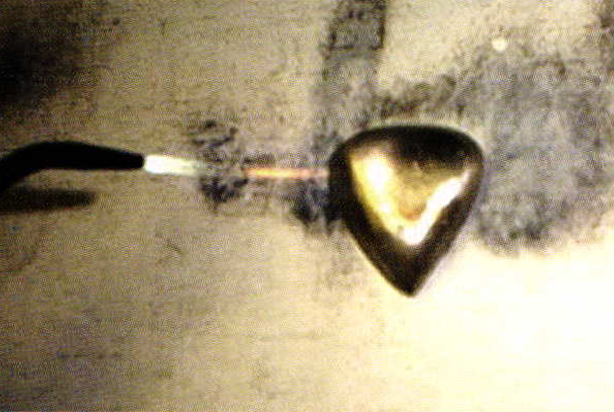
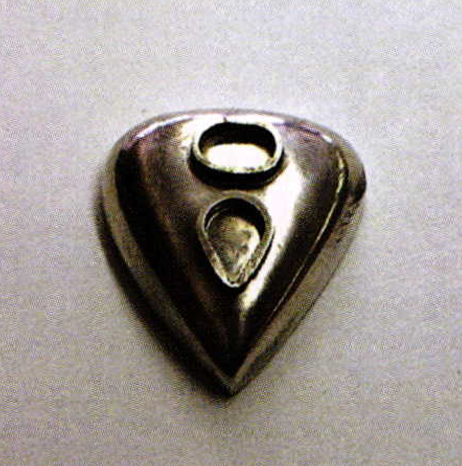
The main body of the pendant is shaped like a guitar pick, with a curved top, and a hollow back. It seems like as good place as any to start. I spend about 3 hours carving this wax pattern, paying close attention to the curvature of the top. The finished wax shown here is ready for casting. This is as far as I'm going to go in wax. I feel that the remainder of the piece would be easier to accomplish using metal fabrication.
Let's Make Some Bezels
 |  |
 | |
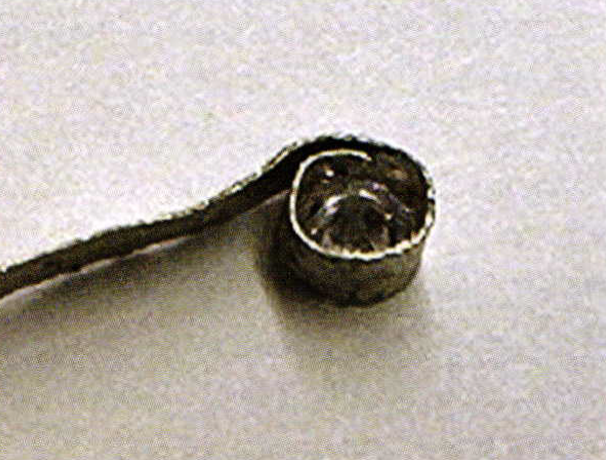
First, a tip on determining the length of the bezel wire: Roll out a very thin strip of sterling silver just thicker than aluminum foil, so it bends very easily. Now wrap it around the stone and pull it tight. Mark where two edges meet with a razor blade and unroll the strip. Next, measure between the two marks and transfer that to your bezel wire and you'll get it right every time. This works well for all shapes ofstones. Just remember to make your strips very thin so they wrap and conform to the stone shape easily. Now, before I actually set the new bezels on the main body I willanneal the piece. Always anneal the piece; skipping this step will come back to haunt you later during construction. I now spend about an hour or so trying to find the perfect spot to solder the bezels onto the main body. The final placement is shown here. It's here that everything changes.
Major Design Change
 |  |
One thing I mentioned early on was that we start all of our pieces with a rough sketch and a general idea - not a firm sketch and a concrete idea. I also said that ifyou let the pieces lead you, they would always make themselves. If you keep this in mind when designing jewelry, you can be flexible when a better idea develops during construction. Most of the time if you decide on a design change, and it doesn't work out, you just scrap the idea and go back to your original design. In our case, the new idea worked out just fine, so we went in a new direction.
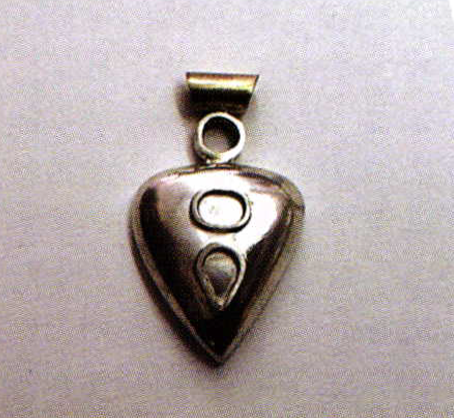
The dangle idea was dropped entirely and replaced by a bezel set stone on top of the piece between the body of the pendant and the bail. I thought it looked cool and Stacey agreed, so we decided to proceed with new idea. I made a bezel to fit a 5mm faceted stone and soldered it between the tube bail and the body. I probably moved the bezel 8-9 times before I was really happy with the positioning. I then moved it twice more until Stacey was really happy with the positioning.
Next, I added the tube to the top of the bezel and went through the same process of soldering, staring, moving; soldering, staring, moving; about the same number of times before we were both convinced everything was lined up properly. The finished fabrication is shown here. All that is needed now is to remove the metal inside the bezels, and install sprues. But, I'm already having some doubts.
This Will Never Work
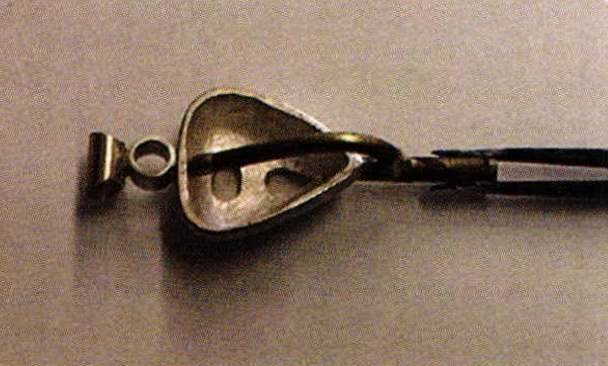
We now need to make a rubber mold in order to make duplicates of this piece. Remember that everything we are doing here is in preparation for making hundreds, or if we're lucky, thousands ofpieces for sale. Now that I have the original assembled, I have to figure out how to sprue the piece. The sprue is the passageway for the wax to exit the mold, and the metal to enter. I decide on a two-part sprue for this pendant. I don't feel that wax or metal entering the large body of the pendant will be able to reduce flow through the 5mm top bezel, and then resume flow and fill the bail on the top. It's just too many different flow rates. So to compensate for this I added a secondary sprue to bypass the body and fill the top bezel and the bail. You can see that the main sprue enters the pendant at the bottom and should fill the main body. The bypass goes directly to the round bezel and bail at the top. I still don't know if this is going to work, but the only way to find out is to just make the rubbermold and see. If it doesn't work, I'll try something else. Stacey really wants this piece to look just like this, and it's my job to see that her dreams come true.
I Can't Believe It Worked
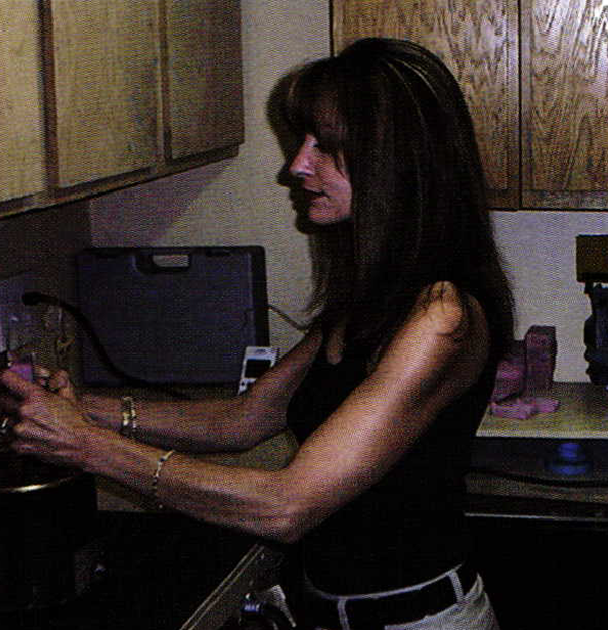
Here is Stacey injecting the ceremonial first wax. They never work the first time, so I always make her do the first one. But, the second and third went without a hitch. They came out just as they were supposed to. Much to my surprise, my sprue system worked. So now in order to turn the wax into metal, we need to cast them. I cast two waxes in sterling silver.
It Didn't Work

While I was waiting for the burn out cycle to complete, which takes about 8 hours,I decided to inject several more waxes. As it turns out the only two that came out were the second and the third waxes. I never got a usable wax after that. The sprues were so heavy, and the wax so delicate, that they kept breaking trying to get them out of the molds. After dozens of adjustments to the rubber mold, I realized it was hopeless. It was time to switch to Plan B, just as soon as I figured out what Plan B was.
Plan B
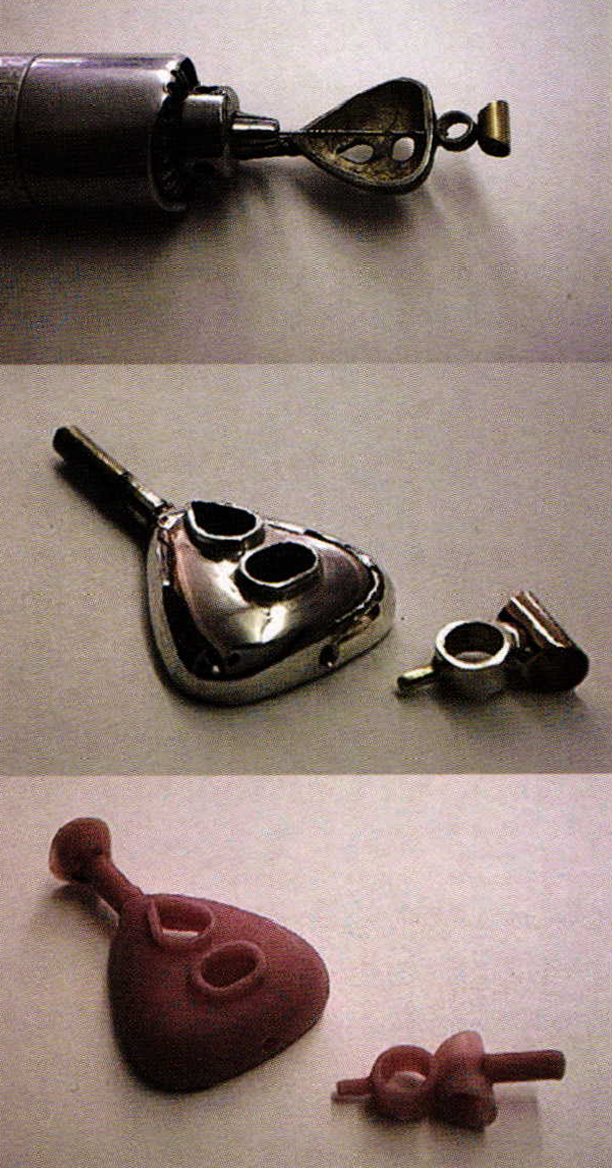 |  |
I now realize I'm going to have to make this piece in two parts, the main body, and the top bezel/bail. But, that is going to present its own set of challenges. When I originally set the round bezel on top, it took a tremendous amount of time to get the placement correct. When you are making multiples of a piece you just can't afford to spend that kind of time. I needed something to speed production and insure proper placement every time. So now Plan B goes like this. I first drill a hole in my original model, through the main body and into the top bezel. That way I can line them up exactly after they are separated. Next, I set a pin into the hole in the top bezel that lines up exactly with the hole in the main body. I make two new rubber molds, and end up with two new waxes. Now I'm averaging about a 95% completion rate on wax injections.
Oops
Never cast a big heavy piece ofjewelry with a small delicate piece ofjewelry. The heavier pieces will win that battle every time. The bail, which is much smaller than the main body, did not fill completely. I knew when I tried to do this I was risking a casting failure, but I didn't think it would really happen to me. Good thing it wasn't someone's 25th anniversary present that was due in 2 hours. The main body cast fine. I injected three more tops and sprued and cast them by themselves and they came out fine. From now on, I know to cast all of the main bodies in one flask, and all ofthe tops in another one. You can do multiple pieces in one flask, just not pieces that are drastically different in size and weight.
The First One
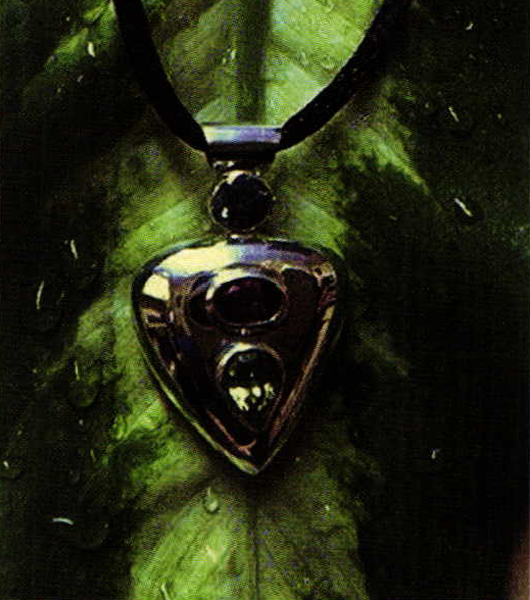
Now armed with a complete top and a complete bottom, I try out my fancy pin and hole design to combine the two pieces. Less than a minute later, I'm finished and ready to start setting stones. It worked perfectly. I knew something had to go right before I finished this thing. This photo shows that perseverance does pay off. We now officially have a new piece in our line, and christen her "Athena".
In Conclusion
Pretty cool, don't you think? I think it came out just fine, considering we didn't really have a plan or a firm design to begin with. When I write about one of our designs I try not to highlight only the successful parts of the process. I will always tell you how it really went, and how many times we got it wrong before we got it right. It seems that after 20 plus years on the bench you would get everything right the first time, doesn't it? If you are new to the bench, don't get discouraged when things go wrong as it's just part ofthe process. Even though I had to go back a few times and re-do a few features, it was well worth the time. Any time you can spend an hour or two making a correction that is going to shave 30-45 minutes off each production piece, it's time well spent.
Finishing one piece only means it's time to start the process all over again on the next one. We'll see you in the next issue with that piece, which by the way hasn't even been dreamed up yet.
Related Articles

William Harper: Artist as Alchemist

Mary V. Smith – Burning Brightly

The Work of Steven Ford and David Forlano

Jewelry Making Study Sheet


The All-In-One Jewelry Making Solution At Your Fingertips
When you join the Ganoksin community, you get the tools you need to take your work to the next level.
