
Tool Alterations
4 Minute Read
This article describes the different tool alterations that any bench man needs to know and learn as guidance for their work and workmanship.
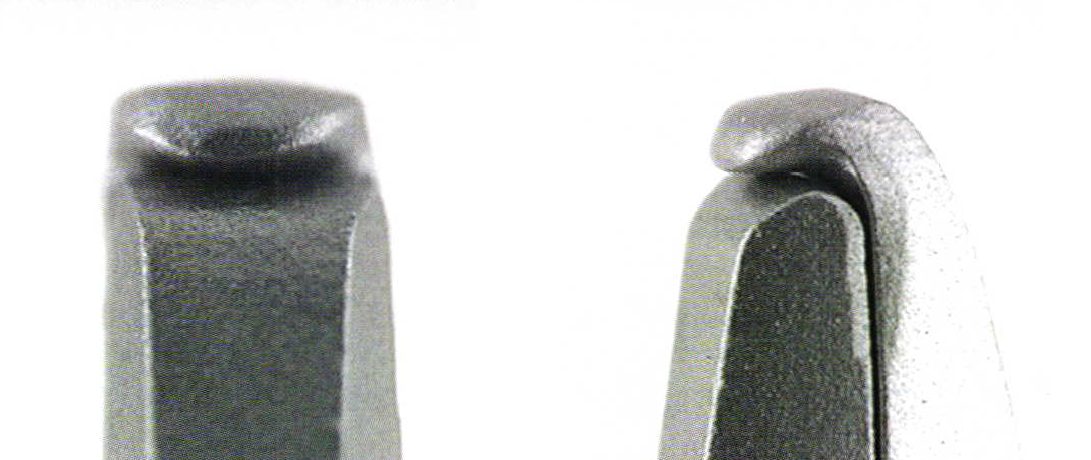
These are simple chain nose pliers that are trimmed like in picture then the tip bent. After the seat is burred in a regular prong head the flat bottom jaw is inserted to the bottom of the notch and a gentle squeeze pre-bends 2 of the prongs so you can slip in the stone and finish the other prongs.
The flat spot in the bottom jaw keeps them in the notch of the prong as you bend them so it doesn't slip out and mar the end of the prong.
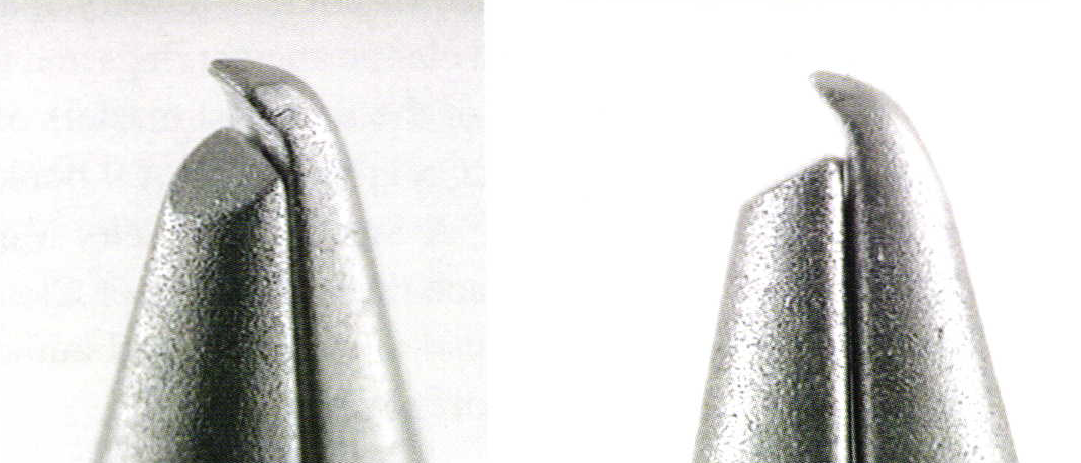
These pictures show a pair of chain nose pliers with the sides slightly flattened to fit in tight places. This allows them to get into skinny places between heads. The bottom edge is rounded to keep the outside of the prong from being deeply scratched. The curved part needed to be extra strong because it was so thin. I used a separating disc and cut out a notch in the top jaw of the plier making sure not to damage the temper in the jaws. The claw part is a piece a #4 graver cut with a separating disk again being careful not to damage temper. I welded it in place with a laser holding a damp paper towel against the backside as I welded it to keep it cool. The final grinding of the tip was done under water to keep the temper then bead blasted for looks. It can be used to pull the bezel back also like the larger round jawed pliers for baguette and princess cuts stones. It works best for pulling single prongs back especially if resetting is in the future.
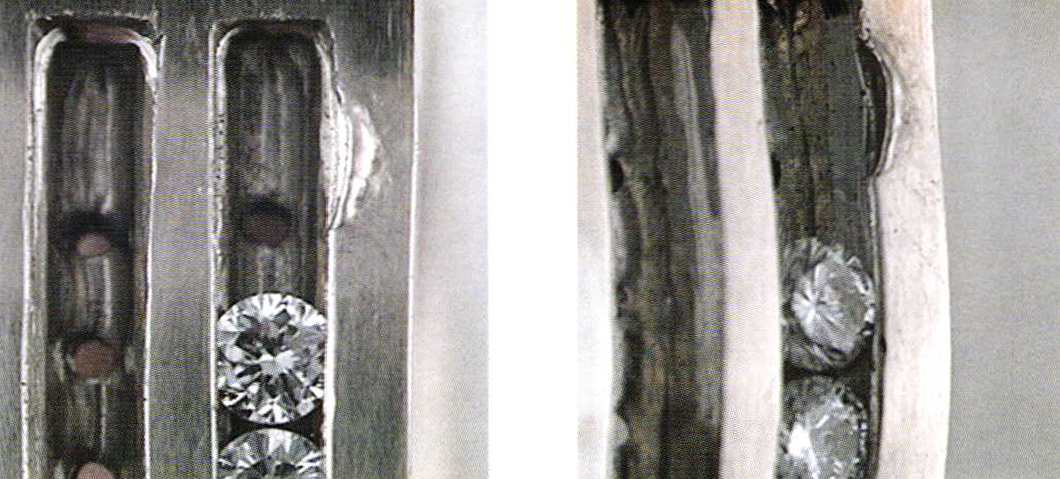
These images show how the pre-notched channel can be pulled back instead of the traditional method of under-cutting one side deeper than the other. Some times the girdle is thick or the stone is very deep and it makes us 6un deeper than we want to, to allow the extra room needed to let the stone drop into the channel. Once this metal is removed it's gone and once tight, the bezel wall is often scalloped looking. In this method you actually cut the seat like it was a open ended channel that you could just slide the stone into. Then pull back the metal until you can drop in the stone then slide them into place. Flow in little wax (I like yellow sprue wax easy to see through) to hold them until you have them aligned perfect. Then tightened the stones. I usually do the pulled area first. Since you haven't removed any metal, there is plenty to tighten with without the scalloped edge. This works especially well with JeffMathews All Set Tool style of channel setting. It also works well with individually seated channel set stones.
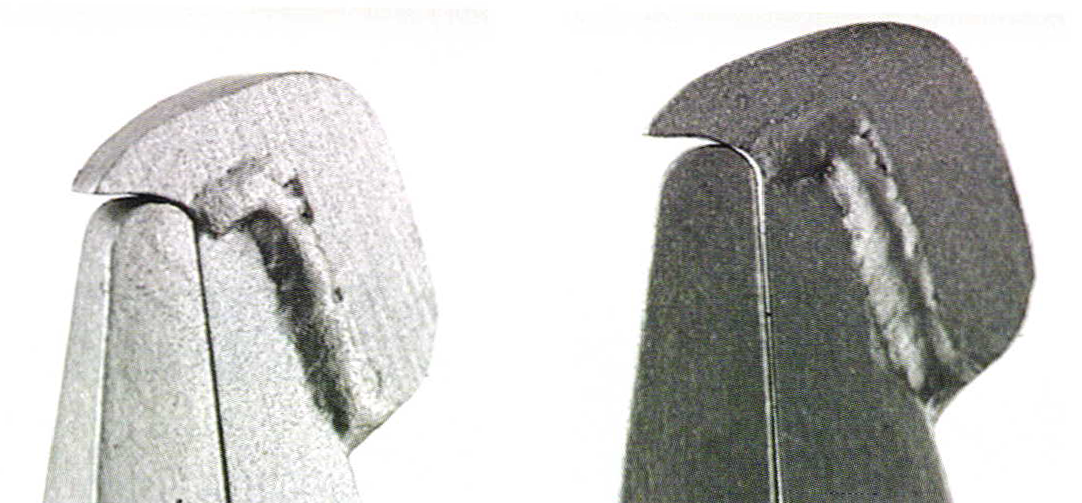
These images show how to reshape the end of the plier. I made mine from a pair of flat nosed pliers. Cut one side back about 4 mm and round at the end so it will mar the side of the ring as little as possible. Other end is heated and bent to a 90o angle over the rounded end. Re-temper the plier end then gently add the curve to the bent end. This angle is meant to mimic the round end of the stone and it makes the pulled section less likely to tear as you pull it back. I glass beaded the finished pliers to make them more presentable.
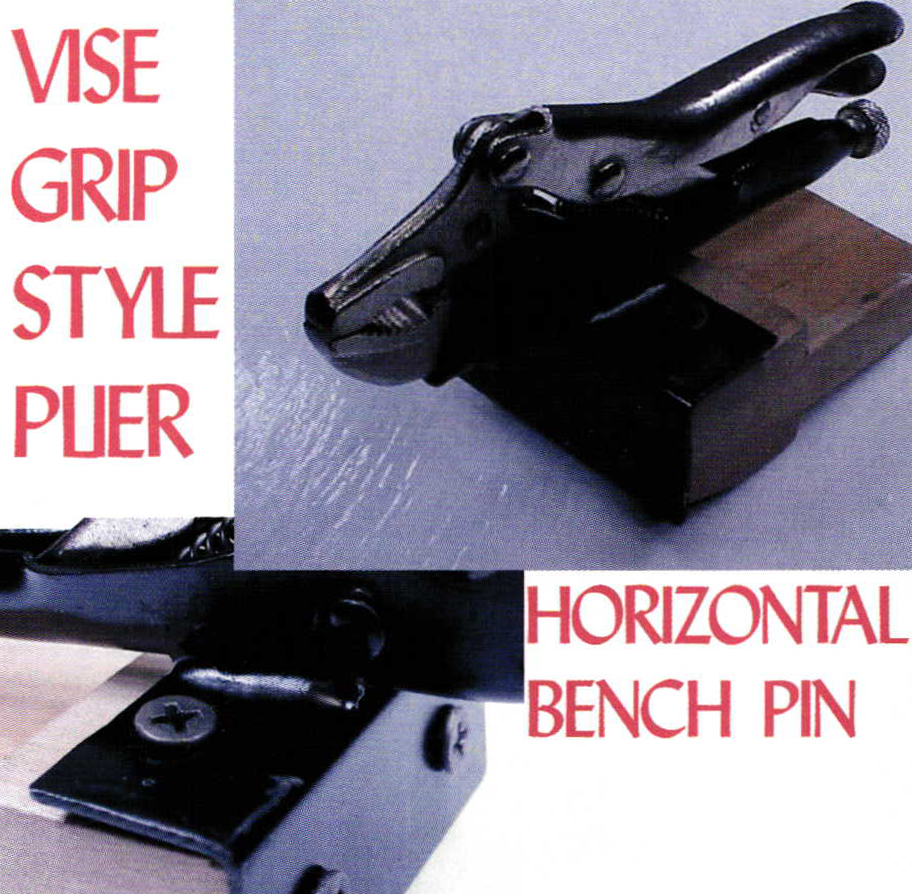
Take a bench pin and cut it down to about I inch long from where it enters the pin holder. Take the spring out of a small pair of Vise Grips to preserve the temper in it. Cut a piece of light angle iron to match width of bench pin. Drill four holes for screws. Braze the Vise Grip onto the angle iron. You can attach the Vice Grips horizontally as pictured above right or sideways as pictured above left. I recommend making two sets, one each direction as the both are useful in different situations. Sandblast and paint to prevent rust. Reattach the spring in the pliers and mount to the bench pin (Suggest pre-drill holes). I prefer to use a GRS bench pin holder as they use side and bottom tightening screws to keep pins really tight. I suggest you solder large wing nuts on these tightening screws to save your fingers. This holder works great for holding small items to be cut, trimmed, and filled.
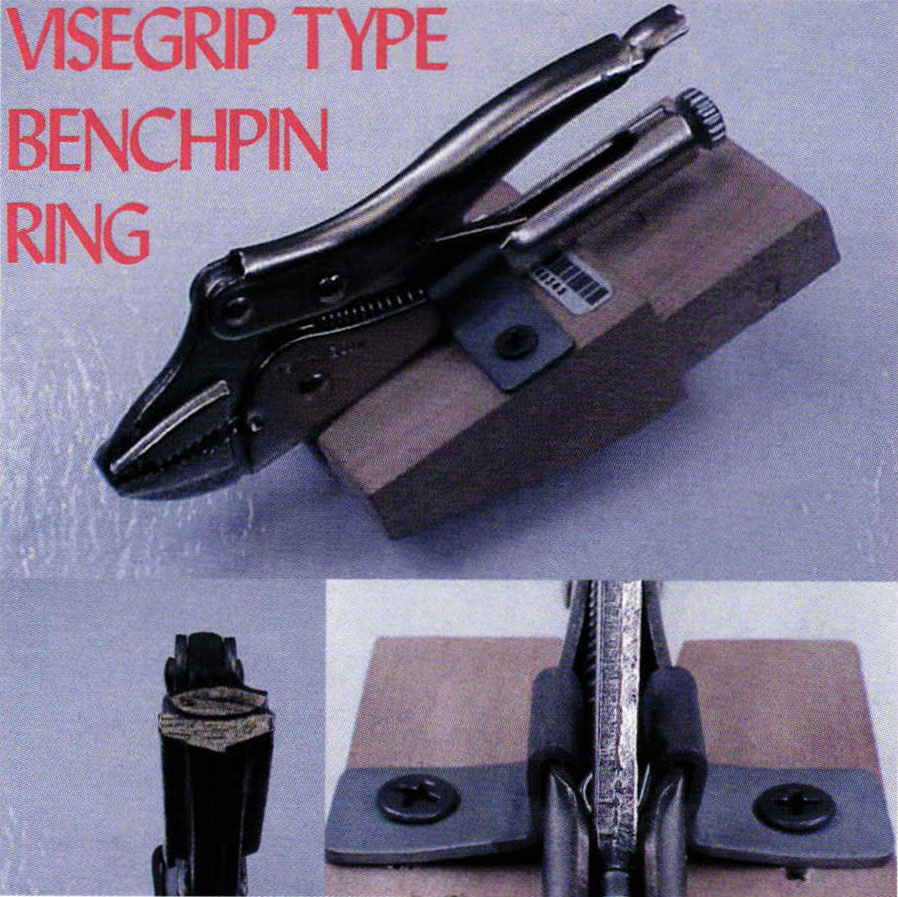
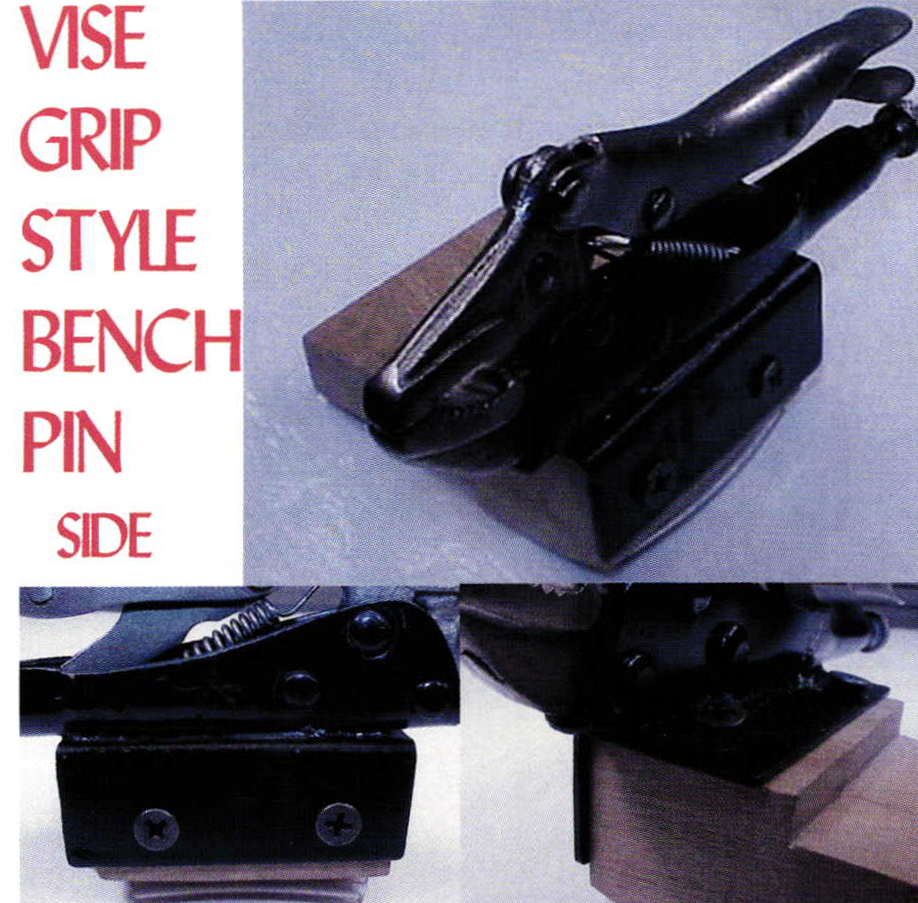
Take a new bench pin and cut to length like in the picture. Purchase two L shape comer brackets with small single screw. Cut and bend to match picture. They need to fit down inside of the plier frame. Then pre-drill bench pin as pictured to match width of pliers.
Open the pliers all the way and grind jaws in a curved radius to minimize the damage when holding a ring. If you are working on a ring were heat isn't involved line the jaws with electric tape to prevent marring. This holder works great for holding rings to be cut, trimmed, and filled. It also works well for holding a ring for retipping.
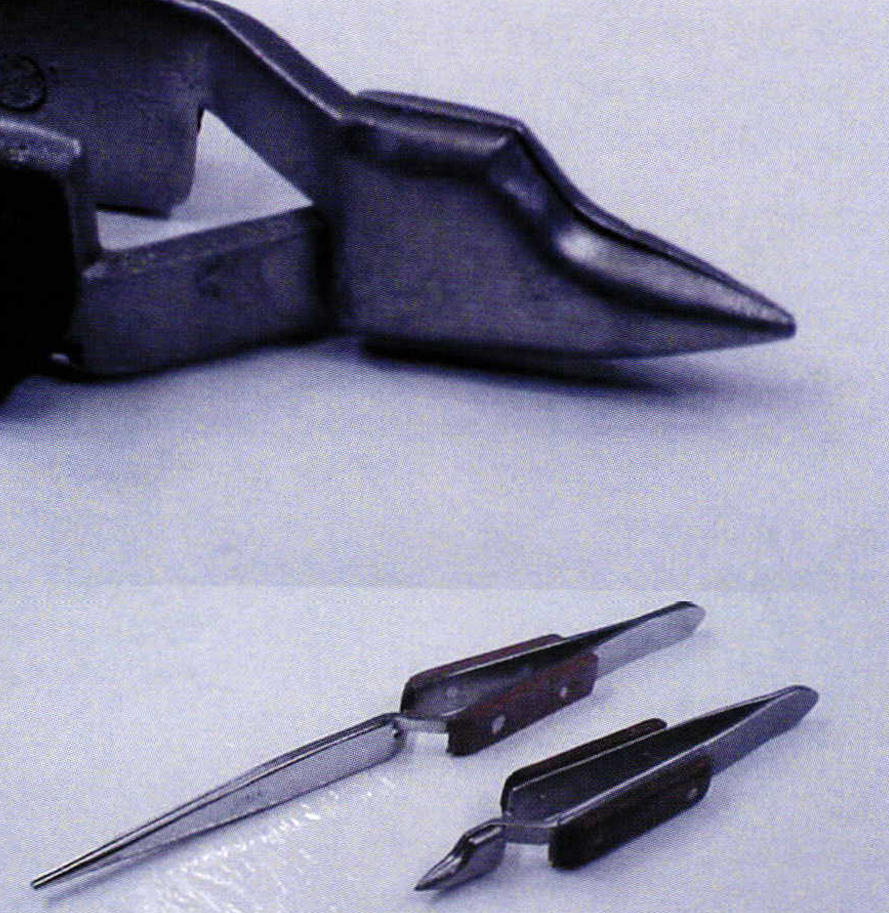
Take a standard pair of stainless tweezers and cut them down to match the picture. you will love the extra spring you achieve and the ability to hold tiny objects while soldering.
Related Articles

Customized Robo Grip Pliers

Customized Solder Holder, Jet Sett, Blast Shield

Creating Beading Pliers Accessory Bezel Settings

How to Modify a Goldsmith Hammer


The All-In-One Jewelry Making Solution At Your Fingertips
When you join the Ganoksin community, you get the tools you need to take your work to the next level.
