
Customized Robo Grip Pliers
3 Minute Read
Steve Satow shares his procedure for customized robo grip pliers to add parallel action and more leverage to standard bow bending pliers.

The robo grip pliers have parallel action and more leverage than standard bow bending pliers. To make, take a 1 ¼ inch nut and cut it in half, removed the threads, then round and polish the inside. Weld to the center of the bot- tom jaw. Next, use ½ inchsteel tubing and cut it the same length, as the nut is wide. Then slit it and open it up. Shape it until it fits the inside curve of the bottom jaw. Then weld it in place while the jaws are compressed holding it in perfect alignment.
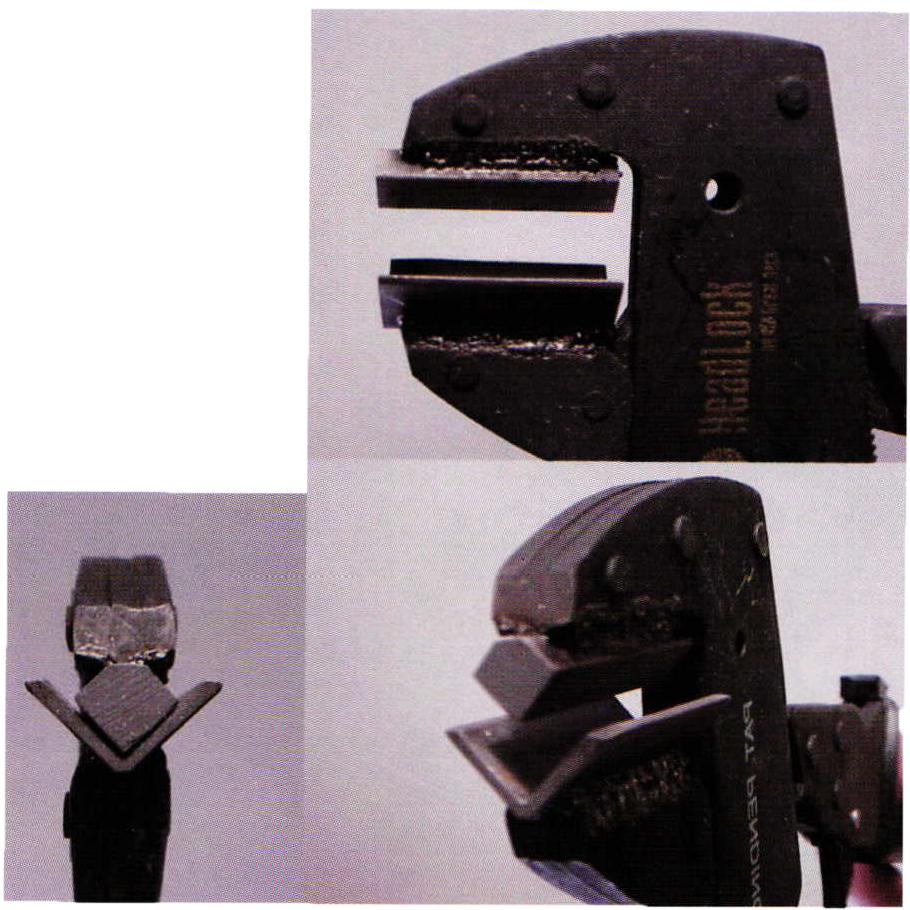
I found these Head Lock Pliers cheaper than robo grips. I used ½ inch angle iron as the bottom jaw. This light walled angle iron has a sharp crease, which will create a sharp bend. I used ¼ inch square rod; it has sharp edges also and makes an excellent upper jaw I cut both pieces to 1 ¼ inch length. I needed to file a flat spot on one edge of the square rod to weld it to the upper jaw. I scribed a parallel line l/16 of an inch on each side to use as a filing guide. This gave me approx. l/8 inch wide flat spot for welding it to the top jaw. I lined up the parts in the jaws and rubber banded the handles together to hold the parts in alignment. I tacked them together with a laser. Then, opened the jaws and finished the weldingjob. These pliers have enough torque to bend 18 ga 1 ¼ in long sheet stock easily. As well as wire and light bar stock to a perfect 90 deg. bend.
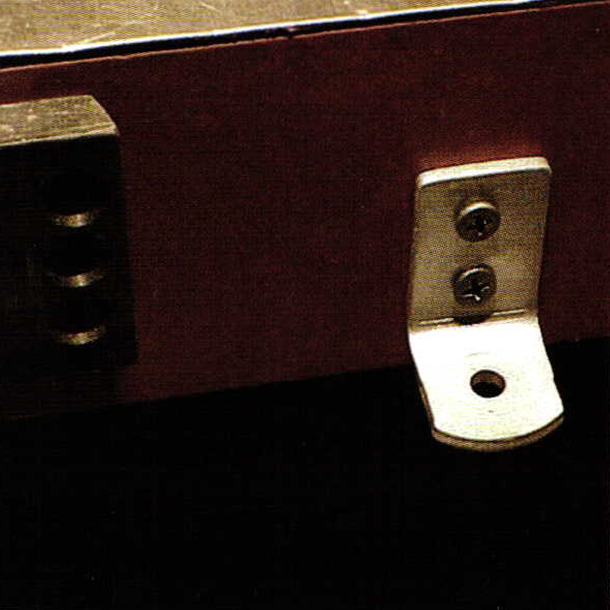
The GRS third hand, in my opinion, is the best available. I've used mine hard for over ten years and it's still like new. I wanted to be able to use mine even when I wasn't using the bench mate. I mounted a small "L" bracket on the front edge of my bench and mounted the third hand on it as pictured. It can curl up out of the way when I don't need it, and when I do, it is there without taking up space on my bench.


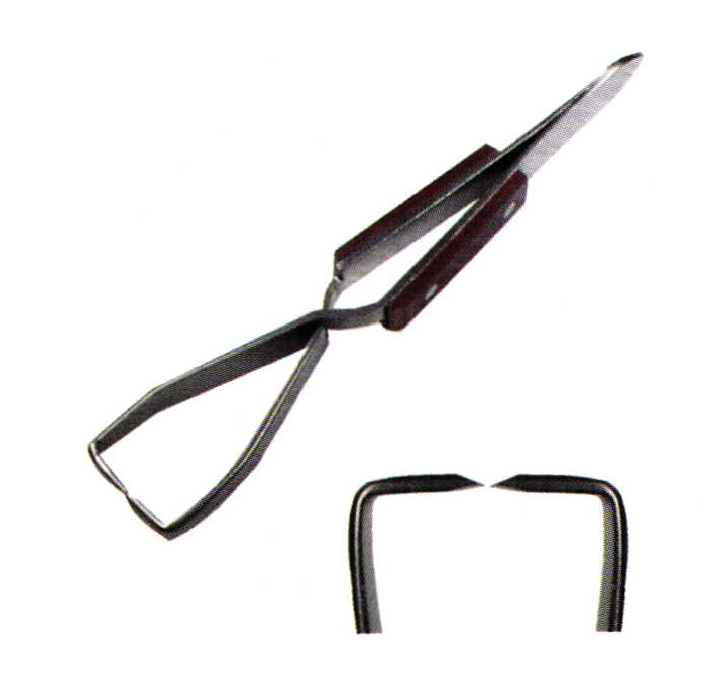
Take a pair of Starret ring dividers or another pair of quality dividers and if you examine them most won't come all the way together at the points. Coming all the way together at the points allows you to more accurately scribe layouts for channels and stone depth and distance measurements as well as sizing measurements.
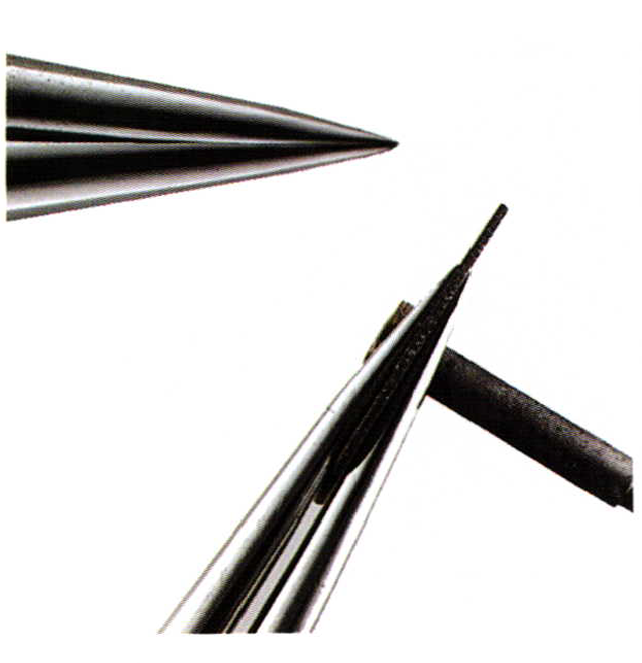
Open the dividers until you can squeeze a separating disk between the ends (wear safety glasses) start the disk spinning and slowly close the dividers until two flat surface have been created so that the ends will come completely together. Grind slowly do not over heat ends and ruin the temper in the tips.
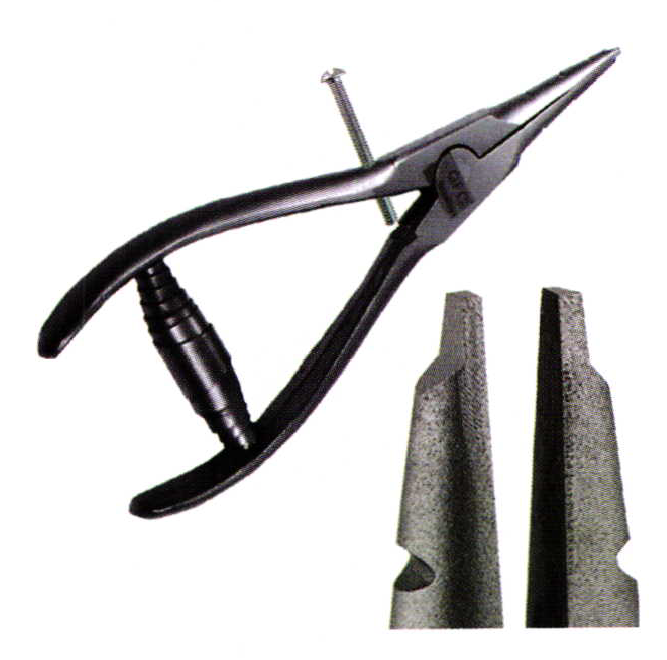
These are standard bow bending pliers that have flat spots ground on the end' The flat spots ale then used to grip the inside of prongs or light channels to open them. I drilled and taped the back of the plier and installed a 6/32 screw to act as a stop. You open your measuring tool to just under the stone's diameter, then squeeze the pliers to that opening, and then adjust the screw so it cannot open wider then that. This allows you to spread a light channel ortwo prongs at a time on a standard head to the same opening each time. Allowing you to spread heads to fit stones quickly and consistently.
Take a standard pair of insulated soldering tweezers and cut a chisel point to the outside edges ofthe ends. Come down about a ¼ inch on each side heat the tweezers red hot and make a 90 deg. bend to the in- side. These tweezers when the tips are placed between rings that are soldered together should force them apart and allow you to unsolder them before a sizing seam lets loose.
Steve Satow is owner of GEM SERVICES & IMAGING and is a graduate of Bowman Tech School Class of 76 and GIA trained. He has 25 years experience in repairs and custom fabrication, wax carving, stone setting, custom tool design & manufacturing. You can reach him at: goldmakerT@aol.com
Related Articles

Build a Basic Jeweler’s Bench

How to Modify Cross-Lock Tweezers

Customized Turntable Tool Rack

Restoring a Jewellers Vulcanising Press


The All-In-One Jewelry Making Solution At Your Fingertips
When you join the Ganoksin community, you get the tools you need to take your work to the next level.
