
Photoetching for the Studio Jeweler
14 Minute Read
In photoetching a photo transparency defines the area of a metal plate to be etched. The transparency is the control unit, the program, that prescribes which parts of the light-sensitive resist will chemically harden, polymerize, to become impervious to attack by the etchant. In our prior article (Metalsmith, Summer 83) we explored the making of the photo transparency. Now we shall look at the etching process itself.
Photoetching begins with the light-sensitive resist. All photo resists can be classified as either negative-working or positive-working, depending on the negative or positive areas of the image to be etched. We can, for instance, decide to etch either the area of a metal plate that has been struck by light or the area that has not. Our choice will determine whether we use a positive or a negative-working resist. In terms of the photo transparency, the area struck by light corresponds to the clear area of the transparency, while the area not struck by light corresponds to the dense or opaque area. To etch the area that has been exposed to light, we use a positive-working resist; to etch the unexposed area we use a negative-working resist. In actual practice, however, it's usually possible to standardize on just one kind of resist and use either a positive or negative photo transparency to determine which areas of the image will etch. For example, an intaglio image on metal can be produced in one of two ways. We can either sensitize the metal with a negative-working resist and use a positive photo transparency of the image to be etched. Or we can use a positive-working resist and a negative photo transparency. Conversely, if we wish to produce a relief image, we do just the opposite. We sensitize the metal with a negative-working resist and use a negative photo transparency of the image, or we employ a positive-working resist with a positive photo transparency.
Photo resists are available from many sources. Manufacturers in the photo-fabrication and electronics industries obtain theirs from such large-scale suppliers as Eastman Kodak or Norland Products Company. Studio jewelers, however, seldom need the quantities offered by these suppliers. A few ounces are sufficient for etching many jewelry pieces. Since photo resists have a limited shelf life, it makes little economic sense to purchase in bulk. Fortunately, most well-stocked electronics specialty stores now carry negative and positive-working resists in small handy spray cans.
Although intended for the electronics hobbyist these resists and accessory products serve the needs of the studio jeweler quite well. Bearing such brand names as Injectoral, GC Electronics, Photax and Kepro, they are designed primarily for use with ferric chloride, a mild etchant capable of producing fine detail on copper and such copper-rich metals as brass and bronze. While not recommended for use with the traditional acid favored by most jewelers, such resists can withstand brief immersions in those baths. But on copper and its kin, ferric chloride etches so well that the traditional acids are not really necessary. For etching silver a 55 percent solution of ferric nitrate produces excellent results. For etching gold in aqua regia, however, we recommend hardier material such as Kodak Thin Film Resist.
Working with photo resists is really no different from working with other light-sensitive materials. The steps followed t produce a photoetching are essentially the same as those taken to produce a photo transparency from a camera negative For a detailed look at those procedures we refer the reader to our prior article on transparency making (Metalsmith, Summer 83). Working with photo resists, however, does offer one decided advantage to the studio jeweler: a darkroom isn't needed. Lacking the extreme sensitivity to light of traditional photographic films and papers, photo resists can be handled in subdued room light. They are sensitive primarily to ultraviolet radiation and so need only to be shielded from inadvertent exposure to sunlight or other sources rich in UV.
Sensitizing the Metal The first step in making a photoetching is to clean the metal to be etched. The surface must be flat, smooth and free of grease. Begin by removing all scratches and other surface blemishes; then scrub with pumice or other fine abrasive cleanser and hold the metal under running water. Water should disperse evenly across the surface. If it forms into beads, the surface is not grease free. Try a degreaser such as a trisodium phosphate based household cleanser. Wash the metal again and dry it carefully; avoid touching the surface with bare fingers.
For convenience in handling while applying the photo resist, tape the metal to a piece of cardboard with a piece of double stick tape and position the metal so that one corner points down. This allows excess photo resist to drain to one area of the metal so it can easily be soaked up with tissue paper. Metal pieces can be sensitized outdoors at night under the illumination of a low-wattage household incandescent bulb. For more light with less danger of inadvertent exposure try a yellow "antibug" light. Working outdoors allows for rapid dispersal of spray mist.
In applying the resist, first prop up the cardboard on which the metal piece is attached. Hold the can of photo resist about eight to l0 inches from the cardboard and begin spraying in a rapid horizontal motion covering the metal from top to bottom. The objective is to apply one coat of resist as evenly as possible. Wait a few minutes for the excess spray to drain; then carefully apply a piece of tissue paper to absorb the excess resist. Otherwise a thick ridge will form that may lift in the etchant. Let the coated metal dry for about a half-hour in the dark. Then carefully remove the metal from the cardboard and place it in a light-tight box to dry thoroughly overnight. The next day the metal plate will be ready for exposure.
The light source used to expose the plate must be rich in ultraviolet radiation. Carbon arcs, mercury vapor and pulsed Xenon lamps and "black light" fluorescent tubes, all rich sources of UV, are typically used in industry. For the studio jeweler, however, a cheaper, less elaborate source of UV is also available. We've used sunlight as the sole exposure source with excellent results. Exposure times will, of course, vary depending on weather conditions. Different brands and types of photo resists may also require different exposure times. On a bright clear day, for instance, we've found that Injectoral negative-working resist requires four to five minutes exposure. On the same day with the same transparency, however, GC Electronics brand negative-working resist will need only about half that exposure time. On overcast days we use a photographic light meter to measure the exposure. We double the exposure time when the meter indicates that the light level has fallen by one f-stop. On a day where the light level is two f-stops less, we quadruple the exposure time.
To expose the sensitized metal plate to sunlight use a photographic contact printing frame, the same device used for making photo transparencies from camera negatives. The purpose of the printing frame is to hold the photo transparency in tight contact with the sensitized metal during exposure. Tight contact must be maintained throughout the exposure to achieve a sharp, clear transfer of the image. We prefer the top or front loading frame design over the rear or back-loading one because the former makes it easier to position the transparency accurately on the metal surface.
But either design will serve. After exposure the metal piece must be "developed." This step is not development in the photographic sense, rather, it is the chemical removal of the resist from those areas of the metal intended to be etched. This is done by soaking the exposed metal plate in the proper chemical solution. Which solution to use depends on which photo resist was employed. A negative-working resist requires a chlorinated solvent, such as trichloroethylene or 1, 1, l-trichloroethane; a positive-working resist needs a dilute solution of lye or sodium hydroxide. Each acts differently on the exposed metal piece-the chlorinated solvent loosens and removes the resist that has not been struck by light, whereas the sodium hydroxide solution makes soluble the light struck resist. These solutions work properly only when used with their intended photo resists. They cannot be used interchangeably.
After soaking, with gentle agitation, in the proper solution for about a minute-and-a-half , carefully remove the metal plate and place it under running water to flush away the loos. ened resist. Until this point in the sensitizing process the plate has been protected from stray UV radiation. Now the piece is no longer UV sensitive and may be examined in bright light. If all has gone well, a minute relief image on the metal surface should be discernible. This image should be as fully detailed as the image on the photo transparency, unless the plate was either vastly overexposed or underexposed. If the latter is true, the metal should be recleaned and the sensitization process started anew. But if all has gone well, proceed to the next step: the etch itself.
Preparing the Sensitized Metal for Etching
Before etching the plate, all traces of developer residue must be flushed away and the piece thoroughly dried. Drying can take place atop a kiln or other warm surface, or the plate can be left in the sun for an hour or so. If one of the traditional acid etchants is to be used, then we recommend drying in a 250oF kiln for about 10 minutes. This so-called post baking step is intended to drive off the last vestiges of developer and harden the resist coating to the maximum. Any trace of developer left in the piece can promote early failure of the resist in the acid etchant. Even with this post baking procedure, the acid etchant should be as diluted and the etching time as short as possible. For a mild etchant like ferric chloride the postbaking step is not necessary.
One final task remains before etching the piece. Since only the front surface of the metal was covered with resist, the back and edges remain unprotected. Any of the traditional resist coatings may be used, such as hard ground or asphaltum. We've found, however, that the cleanest, simplest protective coating is an application of household package sealing tape. Use the two-inch-wide transparent variety, which is very sticky and seals well against penetration by the liquid etchant. Its tough plastic surface seems to hold up as well as the resist itself. For ease in handling during etching, affix the tape-wrapped metal to a piece of plexiglass which has been cut to fit the etching container, a small, rectangular, heavy-duty glass baking dish. The plexiglass holds the metal above the curved bottom of the etching container. Use ordinary masking tape to attach the sealing-tape wrapped metal to the plexiglass. Attach it upside-down because, unlike traditional acid etchants, ferric chloride produces no gas bubbles when it etches. These bubbles help remove the dissolved metal from the etched areas. Attaching the piece upside-down allows the dissolving metal to fall away from the etched areas.
Etching the Metal
As we mentioned earlier, ferric chloride is a good etchant for copper and its alloys. It is sold in liquid form in the proper concentration. It can also be mixed from the dry chemical by dissolving enough to produce a solution whose density is 36′ to 42o Baumé. Ferric chloride is also a fine etchant for nickel and its alloys. Cupric chloride and ammonium persulfate are two chemical etchants that may be substituted for ferric chloride. For etching silver, make a solution from ferric nitrate crystals-four ounces of crystaline ferric nitrate powder and enough water to make four ounces of solution.
Heating the chemical etchant shortens etching time. We use a double-tray arrangement: a smaller tray containing the etchant is placed in a larger tray containing hot water. We also use an aquarium air pump to force air bubbles against the metal surface as it is being etched. This makes up for the lack of gas bubbles when using ferric chloride or ferric nitrate. It hastens the etch and seems to produce a cleaner, deeper line with less undercutting. Etching time in the setup described here runs about five to six minutes with ferric chloride and four to five minutes with ferric nitrate. If the piece seems overetched in this time, it's likely to be underexposed and should have received more time in the sunl if the piece lacks the fine detail evident in the photo transparency, it's been overexposed. Exposure time is critical to a good etch. To stop the etch merely flush the piece with running water. The etching is now complete.
To remove the hardened resist scrub the piece with pumice. Commercial stripper solvents are also available. Pieces etched in ferric chloride display a characteristic dark coating in the etched area. This coating, which is very similar to the results obtained when using an oxidant such as liver of sulfur, is a byproduct of the chemical reaction between etchant and metal. It may be left in place, or it can be removed by soaking for a few minutes in a dilute solution of sulfuric acid.
Conclusion
This concludes our series of articles on transparency making and the photoetching process. These methods are sound and offer the studio jeweler a low cost introduction to photoetching. If nothing else we hope to have dispelled any notion that the process is difficult or mysterious. Photoetching is easy to learn and holds promise for anyone willing to master the craft. Here at the Metalworks we are trying to expand our basic repertoire with further experiments in electrodeposition, multiple metal etch and fill inlay techniques. We believe the concept of imagery, as distinct from design. in metalsmithing has been little explored. It is our hope that a growing interest in photoetching will stimulate an awareness of imagery and lead to an accepted aesthetic for its use.
The Etching Process | |
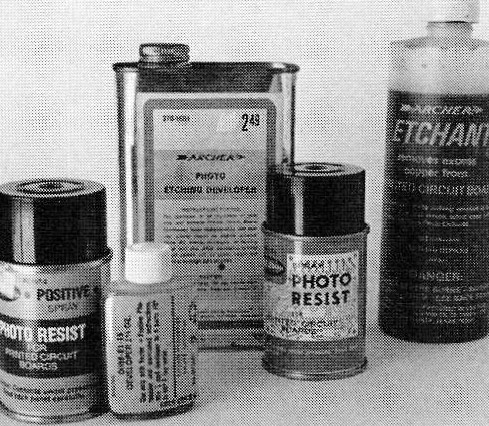 | Some materials used in Photoetching, from L to R: Positive working Photo resist with its companion sodium hydroxide developer, chlorinated solvent developer and its companion negative working Photo resist' ferric chloride etchant for copper and its alloys. |
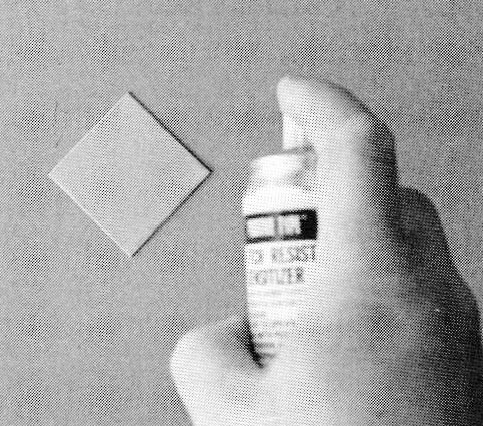 | After careful cleaning the metal to be etched, here a Piece of copper, is attached to a sheet of cardboard with double-stick tape. The cardboard is then propped up vertically and the photo resist s Prayed on. This must be done at night or under proper safelight conditions. |
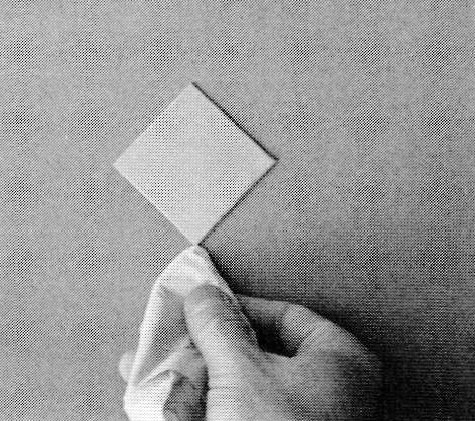 | Attaching the metal Piece with one corner Pointed down encourages excess Photo resist to collect there lor easy removal by blotting with a Piece of tissue paper. In a half hour the surface will be dry enough to allow the metal to be removed and stored in a light-tight box. |
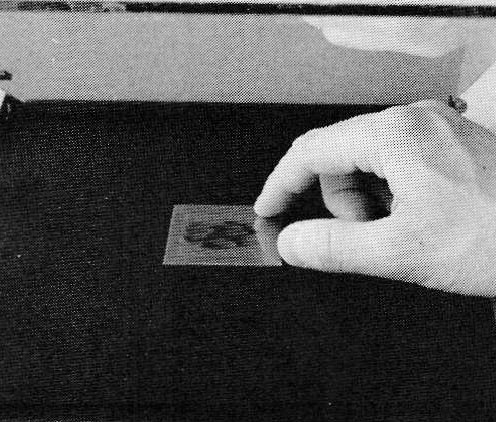 | After drying thoroughly overnight the metal is placed in a photographic contact printing frame, and the photo transparency bearing the image to be etched is positioned carefully on the sensitized surface. |
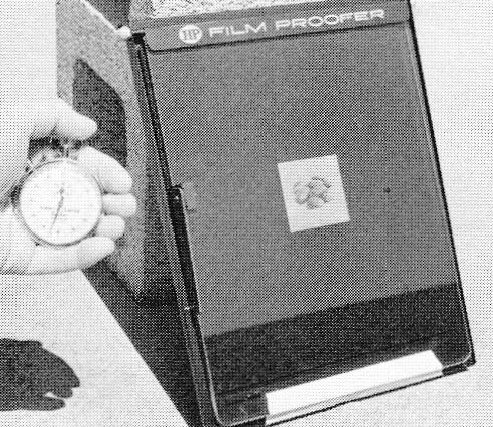 | Exposure time outdoors in direct sunlight varies from about two to five minutes depending on the overall density of the transparency and on the type and brand of photo resist used. The strip of tape at the bottom of the printing frame is used to keep the glass platen pressed tightly against the transparency and sensitized metal. |
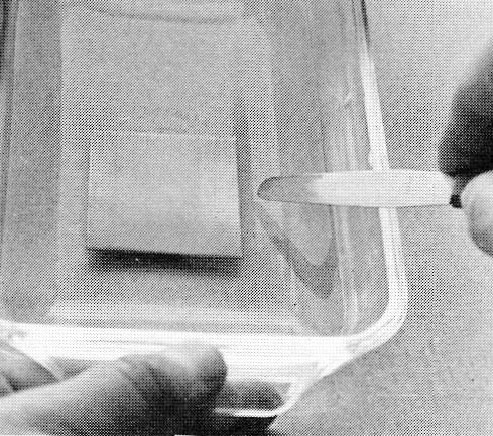 | Following exposure the metal piece is placed in a developer solution, either a chlorinated solvent or dilute sodium hydroxide, depending on whether the resist used was negative or positive working. After about a minute and a half a palette knife is slipped under the metal to lift it out. |
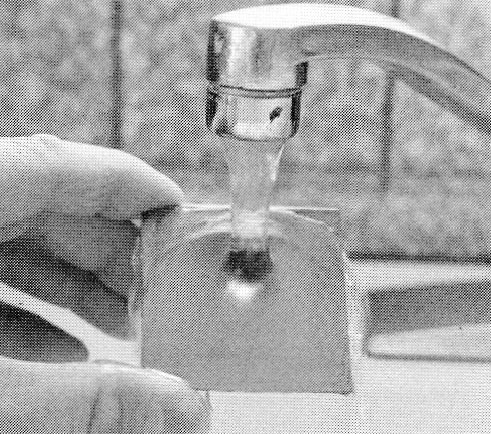 | Running water flushes away the photo resist that has been partially dissolved in development. It's important to clear off this loosened resist so that bare metal is exposed to the etchant. The metal piece must be thoroughly dried and all traces of developer removed before etching. |
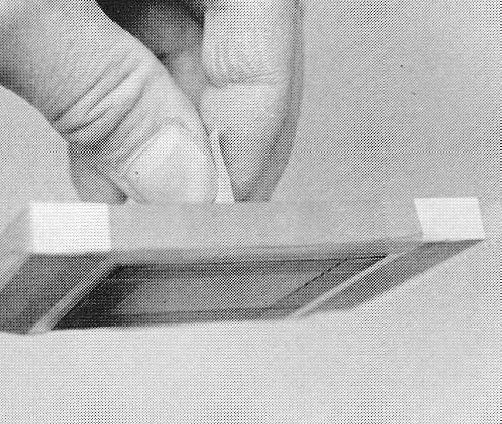
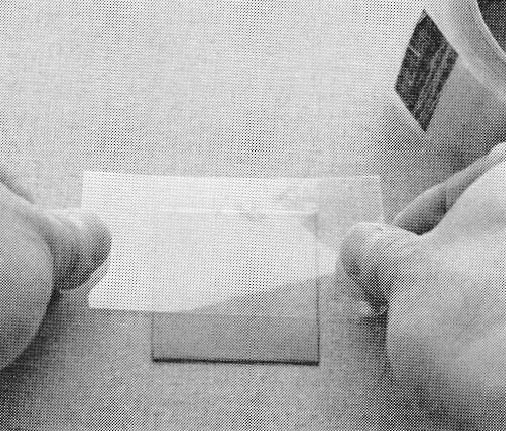 | The back and sides of the metal plate must be protected from attack by the etchant. Here transparent package sealing tape is applied to create a waterlight envelope around the metal, leaving only a window on the front to expose the area to be etched. |
 | The transparent tape sheathed metal is attached to a block of plexiglass with masking tape for ease of handling in the etchant. A tab made of masking tape is affixed to the back of the plexiglass to keep the fingers out of the etchant. |
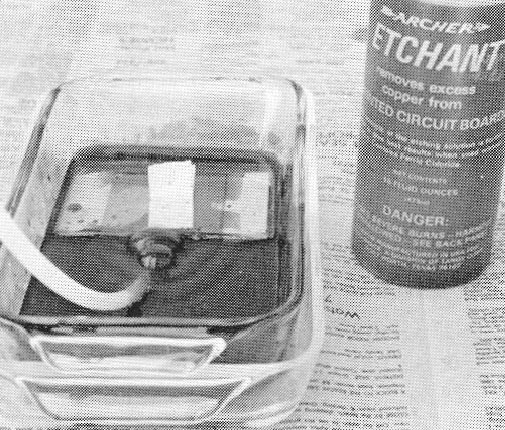 | The plexiglass bearing the metal piece is immersed face down in the ferric chloride etchant. An aquarium pump tube forces a stream of air bubbles which help dislodge the residue to produce a deeper, cleaner etch. Here the inner tray contains the etchant while the outer tray contains hot water to speed uP the etch. |
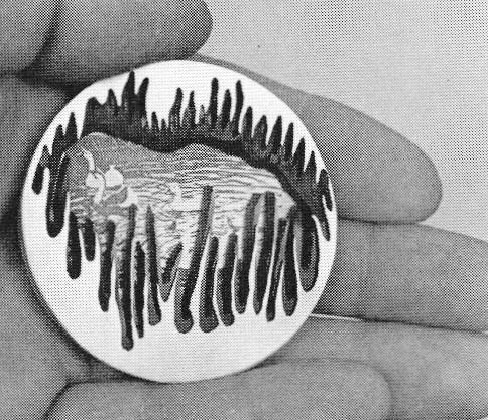 | In this fabricated piece by Carol Webb the delicate tracery of the nickel silver bezel frame, echoed by the shadowy jutting reeds cut from green Plexiglass, suggests the flora that in nature would surround this photoetched image on copper of ducks in a Pond. |
Related Article:
Transparency Making for Photoetching
Related Articles
Metal Salt Etching, Resists and Resist Removal

The Seven Korean Metalsmiths

Goldsmithing: Etching on Metal

Transparency Making for Photoetching


The All-In-One Jewelry Making Solution At Your Fingertips
When you join the Ganoksin community, you get the tools you need to take your work to the next level.
