
Locating Dead Center on Ring Blanks
1 Minute Read
This article provides a helpful tip on locating dead center on ring blanks and finding balance on an object.
Free-form wax carving offers jewelers an unlimited number of design possibilities. However, one noticeable disadvantage of this type of wax carving is the difficulty of producing an object that seems balanced.
Personally, I love to create free-form sculptural rings, and within that category, I don't often seek symmetry. But even when symmetry is not the goal, having some balance to your object is good. Not only does it provide aesthetic appeal, but it can also improve wearability, as an unbalanced ring can ride awkwardly on a finger.
After many years of balancing my waxes by eye, I have developed a very quick technique for finding the top dead center on a ring blank. This helps me to realize that elusive balance the piece needs.
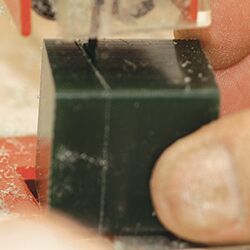
- The first step is to create the blank. I like to use the 1 1/8-inch square bars because they give you a good start to being centered due to their geometry. In addition, because they are not pre-formed in any type of ring shape, they give you complete freedom to explore your creative muse. Saw the slab slightly wider than the total width that you want the finished ring to be.
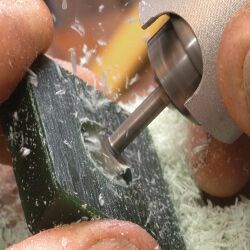
- Use a flex-shaft and bur to start a hole through the wax that is the size of the ring being created. I then slightly heat a steel mandrel that I've dedicated to this purpose and use it to enlarge the hole to the correct finger size.

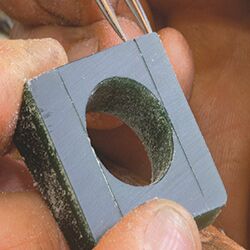
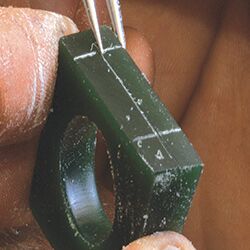
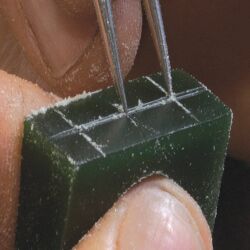
- With a divider, scribe a line up from each side of the finger hole to the top of the ring and extend those lines over the top of the wax block.

- Use the divider to find a midline that is equal distance from each of the top's sides and perpendicular to the finger-hole lines.

- Then use the divider again to find the midpoint on the midline that lies between your previously scribed extended finger-hole edge lines. The single point will be the top dead center of the finger hole. You can use this point for gemstone placement or as a reference point for all of the carving on the ring.

![]()
In association with
![]()
The award-winning Journal is published monthly by MJSA, the trade association for professional jewelry makers, designers, and related suppliers. It offers design ideas, fabrication and production techniques, bench tips, business and marketing insights, and trend and technology updates—the information crucial for business success. “More than other publications, MJSA Journal is oriented toward people like me: those trying to earn a living by designing and making jewelry,” says Jim Binnion of James Binnion Metal Arts.
Click here to read our latest articles
Click here to get a FREE four-month trial subscription.
Related Articles

Cut Loose – Wax Carving Basics Part 1

Jewelry Designs: Maya Pendant

Custom Designed Wax Carving

Make Your Own Wax Tools


The All-In-One Jewelry Making Solution At Your Fingertips
When you join the Ganoksin community, you get the tools you need to take your work to the next level.

