
Jewelry Designs: Maya Pendant
10 Minute Read
Welcometo Stacey Rhodes Jewelry Designs, where we will detail all of the steps involved in adding a new piece ofjewelry to our line. In this issue we will be working with our latest design. I'll take you through every phase of production, from the idea to the showcase.
The Idea
As with all of our pieces, this one begins with a Post-It-Note sketch that Stacey sticks on my bench. I get my first look at Stacey's idea about an hour before I'm catching a flight to Chicago to teach a class on wax carving, utilizing our next design. I gathered up all of the tools and supplies I thought I would need, but forgot my X-acto knives and my gravers. Who would have thought that someone in the front row would have a #40 graver in his pocket? Only at a bench jewelers' conference would that happen I suppose.
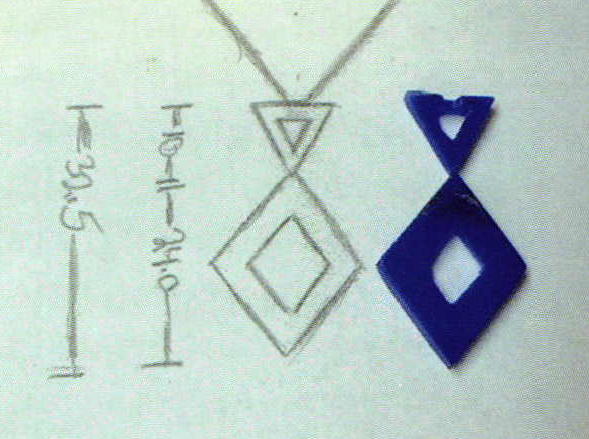
The first decision I make is to divide the piece into two different wax carvings. I was teaching two classes, so this design worked out great. The photo shows the original sketch I had to work from, and the finished waxes we carved during the classes. I brought the waxes back from Chicago, and as usual, the changes begin. And, by the way, Stacey didn't like the name "Surprise" that we came up with in Chicago.
The First Change
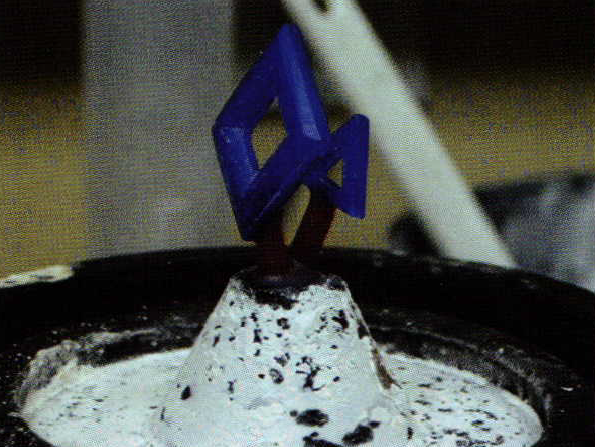 | 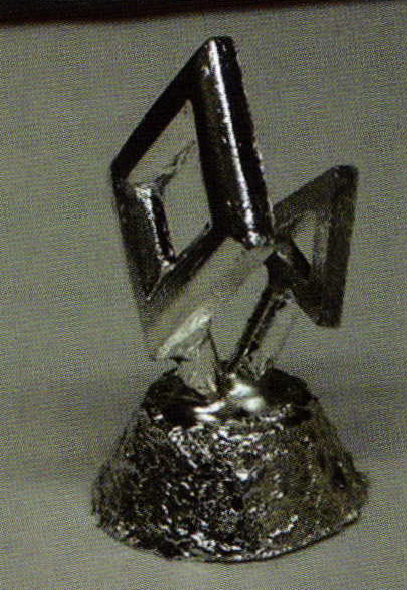 |
The first thing Stacey decided was the piece was too flat and one-dimensional. So, to add depth, we decide to add some bevels to the flat surfaces. The two waxes sprued to the rubber base, and the finished silver casting, clearly show how the bevels really enliven this piece up.
Once cast, I cut the sprues loose and clean andpolish and decide to make my first rubber mold.
Calibrate First!
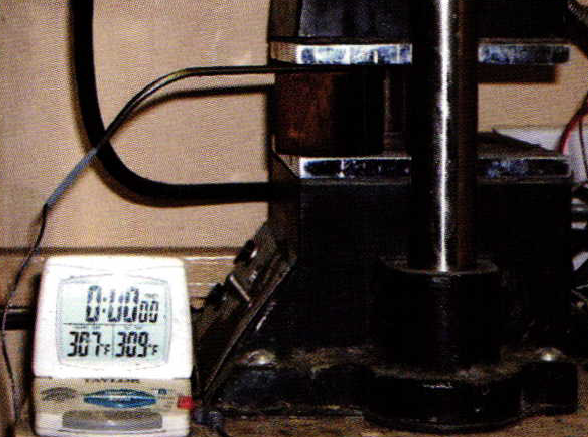
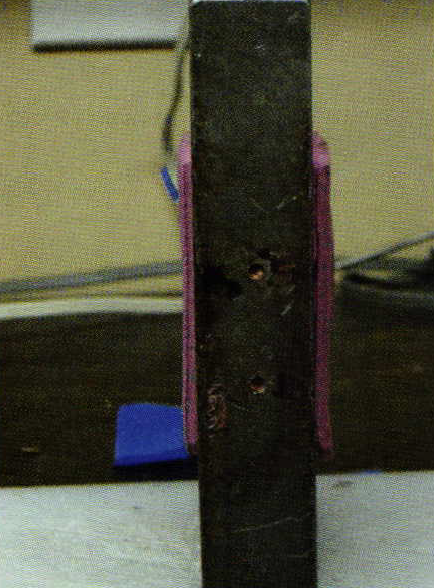
At the conference, I was asked if I could go into detail about the rubber mold. So as not to disappoint, I'm going to spend some time on the rubber mold. Before I ever cut my first piece of rubber, I turn on and begin to calibrate my vulcanizer. Sometimes this can take an hour or so, depending on the weather and season. Look closely at the photo and notice the block of wood between the two plates ofmy machine with a temperature probe between the wood and the top plate. The manufacturer recommends no more than 310 degrees for this compound, so I set my thermometer at 309. My machine has dual temperature controls so I can calibrate each plate independently. What's most important at this phase is an accurate temperature reading where the plate meets the mold, not at the thermostat dial.
Place a block of wood between the plates and insert your temperature probe between the plate and the wood. Now, make small adjustments to the thermostat until you get the desired temperature. Remember that the temperature changes slowly, so begin this process well in advance of starting your mold. There are usually wild temperature swings from the plate to the temperature dial, so don't trust the dial. You are only concerned with the area where the plate meets the mold. Ifyou have a single control vulcanizer, adjust your temperature so that the hottest plate doesn't go over 310 degrees. Once again, there can be wild fluctuations between the two plates, so only concern yourself with the hottest plate.
Making the Rubber Mold

Because I don't think I can get good wax or metal flow between the very sharp points where the top and bottom join together, I decide to mold the piece using two different rubber molds. The photo shows the supplies and all pre-cuts that must be made to begin the molding process on the lower section. I use ten layers of rubber for this mold. I use six full pieces, three on bottom, and three on top. I also pre-cut the four custom pieces in the center. Note that for tools I have a plastic cutting board, (wood leaves slivers and splinters), a brand new X-acto blade, and a Prong Pusher that I use as a punch. I cut a "V" groove out ofthe top ofall four centerpieces to accommodate the sprue button. I also cut a void out of the two center pieces to clearthe piece I'mmolding. If you do not cut away the rubber around the piece you are molding, you'll get air pockets. Also note on the right side of the cutting board I saved the small pieces ofrubberthat were removed. They will be used a little later in the molding process.
Packing the Mold
 |  |
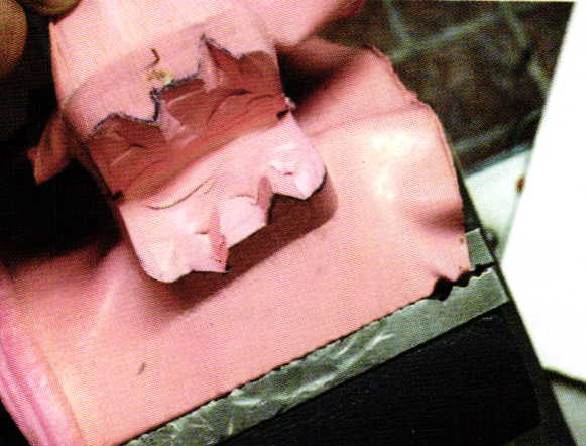
I place the first three pieces of rubber in the mold and pack each one down securely with the prong pusher. I've never counted (until now) how many times I punch the rubber between layers. I discover I'm averaging about seventy punches with each layer to firmly adhere it to the layer below it. In the photo that shows the pendant lying within the void I created, you can clearly see the indentations that the prong pusher leaves and the number of times I punched the mold. Now, the pieces that were removed to create the void come into play. I place the pieces, one at a time, around the piece and punch them very carefully around the piece. What I'm trying to do is fill every void with as much rubber as I can. I end up using all of the pieces I cut out. The photo shows the end result.
Now I can add the top three layers of rubber. Once the mold is packed, you can see about one and one-half pieces of rubber are left outs ide the mold to create pressure during vulcanization.
Vulcanizing Schedule
I cannot stress enough that you cannot get distracted for the next eight minutes. If you walk away and do something else during this crucial eight minute cycle, your mold will be ruined. I set two timers at this point, one at two minutes, and one at eight minutes. Now that my temperature is set, I place my packed mold between the plates and tighten the mold as tight as I can, and start the timers. I refuse to do anything else for the next eight minutes. Once you introduce heat and pressure, the vulcanizing process begins, causing a physical change in the rubber composition. The rubber begins to meltunderthe heat, and compress under the pressure of the machine. Every two minutes, for eight minutes, you must tighten the handle on the machine to keep pressure on the mold. The rubber will begin to cure after eight minutes, so it is imperative that you keep extreme pressure on the mold to force the now semi liquid rubber into every nook and cranny of the piece you are molding. If you don't follow the two minute tightening cycles, the rubber will not flow to all areas of your piece and you will have voids, and your mold will be worthless. Once your eight minute timer goes off, put the final crank on the handle using all your might to get it really snug. No-Shrink Pink requires seven minutes per layer, so since I have ten layers, I reset the timer to seventy minutes and I'm finished for now.
Cutting Open the Mold
 |  |
 | |
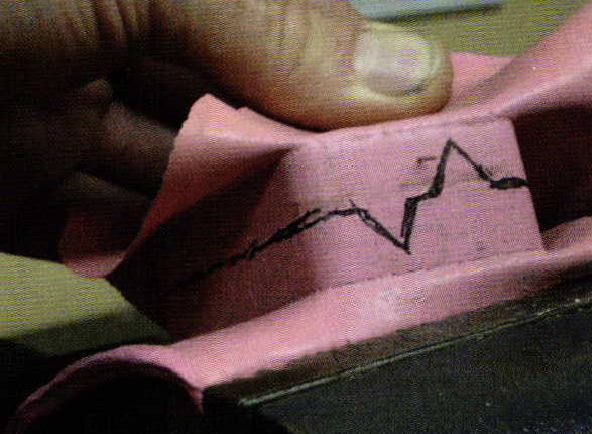
If I have the luxury of time, once the seventy minute timer goes off, I turn off my machine and leave the mold in place overnight at full Pressure to keep the mold from warping. If I don't have the time, I release the pressure and place the mold and mold plates in a vise for an hour or so to cool before cutting. If you have to cut your mold immediately, and notice the edges curling, place a heavy book on the mold overnight and that usually cures the problem. I've taken a sharpie and drawn a line around the mold where I want my initial cuts to be. I use a "Y" shaped mold lock on the top and bottom of the mold. This is done primarily to help align the mold during injection. I begin with about a 2 mm deep cut all around the perimeter of the mold to establish center and mold lock positions. While I'm cutting the mold, notice the position of my fingers in relation to the business side of the X-acto blade. There is never a reason to cut a mold with the blade aimed at your hands and fingers. Think safety first! It's a little awkward at first getting used to cutting away from yourself, but with a little practice, it is second nature. I always cut the bottom of the mold first for a very specific reason. It's the easiest, and it kind of gets me into the mold cutting mind set before I have to do the tricky cutting around the piece. The photo shows the locks are cut, and look closely at the 2 mm deep cut around the edges. This gives you an aiming point at the edge of the mold to keep on center. Once cut open, the mold is ready to inject.
Mold Injection
In keeping with tradition, I always let Stacey do the ceremonial first injection. Since the first one never comes out anyway, I don't want to do it. This time, I was wrong, and it was perfect. The photo with the mold and powder is for a very important reason. When wax is introduced into a mold, air must be displaced. Because rubber, by its nature, is self-sealing, air cannot escape. Therefore, you have to create a method for the air to escape to allow the wax to be injected. Talcum powder is your answer. In the photo, it's clearly visible the amount of powder I sprinkle on the mold.
Now, clap the two pieces together several times like chalkboard erasers. This will remove any excess, and evenly distribute the powder throughout the mold. The powder will create just enough of a gap between the two pieces of rubber to allow the air to escape, yet contain the wax within the mold. I usually re-powder the mold every other injection. Now, all I need to do is inject a few molds and I'm ready to cast, right? Wrong!
Change Number 2
  |  |
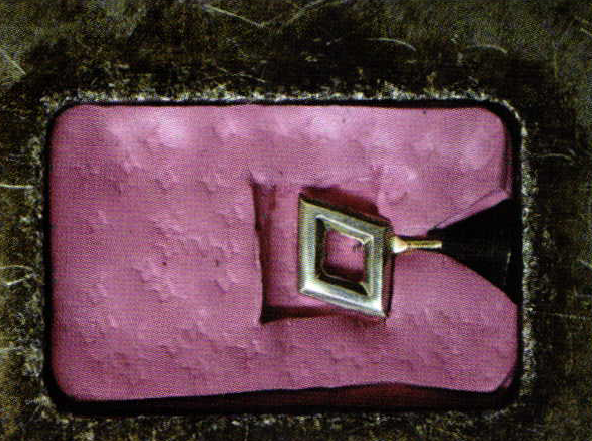
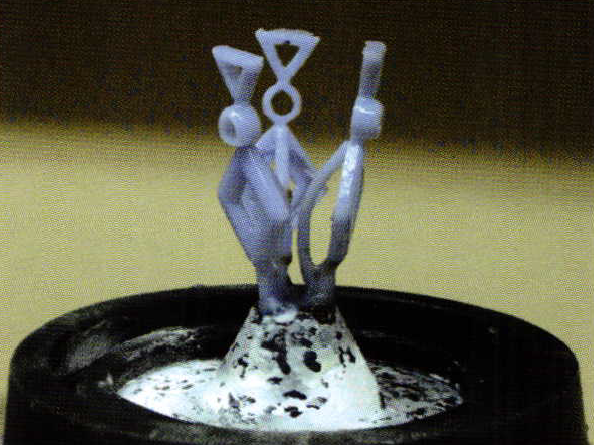
We had been discussing adding something between the two pieces, and make the decision that it's going to be a 5 mm, faceted, bezel set gemstone. Because we wanted a bezel that has the same beveling as the other two pieces, I elect to carve it out ofwax. This way I get exactly what I want. I carve the bezel, cast it, clean and polish it, and solder it into place. Now, since I have a completely new piece, I can throw away the mold I just made. I've also changed my mind on how I want to mold and cast the piece. So, it's time to start over. I decide to double sprue the piece and make a single rubber mold, instead of two. I use one heavy sprue coming into the bottom of the piece, and an auxiliary sprue sending wax and/or metal right to the top. This will make all of the production runs much easier. No assembly, just stone setting. The photo shows the new rubber mold, with a removable center section. Okay, let's inject three molds, cast them, and set some stones and see what we have.
The Chain Installation
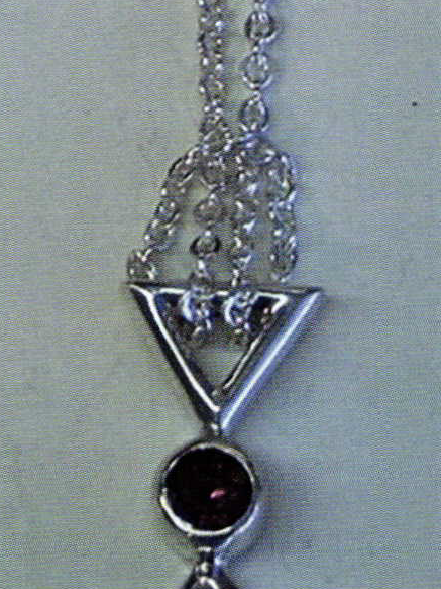
Stacey and I are always looking for innovative ways to suspend a pendant from its chain. It's a pet peeve of mine when the clasp is beside the pendant, instead of on the back of your neck. So, we are always trying to find ways to keep the clasp in its proper place; hidden. The photo shows how we looped the chain through the top of the pendant. I then went behind the pendant and tacked two links together to keep it in place. I set a rhodalite garnet in the first one, and I'm finished.
Maya Lives!
 | 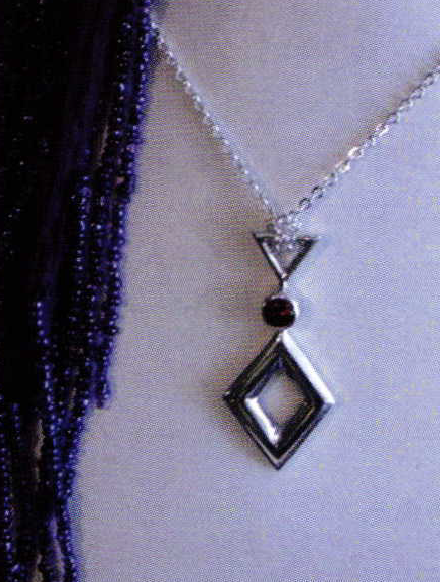 |
It's done. Stacey can be seen modeling the first production piece of her newest design. You can tell by the smile on her face, she is happy with the finished product. Quite a transformation from those two pieces of wax we carved in Chicago, isn't it? And, I kid you not, the two waxes that we carved in Chicago, were used to make this new creation. All in all, it went very smoothly. We had a few changes along the way, but each change made the piece more stylish, or smoothed the production process. As always, never get stressed about your first idea not working. Some of our best ideas were the result of trying something innovative that didn't work the first time. Good luck on your next design. And, to everyone who attended my classes in Chicago, please write me at "koehlerc@bellsouth.net" and tell me what you think of the finished piece. See ya next time.
Related Articles

How To Avoid Destructive Tack-Welds

1989 SNAG Conference Review

2008 Enamel Foundation Conference

The Bauhaus Metal Workshop, 1919-1927


The All-In-One Jewelry Making Solution At Your Fingertips
When you join the Ganoksin community, you get the tools you need to take your work to the next level.
