
John Killmaster and “The Quickening”
6 Minute Read
Updated on
In the early 1980's, I made a drawing based on the theme of transformation, a sudden, intuitive grasp of reality - an epiphany. When it came time to make a new enamel to enter in the Enamelist Society exhibition "Surfacing," I had an epiphany and dug out my drawing. I visualized the images' three dimensional possibilities, and began working.
The following is the record of the making of "The Quickening."
Step by Step Procedure for "The Quickening" | |
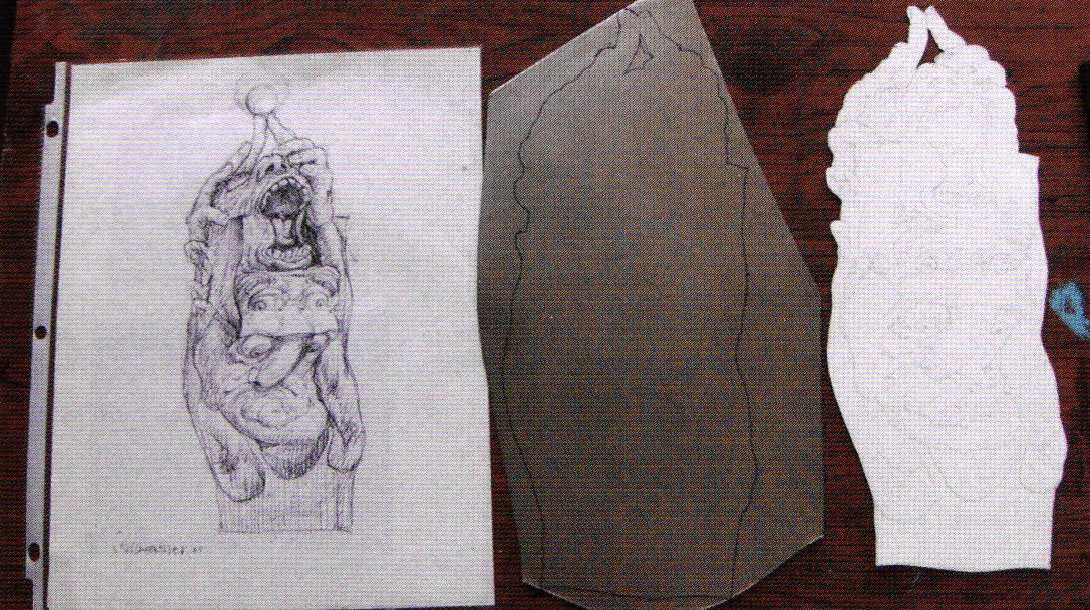 | The initial step was to project the drawing to size on paper by using an opaque projector. Next, I cut out the image to check its fit and clearance inside my kiln. Upon verifying the fit, I traced the outline on clean 24 gauge cold-rolled steel with permanent marker. |
 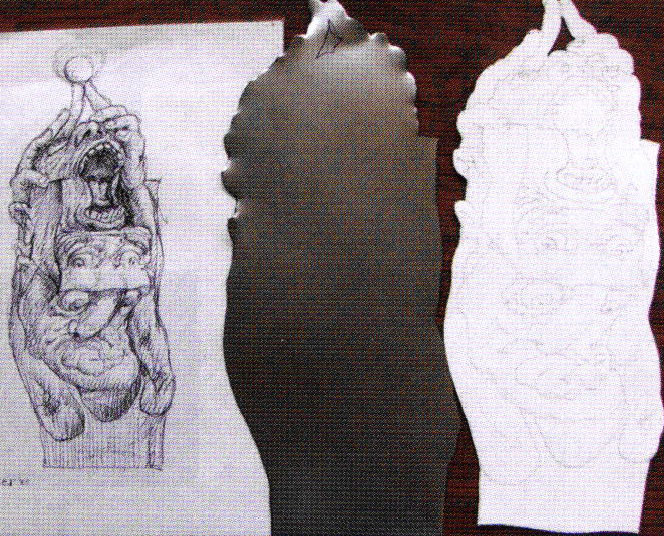 | Using my shear I cut the outer contour from the steel sheet |
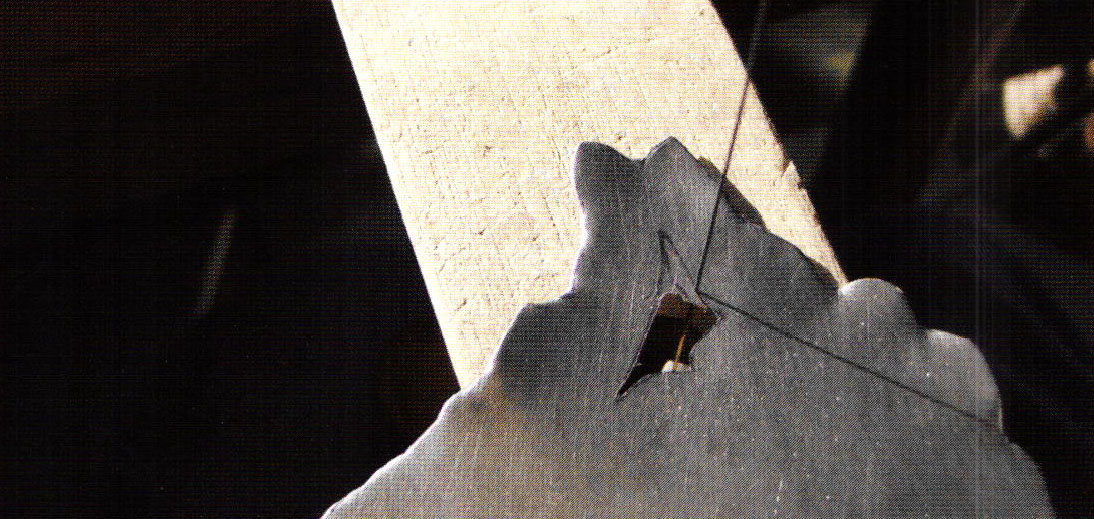 | An interior shape was sawed out with a jewelry saw. |
 | The drawing was transferred to the steel with a permanent marker, and chasing tools were used to indent along the lines with a hammer, only the major contours were incised. |
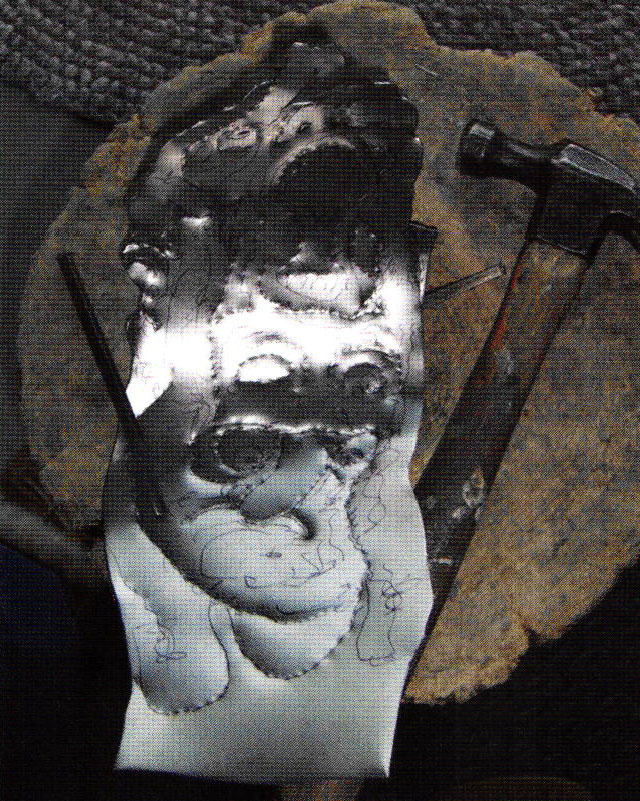
 | Various metal - working hammers were used to shape relief surfaces (repousse), beginning by working the reverse side of the piece, and then the front side. A pine stump, which has endured all my public art hammered works, was again employed. The composition of pine wood offers an ideal amount of resistance and " give " for working steel. I do not heat the steel, since working cold works fine. |
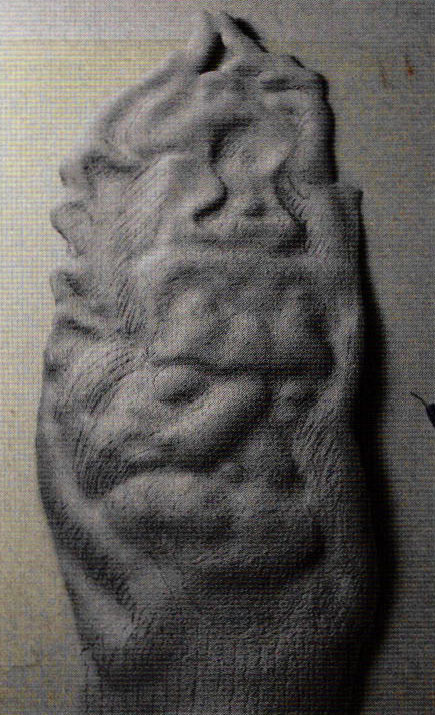
 | The completed repoussed piece. |
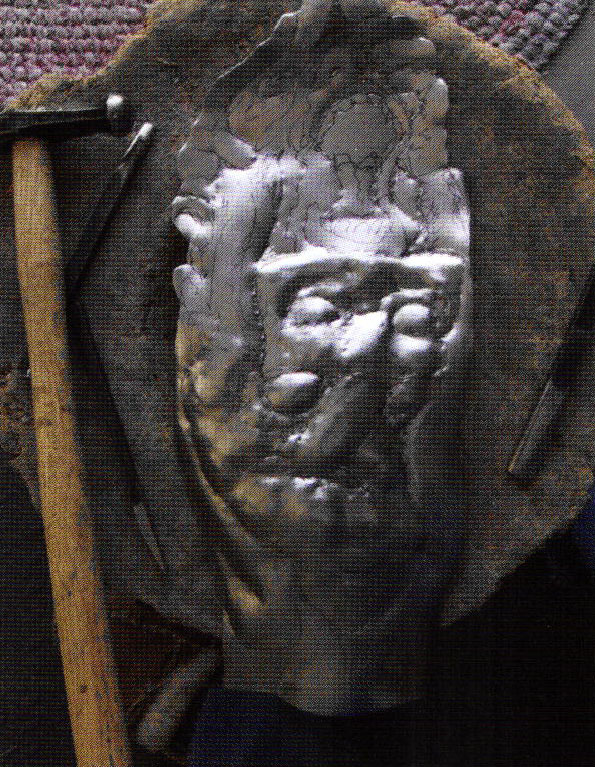
 | Sharp or rough edges were filed and the steel was carefully cleaned with cleanser and hot water and quickly dried to avoid rust. Enamel application covered and obscured most tool marks. |
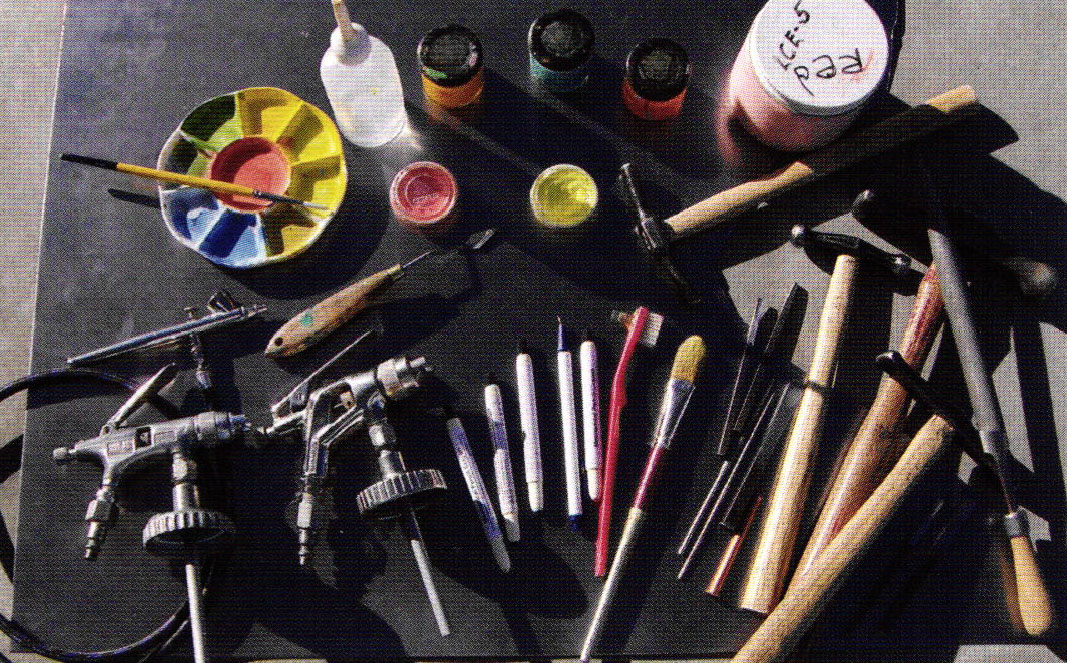
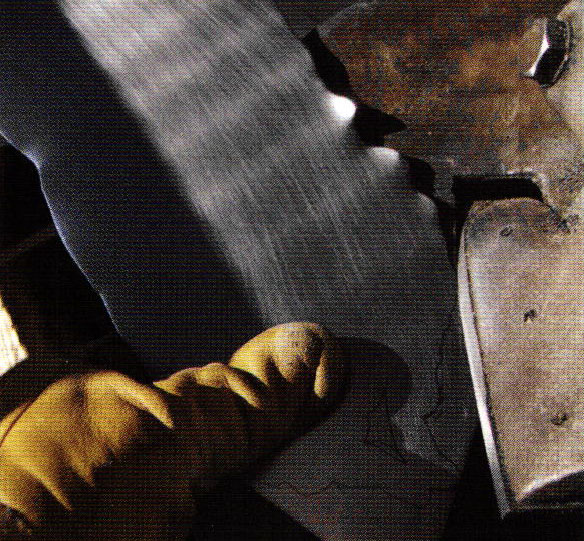
 | I applied ground coat formulated for iron and steel, using an automotive spray-gun equipped with a large spray nozzle. I always strain the ground coat enamel with a 80 mesh strainer to avoid spraying problems. I began by spraying the back of the piece with a coating somewhat less than an X inch thick. Care was taken to apply the enamel coating evenly on rises and recesses to avoid burn-off. |
 | I sprayed the front of the piece somewhat thicker than the back to ensure no burning would occur. Because this enamel piece had high relief, I allowed the coating to "set-up"- dry a little - then I again sprayed the high areas to make sure they were well coated. |
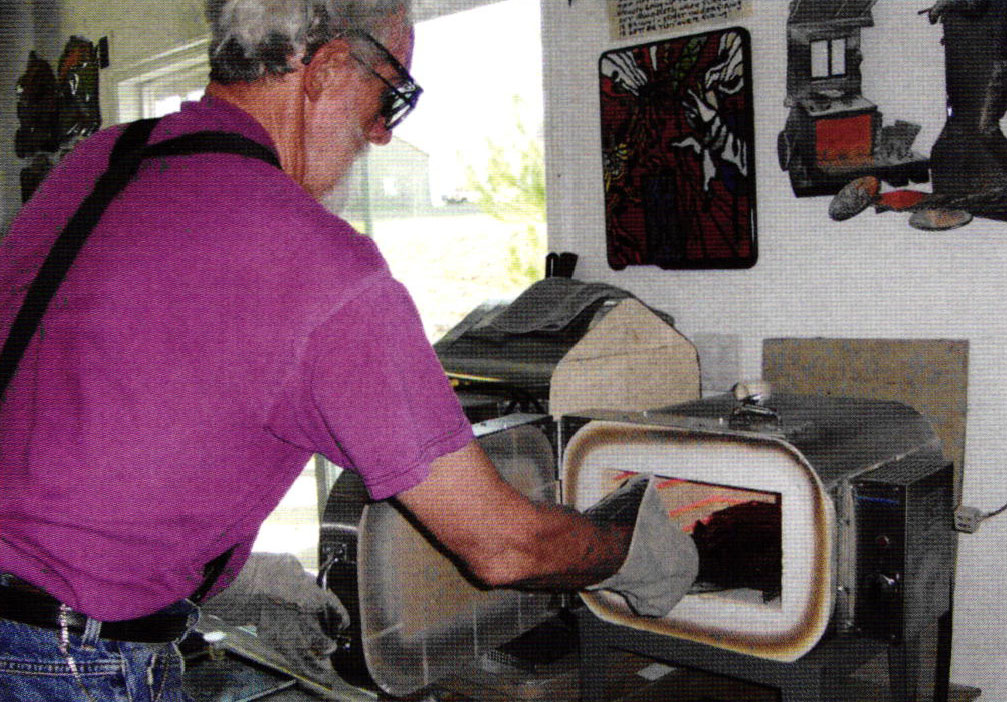 | The ground coating was dried thoroughly on a large hot plate . The enamel was fired at 1500 °F for five minutes. |
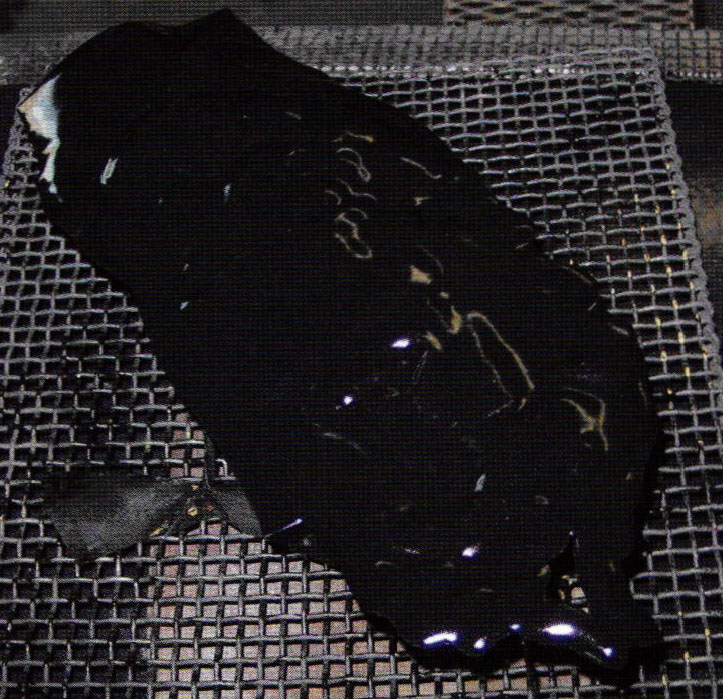 | Fired ground coat. |
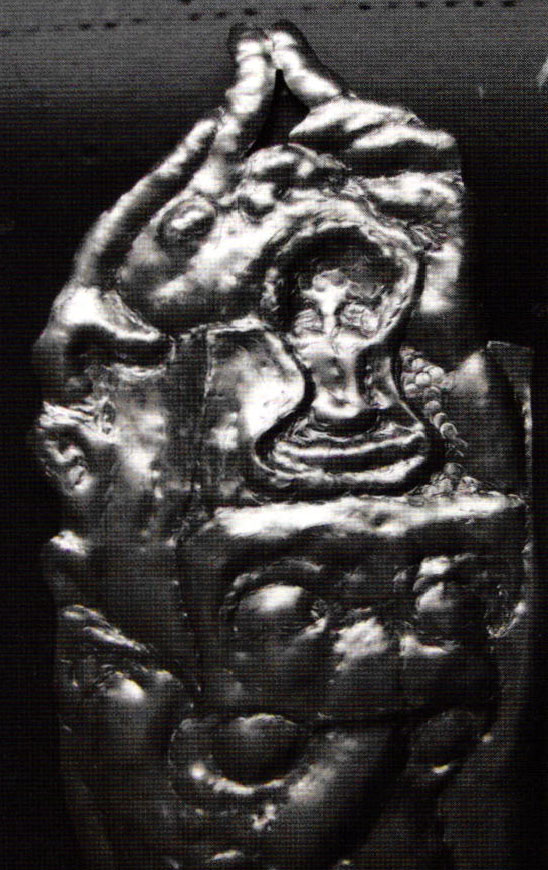
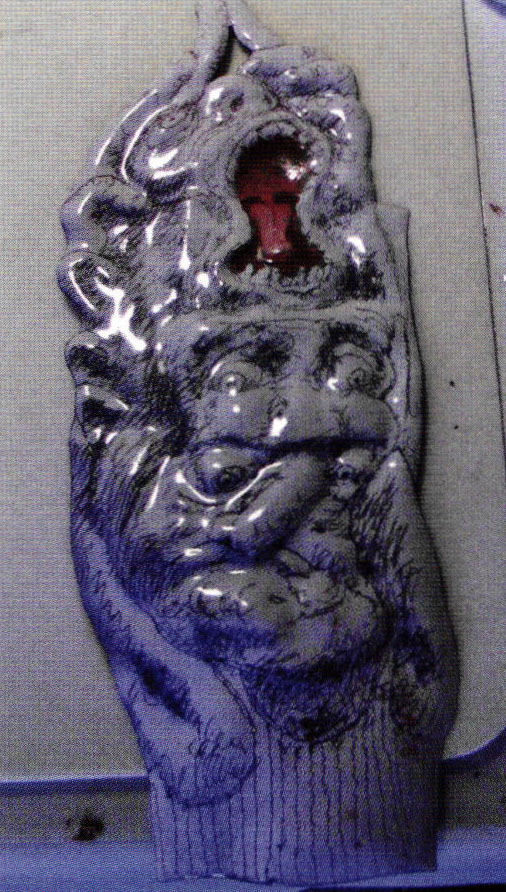
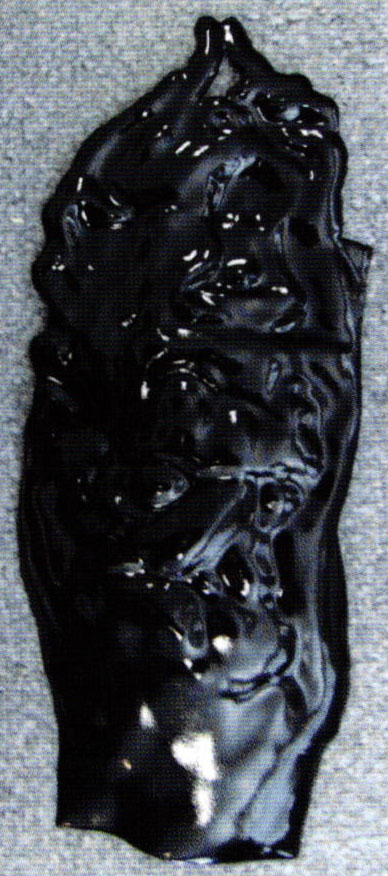 | In much of my sgraffito-grisaille enamels I used a black base color coat over the ground coat, resulting in a black line drawing. For "The Quickening" I desired to contrast the individuals' three transforming states of being by the colors blue, green, and red evoking a progression of mood and changing essence in the characters represented. |
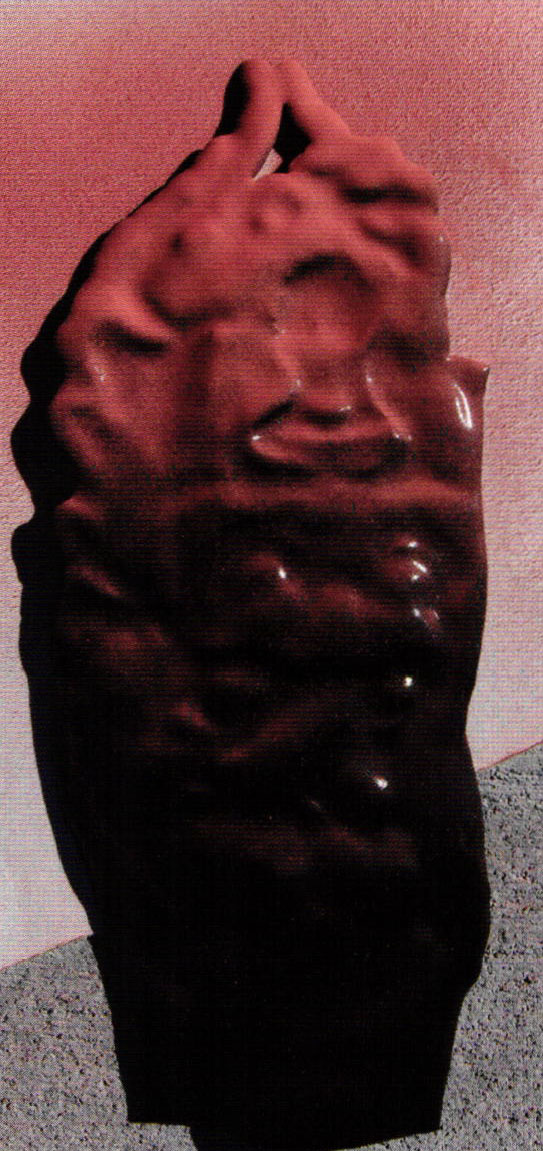 | Porcelain and/or brushable enamel colors were sprayed, beginning with red, from a low angle to bring out the relief. |
 | Next, blue was sprayed in a similar manner on the lower half of the enamel. |
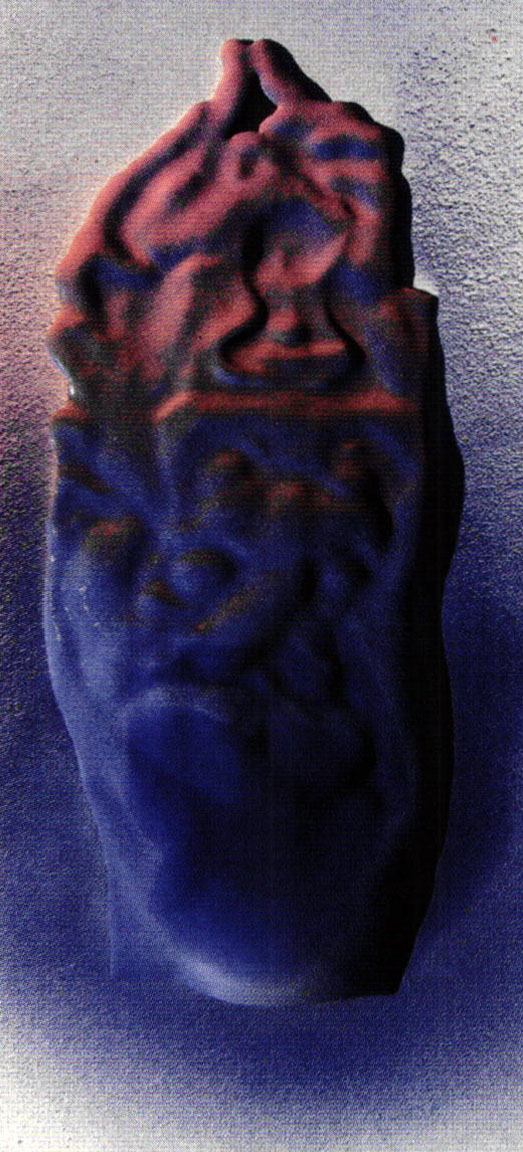 | The result was a contrast of the blue with the red suggesting cool shadows. |
 | Upon firing I realized the red needed more strength. |
 | The red coat was sprayed again and green was added on the center image. |
 | The base color coats were fired at 1450 °F for 2 ½ minutes. |
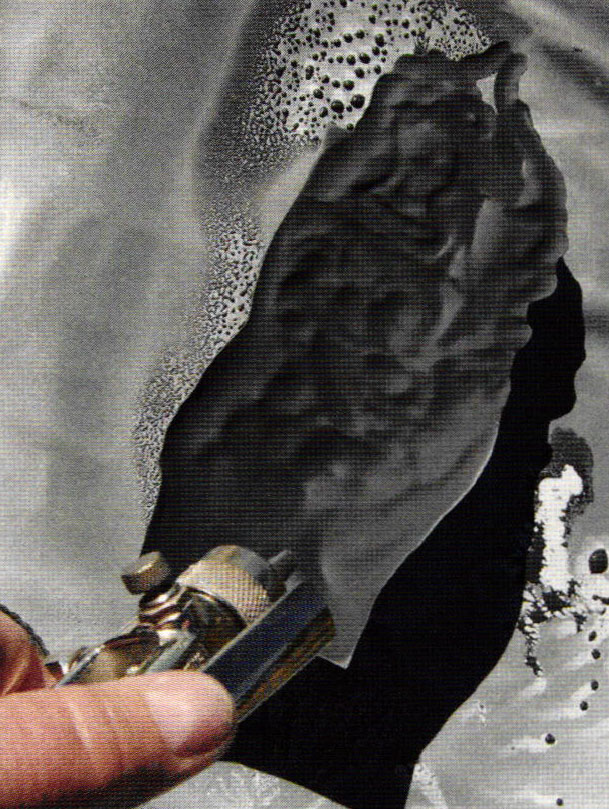
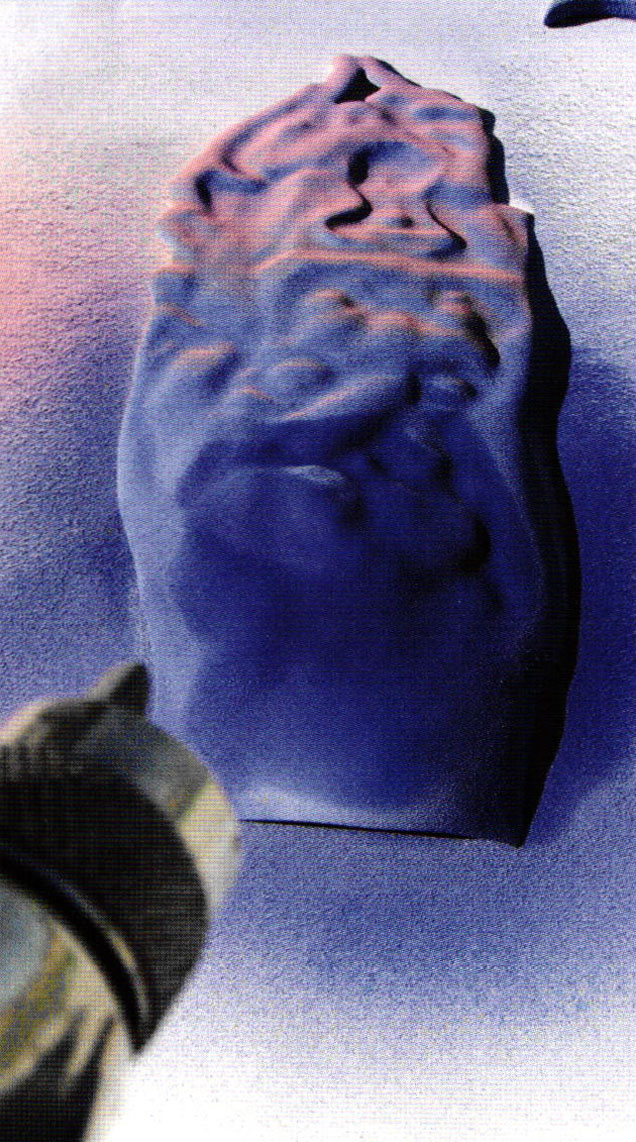
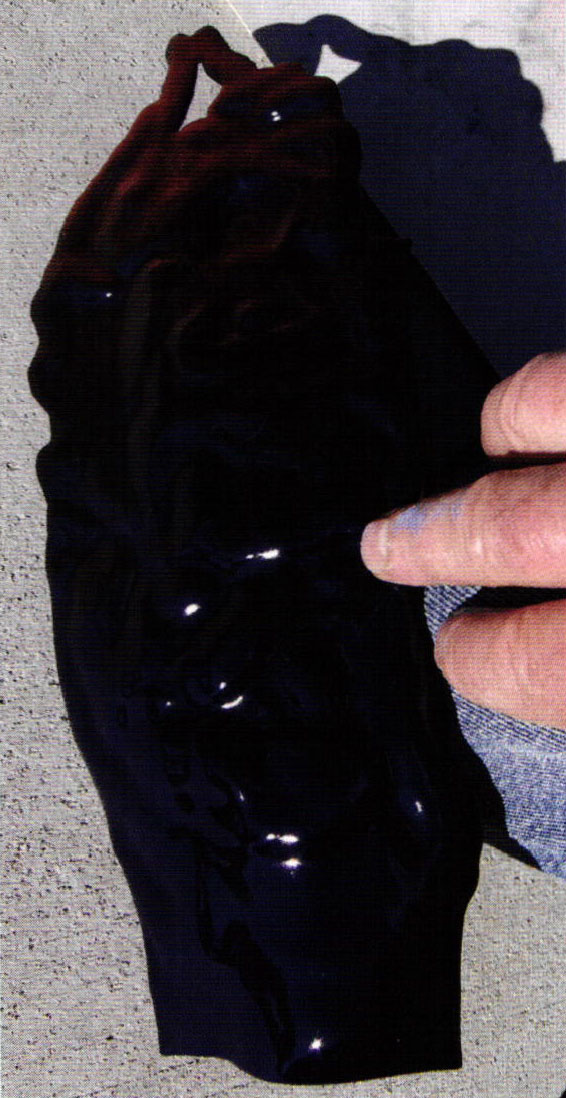
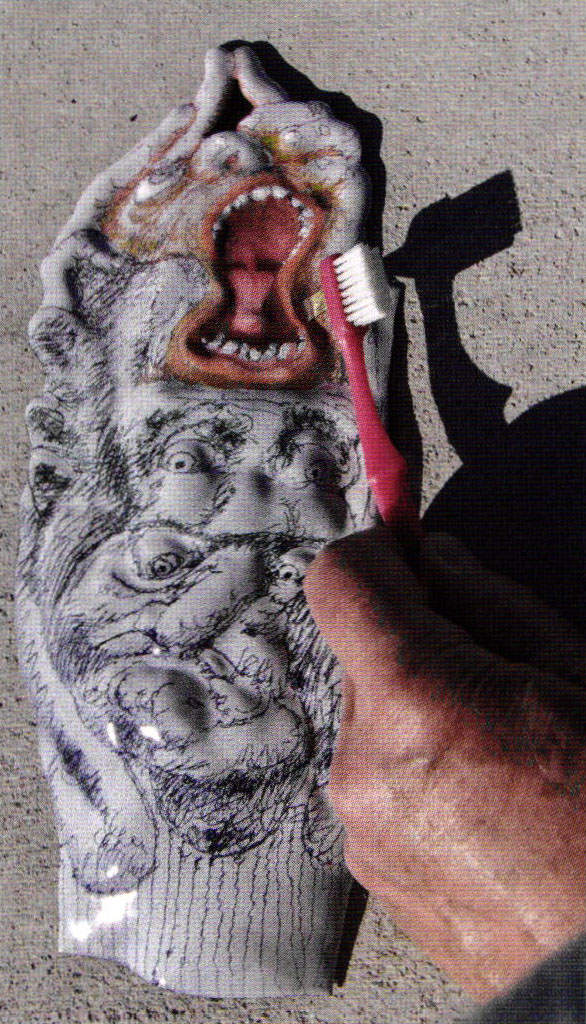
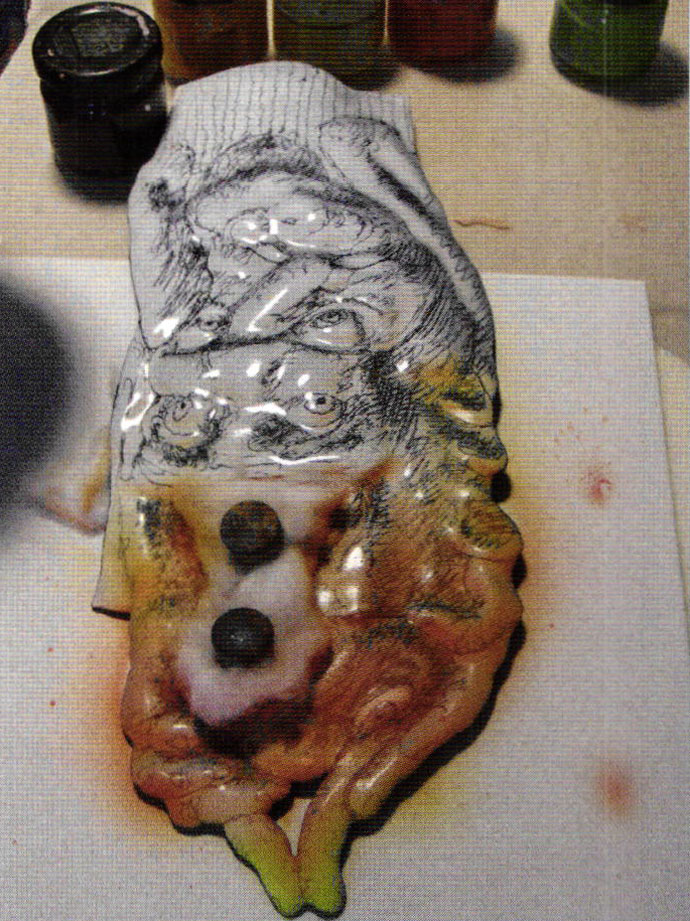
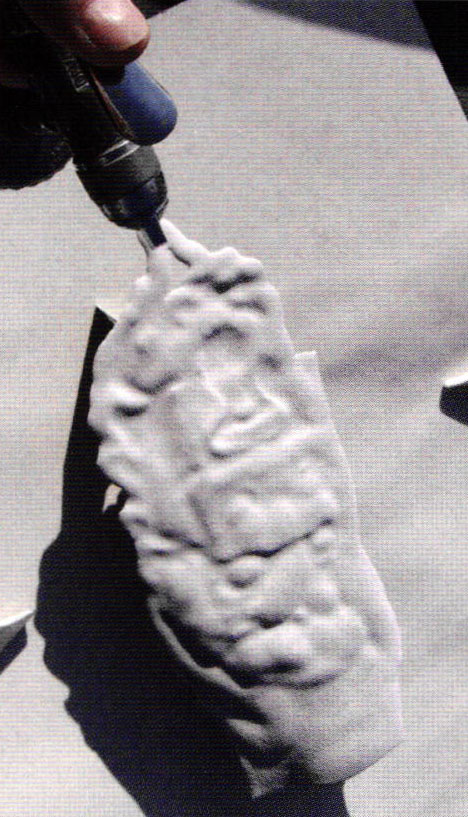 | A smaller spray-gun was used to achieve a granular spray coat of white porcelain enamel. I used approximately 20-25 lbs. of air pressure r.vith an adjustable air compressor. A low pressure is required to achieve the build up of enamel grains while avoiding blorving them loose. The spraygun should be over a foot away from the enamel art. It was necessary to begin spraying, using a light spray from a low angle toward the top of,the art piece to establish the texture to be built up with additional spray layers; this angle also suggested a light source, as the indented areas received less build-up, suggesting shadorvs. I built-up thickness by slighdy drying each layers between sprays, stopping short of too much build-up indicated by grains breaking off. |
 | Reasons for using granular spray with sgraffito work in porcelain enamel: to avoid chipping, by dislodging only individual particles, not large chunks between closely drawn cross-hatch lines. To allow freedom and spontaneity, even the most finely drawn lines are retained while using an effectively heavy enamel coat which endures many firings. |
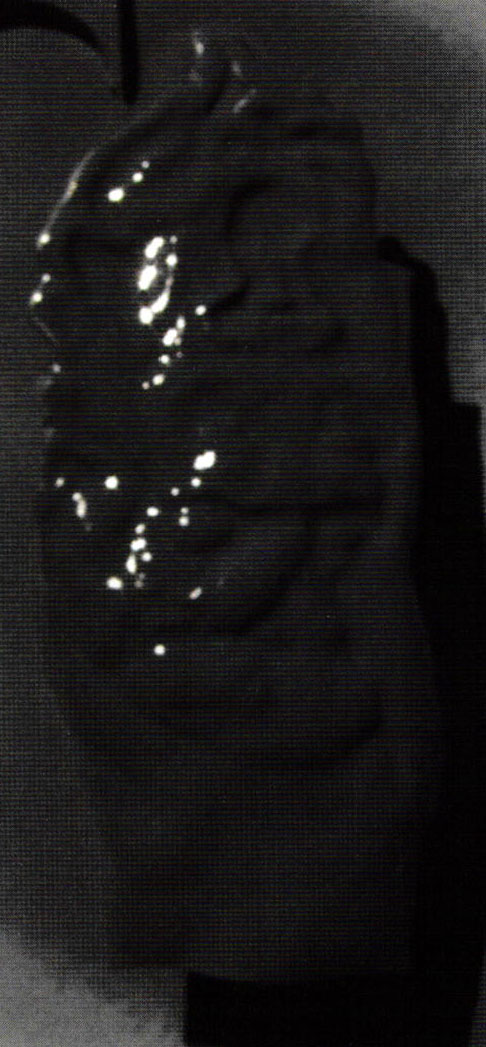
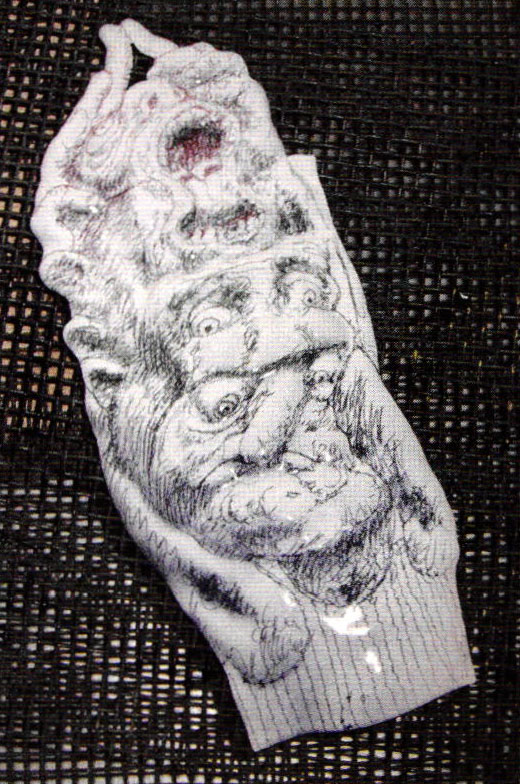
 | A pin inserted in an empty pen is an ideal sgraffito drawing tool if the pin is slightly curved down at its tip. Sgraffito lines were drawn into the dry granular spray. |
 | Once the sgraffito drawing was complete the enamel piece was tipped over to shed loosened granules, and was gently blown on with air to remove additional ones. Some lines were further eroded by lightly brushing with a soft watercolor brush, thus creating darker lines in select areas. |
 | The enamel piece was fired at I350 °F for 3 minutes resulting in blue, green and red line work. |
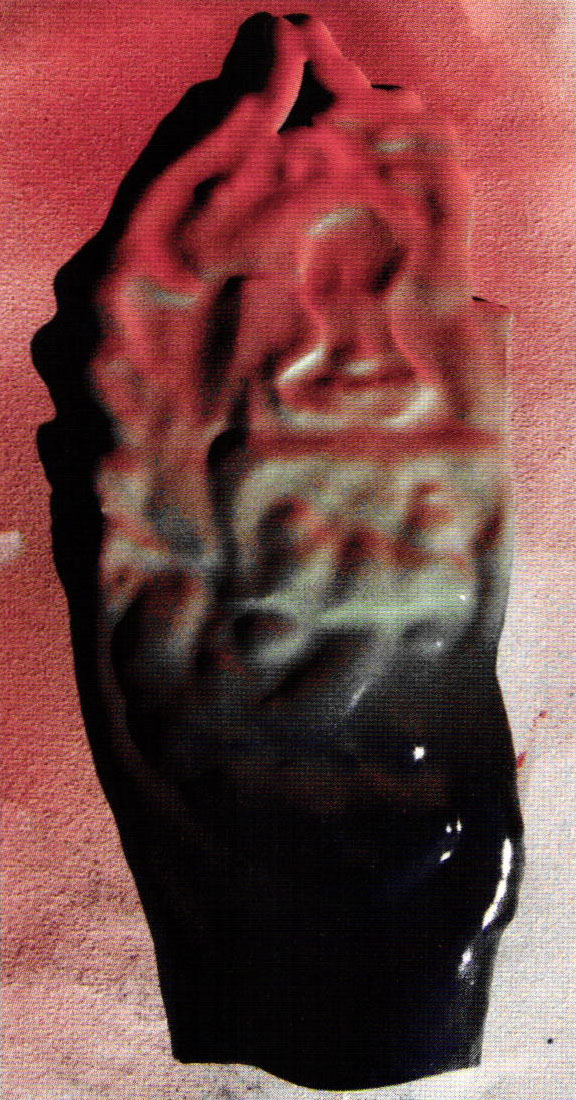
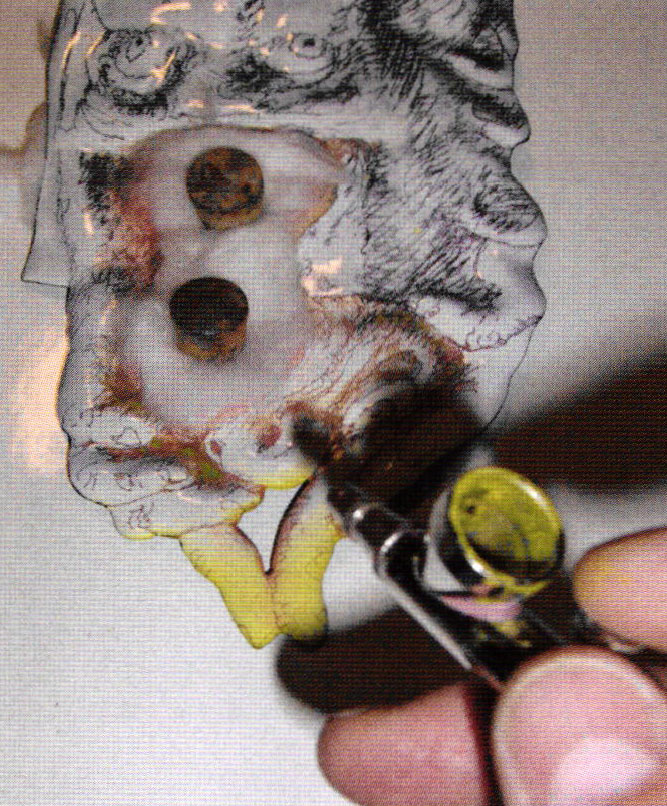
 | By using a finely milled enamel suspended in oil, it is possible to simulate an oil painting- blended effect. I began by mixing my colors with a small painting knife, thinning the oil based screening enamel with rubbing alcohol to a consistency easily blended with a small pointed brush, and began painting. |
 | After painting the mouth and tongue with reds and pink tones, orange was applied to the lips and dark areas around the eyes and fingers before airbrushing lighter tones; a multi-pointed sgraffito tool softened hard edges. |
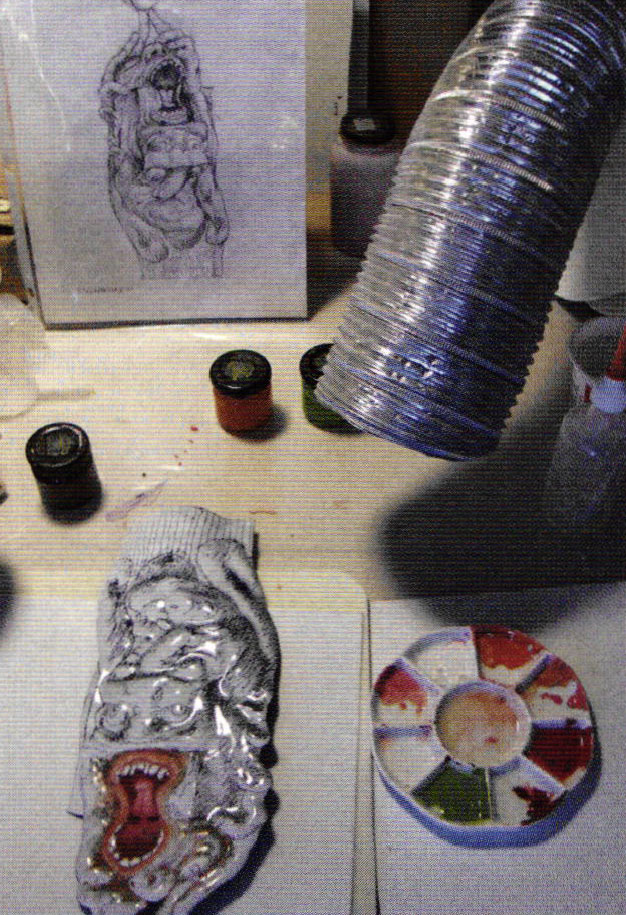 | The combination of oil, alcohol, and airbrush spray dictates a venting system. I use a large box connected with flexible dryer tubing to a wall mounted blower. The tubing is easily moved to exhaust spray fumes. |
 | After drying the painted mouth with a hair dryer, I placed a wad of cotton over it and weighted the masking to keep it from moving during airbrushing. Again, using oil based enamel which was formulated to be used for silk screening, I mixed the enamel in a porcelain palette dish to isolate each color. Rubbing alcohol thinned the oil enamel to a watery consistency, enabling it to flow through the airbrush. I use a gravity cup airbrush which is less apt to plug with enamel; between sprays I added water to the cup to prevent dry out. I began with yellow airbrushed enamel using 20lbs. air pressure. |
 | Orange was airbrushed over areas beyond the yellow, again thinned with a squeeze bottle of rubbing alcohol; the spray dries almost immediately because of evaporation, thus avoiding any dripping / running of the enamel. The cup is filled with a loaded brush of enamel and thinned if necessary with the bottle, which is equipped with a nipple. |
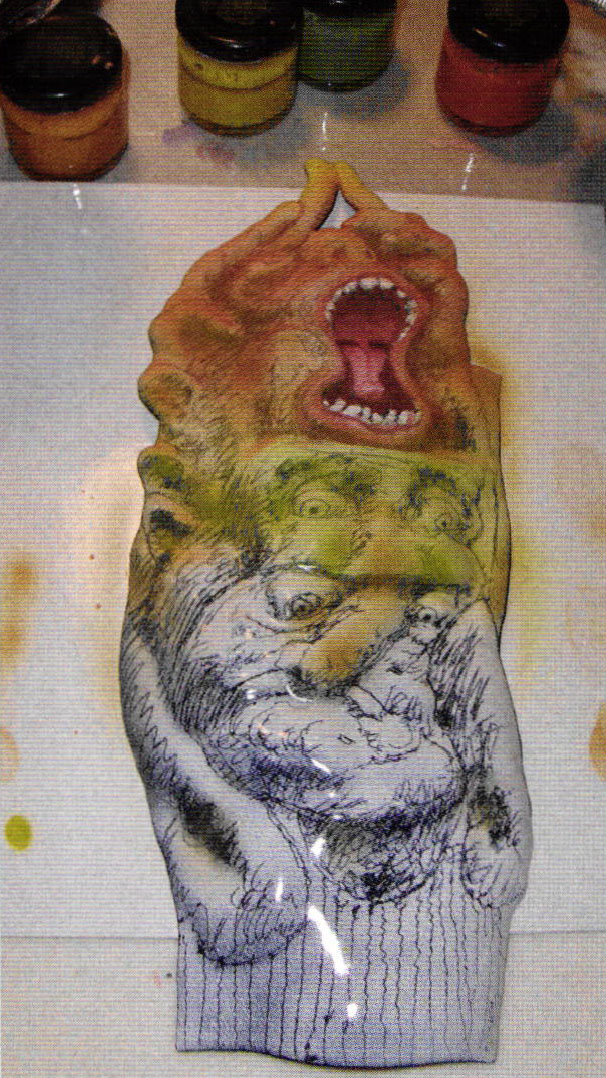 | The orange area was covered with a cotton mask, and yellow green was sprayed on the center image. |
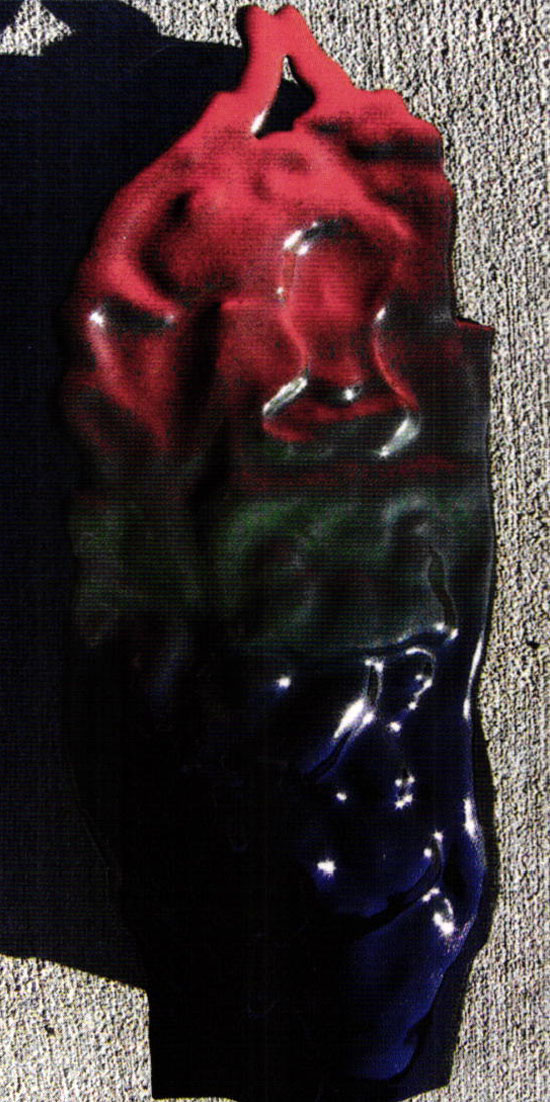
 | In like manner blue was applied to the lower image. At this point I began to remove enamel from areas meant to remain white: teeth, eyes and highlights. The piece was placed outside on a hot plate, and heat was gradually increased to burn out the oil in the airbrush coating; final burn-off (smoking) was accomplished by repeated plunging into the kiln until no more smoke was seen, or smelled, necessitating a good exhaust system! |
 | The piece will look pale and dull after smoking and final touch-up of highlights must be done using sgraffito tools and stiff small brushes before firing. |
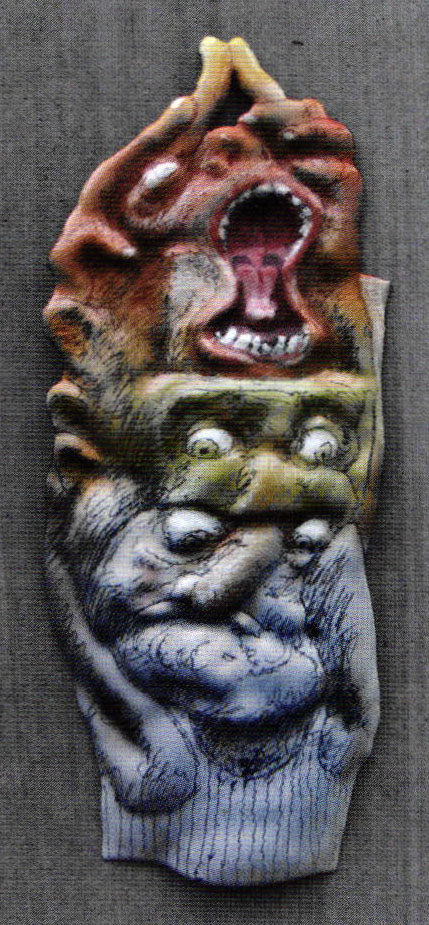 | The airbrushed enamel coating was fired at 1325″ F for 2 minutes. I took care not to over fire these delicate coats. |
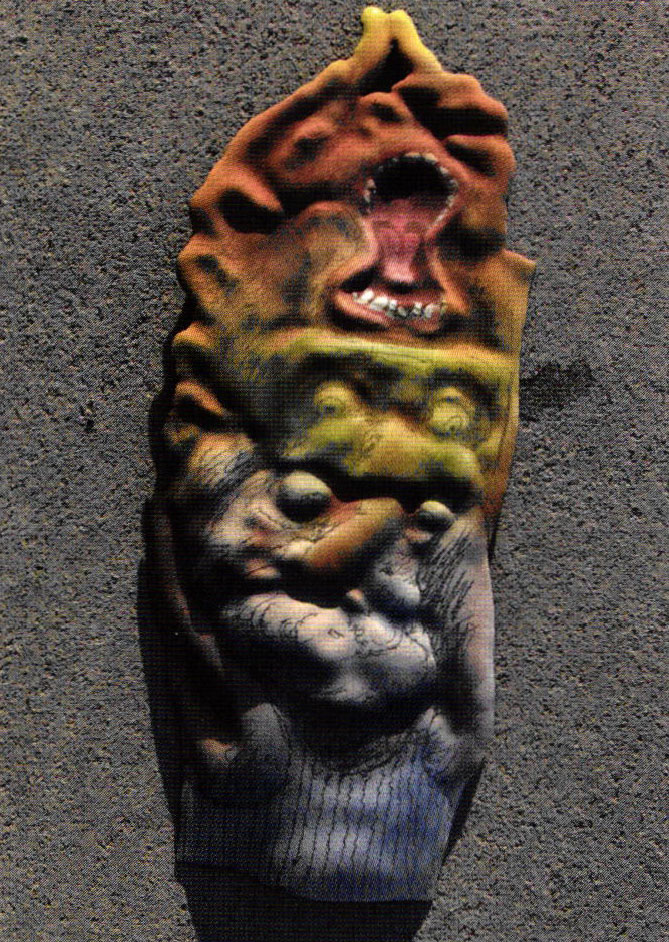
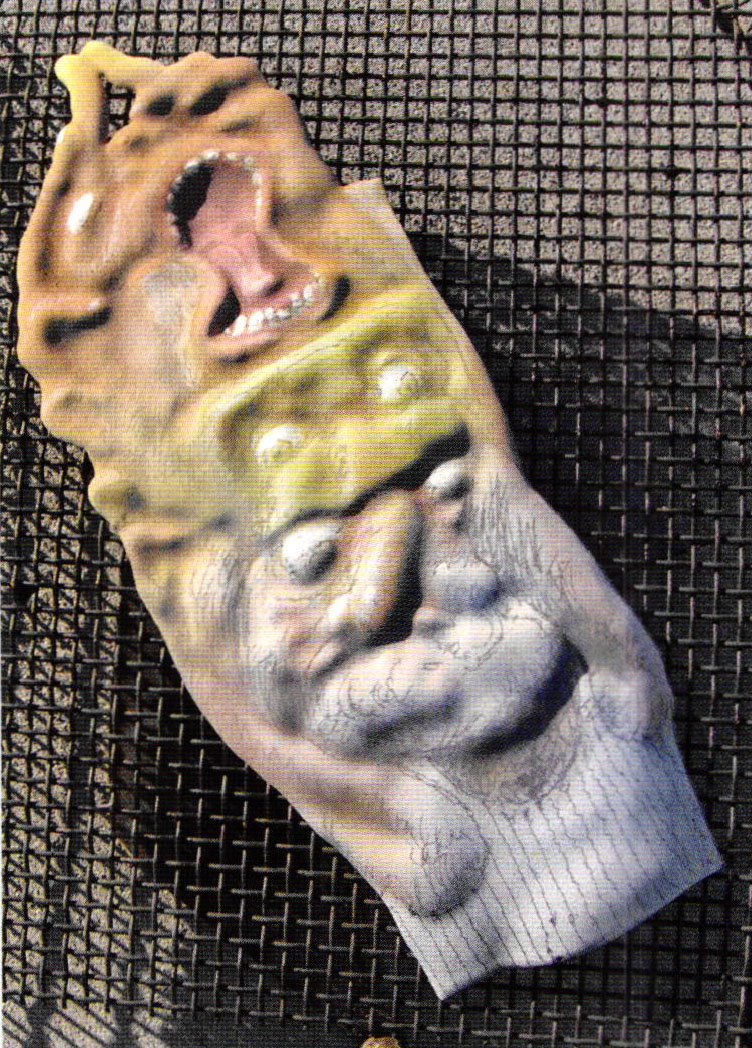
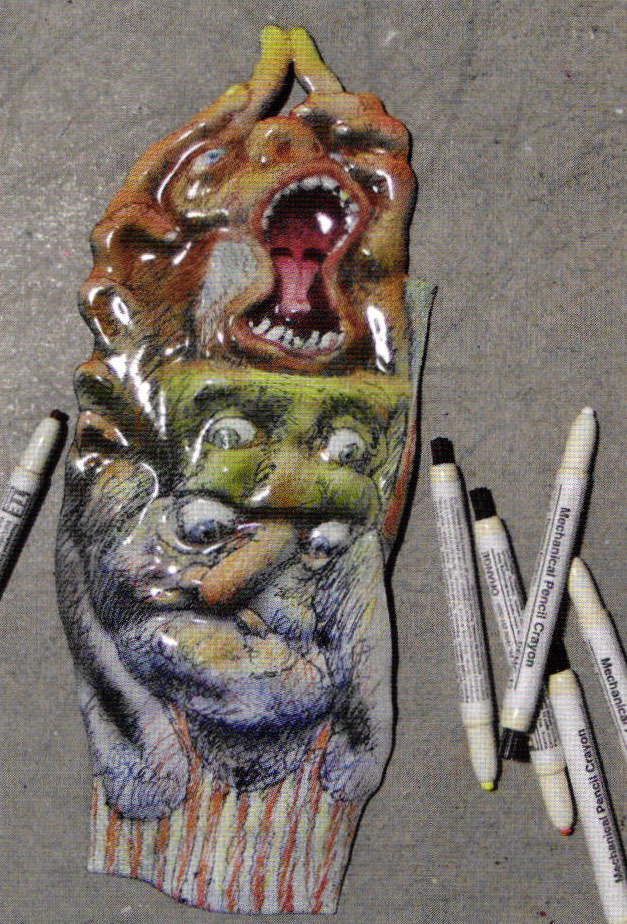 | Thompson enamel crayons, blue, orange, yellow and red were applied to strengthen the airbrush color while adding a spontaneous linear expression, tying color and sgraffito together. |
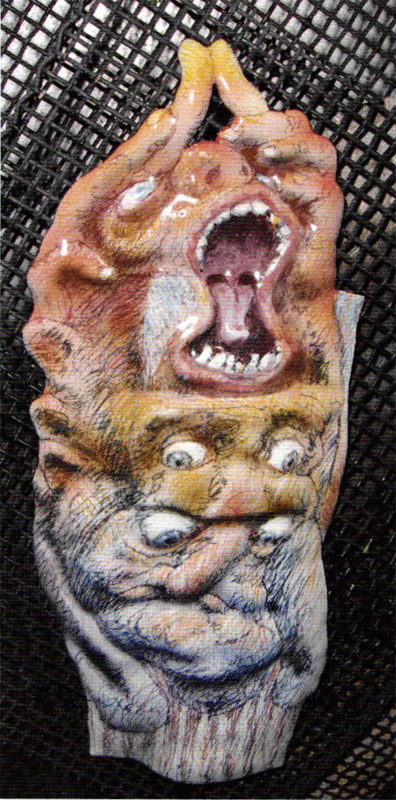 | The crayon enamel was fired at 1325 °F for 2 minutes - the final firing. During the cooling the colors gradually changed and became more pronounced. |
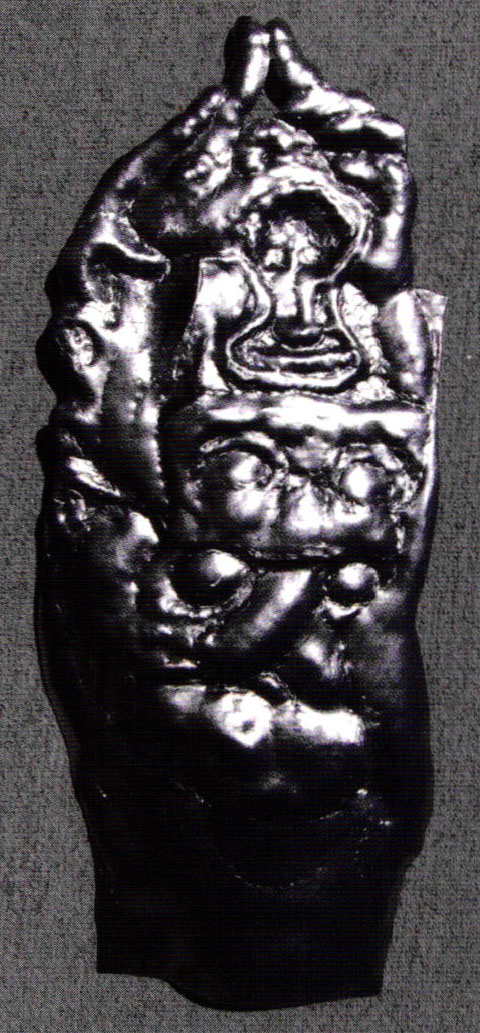
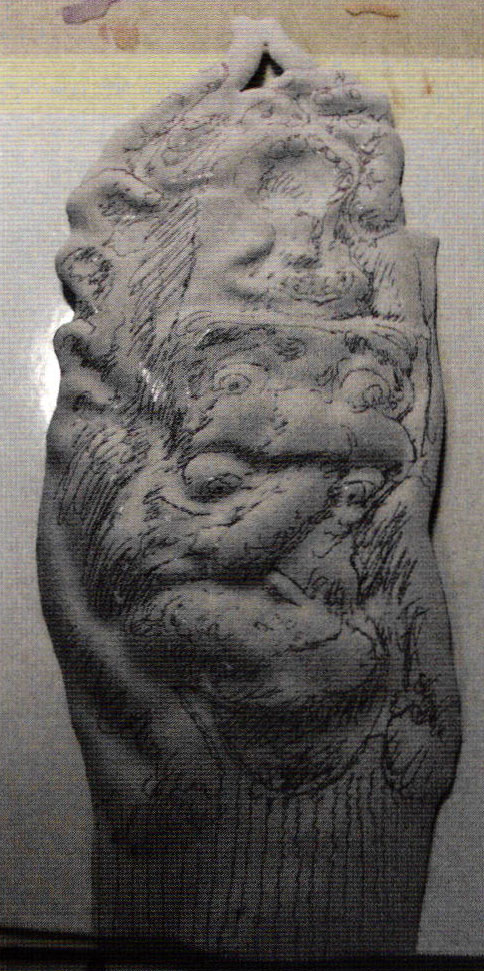
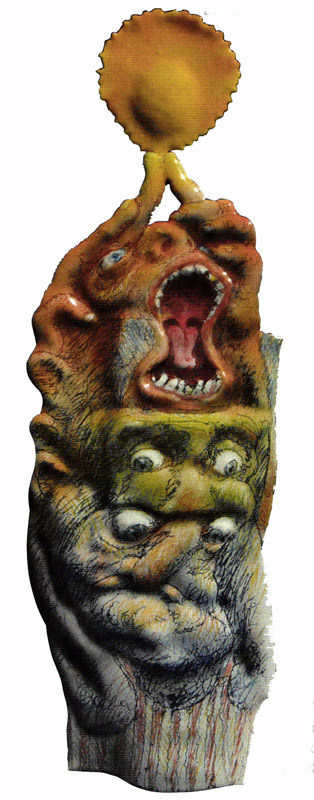
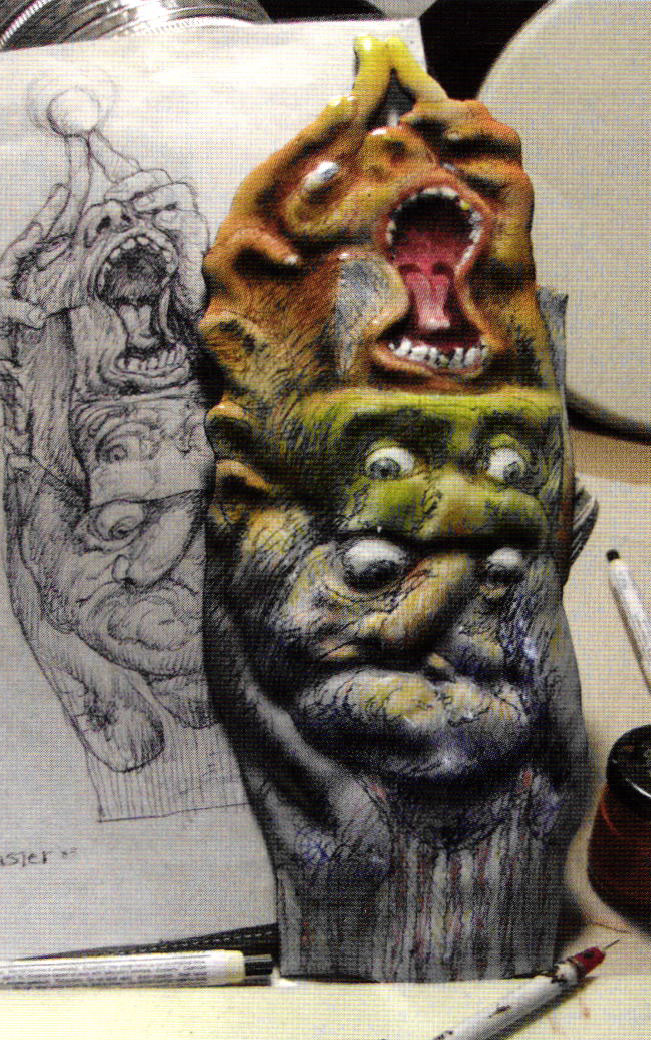 | The final enamel compared to the original drawing. |
 | The orb of glorious transforming power on the top of "The Quickening: was made separately and as attached using a strong adhesive. The whole project came together without mishap and was entered in the Enamelist Society exhibition, and was accepted. |
By John Killmaster [Volume 28, Number 5, December, 2009]
In association with
Glass on Metal is the only publication dedicated to enameling and related arts. Technical information, book reviews, how-to articles and insight on contemporary enamelers highlight each issue.
Related Articles

Channel Setting Princess Cuts
Recently, a woman brought in her diamonds and asked to have a ring made with them. Her requirements were very...
Read More
Platinum Bridal Jewelry
If you have never manufactured with platinum and you think that you are ready, if you manufacture with platinum, but...
Read More

Blacksmith Enameling
February 21 - 22, 2004 was another high point in our enameling career. Irmgard and I travelled to the John...
Read More

The Basic Techniques of Shell Inlay
To learn the art of inlay, its best to start with the basics. This project will walk you through the...
Read More


The All-In-One Jewelry Making Solution At Your Fingertips
When you join the Ganoksin community, you get the tools you need to take your work to the next level.
