
Creating a Two Tone Ring
5 Minute Read
In this issue I'm going to walk you through the creation of a ring with two different colors of gold. My soon-to-be sister-in-law (Kelly) began talking to me about what she wanted in her wedding ring. Of course the first thing that stood out in my mind were those two dreaded words: 'two-tone'.

A lot of mass manufactured jewelry is cast in one color and spot plated to create this effect. For this project, I'm going to actually make it in two different colors of gold.
Creating a Two Tone Ring
The Idea
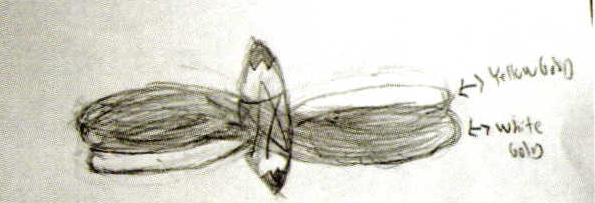
This entire project was done via telephone and email, so as you can imagine, the first few ideas were way off base. But, after a few days of sending ideas and photos back and forth, I had enough of an idea to do a basic sketch. After Kelly saw the sketch she said that it was almost what she wanted. The only change was to make the yellow gold section about half as thick as the white gold section. If you look closely at the sketch, you can see where I erased the original yellow gold line and brought it in a little. After Kelly saw the revised sketch, she said 'That's it! That's what I want." (I know I'm not the best sketch artist in the world, but if it sells the job, it's good enough)
Where to Start
The main problem with creating a piece like this is that you have to treat the two separate metals as separate elements during the casting phase. I thought for a day about how to carve the wax. I originally planned on carving it as two pieces, but decided that wouldn't work. I elected to carve the wax as one element and then deal with the casting issue when I got that far. As I've said before, if you don't know where to start just start somewhere and it'll make itself. That's exactly what I did. I just started carving and let the piece guide me.
The photo shows the wax beginning to take shape. It's here that I start trying to visualize exactly what the finished ring is going to look like. I'm also trying to figure out exactly how I'm going to transition from white to yellow and back again.
At first, my plan was to finish and detail only the white gold sections, and then grind away the bulk of the area that will be yellow gold. Then I was going to carve a piece of wax that I could cast in yellow gold and make a 'cap' to solder in place. In the end, I changed my mind.
Using your optivisor, you can see that I decided to completely finish the wax in the exact form of the finished piece. Next, using an exact blade, I carefully cut out the entire center section to be cast in yellow gold.
When I started this project, I had no idea that I was going to take an exacto blade and separate the elements in this fashion. It kind of came out of left field. The reason I'm telling you this is simple. This publication's purpose is to teach bench jewelers new techniques, but also to give you a little insight as to what to expect when you take on a project like this. The insight I'd like to interject is this: When you make custom jewelry you're making something that you've never made before, so the road isn't all nicely mapped out. You just start and see where the project takes you. Sometimes you get it right the first time, and sometimes you have
to back track a little to make the project work. The key is to be able to look at a project in the beginning and try to estimate the amount of time you're going to put into making it and charge accordingly. I knew that somewhere in this project I was going to spend several hours resolving the two tone problem. I didn't know where it was going to crop up, but I knew it was coming. That being said, I added a couple of hour's labor to the estimate to compensate for this. Remember that it's not how many hours you spend on a project that matters but how many of those hours did you anticipate and charge for.
With These Elements, I Thee Wed
Now we have to marry the two elements back together. When I cut them apart, I took a wax pen and carefully filled in the tool marks that were created by the exacto blade. I then built up the ends of the yellow gold ribbon to compensate for the thickness of the blade.
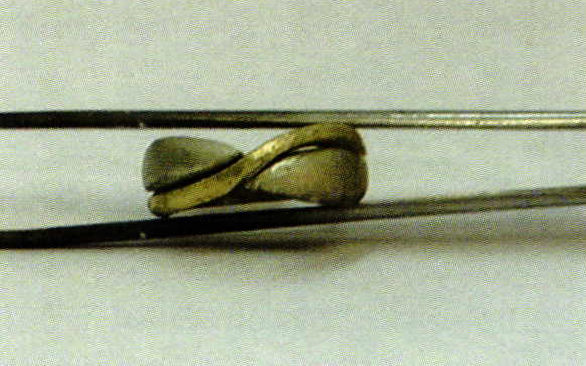
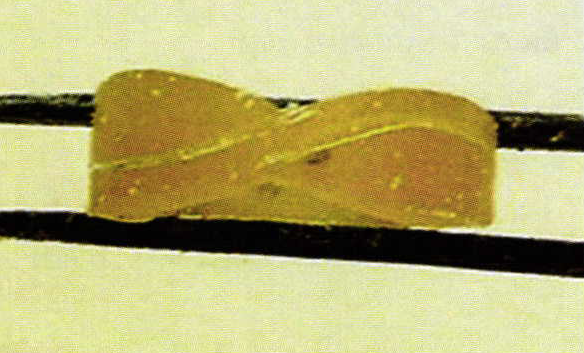
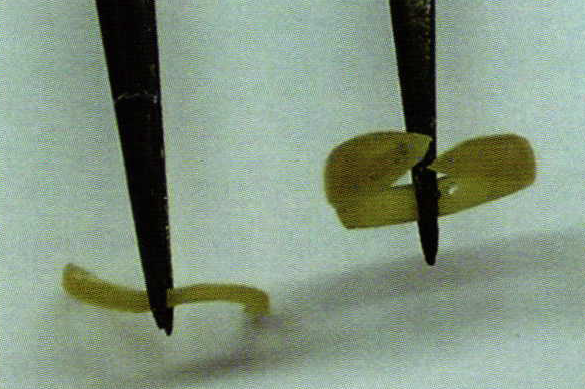
Now with the pieces cast, I start to clean up my castings and see how they look. Once I had the sprues removed and I performed a light filing, I fit the two halves together for the first time. The photo shows that they fit pretty well, but I've still got some work to do.
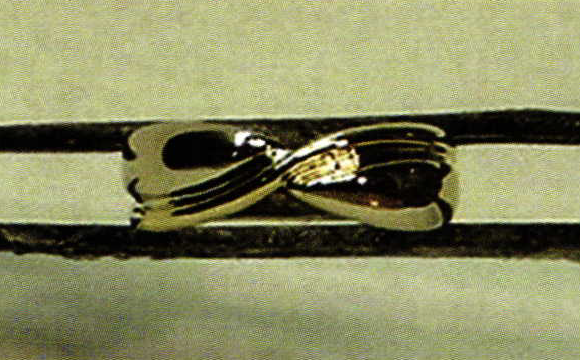
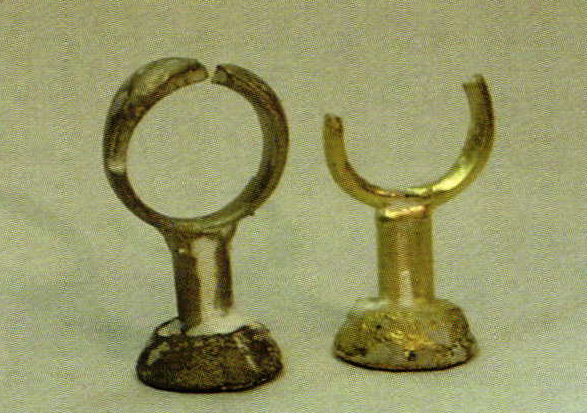
As always, the first thing I do is anneal all of the pieces to make them malleable. Next, I lightly tack one side of the yellow gold element in place and leave the other side un-soldered. Using this technique, I can gently hammer the other side to adjust the contour and fit it snugly into place. Once I'm happy with the fit, I solder it permanently into place. Next, I undo my original tack weld on the other side and repeat the process till I'm happy with the fit. Then lastly,I touch up any areas that need to be soldered for a seamless fit between the two elements. The photo shows the final mounting with the two halves joined.
In Conclusion
I'll let Kelly's email sum this one up:
"Chuck, I know I've told you - but I absolutely love this ring!!!! It is exactly what I was wanting. Perfect."
The good guys win again. Till next time!
Related Articles

950 Palladium: Laser Welding Techniques

Architecture in Silver

Postal Cards and Postage Stamps

Campbell Folk School Enameling Class


The All-In-One Jewelry Making Solution At Your Fingertips
When you join the Ganoksin community, you get the tools you need to take your work to the next level.
