
Customized Mini Clamp Tool
2 Minute Read
I like to hold small pieces of metal with a clamp that allows me to file hands free. I feel it gives me better control, which means faster jobs and better fits.
I took a plain mini hand vise and a 3/8 inch fine thread nut for the first part of the conversion. (Micro-Mark #81582 $8.95 800-225- 1066) Laser welding this clamp will preserve its spring tension.
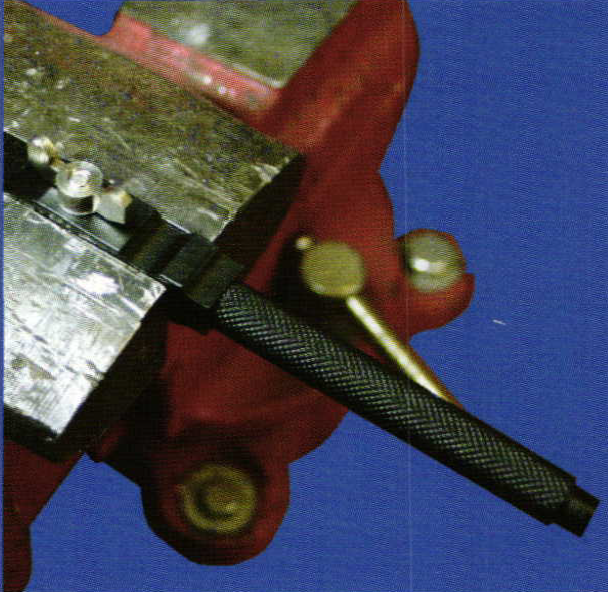
The handle is screwed into place. It can be gently held in a vise to unscrew the handle. The flat base where the handle screws in makes a perfect place to weld the 3/8 inch nut.
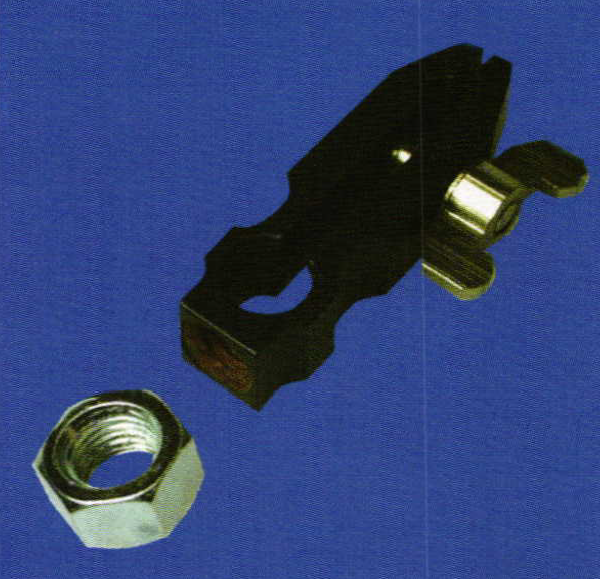
Remove the paint from the bottom of the clamp so the nut can be welded cleanly. Position it evenly on the bottom and laser weld it into place. I like to use stainless steel 30 gauge welding wire. The slight bevels on the nut make perfect groves to fill with stainless laser wire for a strong joint.
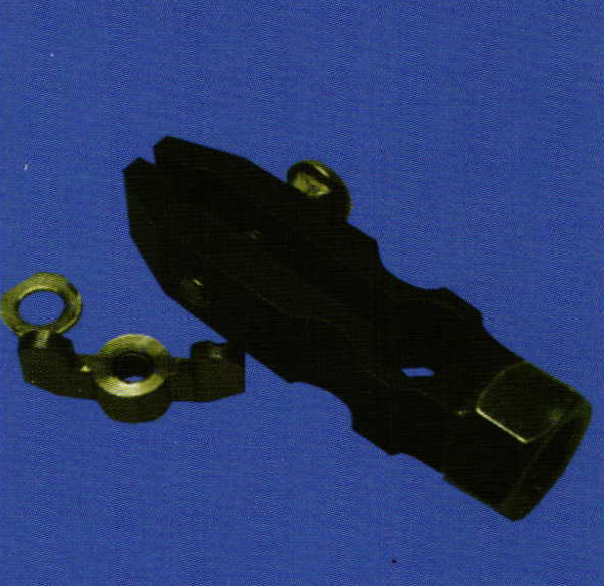
Now that the nut is welded on take off the wing nut and bolt. We will be replacing these with a 10/32 x 3/4 inch button head socket cap screw fully threaded.

Laser weld the 10/32 nut on the back side of the clamp. Be sure to have the screw in place when it's welded so it aligns perfectly.
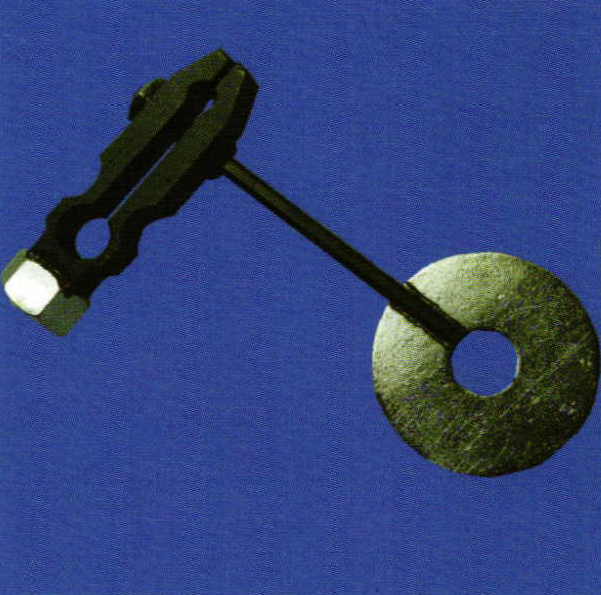
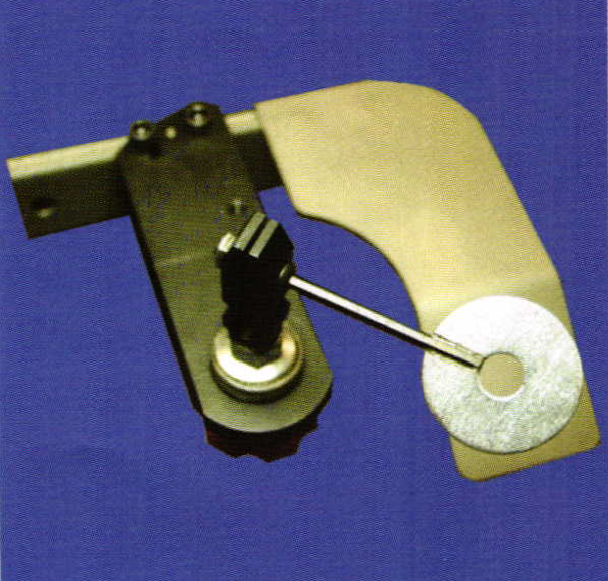
Take a 5/8 inch washer and cut a groove in it to fit the 1/8 inch hex key. Then laser weld in the hex wrench as pictured. Cut to a length that feels comfortable for you. Use a separating disc with safety glasses (they break easily) and cool often to maintain the temper. I like this because it lets you really tighten the clamp without hurting your fingers.
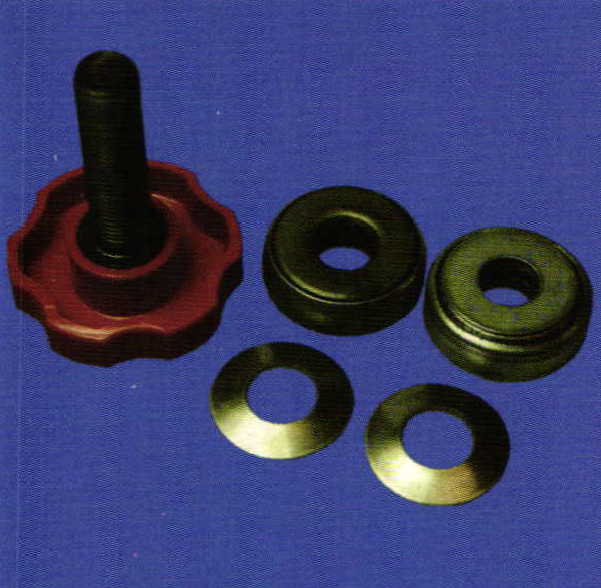
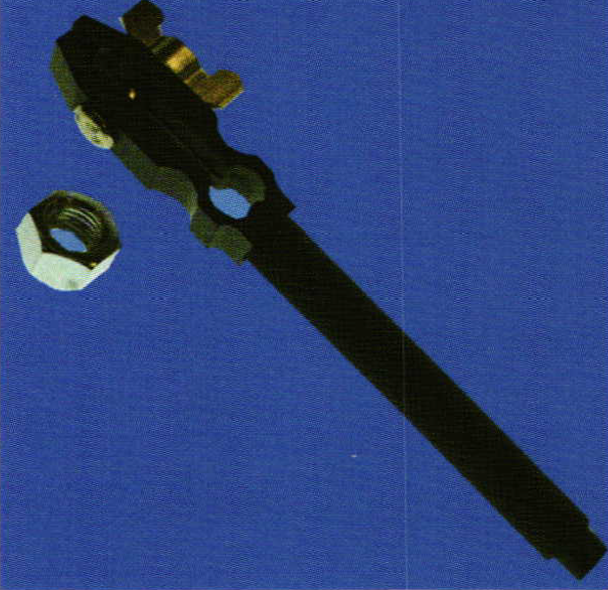
The screw is a 1 1/2 inch socket head cap screw 3/8 inch x 24 fine thread. I use a vise to force on a rosette shaped plastic press-fit thumb screw head (red knob). The red thumb screw can be ordered from McMaster Car at 330-995-5500. Ask for item # 94052A046, which is a pack of 10. You can order the bearings 002-510, and the spring disks 022-193 from Glendo GRS at 800-835-3519.
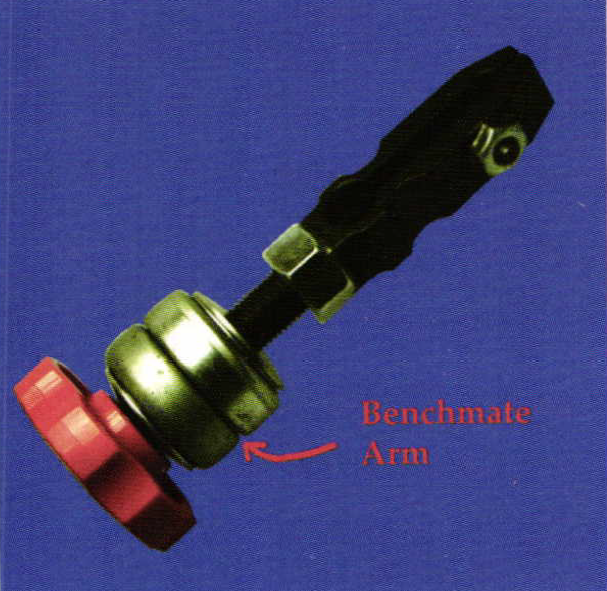
This picture shows the clamp when it is complete. You install it with the Benchmate arm between the two bearings. The spring washers on the outside ofthe bearings allow the clamp to swivel and stay tight. You can spin it and file at many angles with both hands free.
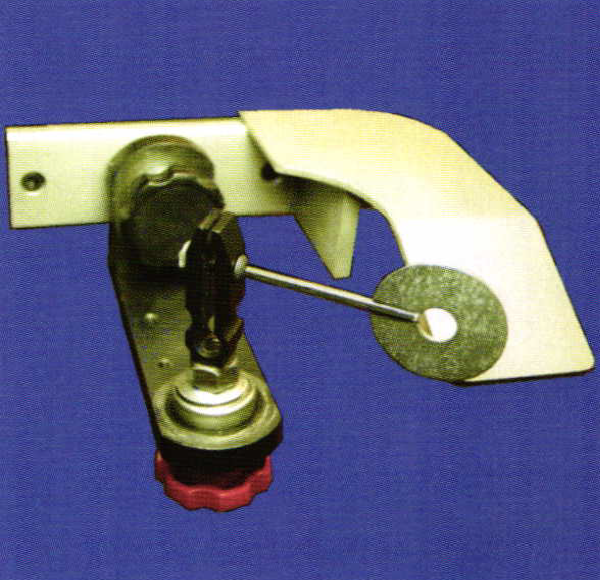
This picture of the Benchmate also has a Steady Rest installed. The clamp will work without the Steady Rest. This picture shows the clamp with the arm down low. This gives you more clearance for larger items.
This view had the arm in the up position for smaller pieces. It makes very detailed filing and sawing much easier. It also holds small pieces of metal for bead setting trim pieces.
Related Articles

Customized Turntable Tool Rack

Using Non-Jeweler’s Tools For Fabrication: How To Repurpose Painting Blades For Bezels

Customized Light Box & Bench Shelf

Tool Alterations


The All-In-One Jewelry Making Solution At Your Fingertips
When you join the Ganoksin community, you get the tools you need to take your work to the next level.
