
Customized Light Box & Bench Shelf
4 Minute Read
Updated on
Steve Satow shares his procedure for customized light box for your jewelry photography projects and customized bench shelf for more storage spaces on your bench.
Customized Light Box | |
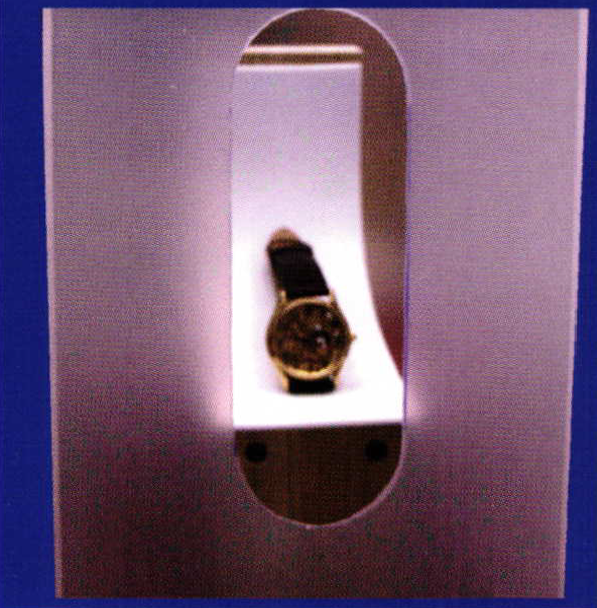
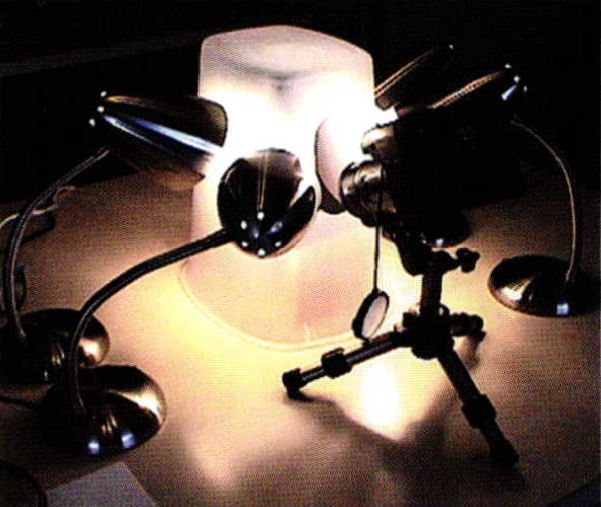 | This is a picture of the Light Box in use, using 4 of 5 lights. The telescoping down light is not pictured. Amini tripod holds a digital camera. |
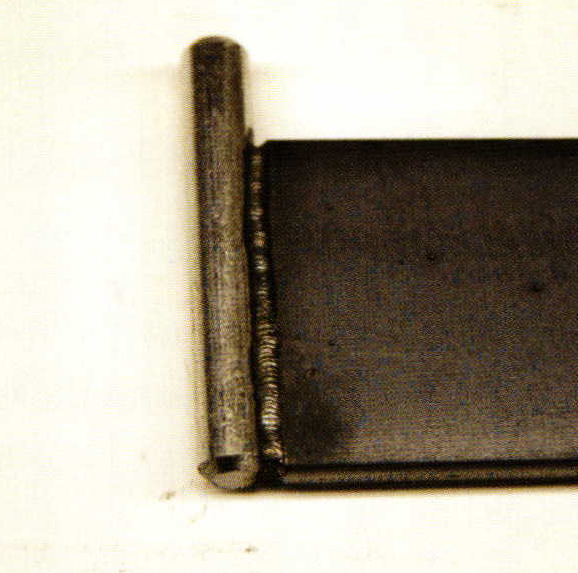
 | The main part for the light box is a translucent waste basket. |
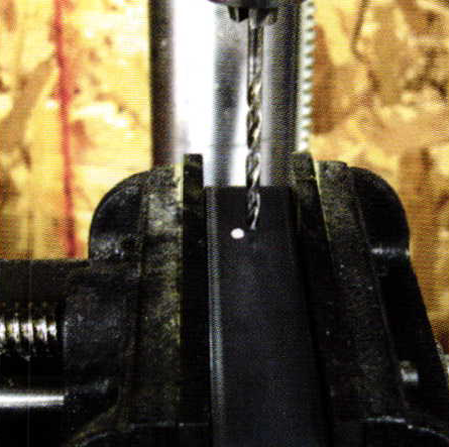
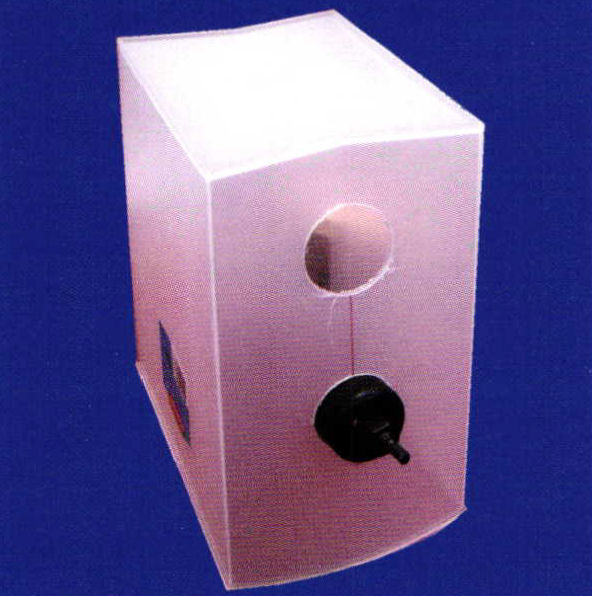 | Turn the waste basket upside down. Draw a line with a sharpie down the center of the side. Put a dot on that line 2 3/4 inches from the basket's bottom and another 7 inches from the bottom. Use a2 1/4 inch diameter hole saw (this is a good average size), center the pilot drill on those dots, and slowly drill them through. |
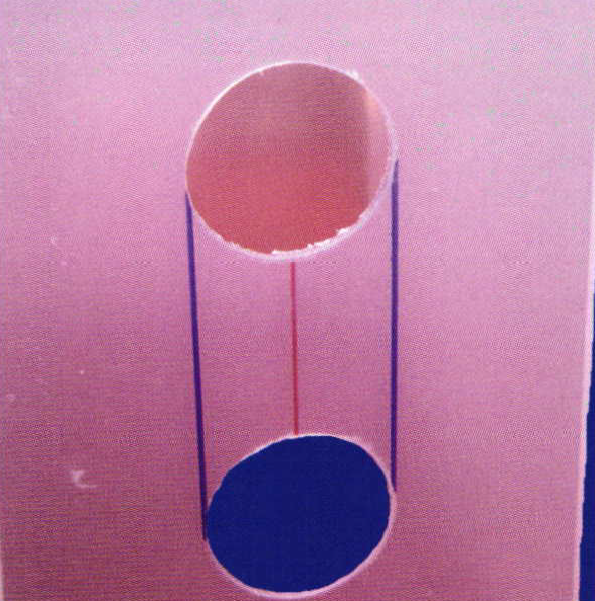 | Draw lines with the sharpie from the outer edges of the holes. Then use a hack saw to cut the plastic. Then use 240 grit sand paper and feather the rough edges. |
Making the Holding Stand | |
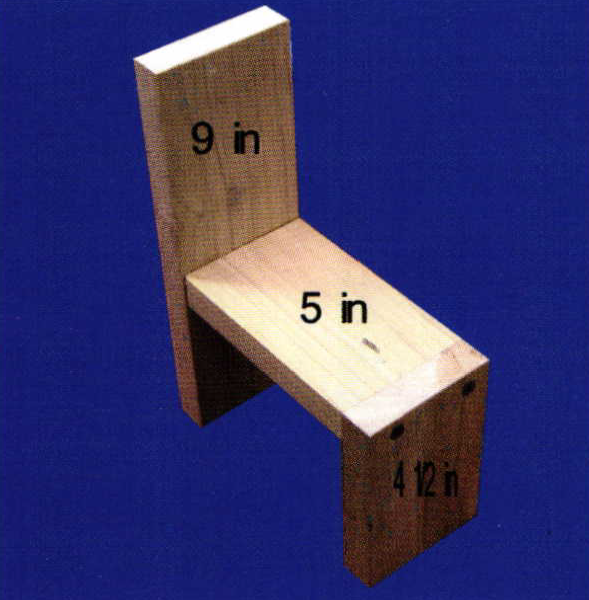 | Find a short piece of good quality 1×4. Cut 3 pieces 9 inches, 5 inches, and 4 1/2 inches long from the piece of wood. Pre-drill and assemble like pictured. I used 2 inch fine thread drywall screws and I always glue as well (high school wood shop lives on). |
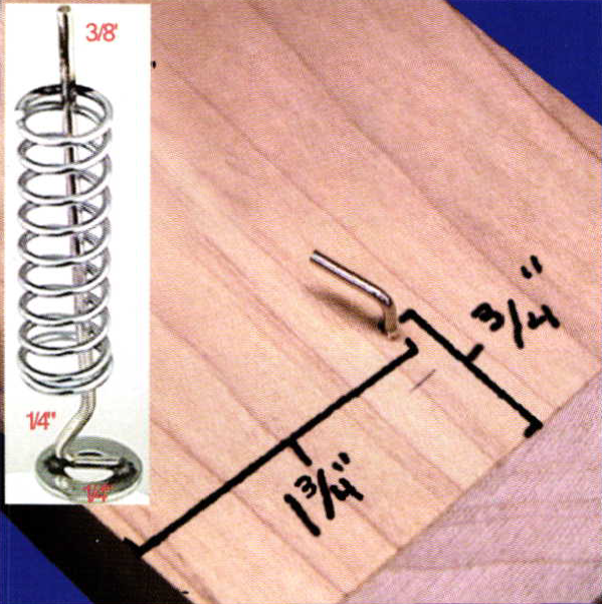 | To make the ring holder, begin by drilling a 1 1/6 inch hole as pictured.Then straighten out a heavy-duty paperclip so you have a straight piece that is 2 3/8 inches long. From one end mark off 1/4 inch and 1/2 inch and from the other end mark off 3/8 inch. Bend the bottom to match the drawing and solder it to a 3/8 inch washer. Drop a spring over the top and push it up through the hole in the wooden base. Push up from the bottom compressing the spring until the 3/8 inch mark on the wire shows then bend with pliers to a 90 degree angle. |
Lights | |
 | This is a flexible neck lamp available at Wal-Mart for less then $ 10.00 and you'll need 4 of them. They'll take up to a 60 watt bulb. |
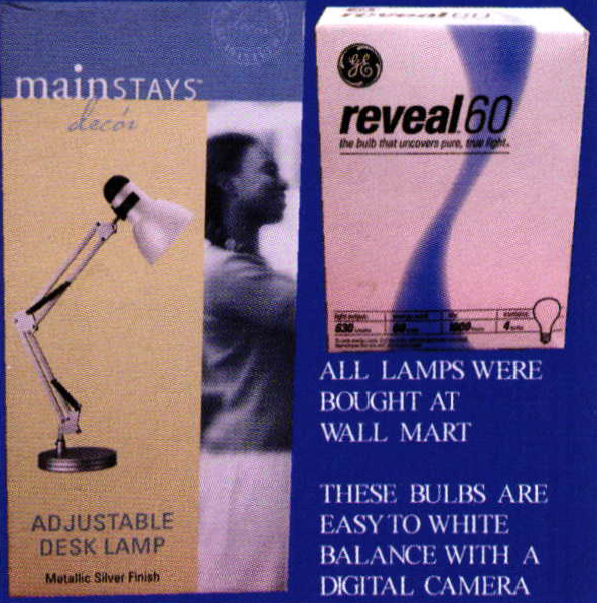 | GE's Reveal light bulbs do a good job imitating daylight. You'll need four 60 watt bulbs and one 40 watt bulb. The other lamp pictured here is an extension type for shooting down from the top using a 40 watt bulb. |
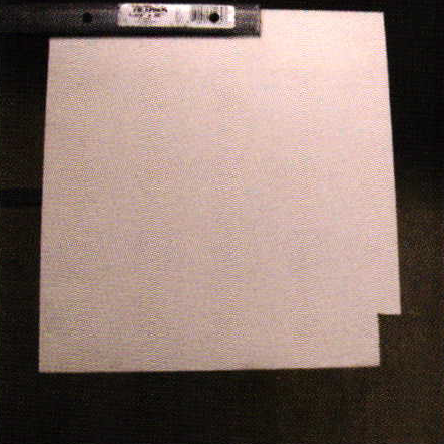
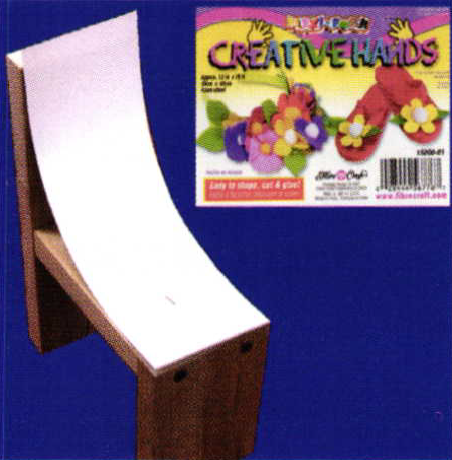 | This is a cut piece of the foam background material called Flexi-Foam. It can be purchased at a craft store. It comes in a 12×18 inchpiece for less then $3.00. Cut it to match the drawing 3×9 inches or a little bigger for wider projects and punch a hole though it for the ring holder. |
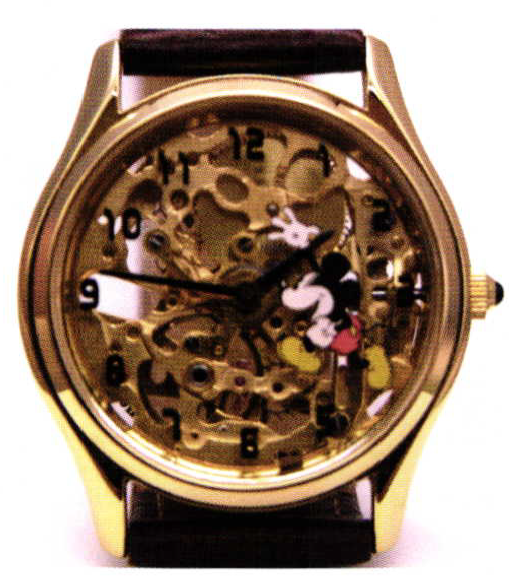 | This was a quick picture I took with over head fluorescent lights and no tripod. |
 | A further back look at how I took the shot with no additional lighting. |
Customized Bench Shelf | |
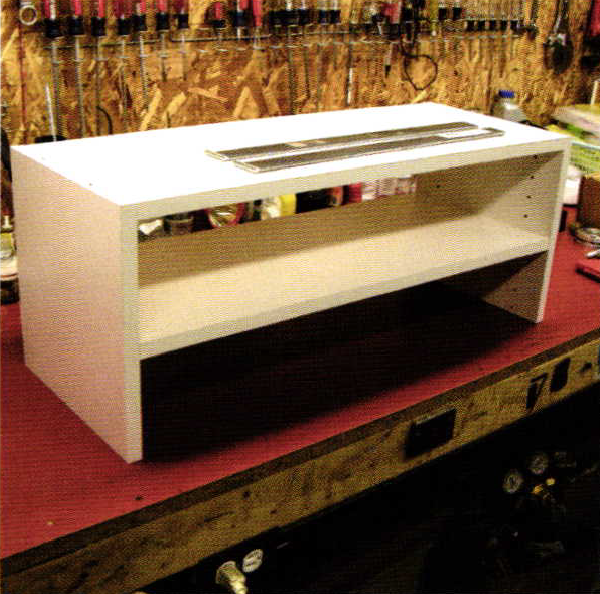 | Many of us need more storage space on our benches. Purchase this inexpensive closet organizer for shoes available in lengths of 24 to 36 inches. It can be used with or without the middle shelf. On a shallow bench, the middle shelf is usually in the way. On benches 24 inches deep or more, the shelf can be used without being in the way. |
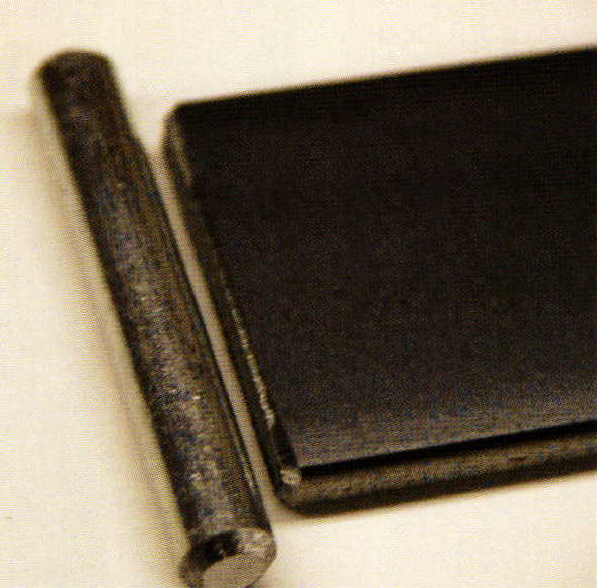 | Cult two pieces of 1/4 inch rod as pictured, slightly wider than the flat bar stock. Bevel the ends of the bar stock to laser weld the two together. If you want to braze them instead, there is no need to bevel the ends. These will act as end stops on the pliers rack. |
 | Supply bar stock that is 1/8 inch thick X 1 1/4 inches wide and 36 inches long. This should be available at any home center. Cut this in half to make two l8 inch pieces. Weld or brazethe 1/4 inch rod to the ends of the bar stock. |
 | Mount the bar stock in a vise with the side with the 1/4 inch rod protruding to the left. This is considered the top of the bar where the rod protrudes. Measure in 1 inch from the end and 3/8 of an inch from the top of the bar. Drill an 11/64 inch hole. Come in 6 inches from the same end and measure 3/8 of an inch from the top of the bar and drill another 11/64 inch hole. Repeat this on the second piece of bar stock. |
 | Place the bar even with the top of the shelf unit and make the drill hole that is 6 inches from the end approximately 1 inch from the front of the shelf. Mark through the drill hole with a pencil. Pre-drill a pilot hole with a 1/8 inch drill. Line up the bracket with the hole and install a 1 5/8 inch drywall screw into the hole. Drill a pilot hole for the hole in the back of the bracket. Screw it in with another 1 5/8 inch drywall screw. Repeat this on the other end of the shelf and your tool racks are done. |
 | If your bench has a rim around the edge, notch the back of the shelf to match the rim. In this case it was 1/2 of an inch deep and 1 1/2 inches high. If your bench is against the wall this makes it harder for stuff to fall behind the bench. |
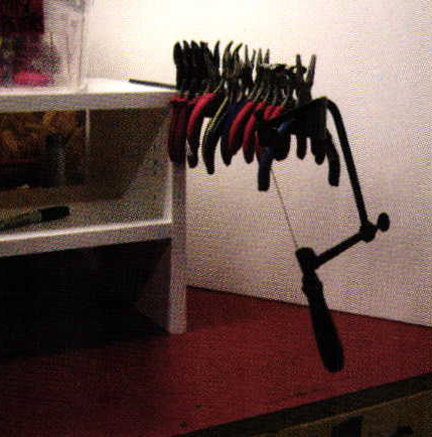 | Theplier racks hold at least 20 pair of pliers per side plus a saw frame and frees up drawers for larger items. |
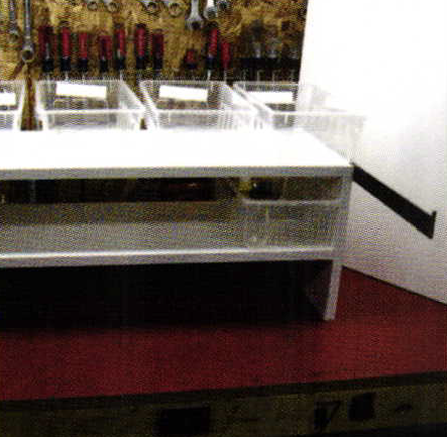 | The shelves will hold at least 7 plastic shoe boxes full of supplies or at least 4 boxes if only the top shelf is used. Another jeweler suggested a self-adhesive magnetic strip along either shelf edge could be used to hang jobs, tools, etc. from. |
By Steve Satow – © Bench Magazine
In association with
BENCH Magazine is devoted to the Bench Jeweler in retail jewelry stores and small trade shops.
Related Articles

How to Make Prong Notching Pliers
These pliers notch round prongs easily to a given depth and replace a bur for the job. They are made...
Read More

Customized Beading Tool Retipper, Trays & Polisher
Steve Satow shares his procedure on how to customize bench tools like a beading tool retipper, small parts trays and ...
Read More
Modified Split Mandrel for Finishing Round Bezels
A bench jeweler typically uses a split mandrel to sand and finish the inside of a ring. Various grits of...
Read More
How to Modify Prong Pushers
Many stone setters would agree that one of the most challenging aspects of prong setting is getting the prongs down...
Read More


The All-In-One Jewelry Making Solution At Your Fingertips
When you join the Ganoksin community, you get the tools you need to take your work to the next level.
