
Creating a Rubber Mold
4 Minute Read
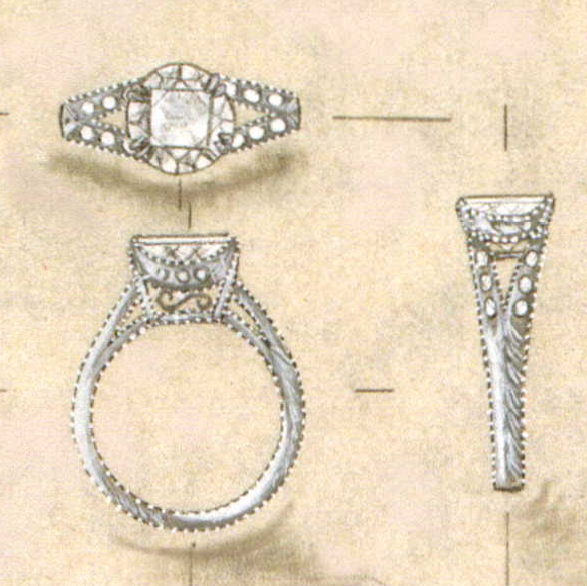
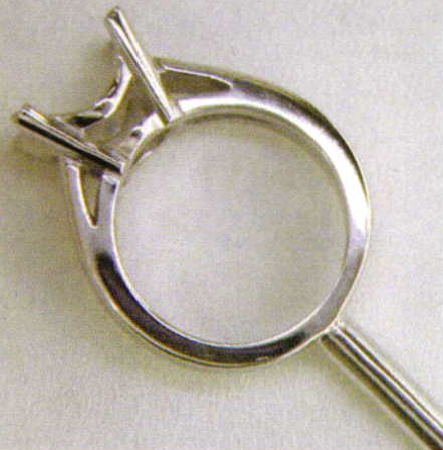
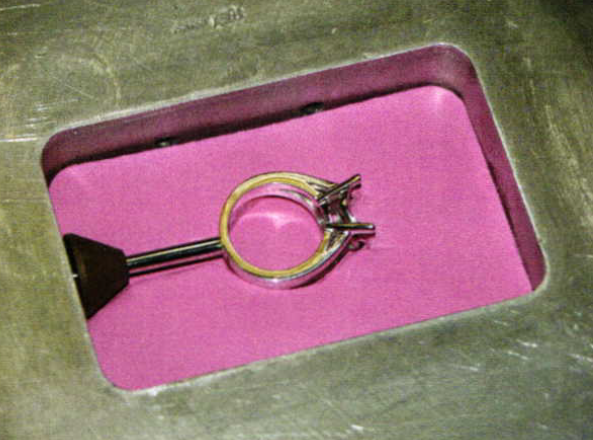
Recently this custom ring design came to my bench with the request that it be made in platinum and a rubber mold be created in case our store ever wanted to make a second ring. The new ring was to be made for a 1.5 carat center stone and also to be set with 24 small melee diamonds in the shank and center head.
Creating a Rubber Mold
Creating high quality rubber molds can be a bit tricky. I thought you might like to see how I go about it.
I started the job by making this sterling silver master model according to the design specifications. Then I soldered a three millimeter brass sprue rod onto to the bottom of the shank. I like to make my models 10% heavier than the finished ring so as to allow for finishing. Also some of the intricate details seen in the drawing will be fabricated and applied later so as to achieve the cleanest possible look in the finished ring.
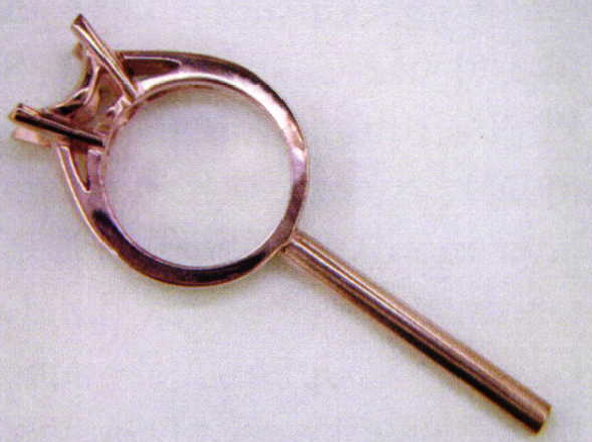
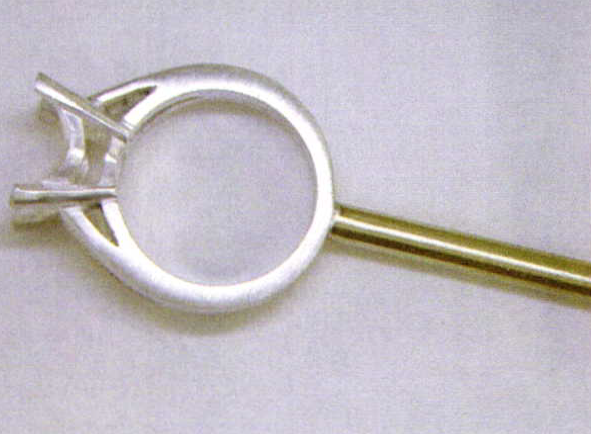
All master models are first polished, then go through a three step plating process prior to molding. The first step is to copper plate the model and the sprue. Copper adheres well to both the silver and the brass sprue rod, and prepares the model for the next step. I like to think of copper plating as priming a wood board before painting.
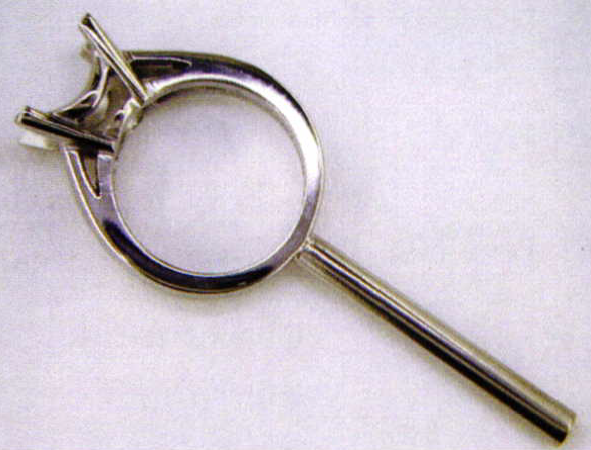
The second step is to nickel plate the model. Nickel is used because it provides a very tough surface that bonds to the copper and prevents metal oxides from contaminating the rubber mold. Rubber molds that are contaminated with metal oxides will stick to your wax injections making intricate wax patterns difficult to release. If you don't know how to tell whether your molds are contaminated, just check for dark areas in the rubber around the where the models hadbeen. Dark, blotchy rubber is usually the result of copper oxides.
Finally the model and the sprue are rhodium plated. Rhodium creates a wonderful surface that will not ad here to the rubber. A surface this smooth in you model ensures that injection wax will flow easily into your mold and release without sticking.
More detailed information on plating techniques is available in "The Midas Guide to Plating" available through Rio Grande (l-800-545-6566).
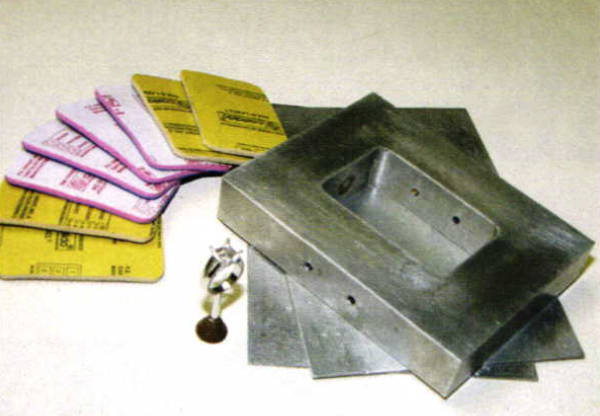
The master model of my ring measures 8 millimeters across. I've chosen a 1 inch mold frame which will leave a little over 8 mm o rubber on each side of the model. I recommend a 1-inch thick mold because it makes for a strong mold that I can cut deep keys into. I like to use Castaldo's, No-Shrink Pink rubber for all my master molds. Since No-Shrink Pink is a bit more expensive rubber, I often create a sandwich mold using Castaldo's, Gold Label, rubber for the outside layers of the mold. A sandwich mold saves a bit of cost and the gold color rubber serves as a device to show me how deep I'm making my cuts.
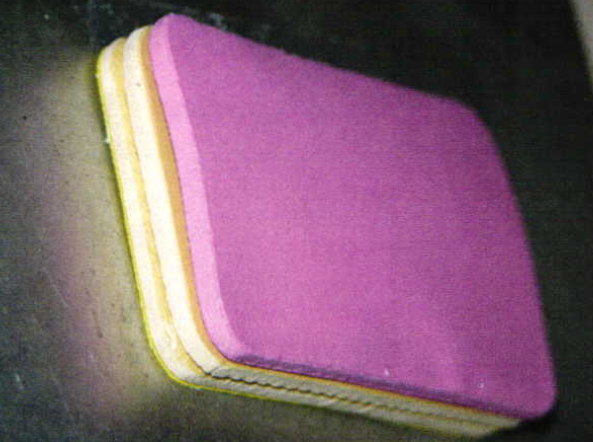
Before handling any mold rubber you should always scrub your hands and fingertips thoroughly. All din and oils must be scrubbed away before touching the rubber. If you prefer, clean latex gloves will prevent any oil or dirt from getting into your mold. Manufactures do not recommend wearing cloth gloves when touching the layers of rubber. The bottom two layers are Gold Label and the top layer of rubber is a sheet of No-Shrink Pink.
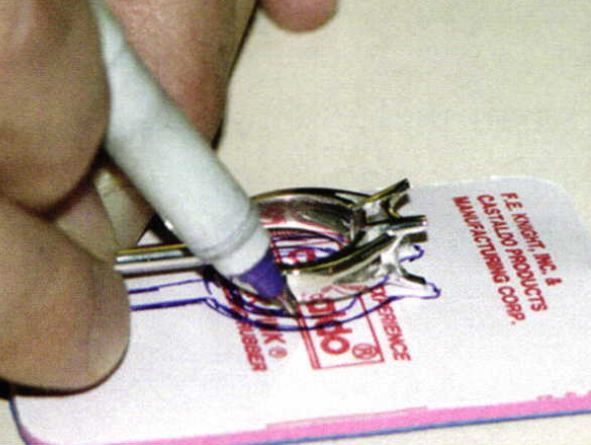
On the backing material of layers 4 and 5 I like to draw an outline of the model. This way I can cut the rubber to fit closely around my model. I like to position the model a bit over halfway into the mold. This gives me a nice long sprue and allows plenty of room to cut large, angular locking keys into the mold.
You can see that the rubber does fit tightly around the model. Gaps in the rubber around the model can cause air pockets in the mold and ruin your wax injections. If there are any large gaps around the model then they should be filled with small pieces of extra rubber. The center of rings will also be filled with round circles of rubber.
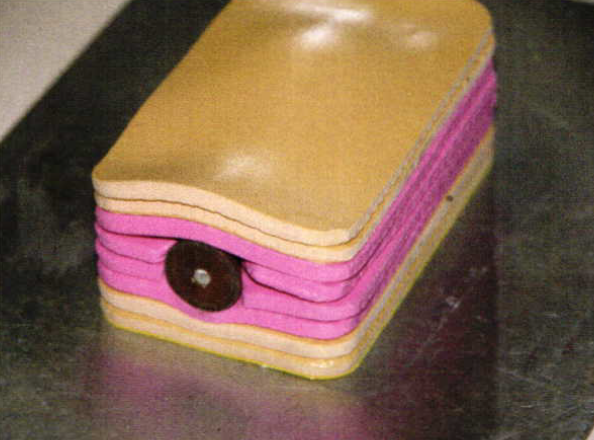
This picture shows all eight layers of the sandwich mold before vulcanizing. Rubber manufactures do not recommend over packing a mold frame as it may cause the mold to be too dense and tend to warp or curl after vulcanizing.
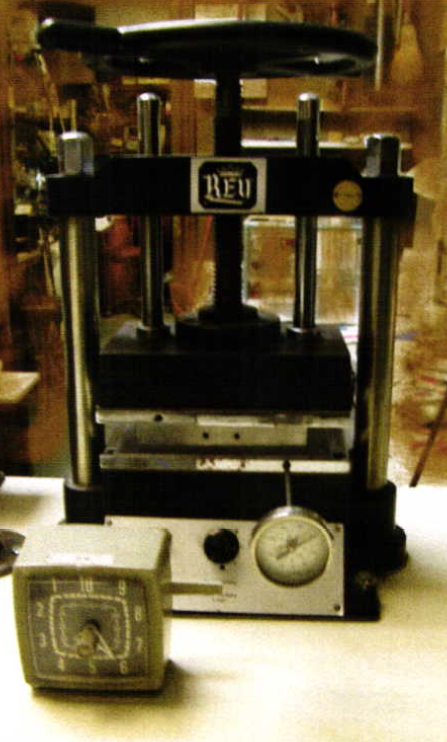
In order to create a high quality rubber mold I need to be precise on both the temperature and the cooking time. I use a thermometer to check the temperature of both the upper and lower heating platens. Digital thermometers are available and would probably do a much betterjob than my old mechanical thermometer. A photographer's clock, with an alarm, allows me to keep track ofthe cooking time according to the manufactures specifications. For both No-Shrink Pink and Gold Label rubber, Castaldo recommends a temperature of 310o and a cooking time of 71/2 minutes per layer. Castaldo recommends that you tighten the vulcanizer down using only light pressure. You can tighten the wheel a bit more after 5 minutes of cooking to slightly increase the pressure once the rubber has softened.
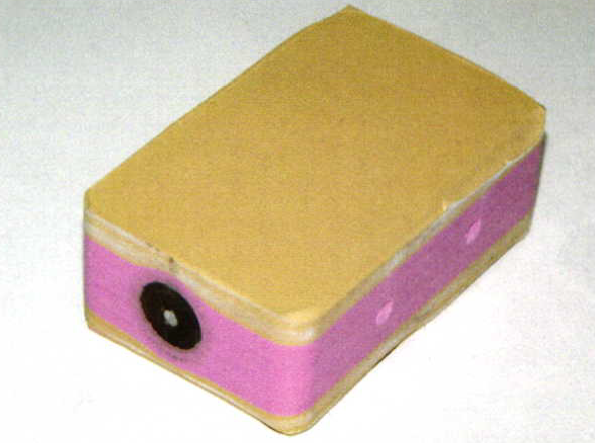
After cooking I like to allow my molds to cool naturally overnight before I cut them. If I'm making several molds at once then I like to draw a picture of the model contained inside the mold as a reminder of how to cut the mold.
In the next issue of BenchMagazine I'll demonstrate how I cut this mold and show you the completed ring.
Related Articles

Using Dental Mold-Making Materials
Testing the New HD Patterns
Oval and Marquis Gemstone Layout Method

5 Classic Casting Tips


The All-In-One Jewelry Making Solution At Your Fingertips
When you join the Ganoksin community, you get the tools you need to take your work to the next level.
