
Cutting a Rubber Mold
6 Minute Read
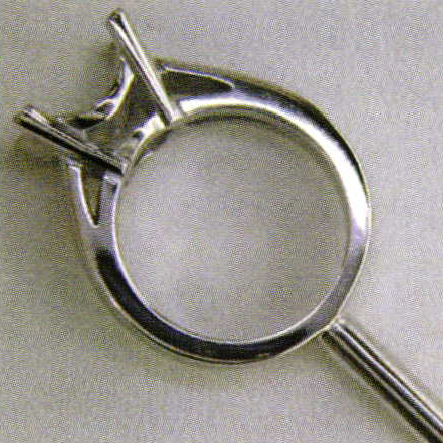
In my first article I made a rubber "sandwich" mold of this basket style mounting. The focus of this article is how to cut the rubber mold so that I can get clean wax injections that require a minimal amount of labor to finish.
The type of mold I am cutting is called a "hinge mold". In a hinge mold I leave the two halves of the mold connected at the back. Hinge molds work well for simple projects like this basket style ring.
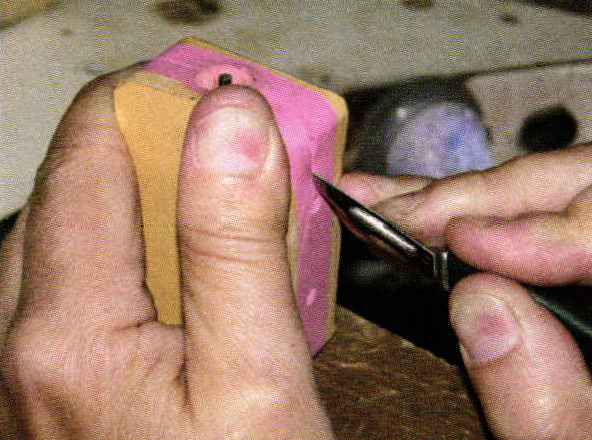
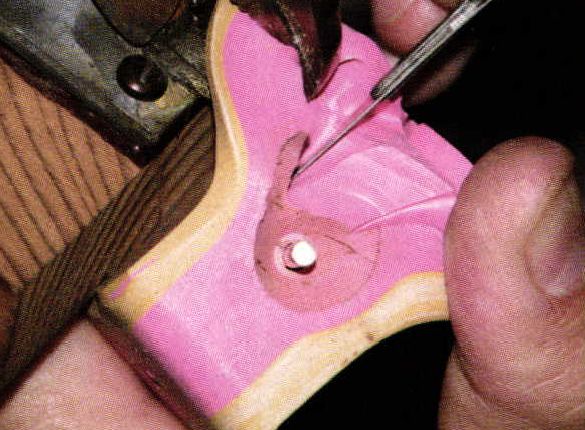
I always use a fresh number 11 scalpel blade for each mold I cut. If at any point I dull the blade on the model then I will change it immediately. I don't want to ruin a nice rubber mold because of an inexpensive scalpel blade. The first cut I make is an eight inch deep cut across the top and down the two sides of the mold. This helps as a guideline for where to begin cutting my "keys".
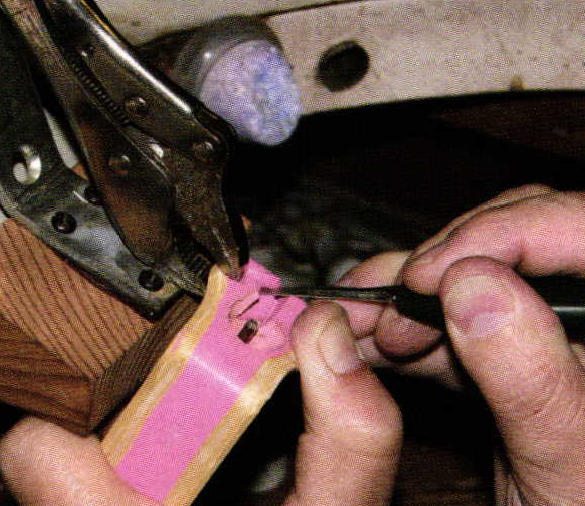
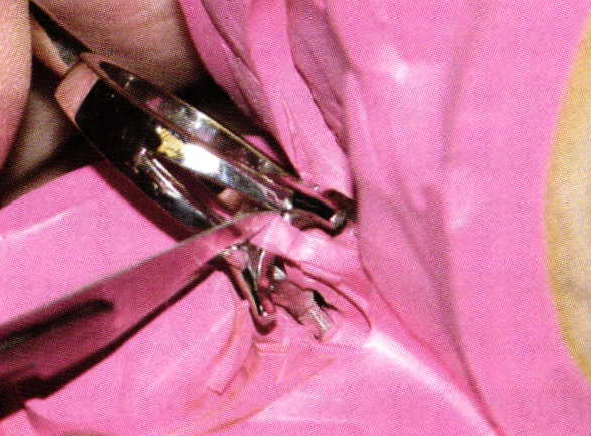
The holding device I like best is a vice grip pliers that I've mounted onto a GRS Bench Mate. The first difficulty in mold cutting is to cut the "keys". Keys are notches, both male and female, that lock the mold into its original position so that it won't twist during wax injection. Keys should be cut deeply and should be geometric in shape to provide good contact. I do not like to use rounded bumps as keys as they don't lock together well. The first key cut begins at the sprue button and slices toward the side of the mold. Do not cut through the wall of the mold.
The second key cut runs along the side of the mold to a point about half the length of the mold. Begin where the front cut ended. You can see how the first slice I made around the perimeter of the mold now acts as a guide for my key cuts.
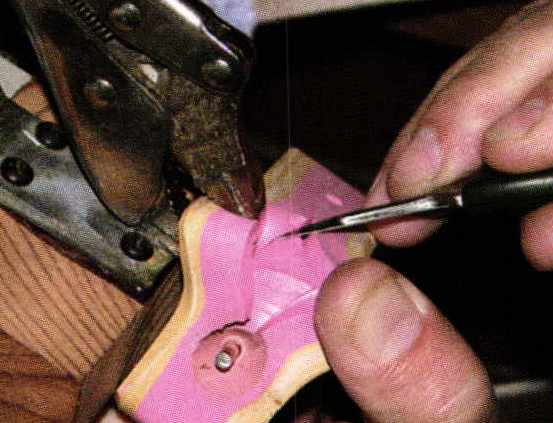
The next cut defines the top of the key, like a mini plateau. If you look hard you can see that my key extends just to the beginning of gold rubber. Using the two colors of rubber gives me a good indicator of how deep to make my cuts. This cut, like all cuts, is made with a single deep slice of the blade. Try to avoid using a sawing motion in your cuts.

You need to really stretch the rubber for the inside key cut. I like to use a step cut for the inside of my keys. Step cuts provide great gripping strength in the finished mold and I rarely get any parting seams in my wax injections.
Some bench jewelers like to cut their keys so they are both facing the same direction. I don't think this matters but I like my second key to go in the opposite direction. This logic is based solely on the fact that it's easiest for me to cut the keys this way.
When slicing along the model I avoid making the cut down the center of the model. If I get a parting seam I don't want it to be in a conspicuous place. For rings I cut the top edge of the mounting then I flip the mold over and cut the inside along the opposite edge. Please notice that the keys extend almost to the edge of the ring' I want that holding power close to my model.
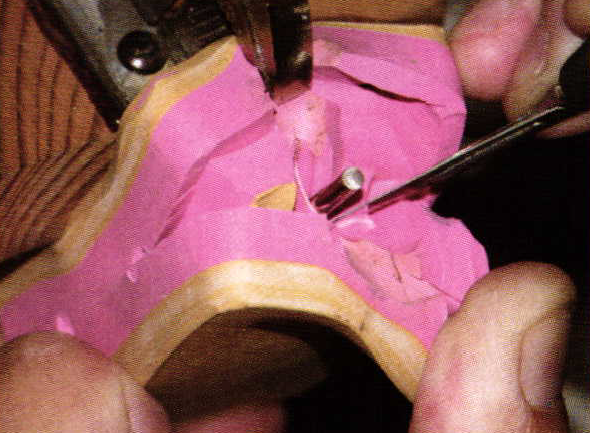
To cut the rubber inside the side galleries I need to stretch the mold open quite far. This way my seam ends up going through the center of the side gallery and not along the edge of the ring. Cutting the mold so that the seam is inside the gallery makes it easier to pull the wax injection out of the mold.

When making the gallery cuts for the center stone the rubber is again stretched far. Here I want the cut to end up on the inside of the head. This will make the wax model easier to pull from the mold. I would also like you to notice that by thoroughly plating the master model before molding there is no oxide residue left in the mold. This ring and all wax injections will release easily from this mold.
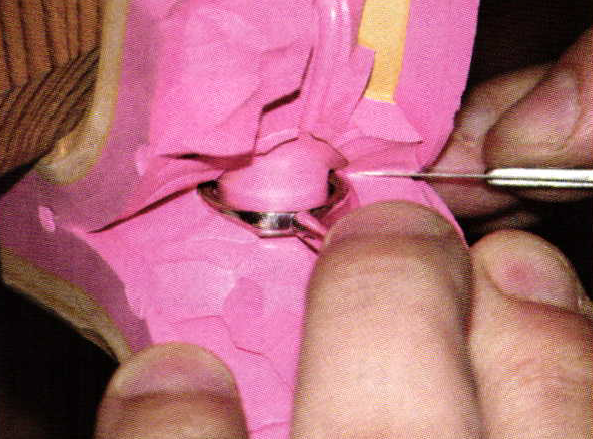
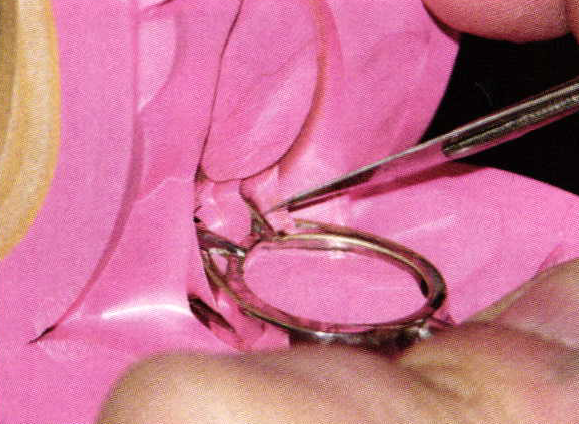
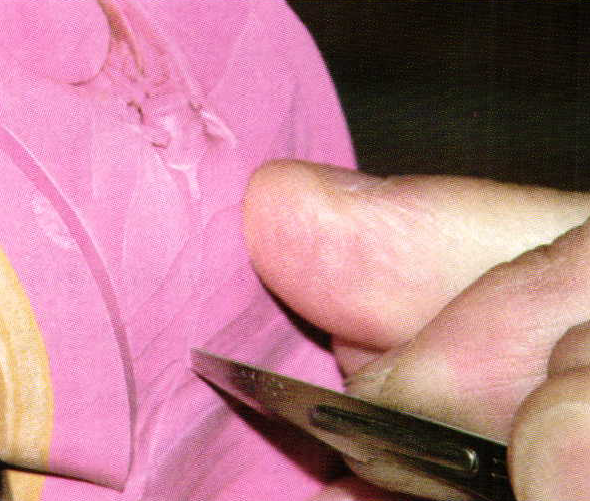
I just need to get inside the gallery and this ring will be free. These are areas where it is important not to touch the scalpel blade to the metal model. Even though the silver model is soft metal it will instantly dull my blade if I touch the two together.

With just a few more slices I cut almost to the rear edge of the rubber' By leaving about an eighth of an inch of rubber uncut I've created a hinge at the back of the mold. The hinge acts like a key and prevents the mold from twisting during wax injection. When I do cut molds into separate halves then I need to cut a third and forth key.
A very important and most often overlooked step in mold making is to slice air vents in the mold. Air vents extend from each of the high points of the model out to the sides at the back of the mold. Without proper venting a mold will become air bound during wax injection and high points will not fill with wax. Bench jewelers tend to over compensate by cranking up the air pressure on the injector and thus causing the wax to "fin" on the model or worse yet blow out the side of the mold.
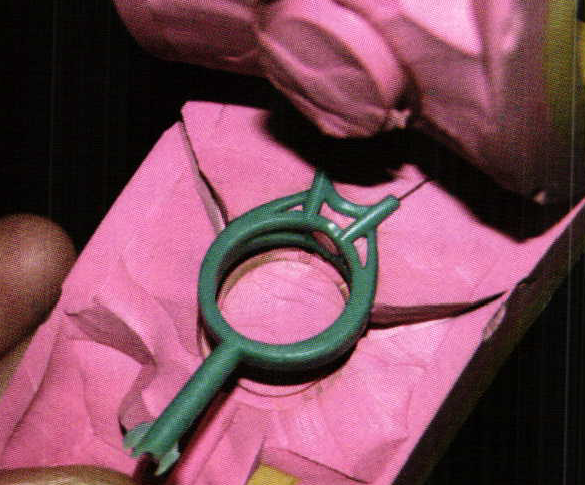
A well cut mold makes for a perfect wax injection. This wax model will easily pull from the mold. Notice the air vents extending from the sides and prongs of the mounting. Modern injector wax has a built in release agent and reduces the need for silicone sprays. The wax I am using here is "Rio Turquoise Wax" and sold by Rio Grande who can be reached at 1-800-545-6566.
Also powder should never be used in the mold cavity itself as it sticks to your injections and ruins your models.If powders are used at all then very small amounts can be carefully placed in the air vents just to aid the flow of air out of the mold. Always use the least amount of air pressure necessary to fill the mold cavity with wax and never over pressure your injections. This injection was shot using only 4 lbs. of air pressure.

The wax model has come back from the platinum caster and is ready for finishing and setting work. This casting is in its rough state and no finishing has been done to it yet.
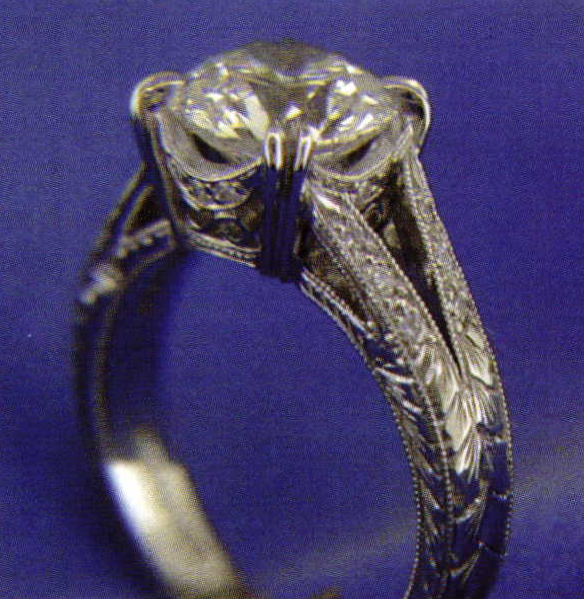
The mounting has now been finished and set. I engraved the sides of the mounting with the "Praying Hands" pattern and added small melee to the upper gallery supports and down the sides of the shank. I certainly hope this series of articles has helped to answer any questions you might have about mold making.
Vice-Grip pliers attached to a bench pin make an excellent clamp to hold your rubber mold while cutting. To attach the pliers use a piece of 3/16″ thick by 1″ wide flat steel stock and bend as pictured to form the mounting frame. Drill a hole through one end for the adjustment screw to lit through. Remove the adjustment screw and the spring and weld one jaw of the pliers to the steel frame.
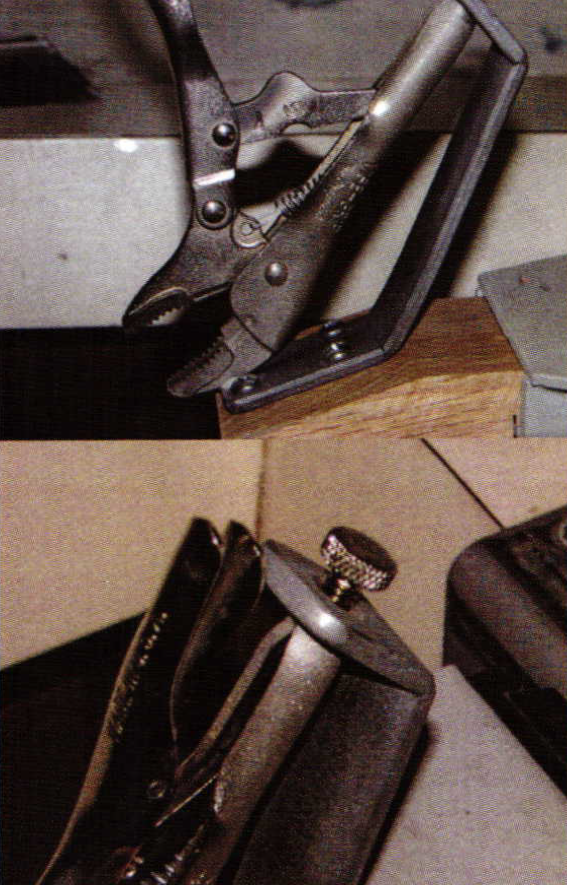
Re-assemble the pliers and screw the frame to a bench pin and your new clamp is ready to use. Using a GRS Bench Mate system makes it easy to change between your regular bench pin, and your new clamp.
Related Articles

Spiral Cut Technique for Rubber Molds

Testing the CAD/CAM LMR Mold Compound
Oval and Marquis Gemstone Layout Method
Precious Metal Clay 101


The All-In-One Jewelry Making Solution At Your Fingertips
When you join the Ganoksin community, you get the tools you need to take your work to the next level.
