
Channel Setting Round Diamonds
6 Minute Read
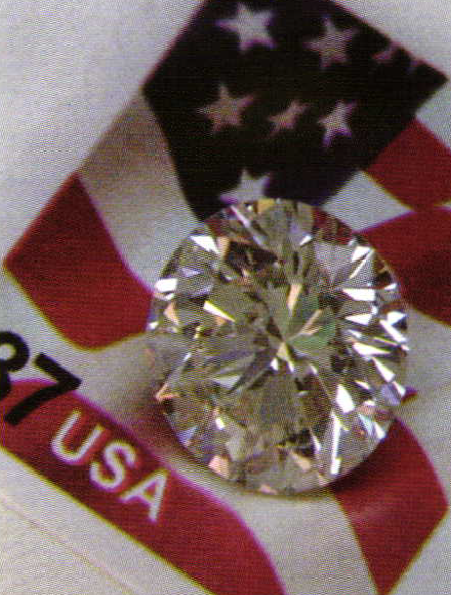
Recently a woman brought an old family diamond into our store and asked to have a custom mounting made for it. The diamond was a 3.18 carat round brilliant and a pretty one at that. She looked through our showcases and fell in love with a yellow gold mounting with channel set melee diamonds on either side of the center.
The woman asked if I could recreate the ring using larger melee that would look more appropriate next to her larger center stone.
I thought you might like to follow along and see the method I used for channel setting the round diamonds into this mounting.
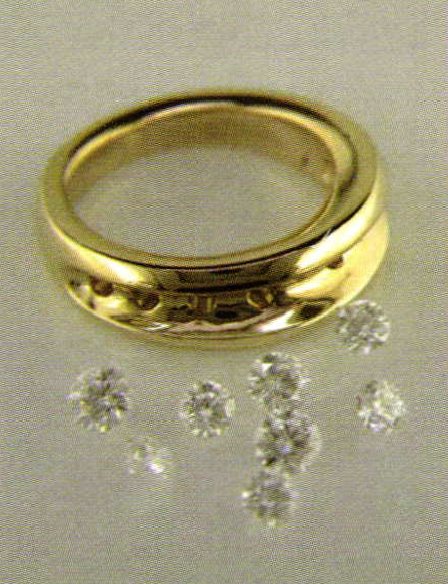
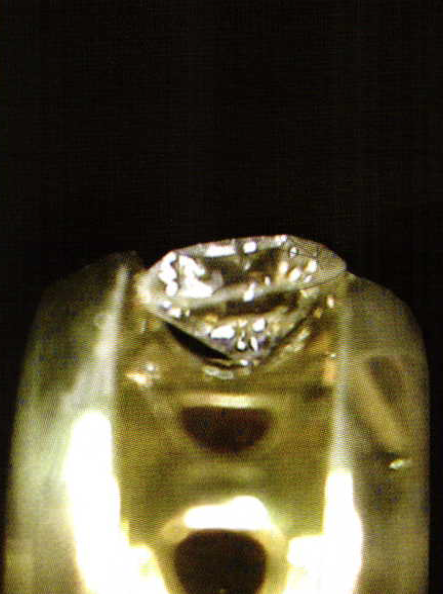
The customer's center stone measures 8.5 mm in diameter. I first carved it wax little cast this mounting in 18 karat yellow. It treasures 7 millimeters in width and 4 millimeters tall at the center. The accent diamond s taper in size from 1/4 carat, next to the center, down to ten pointers on the outside. All of these side diamonds are high quality and ideal cut. Channel setting ideal cut stones is an uncommon treat, but the same techniques apply to setting poorly cut diamonds.
There arc several rules that apply just to channel setting. Knowing them will help solve many common problems.
Rule #1 - The width of the channel should be between 90% and 95% of the diameter of the stone.
This is important because if the channel is too narrow you will get scalloping of the channel wall between the stones and if the channel is too wide it will not offer support to thestone's pavilions and they will become loose.
Rule #2 - The depth of the channel should be between 75% and 100% of the stone's depth. If the channel is too shallow then the pilot hole might show around the stone. If the channel is too deep then you run the risk of too little structural support for the mounting.
My preference is to use a rounded channel instead of a squared out one. I think it's more attractive and easier to polish.
I like to use a pair of dividers to strike a line on the inside of the channel wall. This line will serve as a guide for how deep to cut my scats. This line is just a guide. I will make individual adjustments depending ort the size of the stones.
Rule #3 - Stones which 3 millimeters in diameter or smaller should be set so that their tables are even with the surface of the metal. Stones larger than 3 mm should have their tables slightly above the metal's surface.
The depth rule is important to follow because it provides the proper thickness of metal which can be easily tapped down onto the stone. If you have too much metal above the stone then it will be difficult to tap down. If the metal is too thin then it will wear away too quickly.
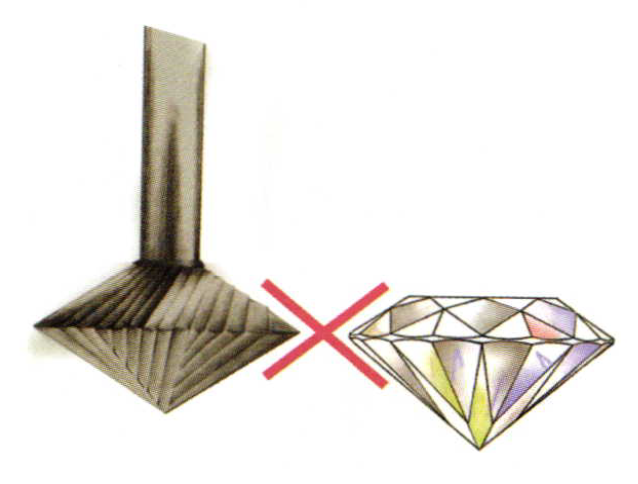
Another important factor to consider in channel setting is which bur to use. My first choice is always a 70o bearing (or hart) bur. The angles of it most closely match the angles of a diamond. It will cut the tightest seat and that means you will not have to work very hard to tighten the channel on to the stone.
If you don't have a 70o bur, then use a 45o bur. When you use this bur you will need to wiggle it slightly so as to open the seat enough to fit the stone.
Please don't use 90o hart burs or ball burs for channel setting. They will cut a seat too large for the stone and you will have difficulty tightening the diamond.
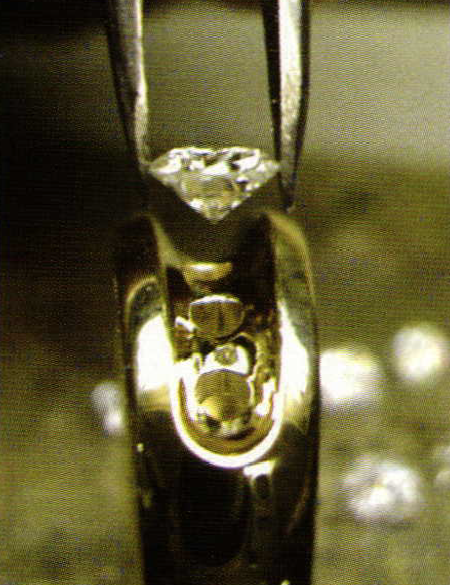
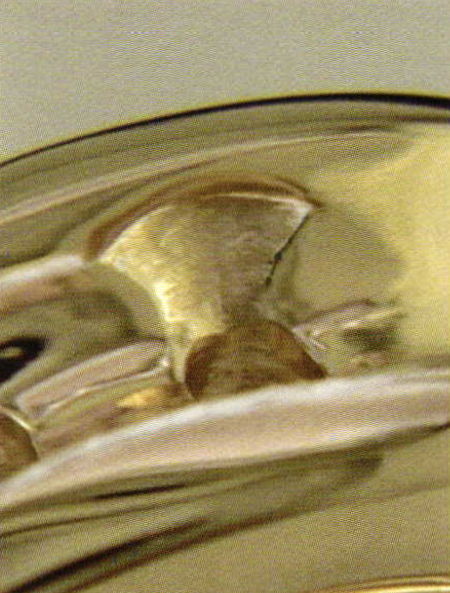
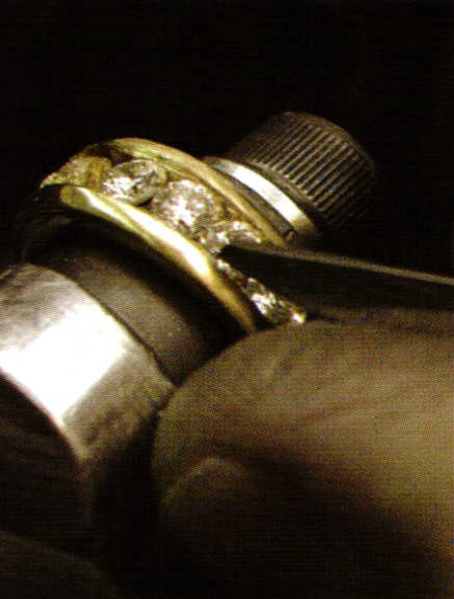
I always make my first cut into one wall of the channel, I call this Side A. My first cut is shallow. I cut very small amounts at one time and I like to stop frequently and check to make sure the seat is level and the cut is clean. I also check to see how the diamond is fitting.
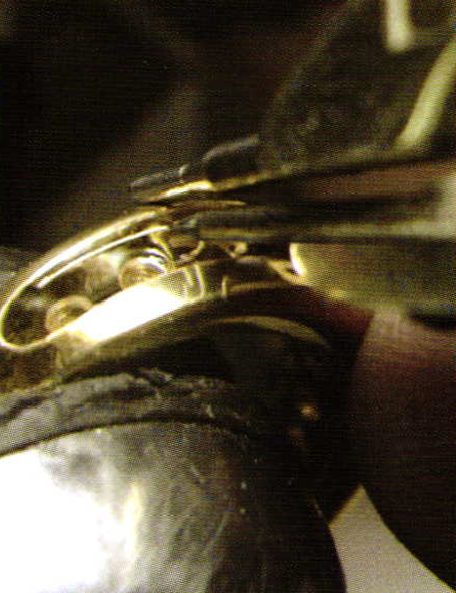
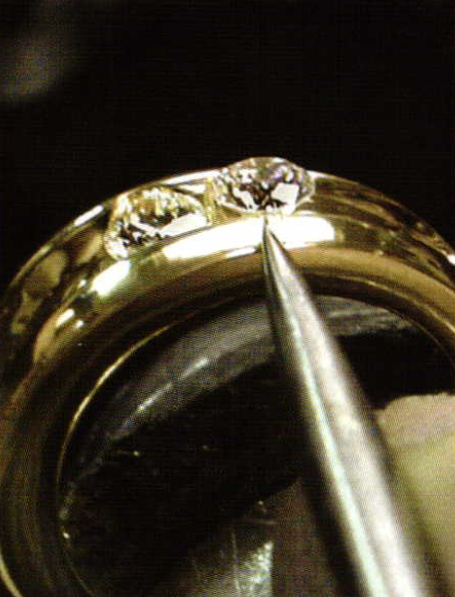
I continue cutting the seat in Side A until I get the diamond to slide in and have the girdle just barely resting on the opposite channel wall, Side B.
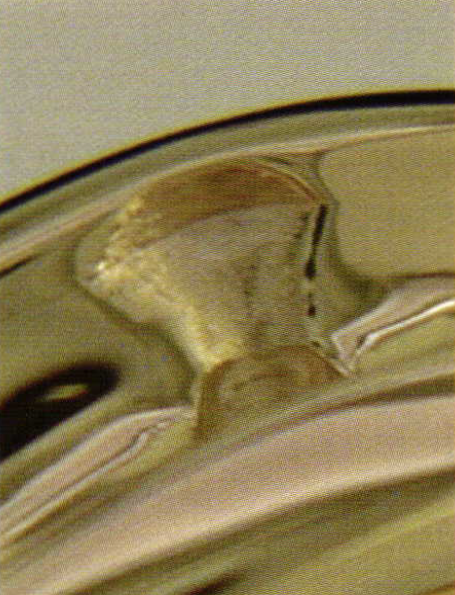
Here you can get a good idea of how the girdle of the diamond is resting on Side B. This also helps to illustrate why the depth of the channel is so important. If this channel were shallow then I would need to carve much more of it away to be able to have the diamond fit down in the channel.
These next two pictures seem very similar but they have very different purposes. The first picture is the completed seat in Side A. The seat has been polished and cleaned and is ready for setting. I would like you to notice how the top edge of the seat is below the upper rim of the channel wall. This seat is cut nice and tight and will require very little hammering in order to tighten the diamond.
This picture is the completed seat in channel wall B. The difference here is that the top edge of the seat has been extended up to the rim of the channel wall. This is so that the diamond can first slip into the seat in side A and then can slide down into the seat in side B.
This picture illustrates how the diamond fits cleanly into the seat of side A and how just a touch of metal has been removed from the channel rim in side B.
After the first diamond has been completely seated I like to lay the second diamond into the channel and mark its position. I like to allow a narrow gap between the stones so that they won't overlap once set. The amount of gap I use is about the thickness of two sheets of paper.
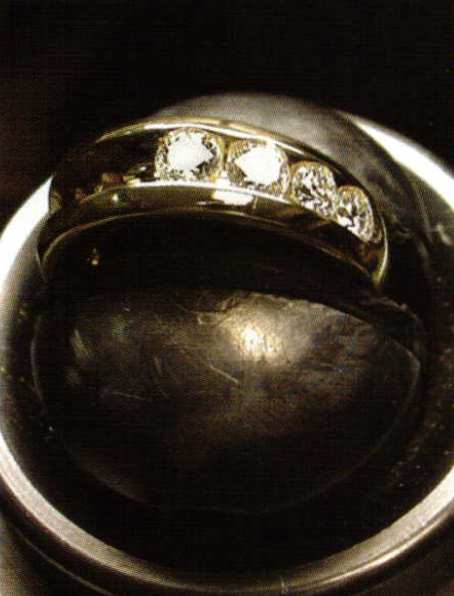
Here all four diamonds have been seated in the right half of the ring. It is now time to start tightening them.
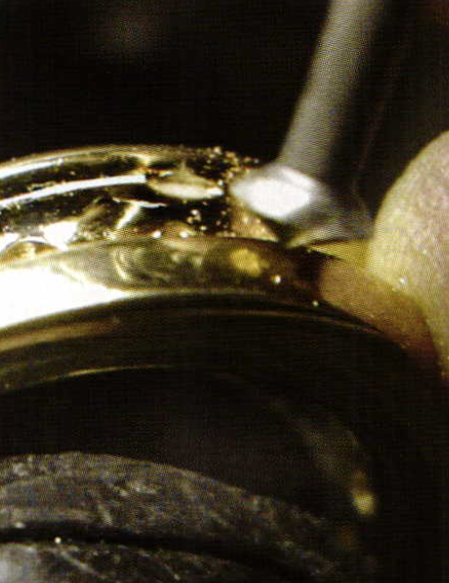
I have trimmed the tip of my hammer tool so the very end is quite small. Please notice that the tip has also been beveled. This combination of a small, beveled tip allows me to direct the force of the hammer action just where I need it to be. If I stand the tool upright then I can use the leading edge of the tip to really pound metal into a gap. Conversely by laying the tool down I can use the flat surface of the tip to smooth over my tool marks.
After all the diamonds have been tightened I like to use a beveled barrett needle file to trim away any excess metal and straighten the channel walls.
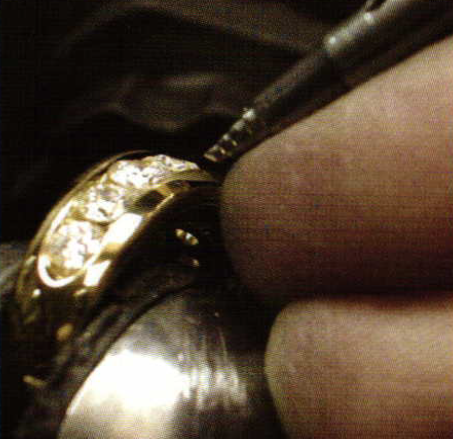
I use an onglette graver to trim any metal flashing that extends over and between the stones.
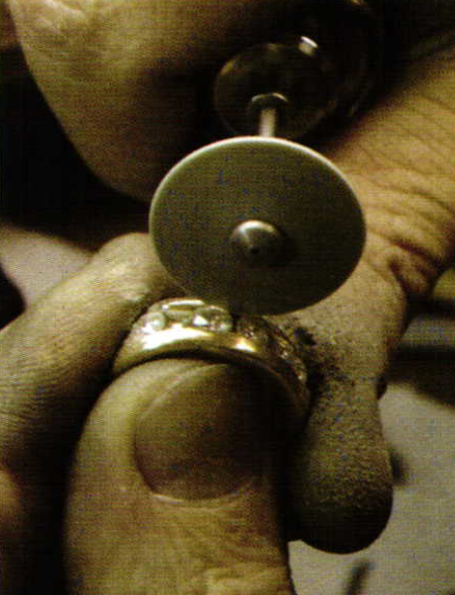
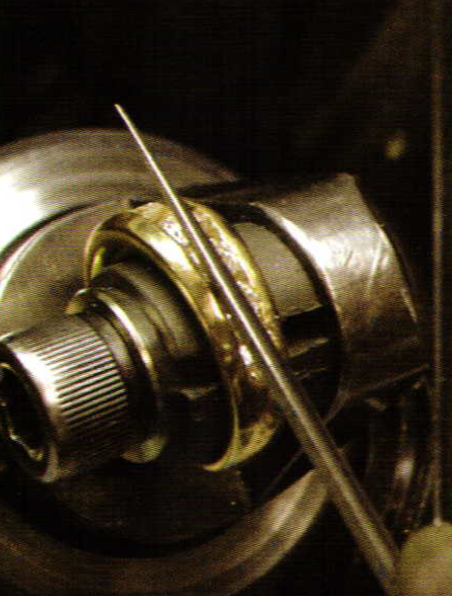
A knife edge pumice wheel is great for giving the channel walls that final smoothing touch before polishing. But don't over do it with the pumice wheel or you'll round over the rims of the channel wall.
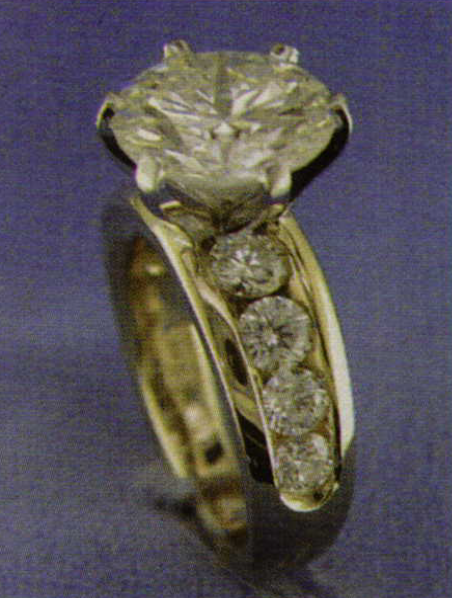
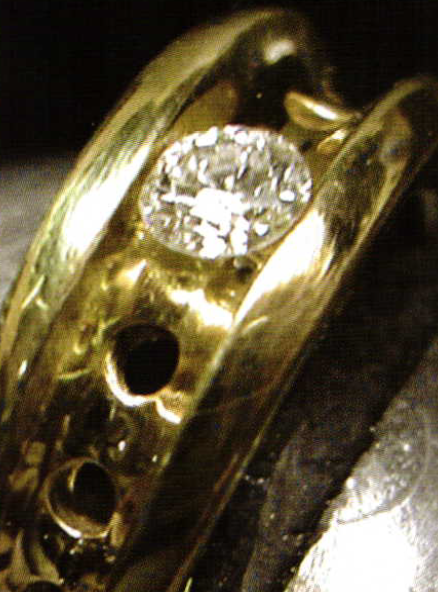
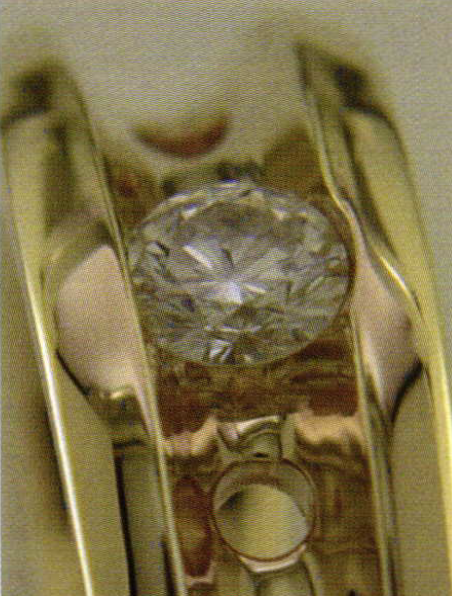
This picture is of the final ring. Our customer's family diamond has been added with a Tiffany style crown. I hope you've enjoyed this article on channel setting round diamonds. In the next issue of Bench Magazine I have a similar but more challenging article on channel setting a customer's princess cut diamonds into an arthritic shank.
Related Articles

Working with Jewelry Hinges Made Easy
1985 SNAG Conference Review

Prix Golay 2006: Winner’s Circle

Urushi: Japanese Lacquer


The All-In-One Jewelry Making Solution At Your Fingertips
When you join the Ganoksin community, you get the tools you need to take your work to the next level.
