
Channel Setting Princess Cuts
4 Minute Read
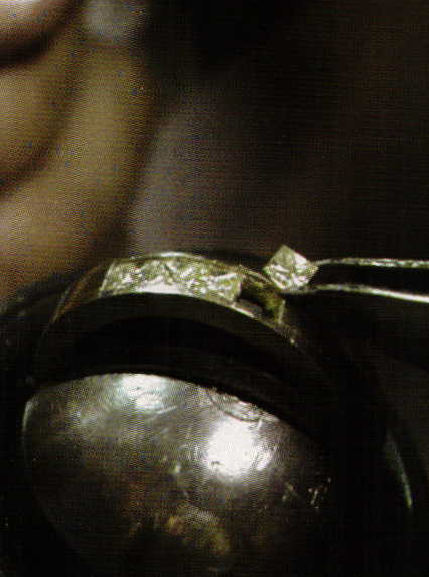
Recently, a woman brought in her diamonds and asked to have a ring made with them. Her requirements were very simple. She wanted her I carat princess cut to be prong set as the center stone and her small princess cut melee to be channel set on either side.
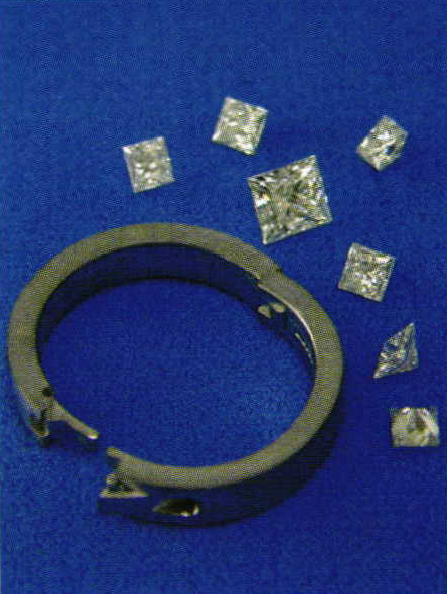
The ring was to be made in white gold. The only difficult stipulation was the ring needed to be an arthritic shank.
I chose a Dream Ring arthritic shank because I could get the thickest ring blank from this company. I thought you might like to see how I went about channel setting the princess cut melee into this ring.
I began with what I call the Layout Procedure. I always start my setting Projects by carefully marking where everything needs to go. I marked the center space between the arthritic ring's hinges with blue ink, then added red sticky wax to each side.
The center stone and each of the princess cut melee were carefully placed onto the shank. Spacing is very tricky in these situations. Melee placed above a curved surface will have a broader radius than when the stones are right-side-up and down into the shank. To compensate for the spacing differences I put a small gap of about 1/8 mm (about the thickness of a 2/0 saw blade) between the melee when I mark their positions. They will come together once they are set.

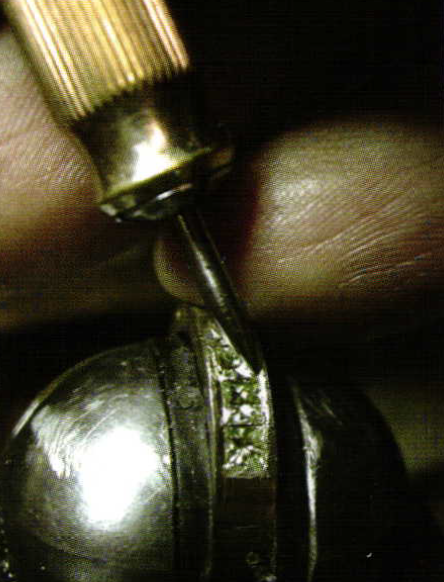
Here I'm using a sharp tool to mark a frame line around each of the small princess cut melee.

This picture shows the final markings where all of the melee will be set. Now it's time to get down to cutting the seats for these stones.

I like to use a ball bur when I'm grinding out large areas of metal. Ball burs are said to be aggressive because they usually have large spiral cut flutes that quickly cut the metal. This ball bur is about 10% smaller than my melee so that I won'tremove any metal I'll need for setting stones. This channel will be cut to about half the stone's depth.
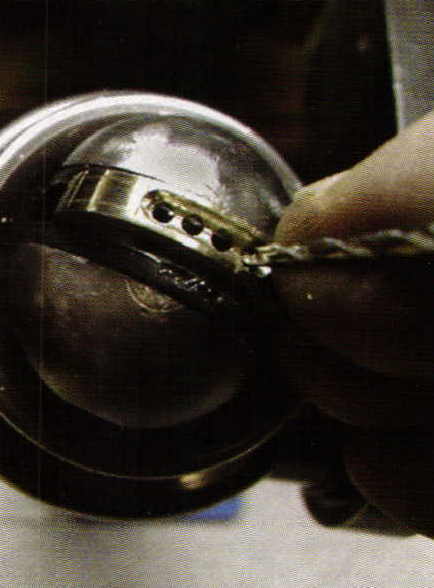
Once my channel has been roughly carved out it's time to drill the cleaning ports where the stones will be placed. I'm using a drill that is 50% of the diameter of the stone so that I won't have as much metal to carve away by hand.
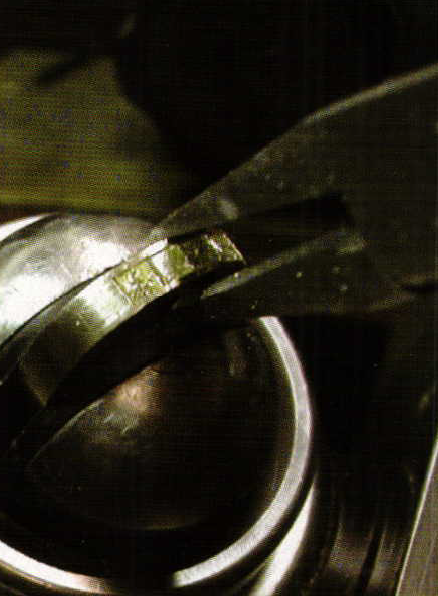
Whenever I channel set princess cuts I like to cut square a jours on the inside of the ring. I think this looks better than using a round a jour. I'm using a 4/0 saw blade to cut the ajours.
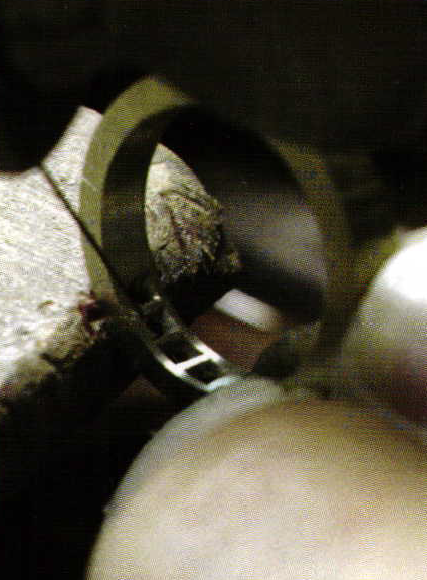
I like to use a small flat graver to square up the insides of the channel walls and the pavilion supports. I know some jewelers who use ball burs to wallow an oversize seat, and then they set stones as best they can. This method may be faster but it does not provide support of the stones pavilions and soon the princess cuts will be loose or fall out. When I set stones I want each one to have its own frame to sit in.
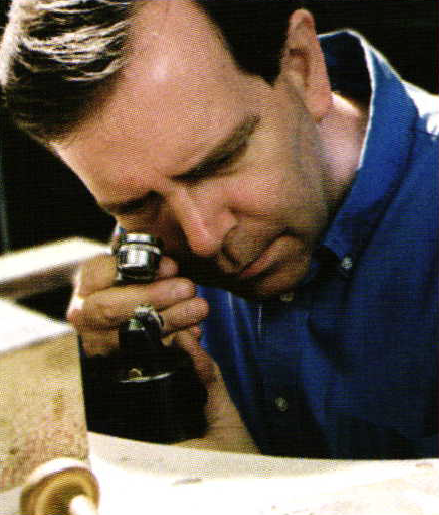
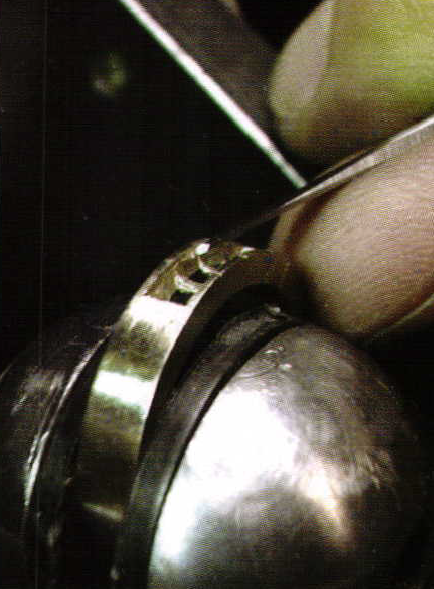
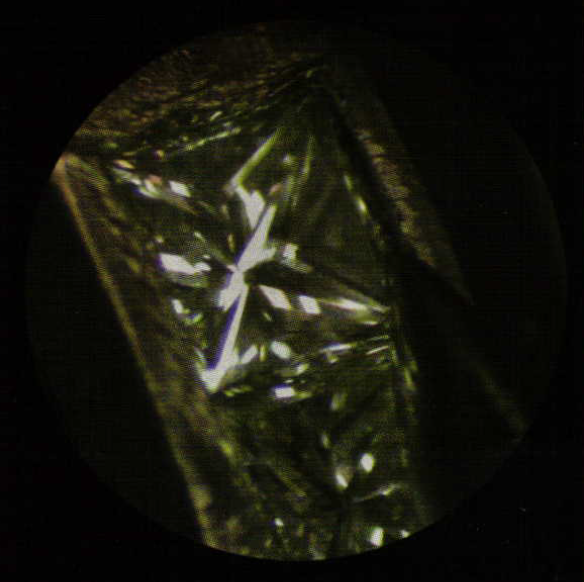
This picture was taken through the lens of my Mieji Microscope. When I turned forty my eyesight began to fail and I thought my career was over. I mounted a microscope purchased through G.R.S. to my bench and I now feel like I'm doing the best work I have ever done. This picture is taken at 10 power magnification and shows how an exact square hole is cut for each stone.
Each stone is repeatedly checked in the mounting until its seat fits perfectly. I am careful that no gaps appear between the stones, that each is level, and all the stones are set to the same depth.
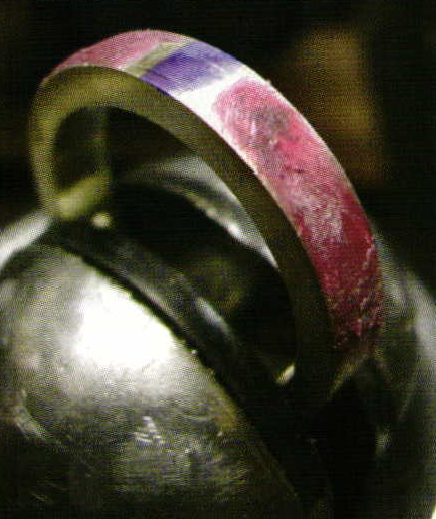
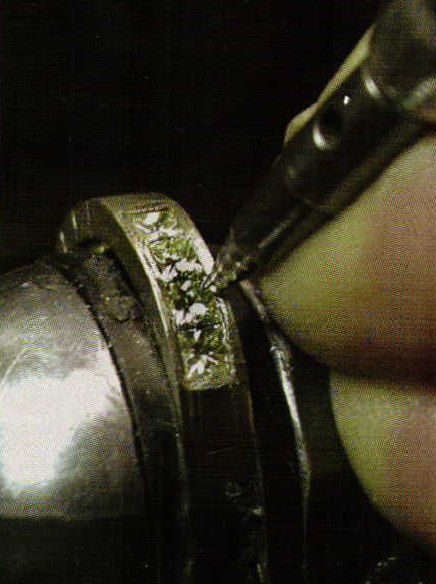
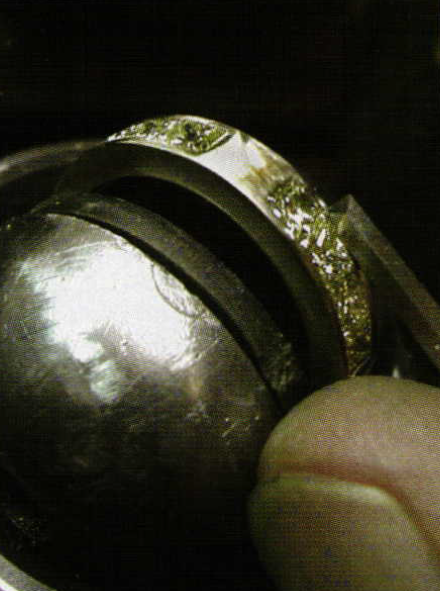
Here I am lightly pinching the channel walls together. This will close the stones inside the channel and prevent them from falling out during hammering.
I've mentioned in previous articles that my hammer tool's tip comes to a fairly narrow end. I use a ridge on one side and a beveled flat spot on the other. The ridge allows me to concentrate a hammer blow to a small spot of metal for extra power. The beveled flat side lets me smooth metal and hammer out any rough gouges caused by the ridge.
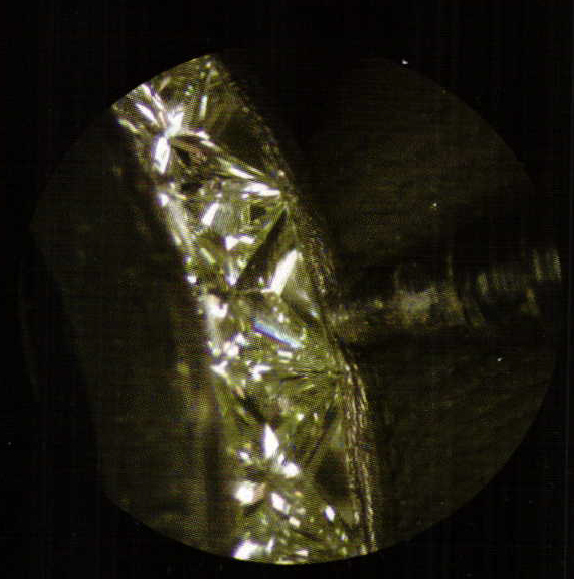
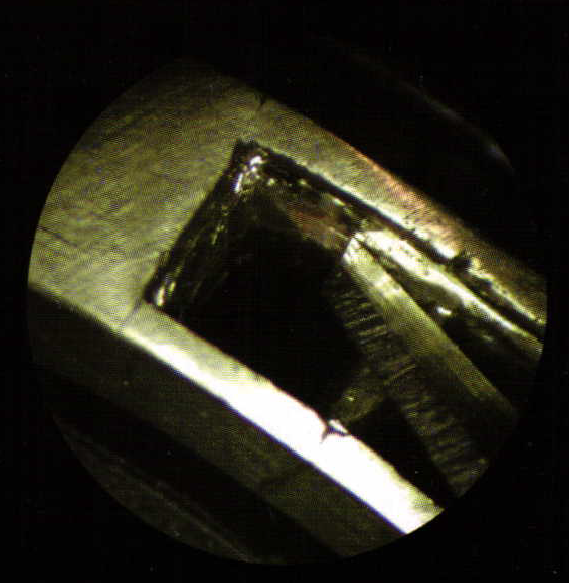
Another microscope close-up. The beauty of setting with the aid of a microscope is that it allows me to see exactly where every hammer stroke went and how much metal was moved. I have not chipped a single stone in the six years I've used the microscope. It's honestly a wonderful tool.
I like to use a worn-out beading tool that has been sharpened and polished as a mini burnisher. This homemade tool allows me to push any extra or rough metal down onto the stones. I have several different sizes of mini burnishers. Each has a different angle and thickness of tip to help set various sizes of stones.
While the detail that you can see through the microscope is a fantastic help it can also be a problem. When I first began using a microscope I spent way too much time chasing down the smallest of imperfections. You have to teach yourself to let some things go because they could never been seen by the customer, even with a loupe.
My last procedure before polishing is to cut away any flashing of metal with my flat, beveled graver. This procedure also helps me to get clean straight channel walls before I polish the ring.
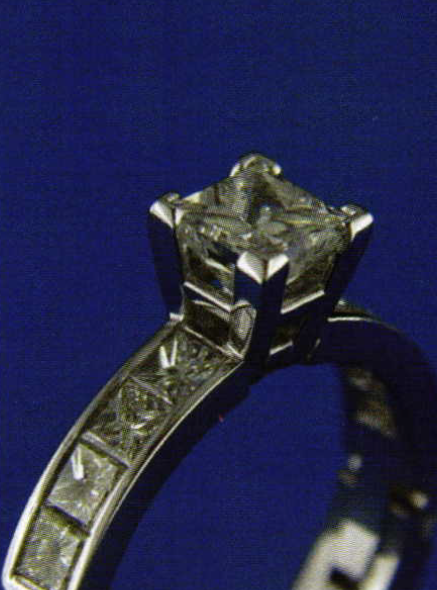
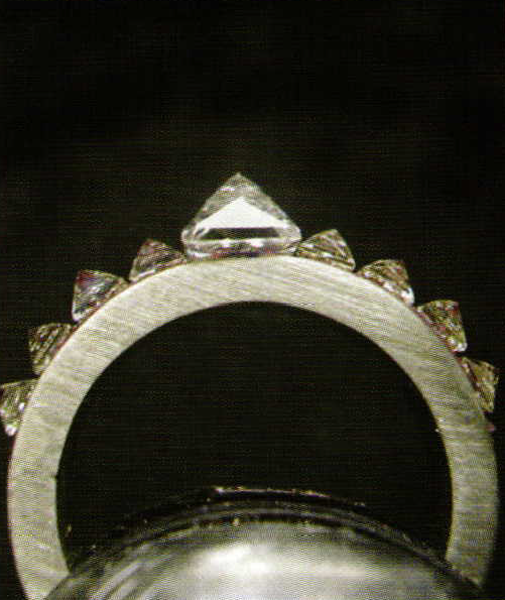
After the princess cut melee were all set, the customer's I carat princess cut center diamond was mounted into a four prong chevron tipped crown. The final ring came out nicely and the customer was very pleased with the quality of setting work.
Related Articles

Damascus and Pattern Welding
Ins and Outs

How to Modify Cross-Lock Tweezers

1984 Jewelry International Exhibition


The All-In-One Jewelry Making Solution At Your Fingertips
When you join the Ganoksin community, you get the tools you need to take your work to the next level.
