
Studio Visit – Patty Spiro
5 Minute Read
Although Patty Spiro of Live Oak Studios in Chipley, Florida, doesn't earn a living making jewelry full time, you wouldn't know that by looking at her studio. She and her husband have transformed a spare bedroom in their octagon-shaped house into a workshop they both use. Spiro's bench takes up one wall in the room, while her husband's "mini-machine shop" is tucked into a corner on the opposite wall. "We refer to this room as the 'Activity Room,'" she says.
- Because of the odd shape of our home, we have to build a lot of things to accommodate its weird angles. (Luckily for me, my husband was a carpenter in a former life.) Measuring about 11 feet long by two feet deep, my bench is constructed of a 2-by-4 frame that is fitted into the corner of the room. It's topped with a sheet of MDF that I varnished to give it a smooth finish. Since I have a lot of tools and supplies, I also built and installed shelving above and below the bench.
- I installed fluorescent lighting to the shelving over my bench, adding a wooden shade that covers the front of the lights. This helps to direct the light downward toward my work surface and prevents the lights from shining into my eyes while I'm working.
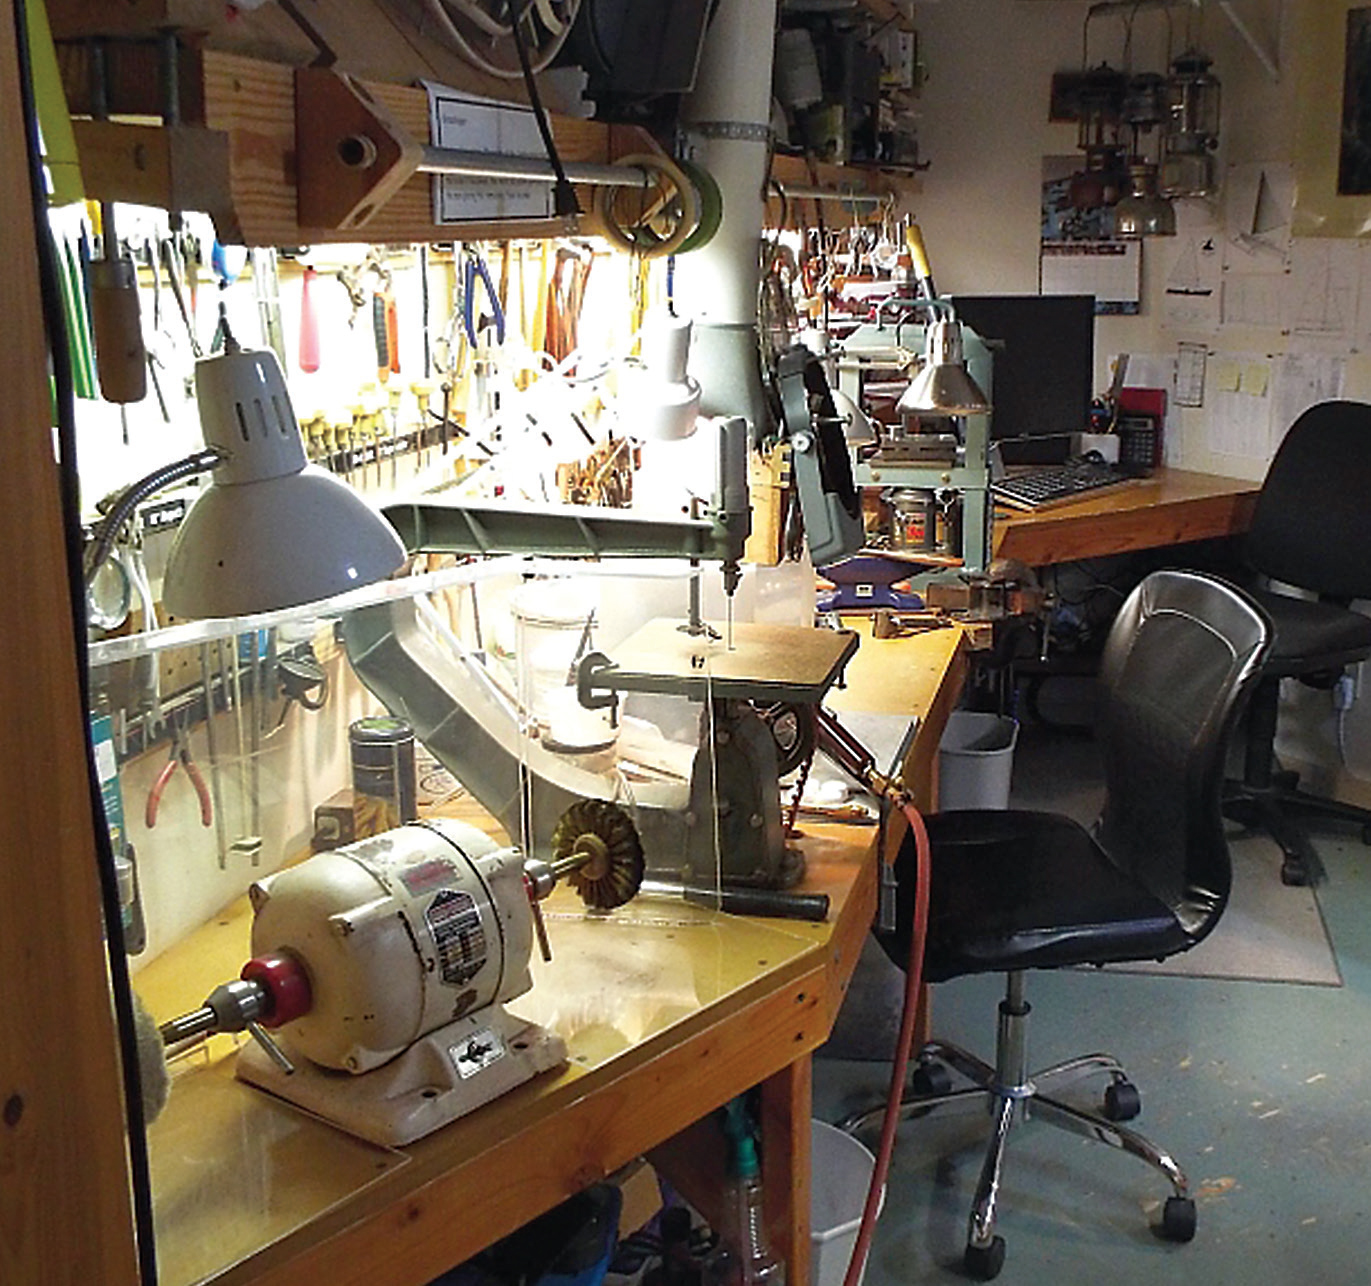
- To keep things handy but out of the way, I added a couple of metal bars to the front of my light shades. They're cut from electrical metal tubing, which is galvanized so it won't rust. They're great for hanging pieces in progress or flex shaft handpieces not in use.
- Since I don't yet make a living from my jewelry work, I haven't been able to buy the latest and greatest equipment for my shop. Instead, I've invested in a number of vintage machines and tools.
On the left side of my bench, I have a Red Wing buffer that I picked up for $20. To keep my bench clean, I turned old acrylic store shelves into a three sided folding screen that sits around the buffer. After polishing, I can lift it up and wash off any polishing compound dust in the sink.
- Another old tool I've put to use is a Walker Turner Scroll Saw that was made around 1935. My husband rebuilt it and changed out the pulleys to slow it down to a manageable speed. It's powered by a ¼-hp motor that is mounted under the bench and controlled by a foot pedal. Not all scroll saws can be used for this work, as most of them aren't able to take the fine saw blades jewelers use. However, this one came with blade clamps that hold them really well. I made a zero clearance top from a piece of Masonite that covers the original metal saw table. It has a small hole drilled into it that allows the jeweler's saw blade to pass through. This gives the table the support needed for cutting metal sheet.
- For my soldering station, I created an exhaust hood using a conglomeration of wood, heat vent duct fittings, a PVC pipe, and a cut-away plastic storage bin. It looks a little strange but works really well and is powered by two exhaust fans.
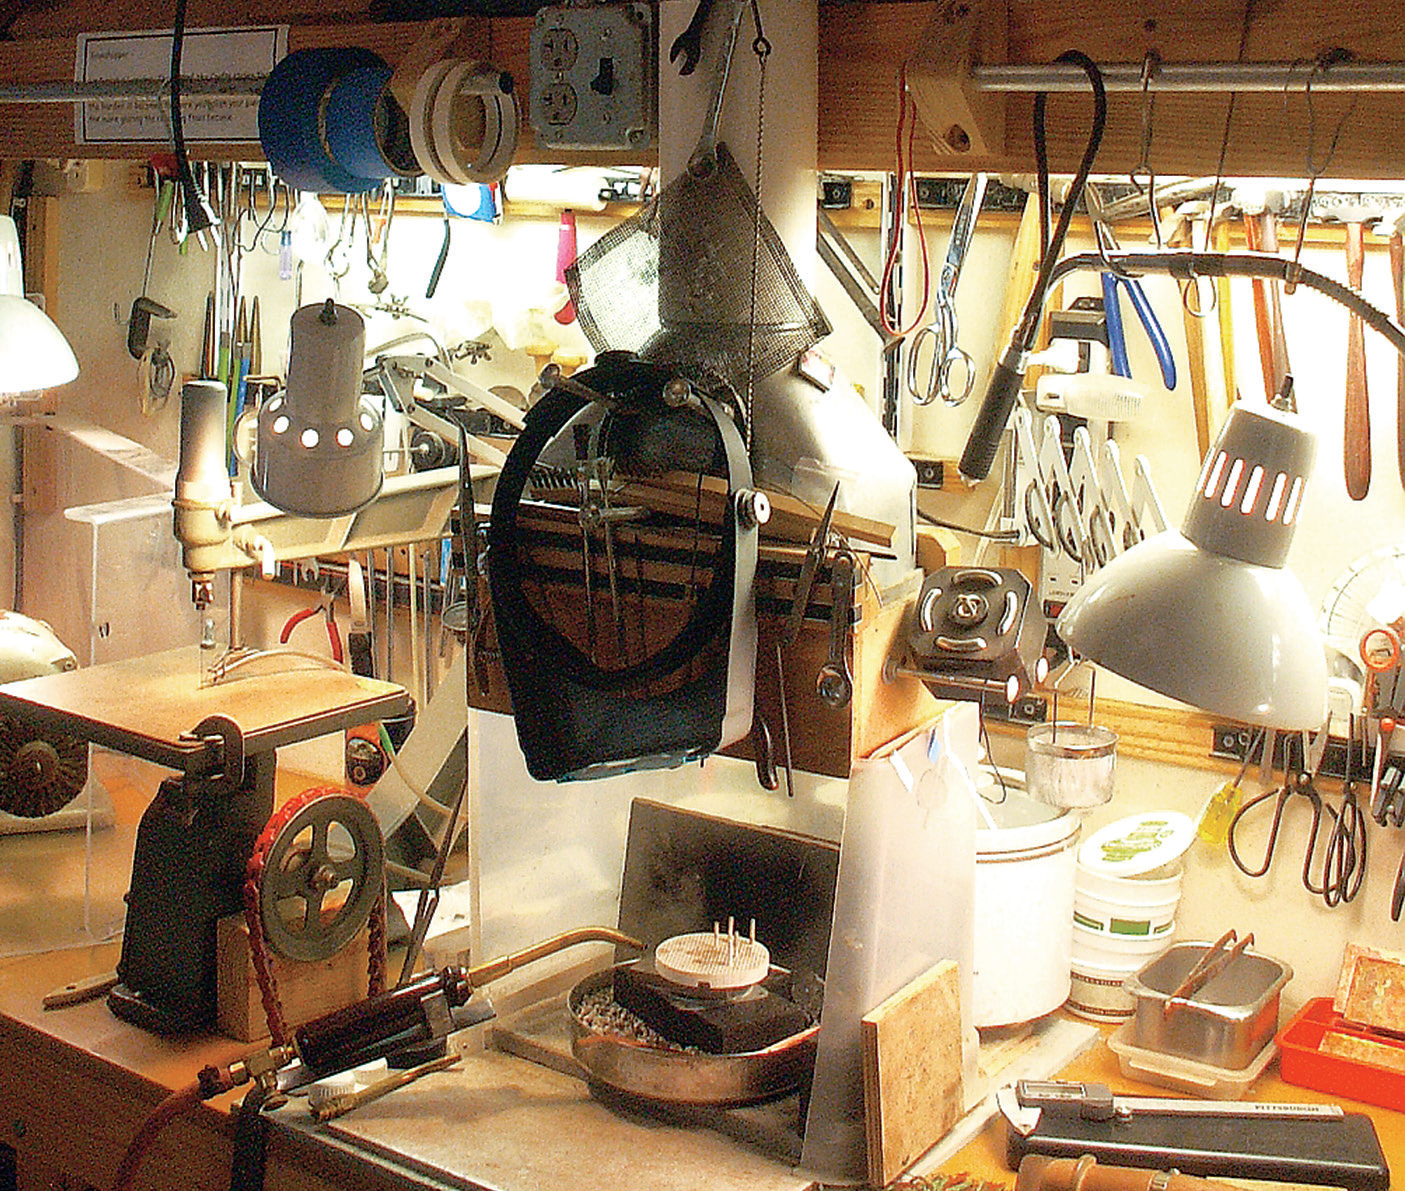
- My pickle pot sits behind the soldering hood. It's not particularly handy there but space is at a premium on my bench, and this location works best.
- I use an old Prest-O-Lite torch set. My husband rigged up a torch holder from a piece of steel bar with a metal broom clip to grab the torch handle. It's secure enough that I can leave it lit while I reposition something.
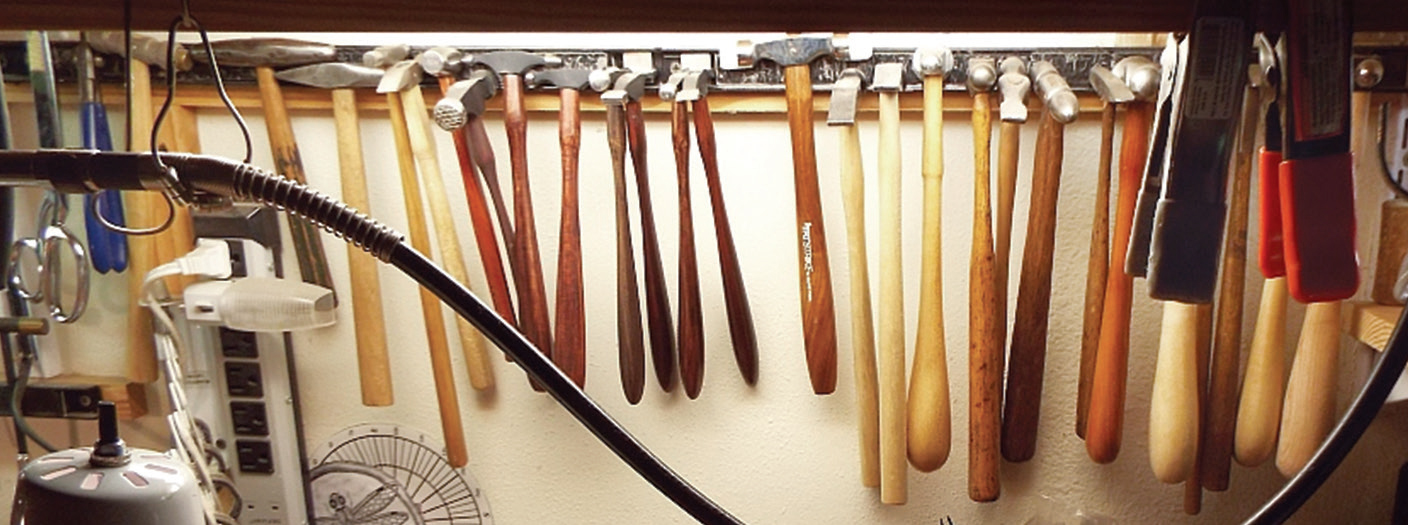
- One of my favorite things to do is search fl ea markets for old hammers and pliers. I've managed to collect quite a few of them. To keep them accessible but out of my way, I have made extensive use of magnet strips, adhering them along the wall behind my workspace to secure the tools.
- I keep a 15-pound anvil on my bench. It was relatively cheap but is extremely useful because it has a traditional hardy hole in its top. My husband made an aluminum insert for it that lets me wedge my small stakes in the oversized hole. It holds them very solidly.
- This press was last year's Christmas present from my husband. I have wanted a press for a long time, but the size and cost have always been prohibitive. My wonderful husband took it upon himself to design and make one for me. It's very compact and weighs 55 pounds with the jack. It has a Shorty 12-ton jack, and its frame is welded using 3-inch structural steel. I've only just begun to explore the possibilities with it, but it sure makes doming and punching a breeze.
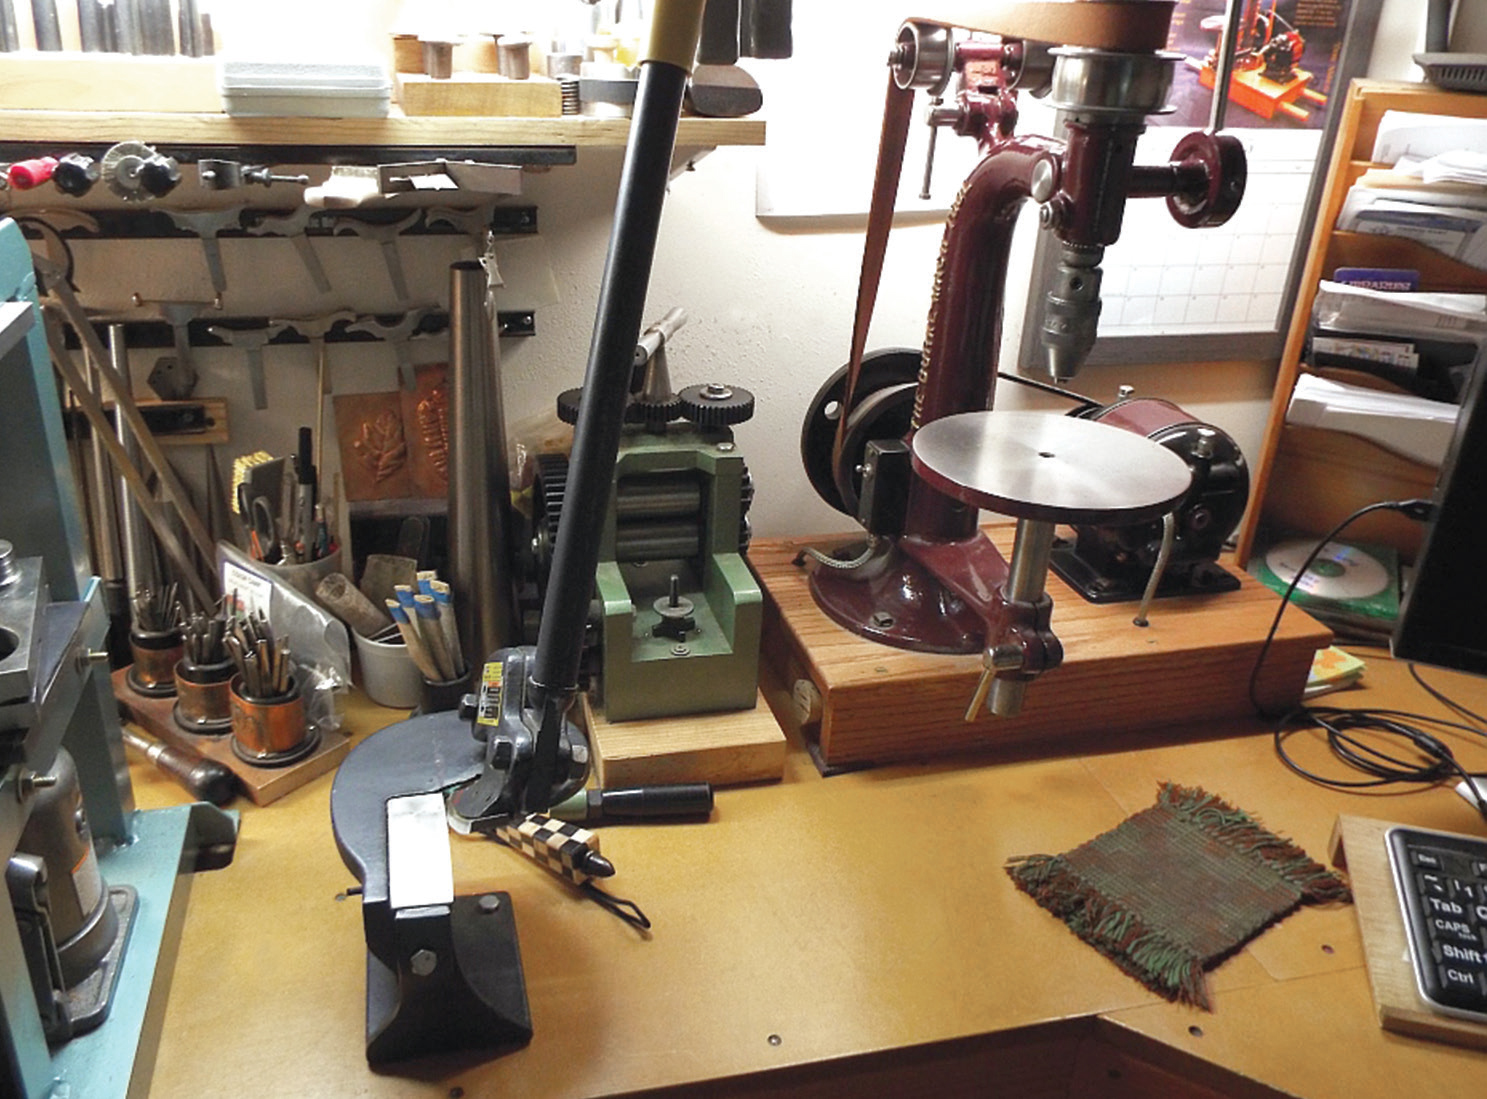
- To the right of my press is a throatless sheer that is great for rough cutting sheet metal blanks. I also have an inexpensive rolling mill. I've modified the mill to have a quick-release handle, allowing me to slide it to the back of my bench when I'm not using it.
- Next to my mill I have a Burke #25 drill press from the early 1900s. It was originally a line shaft machine but my husband restored and converted it with a small electric motor.
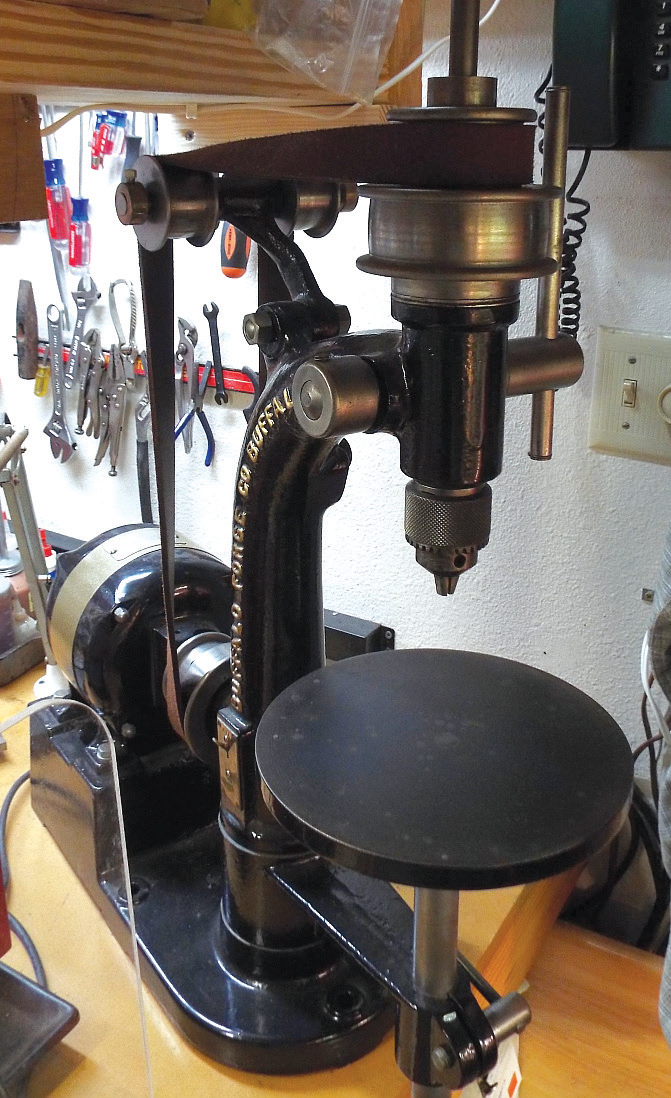
- I have three drill presses but this one is my favorite. It's a Buffalo Forge Junior from about 1920 and it sits on a secondary bench opposite my main bench just a chair swivel away. I truly love these old drill presses and the sound that their leather belts make. Because of the open belts and unguarded pulleys, shop safety is key. No long hair, long sleeves, or dangling jewelry is worn around them.
- I've begun outgrowing my shop. My latest toy is an old Paragon enameling kiln. It's located on a table in an outside hallway of our home because there wasn't a reasonable place to put it in my studio. (Plus, we live in Florida so the heat it generates would not be welcome inside!)
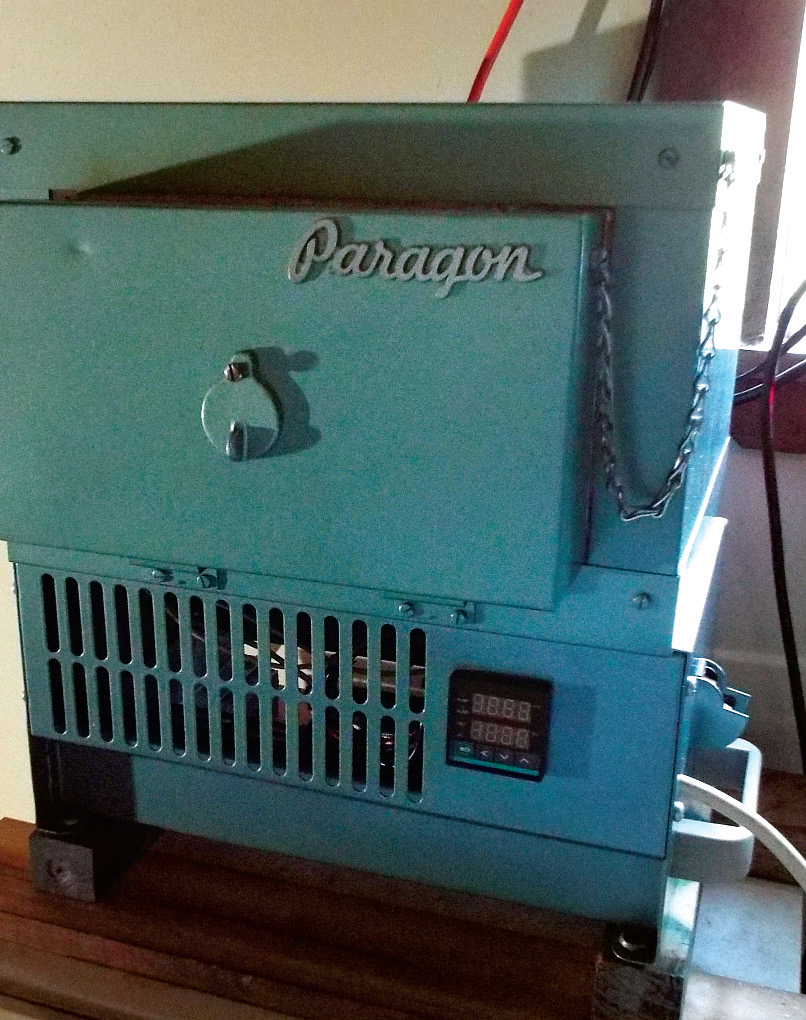 The kiln was inexpensive because it was in rough shape. My husband installed a new heating element and mounted it on a base from a defunct small tile saw. After adding a new PID controller and giving it a fresh coat of paint, it works (and looks) as good as new. **
![]()
In association with
![]()
The award-winning Journal is published monthly by MJSA, the trade association for professional jewelry makers, designers, and related suppliers. It offers design ideas, fabrication and production techniques, bench tips, business and marketing insights, and trend and technology updates—the information crucial for business success. “More than other publications, MJSA Journal is oriented toward people like me: those trying to earn a living by designing and making jewelry,” says Jim Binnion of James Binnion Metal Arts.
Click here to read our latest articles
Click here to get a FREE four-month trial subscription.
Related Articles

Studio Visit – Tom Joyce

Studio Visit – Fred Fenster

Large Scale Enameling at JSW Studio

Studio Visit – Milt Fischbein


The All-In-One Jewelry Making Solution At Your Fingertips
When you join the Ganoksin community, you get the tools you need to take your work to the next level.

