
Platinum Finishing 3 – Notes and Procedures
4 Minute Read
In this final article we continue our discussion of platinum polishing notes & procedures.
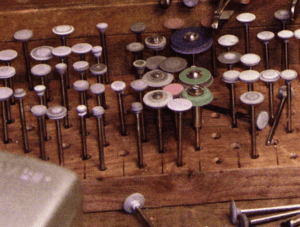
Abrasive Wheels
"Cera" ceramic impregnated square edge wheels - about 3/5″ to 3/4″ in diameter. So far, I've used 220 and 500 grit. There are a number of grits available in this brand of wheel.
"Silipum" pumice in silicone binder - knife and square edge - available in several sizes up to 7/8″.
Mounted 14.5 mm. knife edge wheels in Gray (medium) and lilac (fine) in a hard binder. 14.5 mm. red acrylic bound medium cut wheel. These cost about $1.40 and up.
Ahard binder keeps cuts crisp and is easily shaped against shaping stones for special contours. I'll use up half a dozen or more on an average lady's platinum solitaire.
The above are in constant use in my shop. I have boxes full of assorted abrasive wheels for the flex shaft. Some see more use than others. Some won't see use again. I keep searching for the best wheels for the job. This will continue.
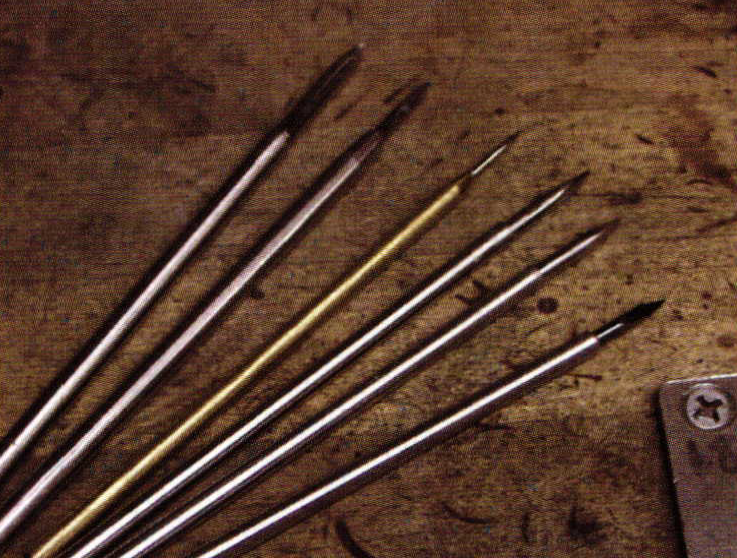
3M Radial Bristle Disc
Assorted 3M radial bristle discs can be used after filing, abrasive wheels and papers, to blend and pre-polish small heads, galleries, intersections between heads and shanks and confined spaces. Using these wheels effectively can leave you in a position of being ready to move directly to your final polishing compound. These wheels require almost no pressure to be applied to them as you work. Excess pressure actually inhibits their action and will consume the wheel more rapidly. Keep these wheels in motion and don't linger in a spot. They will surprise you with their clean, effective results. At first glance, they seem to be accomplishing very little but they can nearly render a final polish on small parts and details.
Burnishing
Burnishing is basically rubbing a surface with another (usually harder) surface to compress and blend any irregularities thereby making the subject surface smooth and somewhat harder than it had been. I have been uncertain as to where I should include comments about burnishing because it may be employed at any point in the finishing time line. In the early stages of roughing out a new piece, "hammer" burnishing might help to close voids (saw cuts, pores, digs caused by the edge of a file) in an area. Later in the process, a polished burnisher may come in handy for blending out fine micro-porosity or light imperfections that might reveal themselves in a nearly finished surface. With some practice, a raw piece of platinum can be brought to a near final finish by burnishing alone.
Abrasive Compounds
Begin with 800 grit "Gray" after 600 grit paper or abrasive wheels. Apply to a "Soft" bristle brush and run at low speed on the flex shaft to completely eliminate any remaining evidence of filing, abrasive papers and wheels. Stay on it until all interruptions are gone from the surface of the metal. It can next be applied to a small muslin wheel to enhance the effects of the same 800 grit compound after the brush work. At this point, there should not be any disruption in the surface of yourpiece. If there is disruption remaining, you may have to repeat steps until it's gone. The remaining polishing steps will only serve the purpose of bringing the surface to a high luster. They won't remedy imperfections in your surfaces.
Clean thoroughly in an ultrasonic and steam cleaner before proceeding.
After the 800 grit gray,I am now using Gesswein's new 2 part platinum polish. Use the "step 1" compound to remove the surface texture left by the 800 gray compound. Apply to a soft bristle bush to reach hard to access areas such as galleries and other tight points of intersection. Apply "step 1″ again to a small muslin wheel to further blend and refine your hard to reach, confined areas. Move on to the 6" X 50 layer "Blue" wheel on the large polishing motor to blend and smooth broader surface areas such as ring shanks and panels. At this point, the entire piece has been brought to a near final finish.
Clean thoroughly in ultrasonic and steam before proceeding.
For your final step: Get an incredible final luster with "step 2″ of the Gesswein2 part platinum system on a muslin wheel at the flex shaft for the inside of a ring and any hard to reach areas and move to 6" X 50 layer "Blue" wheel on the large polishing lathe for an intense, fluid looking, final polish. Contrary to what is often done - using a soft unbound wheel for final finish on gold and silver - I am still using the hard, Gesswein "Blue" wheels for final polish on platinum. I believe that the higher resistance, hard wheel works best on the highly resistant surface of platinum.
When working with brushes, be sure to alternate the direction that the bristles contact the surface so as not to dig trenches. Because brush bristles are individual little fingers with acharge of compound at the tip of each, they will cut much more aggressively while carrying the same compound than a muslin wheel. This is why I follow brush work with a muslin wheel charged with the same compound as the brush I just used to further smooth my surfaces.
See also:
Related Articles

Fearless Platinum Repairs

The Representation in Contemporary Metals

How to Build Up a Thin Shank

Securing Curved Stones for Easy Drilling


The All-In-One Jewelry Making Solution At Your Fingertips
When you join the Ganoksin community, you get the tools you need to take your work to the next level.
