
Using Non-Jeweler’s Tools For Fabrication: How To Repurpose Painting Blades For Bezels
2 Minute Read
Helen I. Driggs demonstrates how some non-jewelers tools give fabrication a new twist.
My background is in graphic design, so I have spent lots of time in traditional artist's supply stores. I have discovered quite a few tools that do double duty at my jewelry bench and in my painting studio that are especially suited to pattern creation and design. One of my recent finds is a tool used for heavy body paints, such as oils, acrylics, or alkyds as well as plaster, clay, and encaustics.
What You'll Need: Unexpected Jewelry-Making Tools
This month I will demonstrate how I use them to create custom-sawn scalloped bezels.
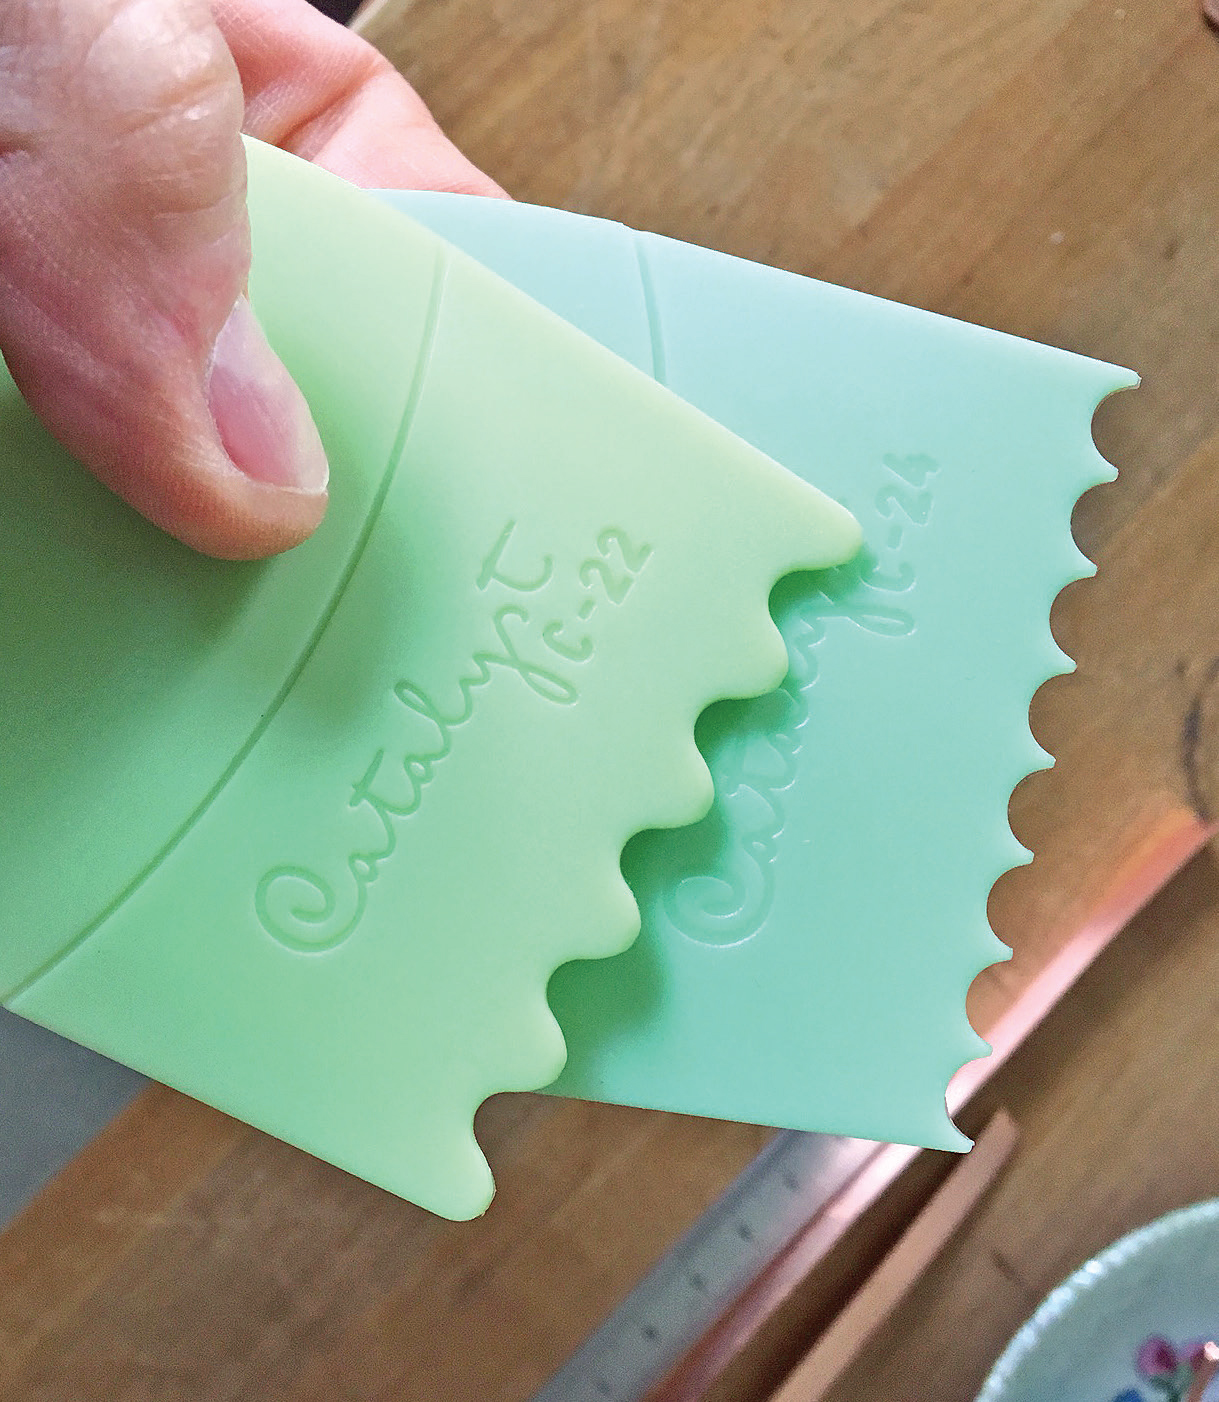 | Princeton Catalyst brand paint contour tools come in about a dozen shapes, but I like the small-scale crenelated, zig-zag, and wave shapes best for jewelry work. |
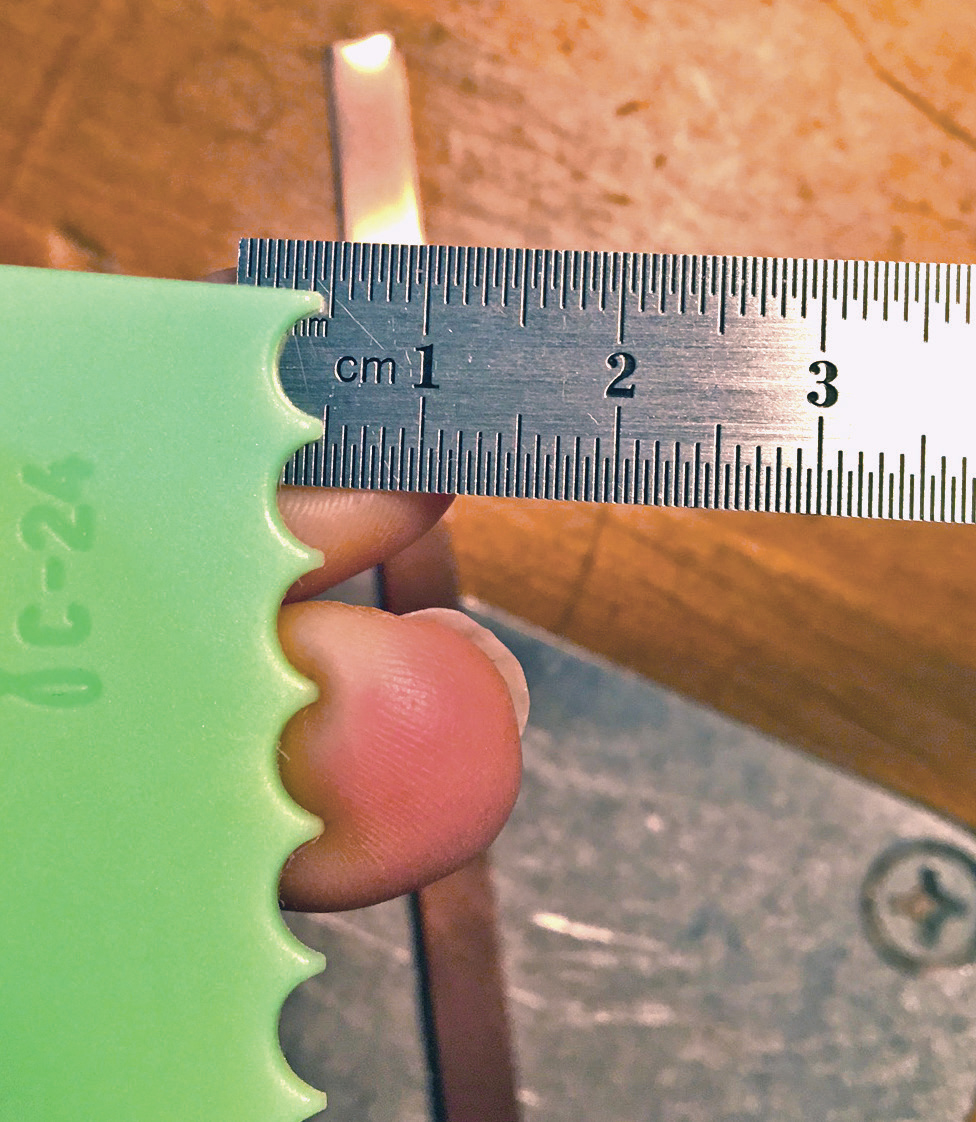 | For bezels, you'll need to measure the total depth of the indentations in the tool then add another 2 or 3 mm to allow for a metal base to solder onto a back plate. Set dividers to the measurement, and verify it is the correct height and length for the stone you intend to set as well. I typically use 6 to 8 inch lengths of bezel strip at most—any more is difficult to control. |
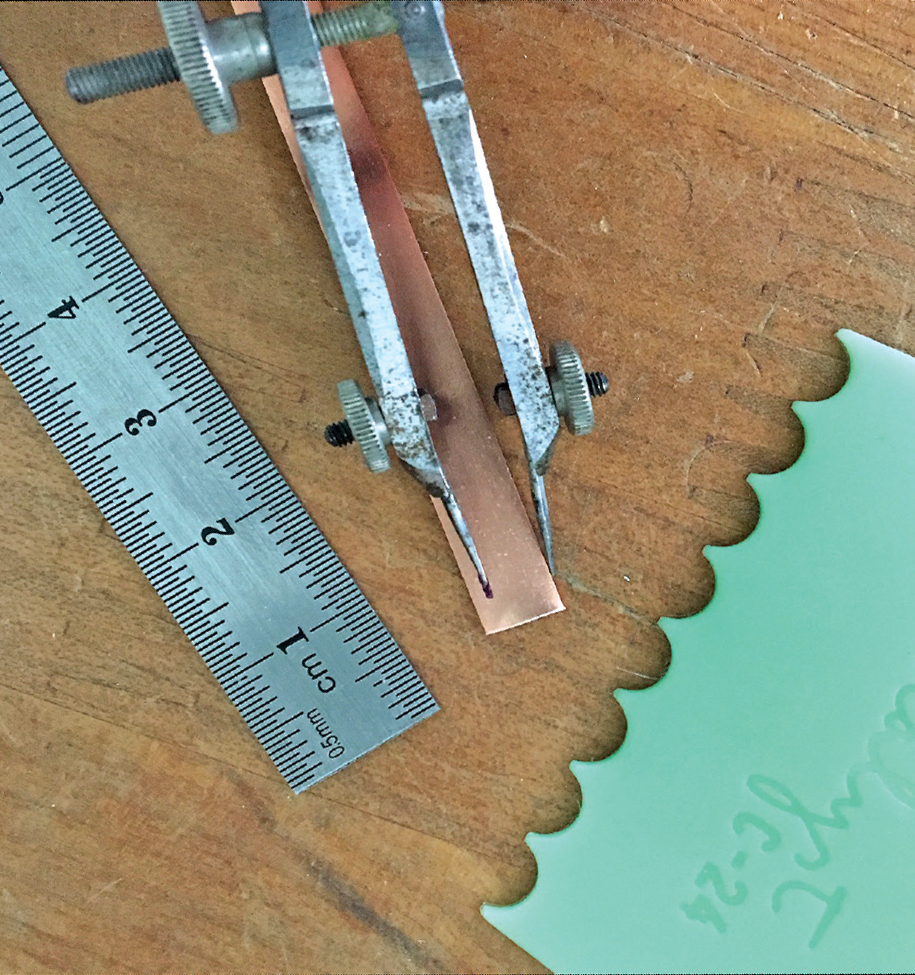 | Use the dividers to scribe a line along the bezel strip at the set measurement. |
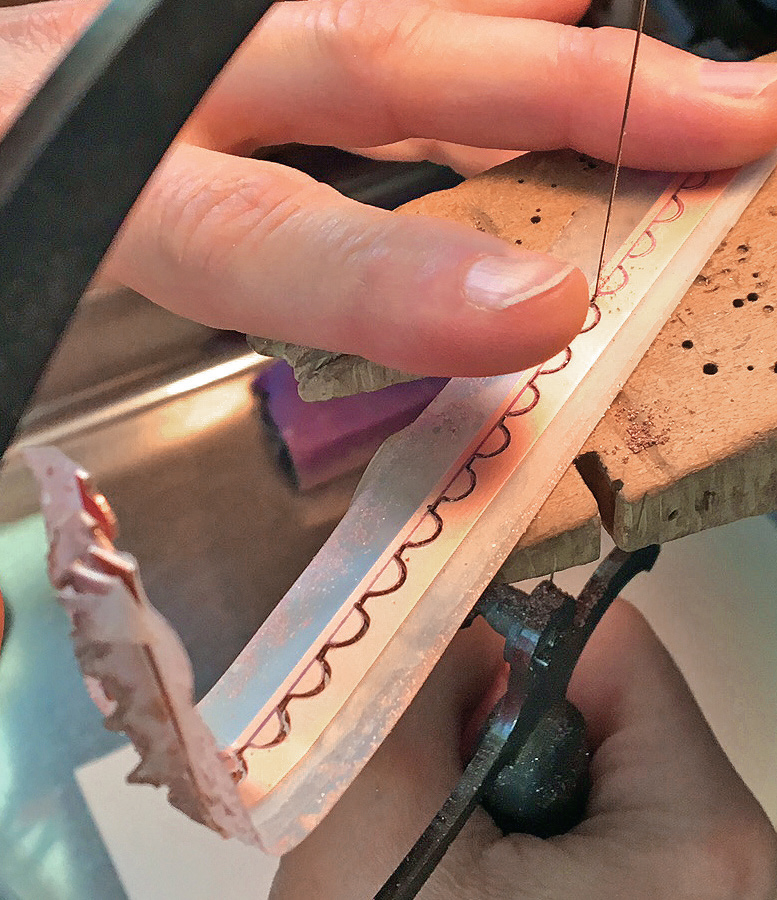
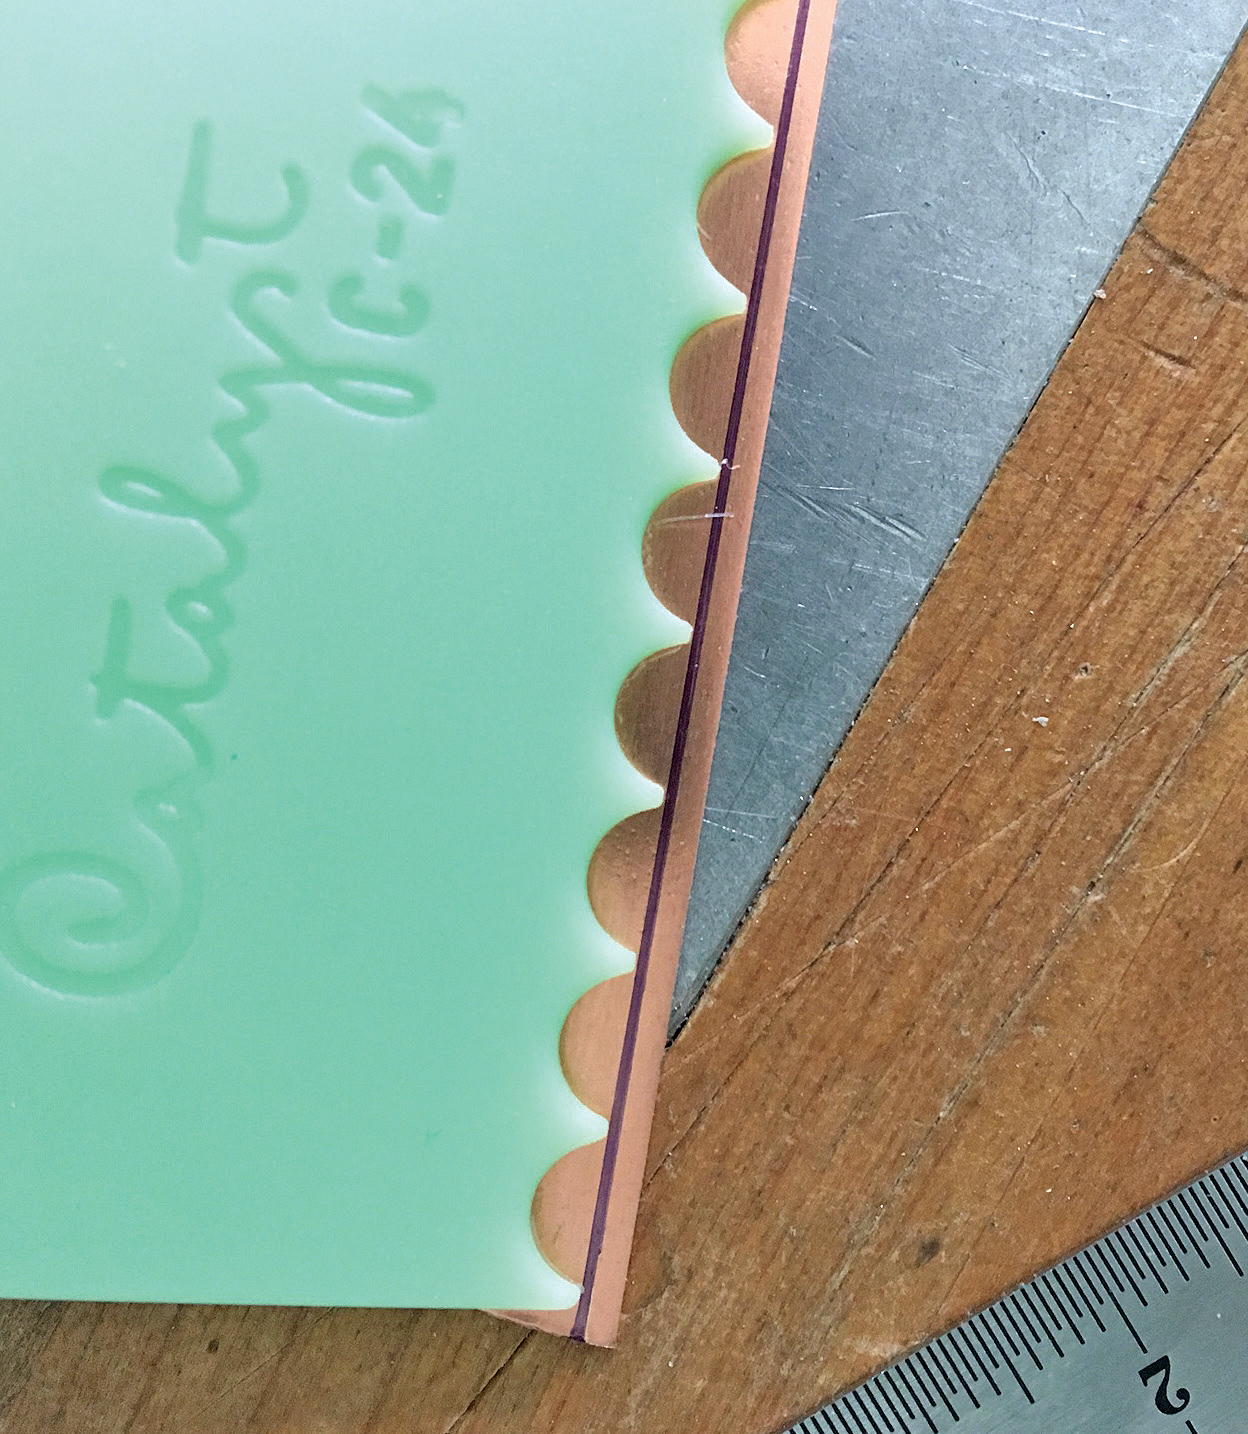 | I also draw a marker line at the scribed line to assist me when I position the contour tool. |
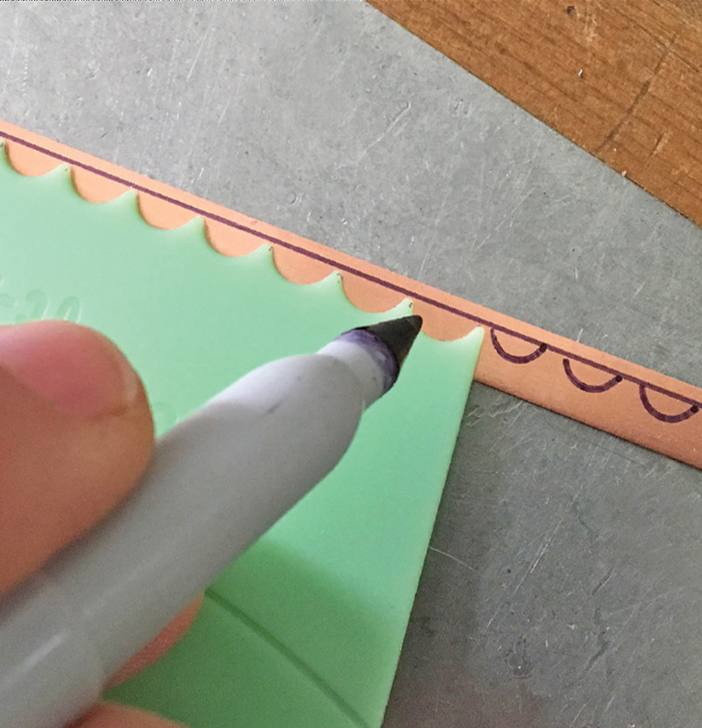 | Trace the indents along the baseline you scribed/marked on the bezel wire (or sheet) with a permanent marker. Because the contour tool is mildly flexible and has a non-skid surface, the metal stays put as you mark it. You can also scribe these if you prefer. |
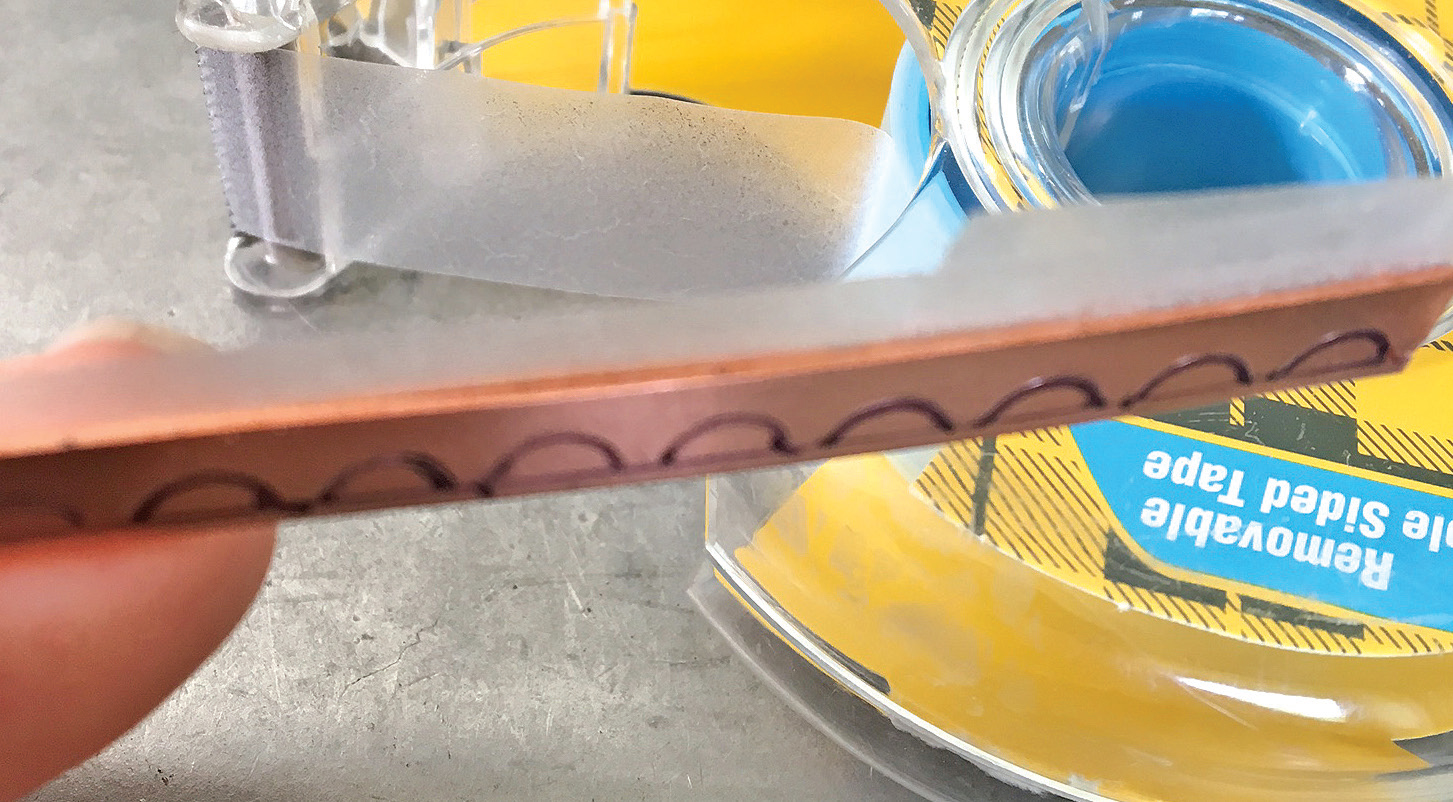 | Most bezel wire is thin and can be challenging to saw as it moves around a lot. To make things easier, I create a double thickness stack of two strips of metal. To do this, I use double-sided tape to carefully align and then adhere the second bezel strip to the back of the first one. |
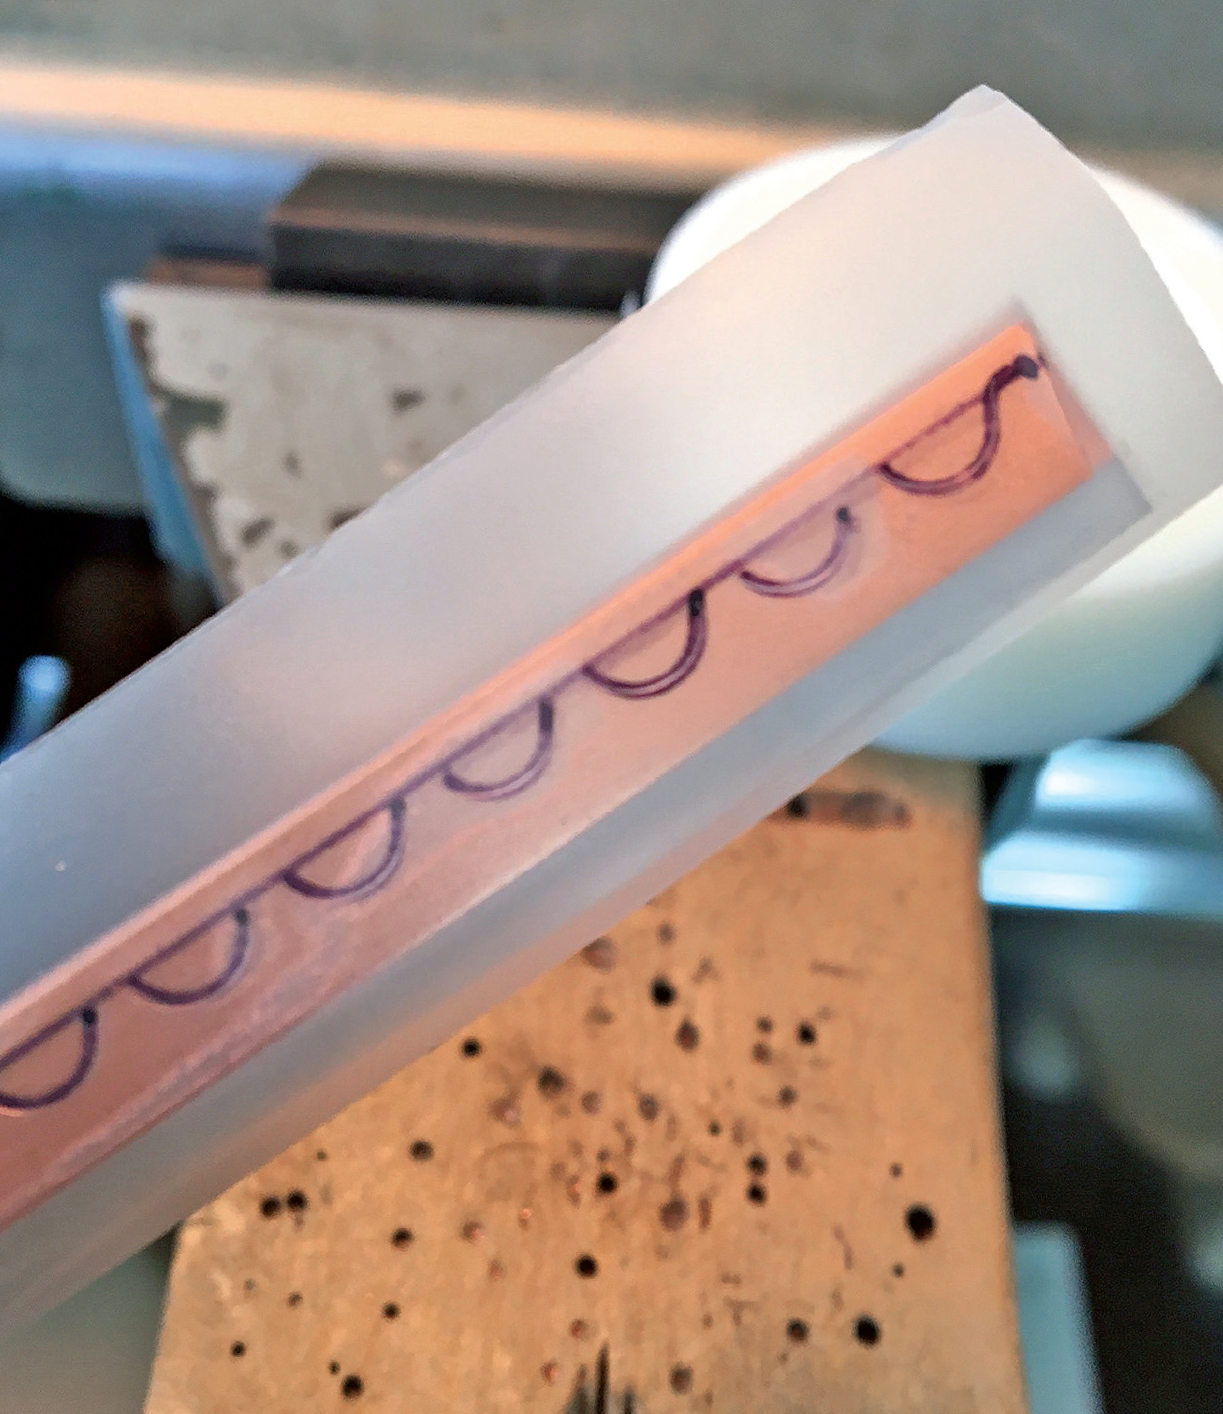 | Next, I encase the two stacked bezel strips completely in clear tape for extra security, and also to prevent the marker sawing lines from being rubbed off. |
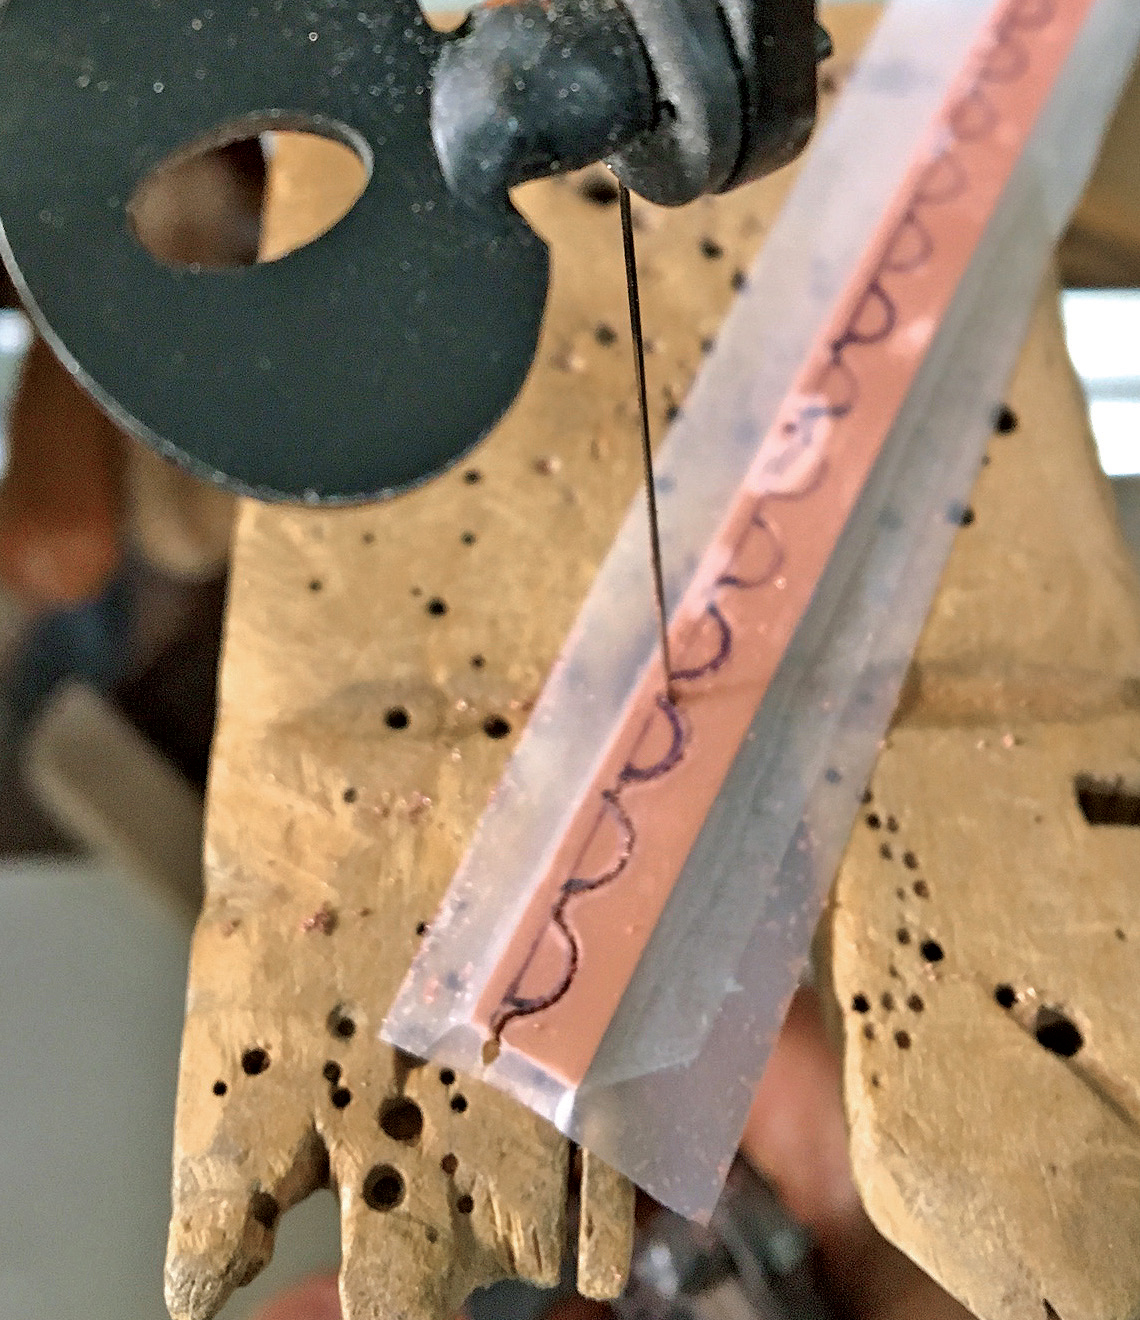 | Saw. Saw. Saw. |
 | If the bezel strip is too long to fit in the throat of your saw frame, carefully curl the metal up to get it out of the way, but do not fold it, or those fold lines will be nearly impossible to eradicate. |
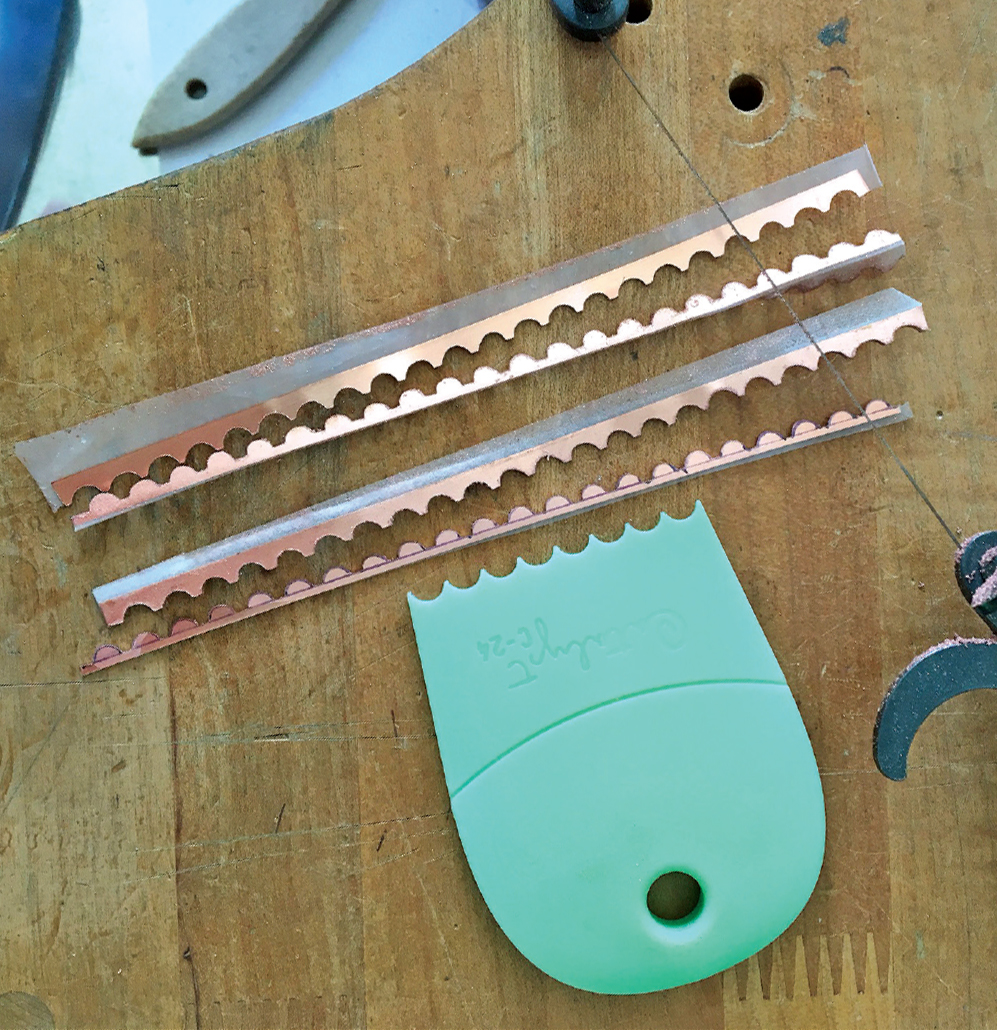 | Careful sawing means you should be able to use all four sections of the bezel wire. Peel them apart, remove the tape and any tape residue (alcohol or acetone works here), and run a sanding stick over all of the sawn edges. Your custom designed bezel strips are then ready to roll. |
Originally published under the title: Unexpected Tools For Fabrication
Helen I. Driggs is an experienced metalsmith, lapidary, and studio jewelry instructor, and she has appeared in six instructional jewelry technique videos. Her book, The Jewelry Maker's Field Guide, was published in 2013.
![]()
In association with
![]()
The award-winning Journal is published monthly by MJSA, the trade association for professional jewelry makers, designers, and related suppliers. It offers design ideas, fabrication and production techniques, bench tips, business and marketing insights, and trend and technology updates—the information crucial for business success. “More than other publications, MJSA Journal is oriented toward people like me: those trying to earn a living by designing and making jewelry,” says Jim Binnion of James Binnion Metal Arts.
Click here to read our latest articles
Click here to get a FREE four-month trial subscription.
Related Articles

How to Modify Separating Tweezers

Customized Steamer Bucket Enclosure

Creating Beading Pliers Accessory Bezel Settings

The Art of Tool Making


The All-In-One Jewelry Making Solution At Your Fingertips
When you join the Ganoksin community, you get the tools you need to take your work to the next level.

