
Bypass Shank Ring Assembly
Rings with by-pass shanks are right hand and left hand specific and are not interchangeable. When creating a ring with a by-pass shank, the side of the shank closest to the hand should come from the side of little finger. The ring will then sit straight on the finger. This is because the skin joining the fingers together is lower between the little finger and the ring finger than between the ring finger and the middle finger. If the ring is created with the shank going the other way, the shank will contact the hand on the middle finger side first and cause the ring to twist while wearing it.
1 Minute Read
Rings with bypass shanks are right hand and left hand specific and are not interchangeable. When creating a ring with a bypass shank, the side of the shank closest to the hand should come from the side of little finger. The ring will then sit straight on the finger.
This is because the skin joining the fingers together is lower between the little finger and the ring finger than between the ring finger and the middle finger. If the ring is created with the shank going the other way, the shank will contact the hand on the middle finger side first and cause the ring to twist while wearing it.
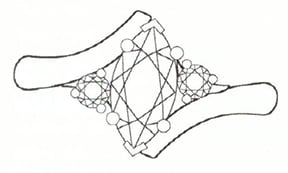
With a few basic bench skills and readily available findings, you can easily assemble this beautiful bypass ring to fit your customer's stones. For the ring in this project, we will use a bypass ring shank for a right hand ring, a heavy marquise wire basket crown, a pair of three-prong extended prong crowns (small wire crowns where the prongs extend down below the under-bezel), and two small sections of sizing stock.

To begin select a bypass shank with the correct orientation for the hand the customer will be wearing the ring on, and adjust it to the proper ring size. Then solder the center marquise crown in place using hard solder of the same karat and color as the metal.
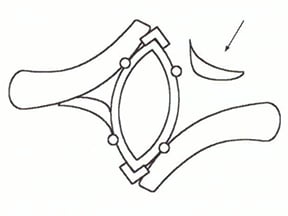
Next, shape two small pieces of sizing stock to form bridge for the side stones. Using medium solder, attach the bridges between the ring shank and the center crown. These bridges are to be flush with the inside of the ring.
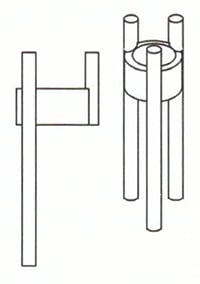
Remove one prong on each of the extended prong crowns flush with the bottom of the under-bezel. Solder the crowns in place using easy solder. First, solder the base of the prong you altered, to the top of the ring shank. Then solder the two remaining prongs where they contact the bridges.
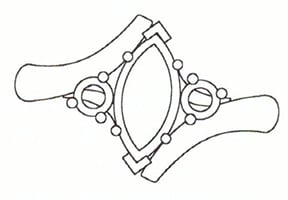
Trim the remaining wire from the finger hole, polish the mounting, and you are ready to begin setting the stones. By using standard findings, you can assemble this mounting in a fraction of the time it would take to hand-fabricate it, and still have a mounting that matches your customer's stones.
Related Articles

CAD/CAM Techniques
Safety Notes for Jewelers on Pitch, Chasing and Repousse

1984 Metals Invitational Exhibition

Stone Setting Tips


The All-In-One Jewelry Making Solution At Your Fingertips
When you join the Ganoksin community, you get the tools you need to take your work to the next level.
