
How to Make a Plique a Jour Fairy
7 Minute Read
This is a HIDI, (How I Do It). It is not the only way to make a piece like this, there are probably better ways, but this one worked for me. I also assume you are familiar with all the basic goldsmithing techniques.
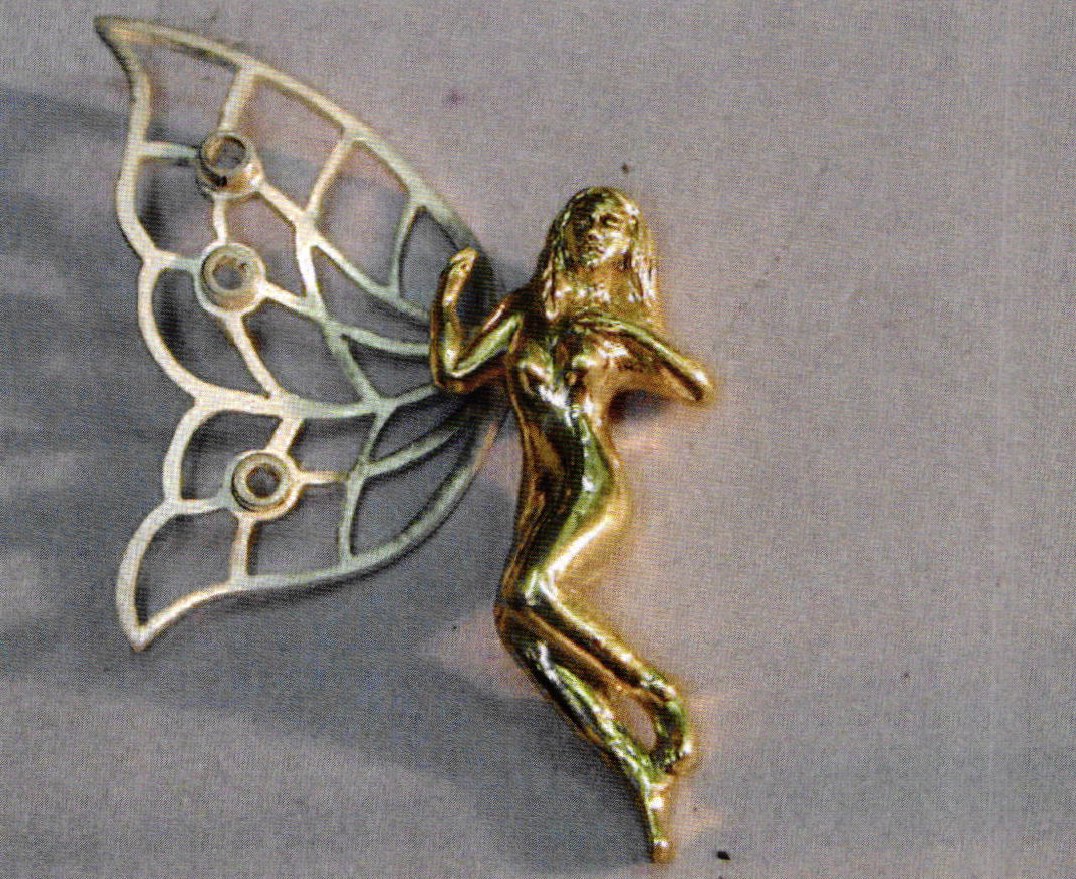
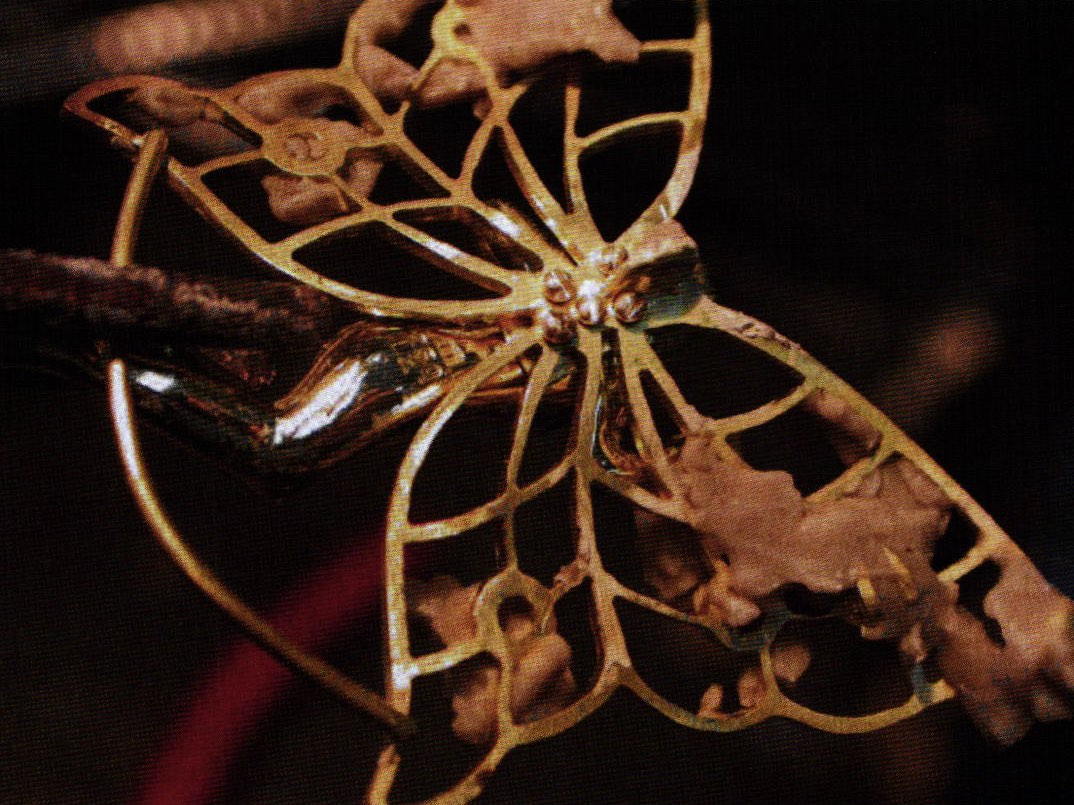
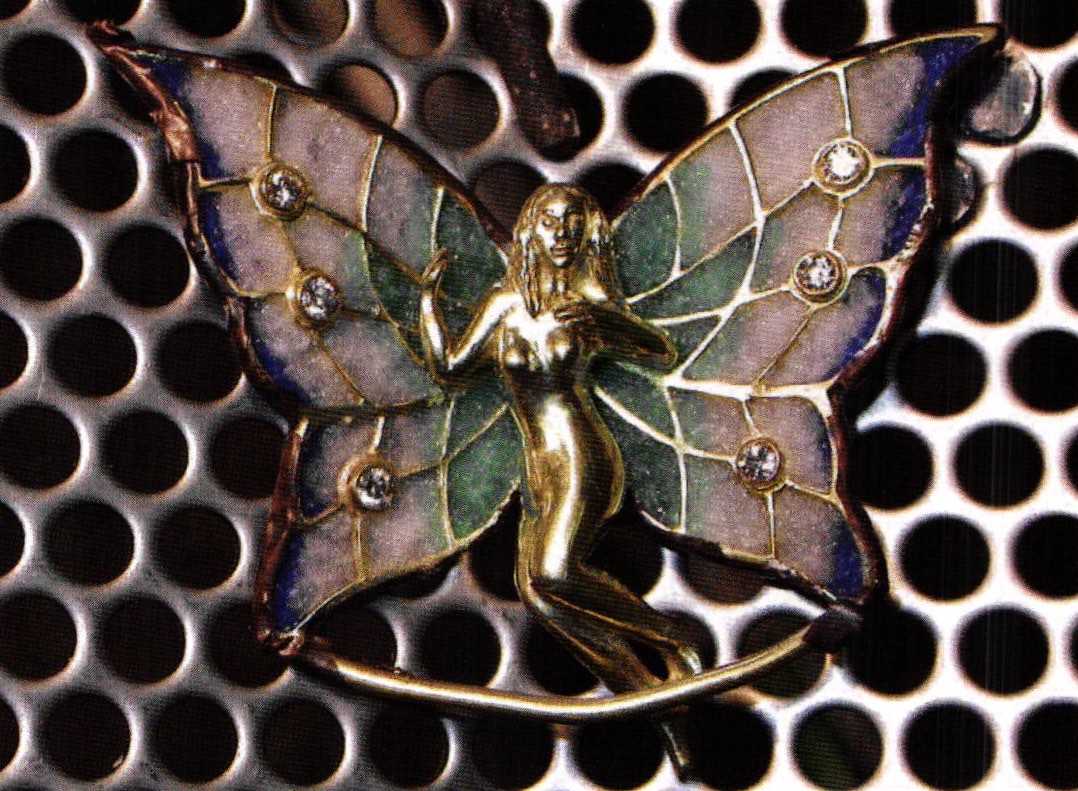
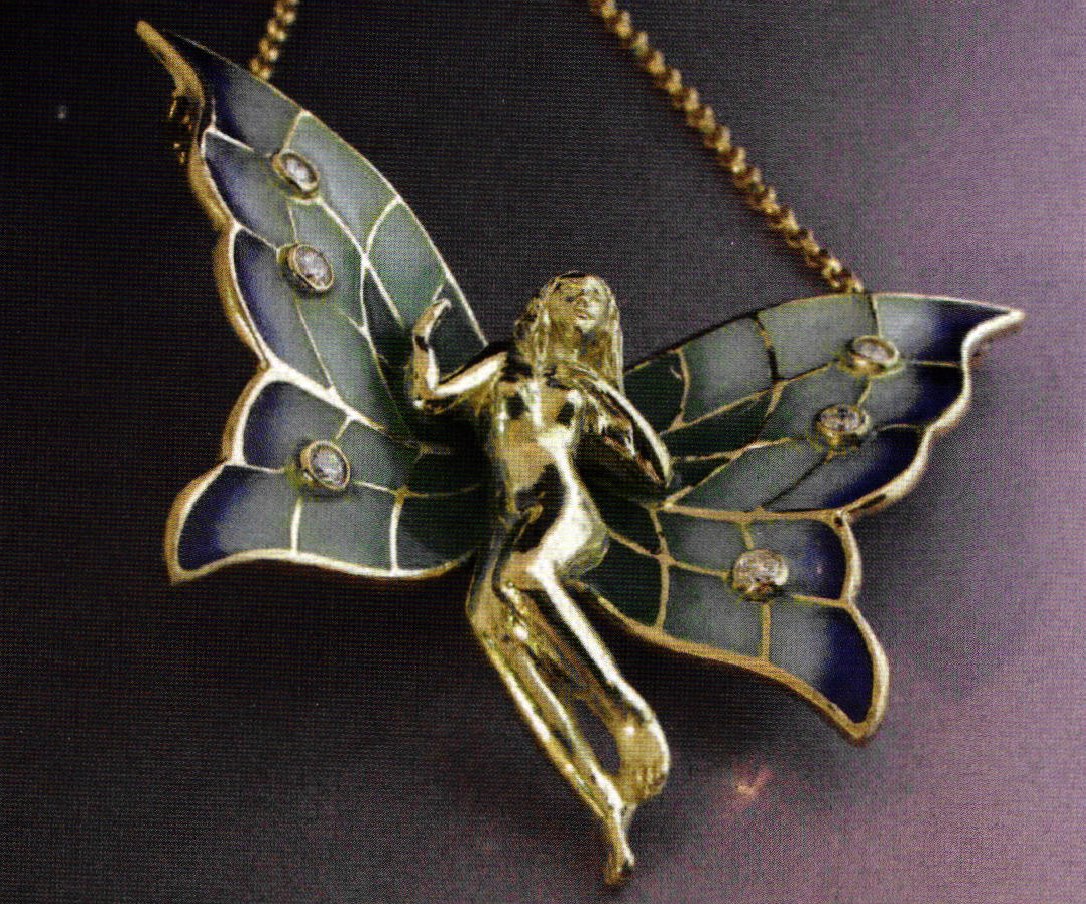
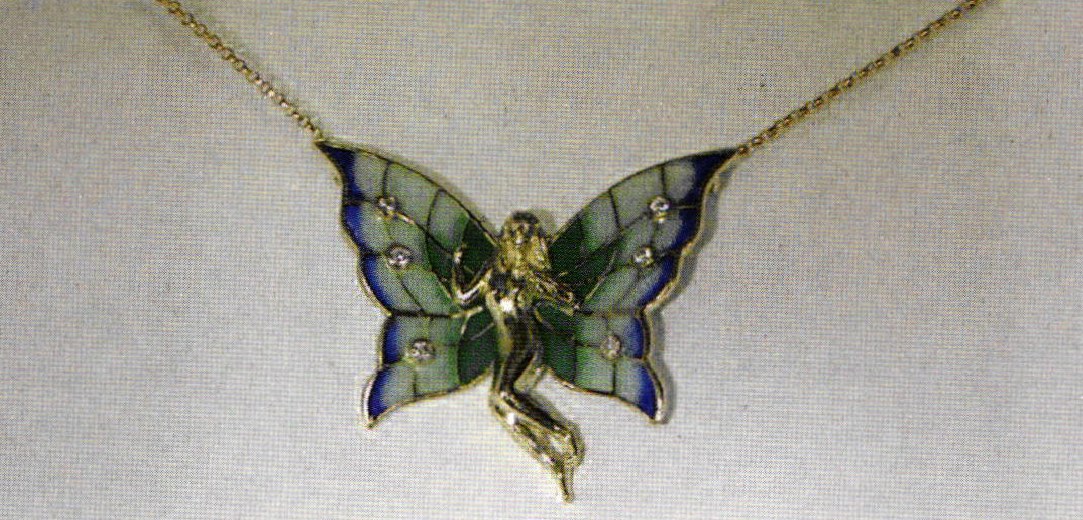
- Figure 1 - Completed Plique-a-Jour Fairy
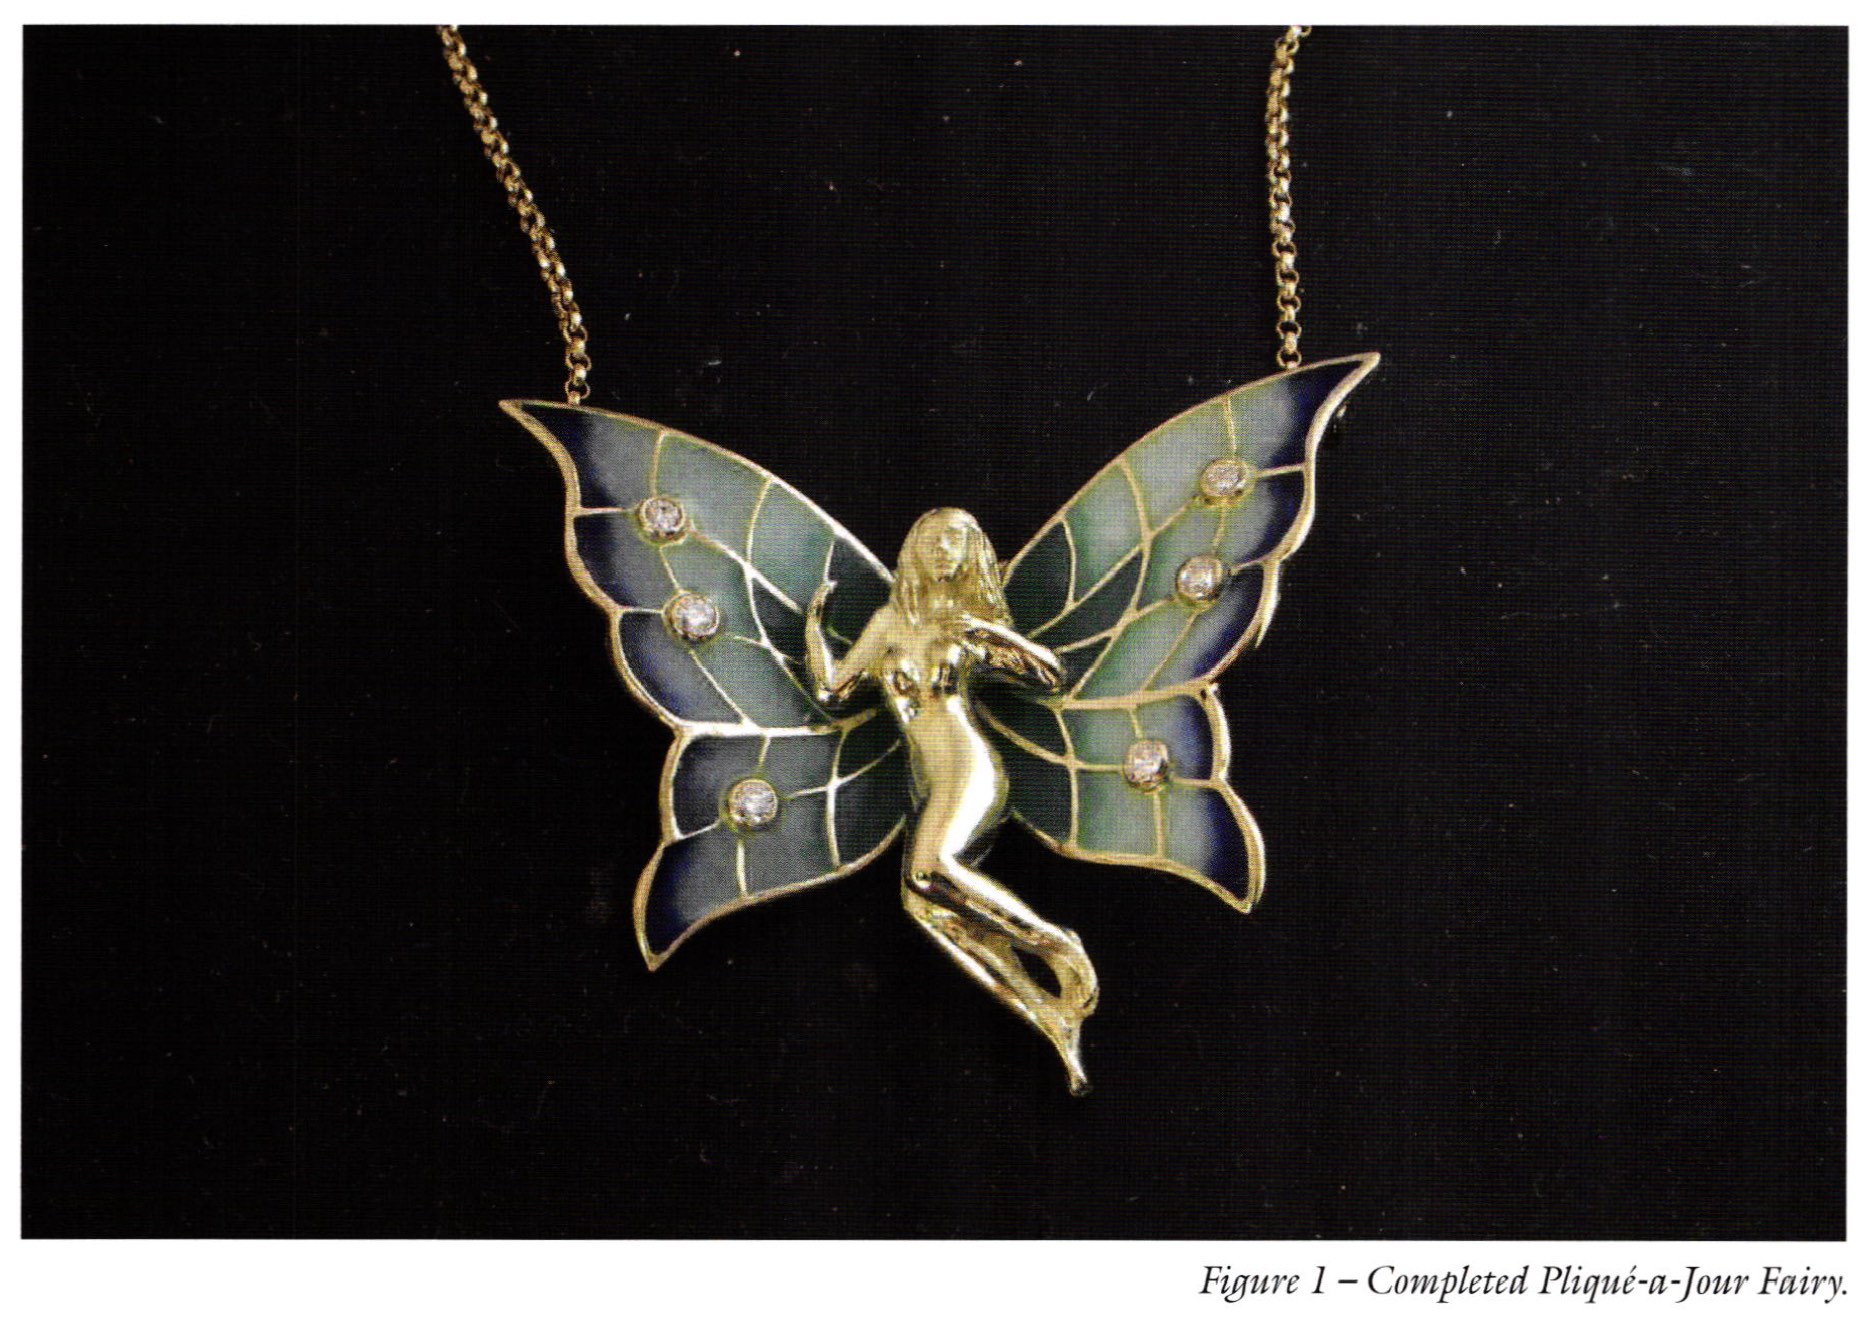
This is a 'classical' design of a fairy (to me) and is by no means my own design. Rather, it is a modern replica of a model that was made in about 1912 during the Art Nouveau period of that time.
The first thing I do is to carve the body out of wax. I use Ferris Purple wax, but if I do another one I would carve it out of a green wax. I found the purple a bit too soft for the detail on the face. The face I carved under a microscope.
How to Make a Plique a Jour Fairy | |
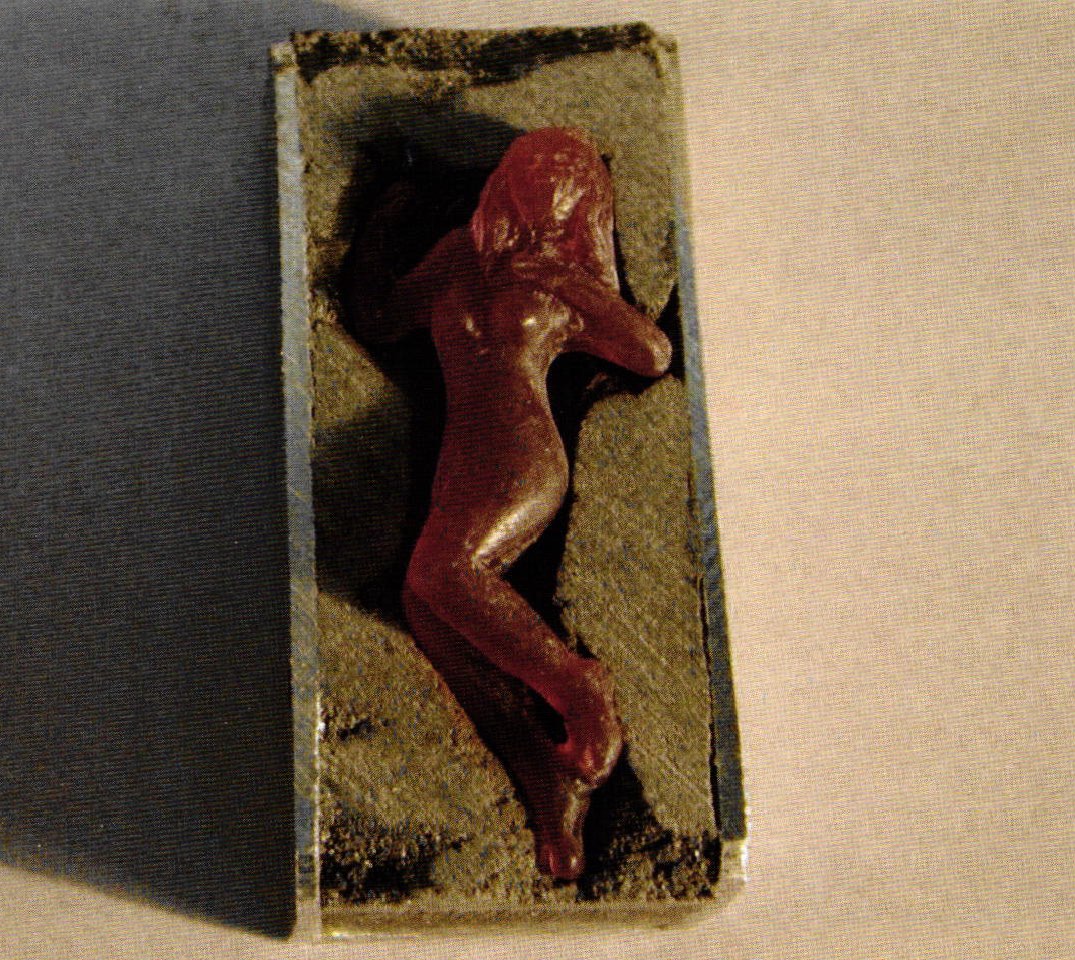
 | Fig. 2 After about 3 hours of carving. I am going to carve the back of the body, and then the face last. This is always problematic, because it is easy to damage the finer detail on one side when I work on the other side. |
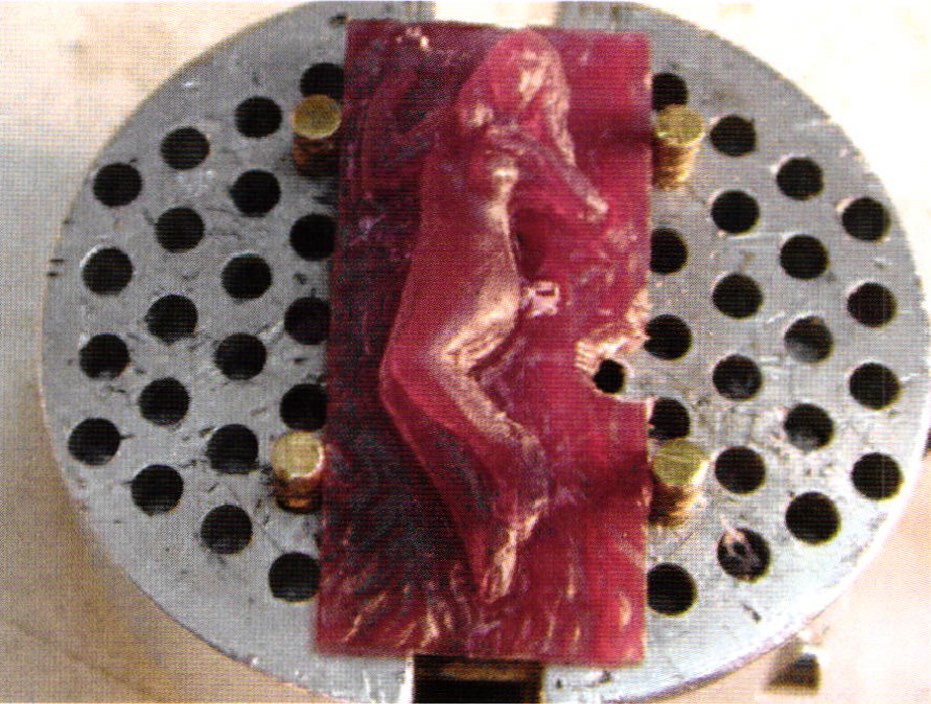
 | Fig. 3 I make a bed for her by cutting a short section of aluminum "U" channel, and mix up some two component epoxy putty that can be bought at a motor spares shop - used for fixing exhausts. |
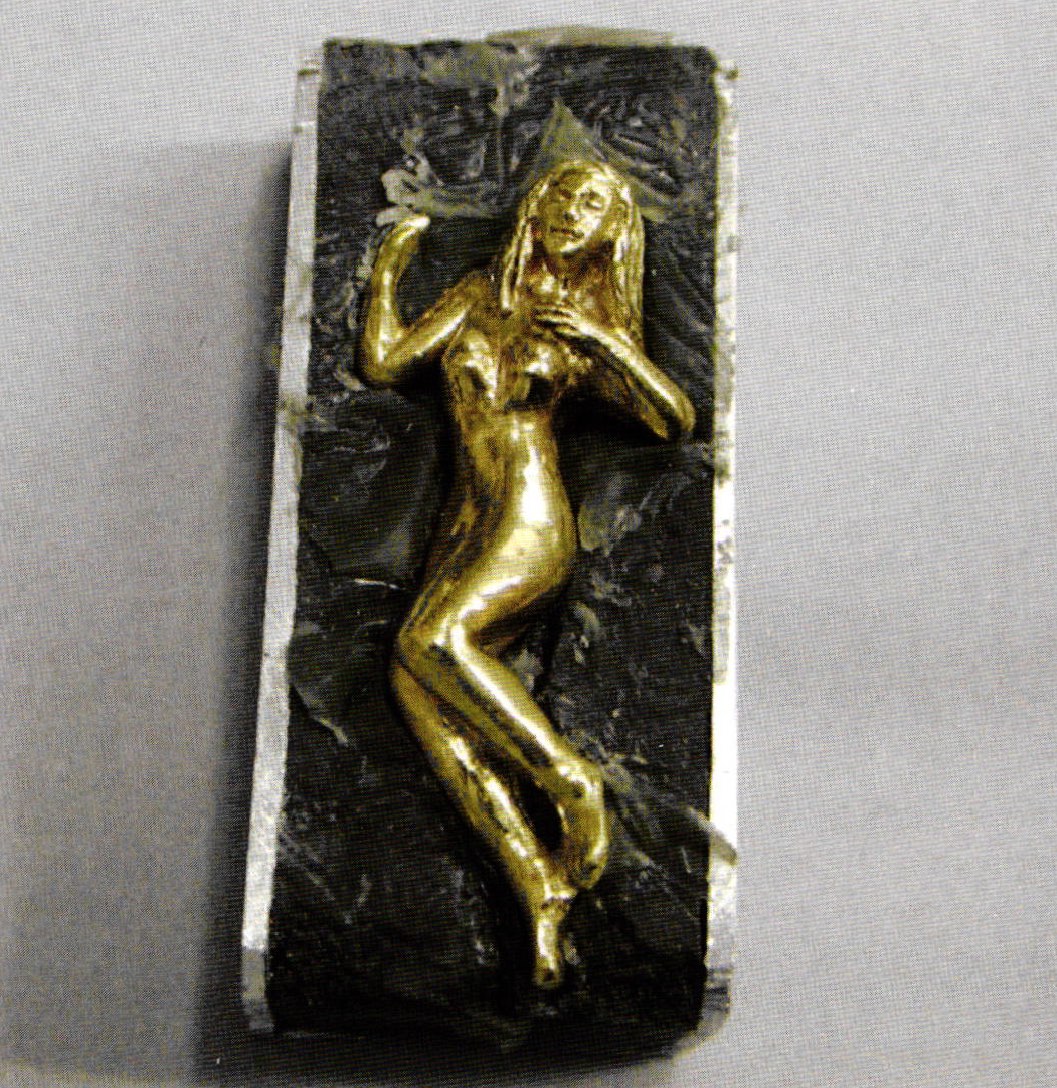
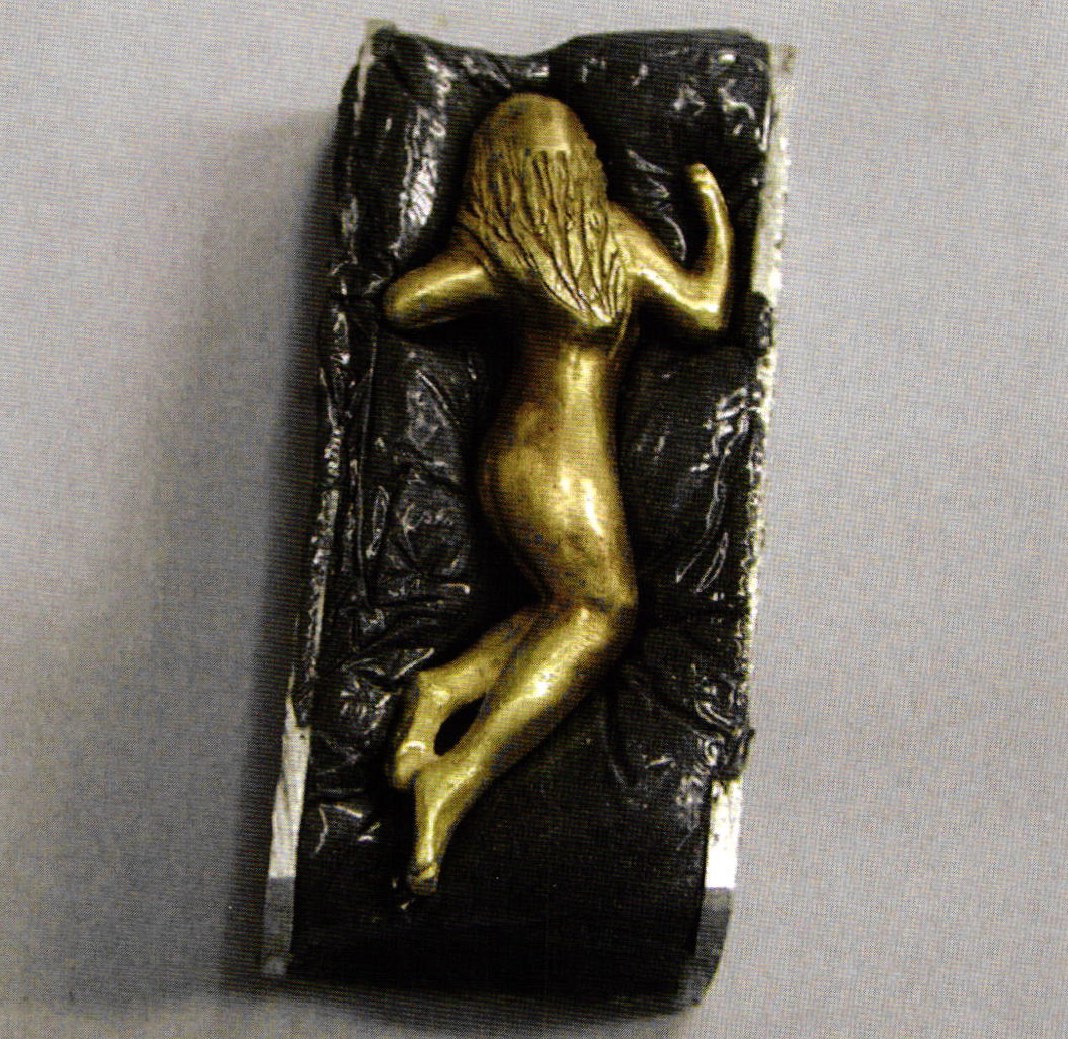
| I press the epoxy putty into the channel and put a piece of cling wrap over it. I gently and oh-so carefully press the model into it. The cling wrap stops the putty sticking to the model. I pull the model out and after the putty has hardened, file it down like in the picture. I do this for all four sides of the model. The "U" channels are handy for support when I carve and it stops the model from getting damaged on the opposite side. | |
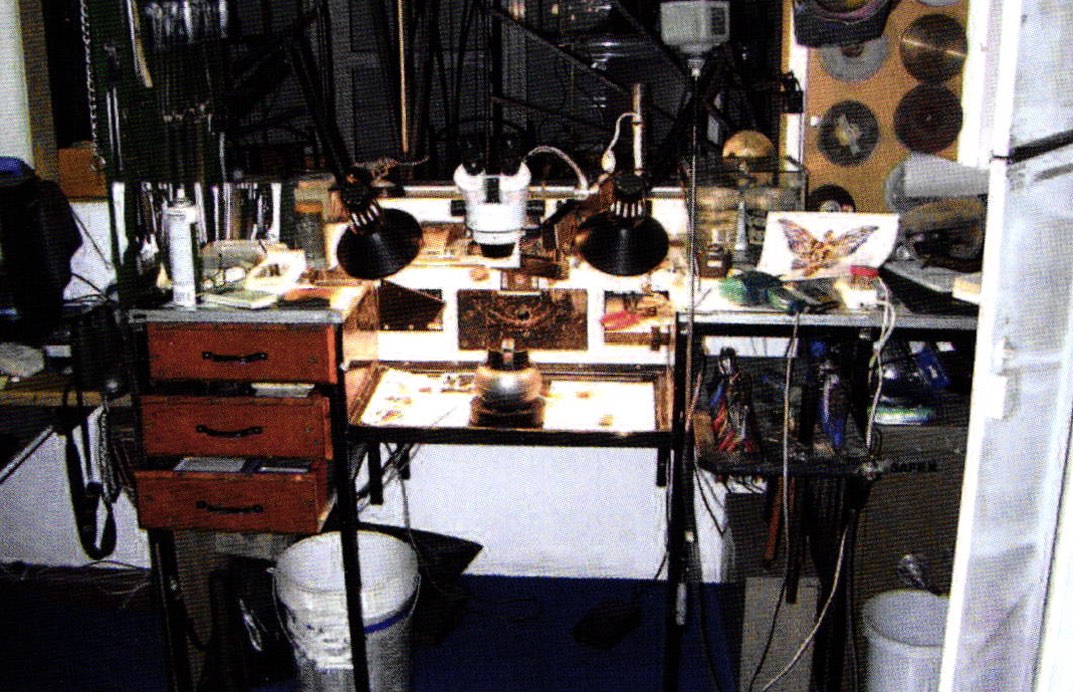 | Fig. 4 This is the bench where I do my carving. The fairy piece is mounted in the engravers ball, and I use a stereo microscope with various pictures of a woman's anatomy, like hands, feet, faces, etc. It is absolutely essential to have these references to carve. |
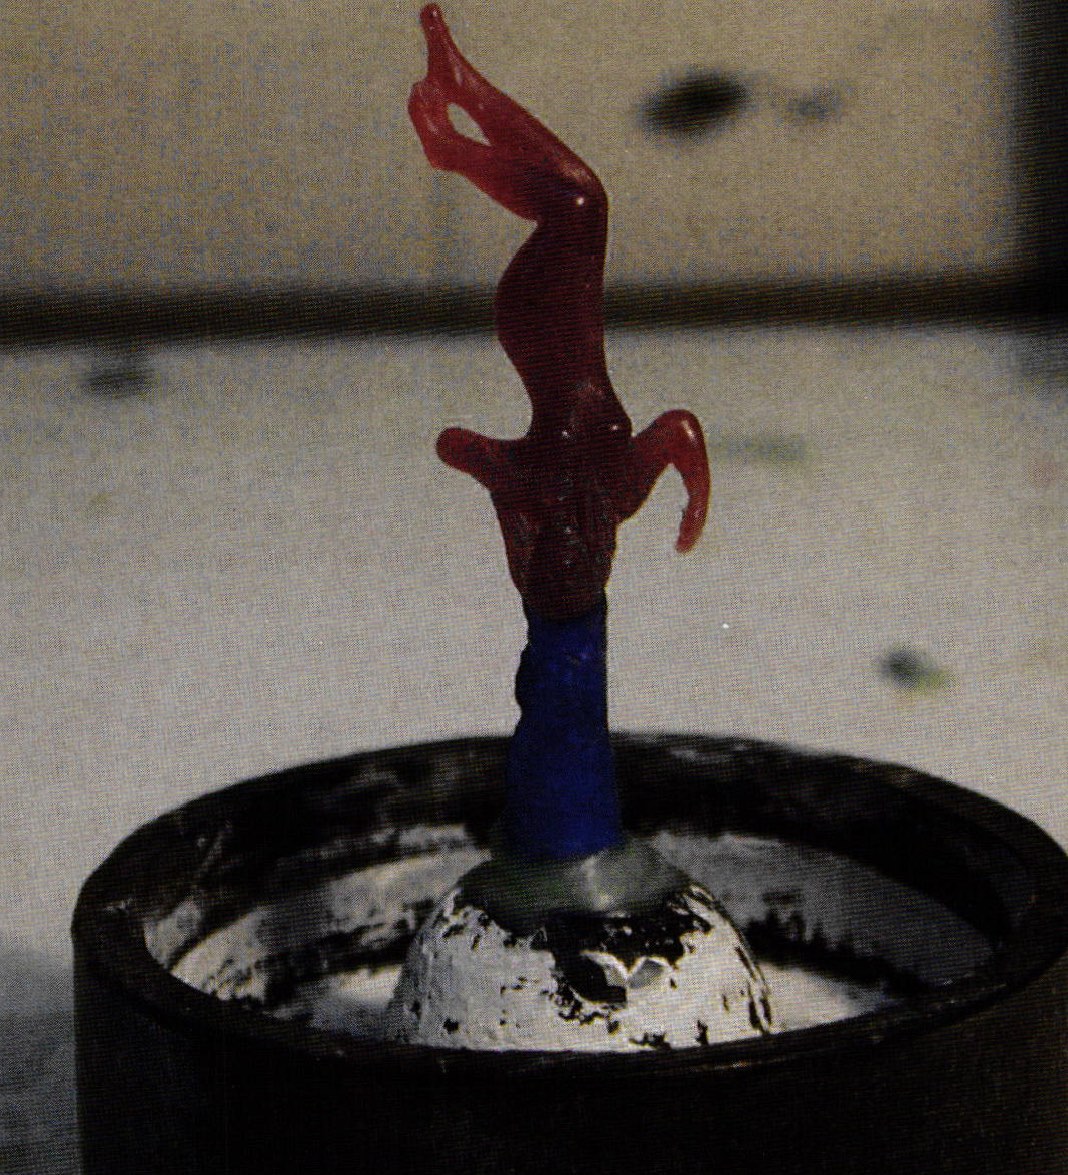 | Fig. 5 How inelegant. Shame, the poor thing. Anyway, she is cast in the normal manner, using a spin caster. I did make a silicone mould first, just in case the cast did not come out properly. Notice the thick sprue - taking no chances. |
 | Fig. 6 It casts perfectly. Now I use the epoxy bed again to hold her while I finish the gold off. |
 | Fig. 7 Here I finish the details on her back and hair where the sprue was joined. |
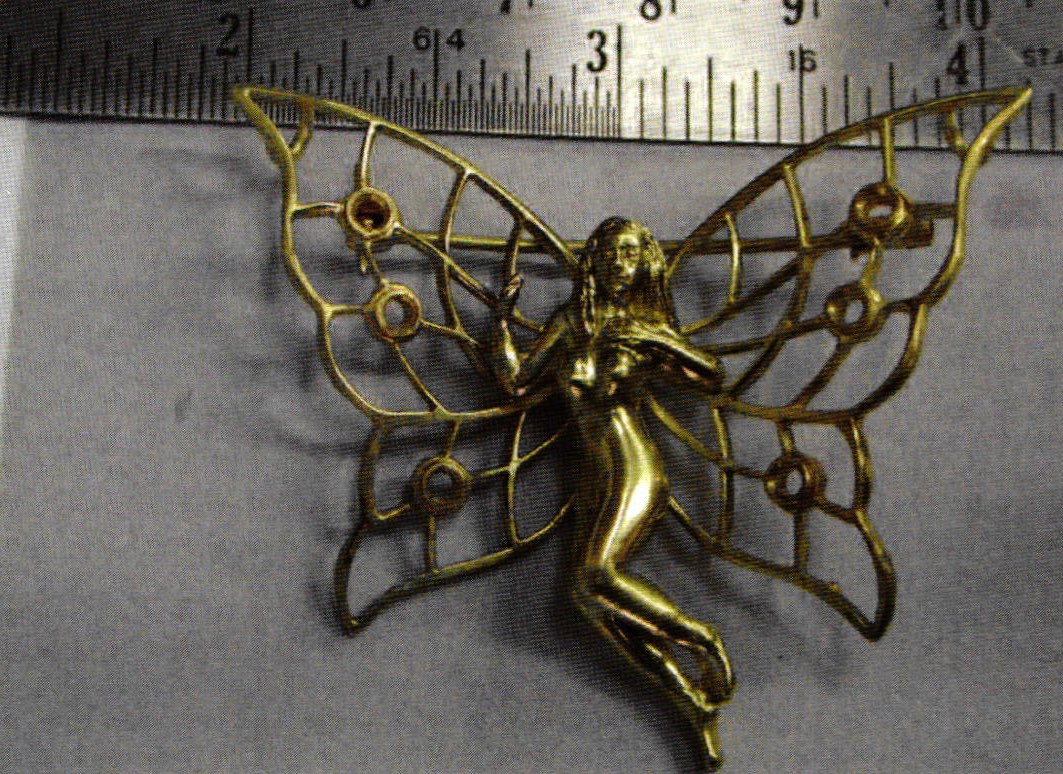
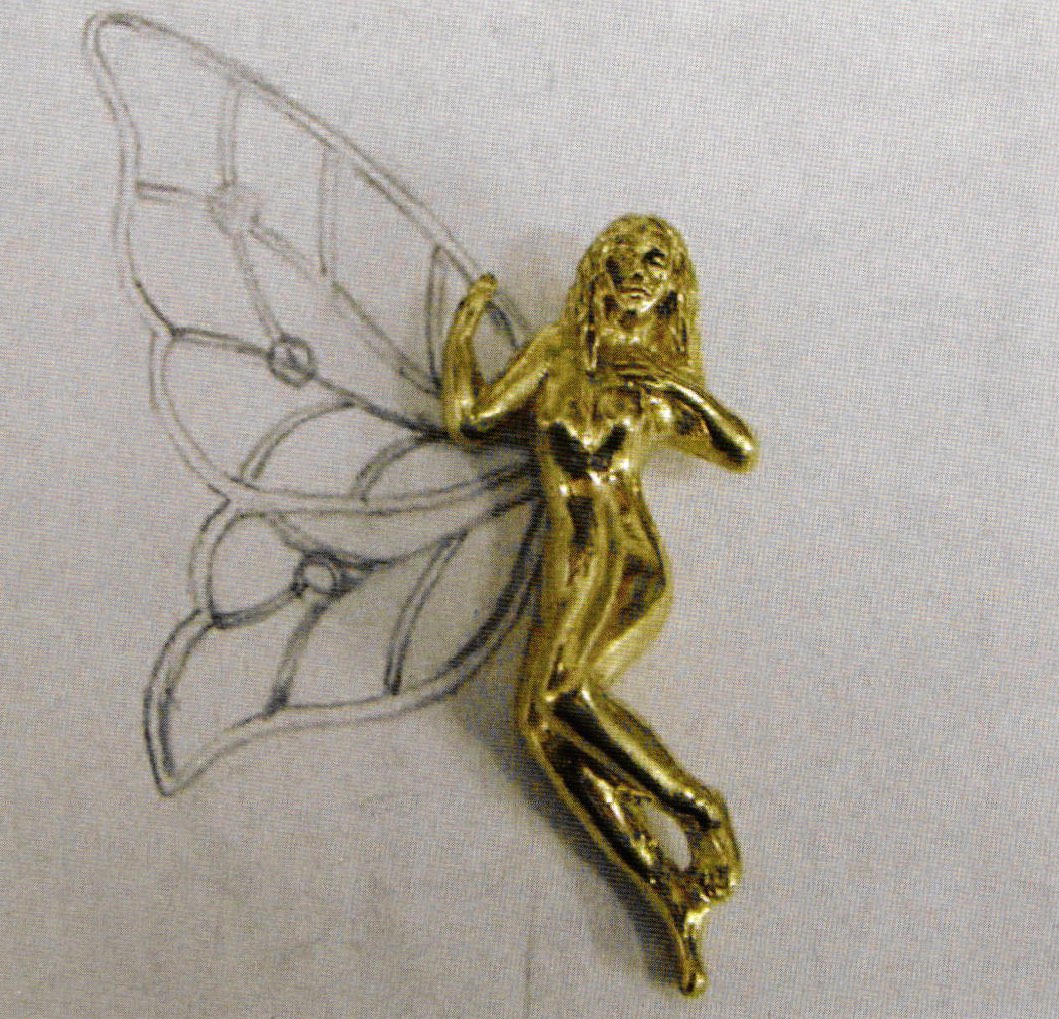 | Fig. 8 I have finished her body and now I want to start designing the wings. It is much easier to get a good perspective if I draw one side out on paper. When I am satisfied, I tidy up, scan it into Photoshop and mirror the image. Now I have two perfect wings. I print the wings and glue onto a piece of 18 karat gold that has been rolled out to 1.2 millimeters thick. |
 | Fig. 9 First I make one out of silver to test the whole balance and experiment with the colors of enamel I will use. |
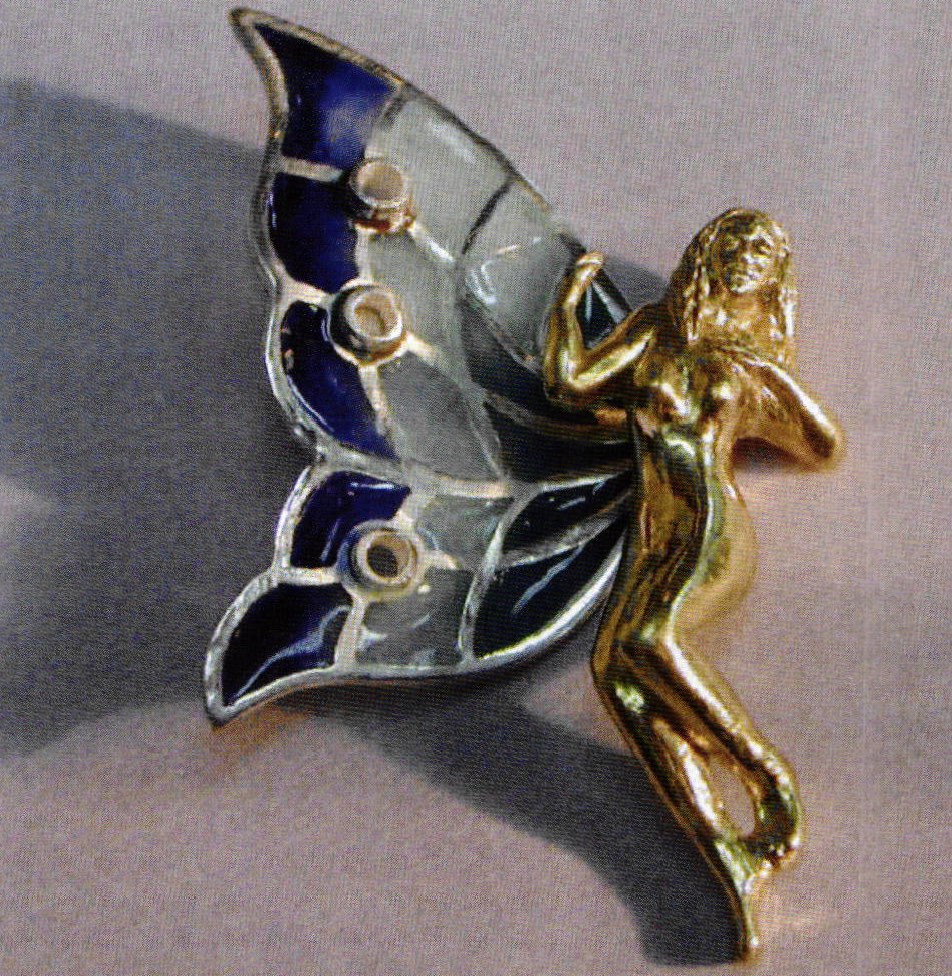 | Fig. 10 If you look at the final picture of her wings, you will see that they are not the same as this test wing. The reason for this extra effort is the gold wings must be soldered to the body, then enameled, so there is only one chance to get the enamel right. Therefore, it is much easier to make a sample wing and mess it up and not ruin the whole piece. |
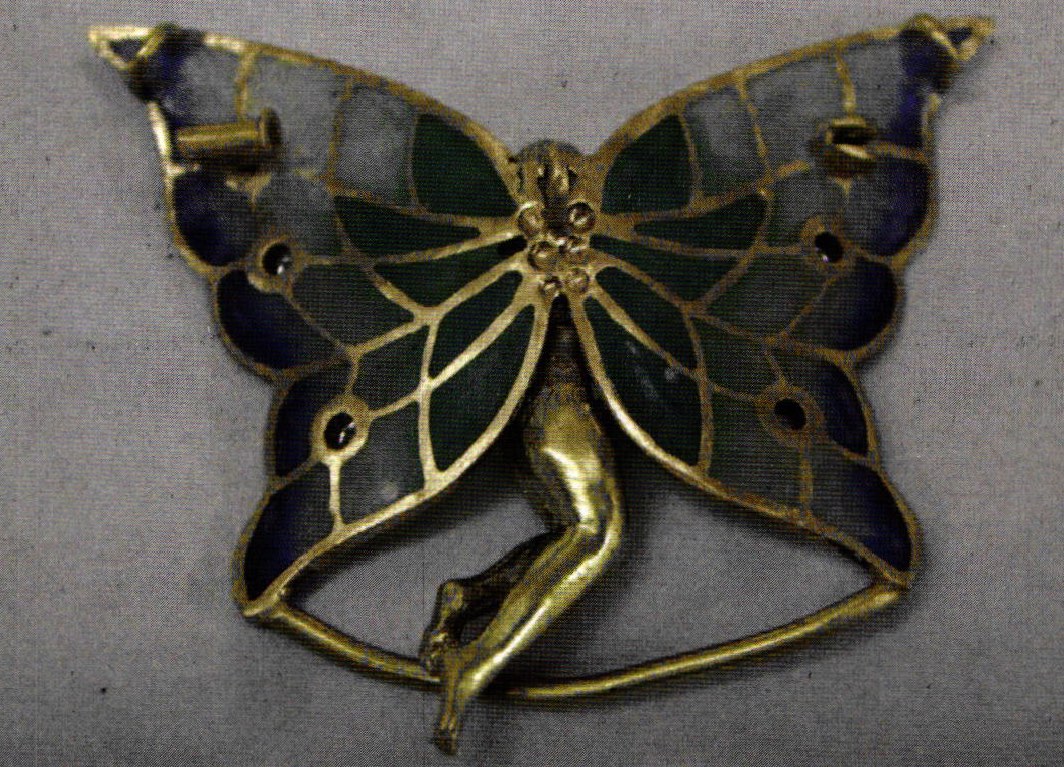
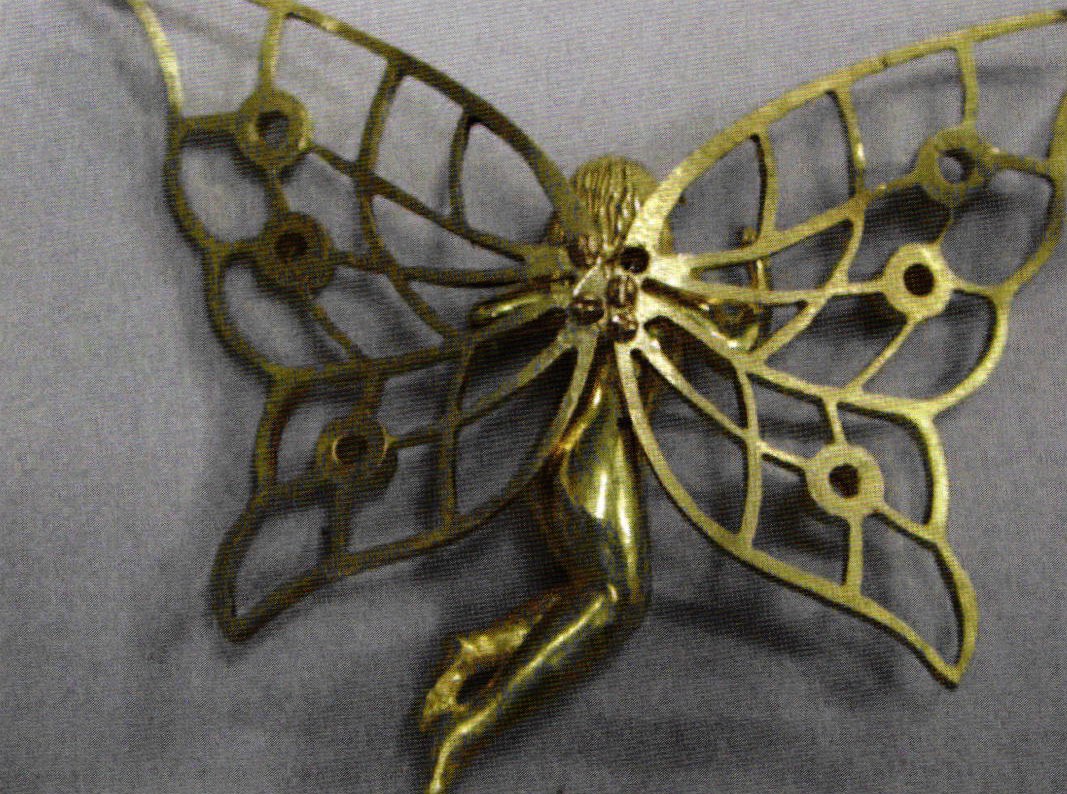 | Fig. 11 Once the wings were pierced out, (using a No. 6 saw blade), they were cleaned up, filed, sanded and soldered together at the center. I tap holes into her body and screw the wings in place. The screws are made with a watchmakers tap and die set. |
 | Fig. 12 I solder a piece of scrap gold to the front so they will not move while the brooch mechanism and pendant hangers thingamabobs are attached. The chain threads through the three loops. In this piece, only hard solder can be used because of the enameling to come. |
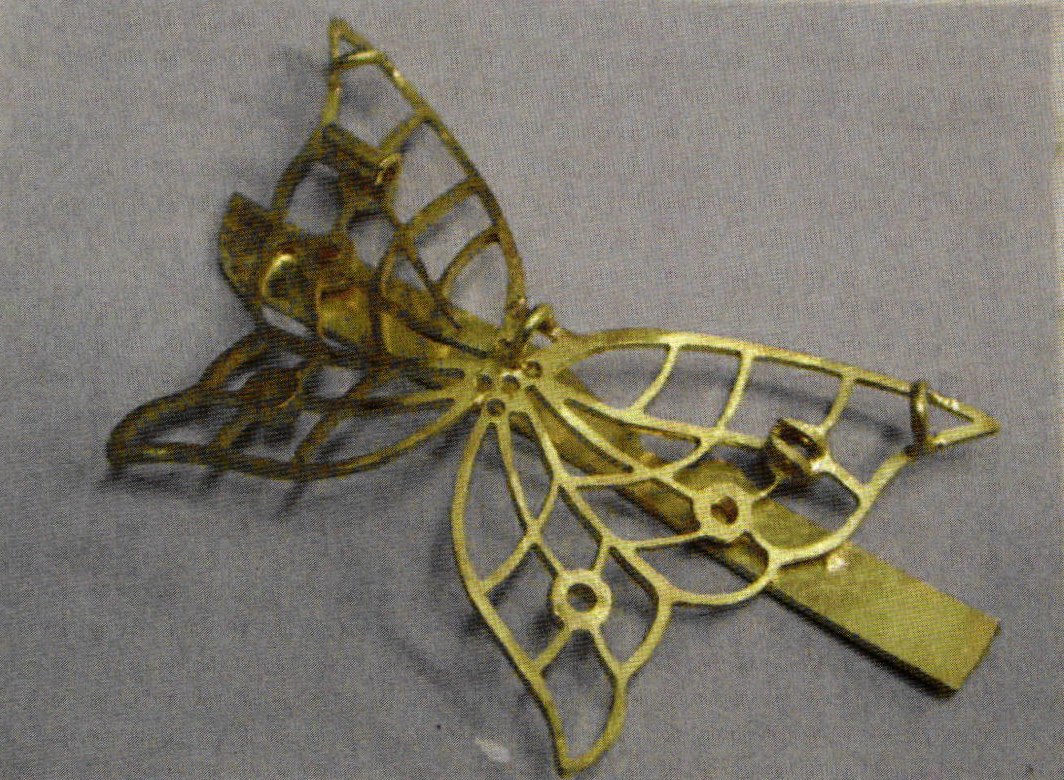
 | Fig. 13 I solder a temporary piece of wire to the bottom of the wings to stop any movement. A cooling paste has been smeared over the previous solder joints, not to keep things cool actually, but rather to stop anything moving when it reaches soldering temperature. The wings have been screwed into the body with a layer of solder in between the wing and body. This was a difficult soldering job because the wings are very light and the body much heavier. So it is VERY easy to melt the wings. |
 | Fig. 14 The wings are soldered on and the pin is temporality in place. |
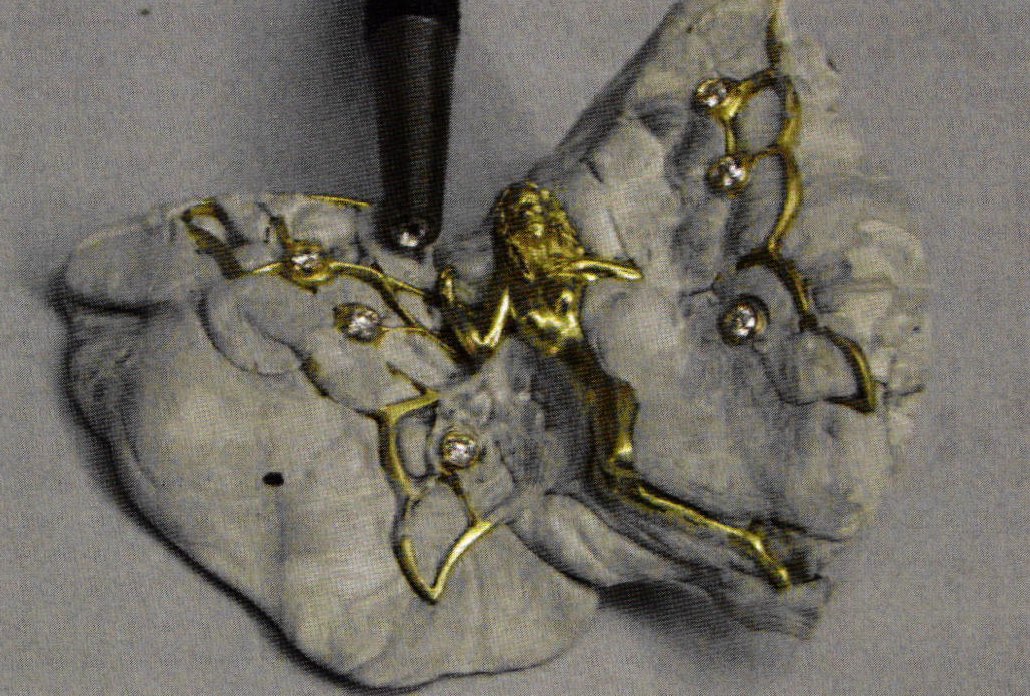 | Fig. 15 Next is to set the diamonds and give everything a light polish before the enameling starts. I use Jet Set to hold everything in place. When I set small diamonds, I use a punch to force the metal over. It makes the setting very neat, and once you get the hang of it, much faster. |
 | Fig. 16 The jet set is removed, and the whole piece is cleaned in acetone and polished and made ready for enameling |
The Enameling Process
My method of enameling is unorthodox.
I put a thin layer (.05 mm) of annealed copper behind the wings. I carefully cut it out and bend it over the edges. The design was such that I had to make two little caps for the tips, and I took this picture just to show the caps. The trick here is to get the copper flush against the wing lattice, so that when the enamel melts, it does not run between the copper and gold.
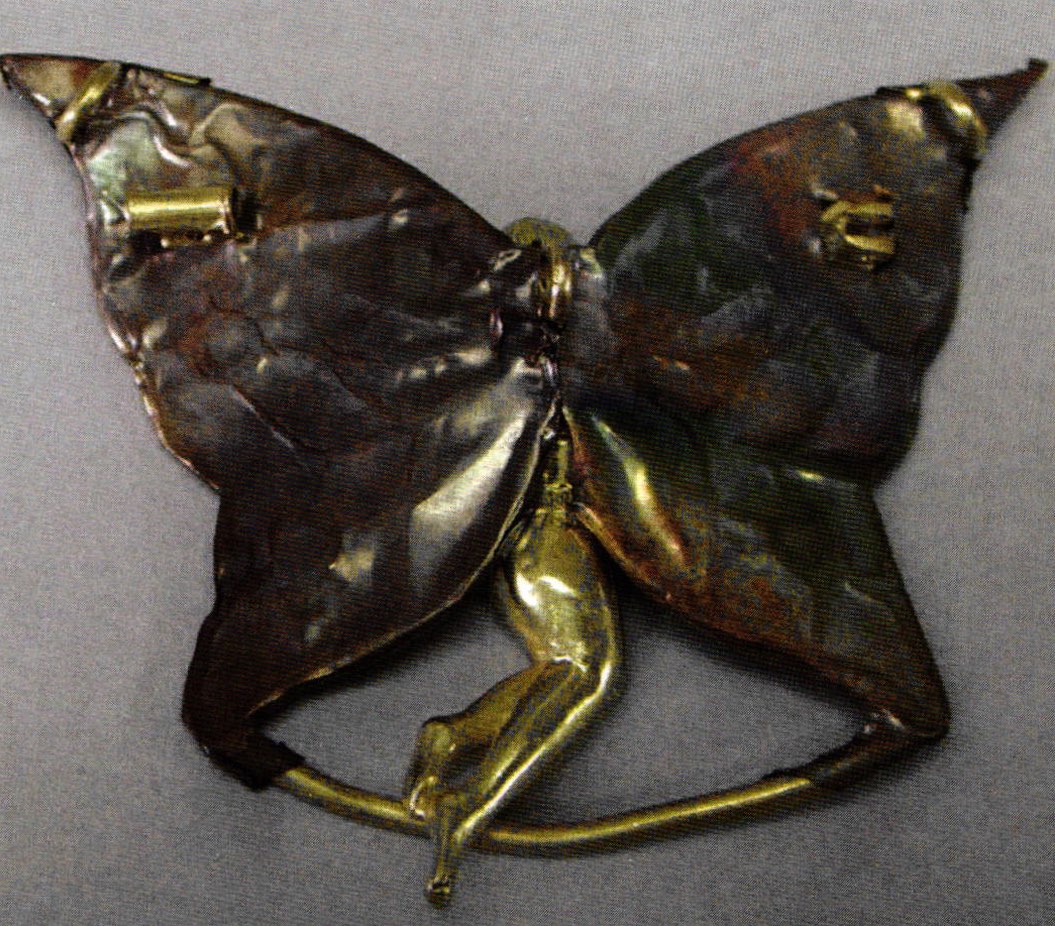 | Fig. 17 A rear view of the wings |
 | Fig. 18 The enamel is about to be fired with a torch on my bench, I use a soft, largish flame. It is very easy to do, much more so than using an oven at this stage, because you can see exactly where the enamel needs more heat. I use a 2mm thick stainless steel gauze, bent in a "V" for the wings shape. On the top of the right wing, at two o'clock, two holes are blocked out. There is one more blocked out one under the wing. This is to stop the flame from over heating the brooch catch. |
 | Fig. 19 After the first firing, I add another layer checking carefully for any bubbles or uncovered areas. Normally only two firings are necessary, by then the enamel is thick enough for finishing. |
To see a tutorial on traditional enameling methods, visit www.jewelryartistmagazine.com/stepbystep/dec02.cfm.
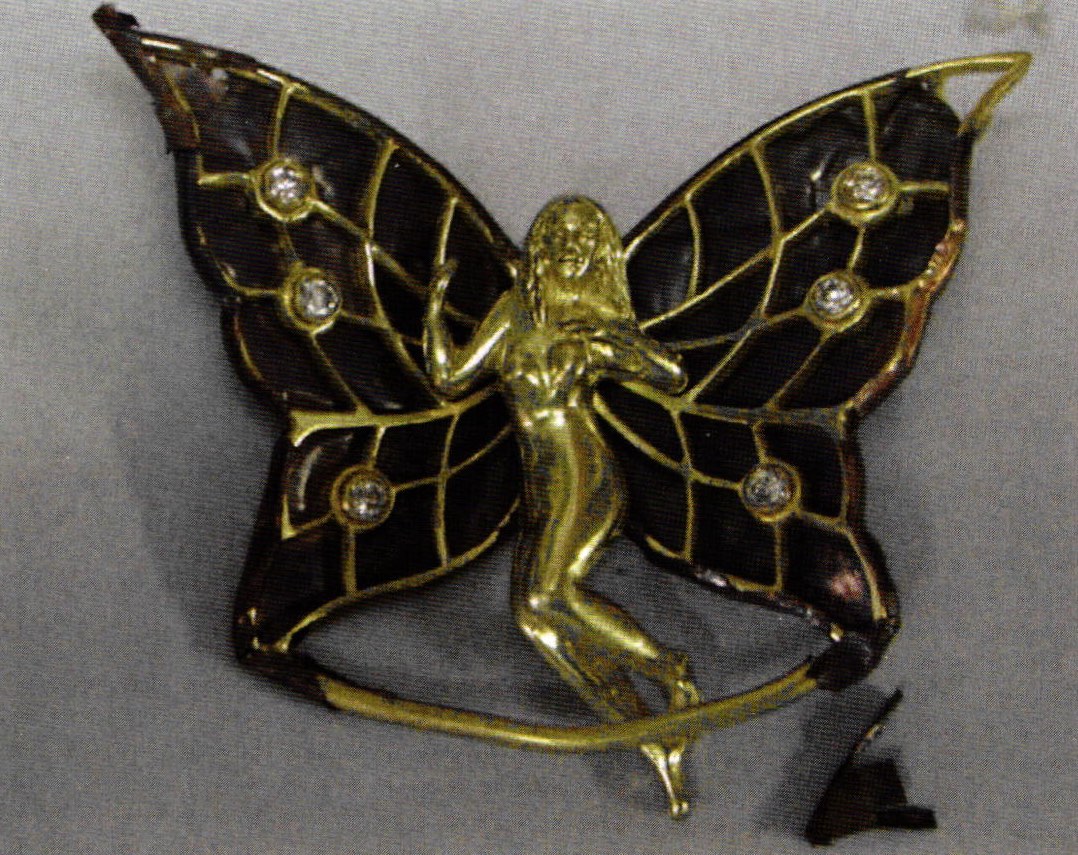
After the second layer of enamel has been fired the copper is peeled off the back.
 | Fig. 20 I am using another picture to show what I mean by "peeling off". (I got so hung up on the fairy I forgot to take pictures as I went along. Anyway, the copper peels of easily leaving behind a thin layer of copper oxide. Sand this down with a normal sanding mandrel with 220 grit sandpaper (the type used for sanding the inside of a ring). This, along with rubber wheels and some diamond burrs, will take off the copper oxide. |
| Diamond burrs are also used to clean any glass and enamel that is stuck on the lattice of the wing. If any pits remain in the glass, use some Nitric acid to clean them out. I use a paintbrush and lightly paint nitric acid on the back of the enamel for about 15 seconds or so just to get it super clean. NOTE: Be careful, the nitric will attack the enamel. | |
 | Fig.21 The fairy is now sanded, cleaned and ready for final firing in an oven. Depending on the enamels and oven usrd this is at about 780°C for 2-3 minutes. This allows the glass to flame polish, thus giving it the enameled shiny look. Once the enamel is fired to the right gloss, let the piece sit in the oven at 500°C for about an hour then switch the oven off and let it cool down to room temperature. That takes care of the annealing of the glass. It would be prone to crack otherwise. |
| I pickle it in dilute sulphuric acid (battery acid) just long enough to loosen the oxide; I think Sparex would be a much better solution. I left the test wing in sulphuric acid for about 20 minutes and the acid attacked the opalescent enamels. | |
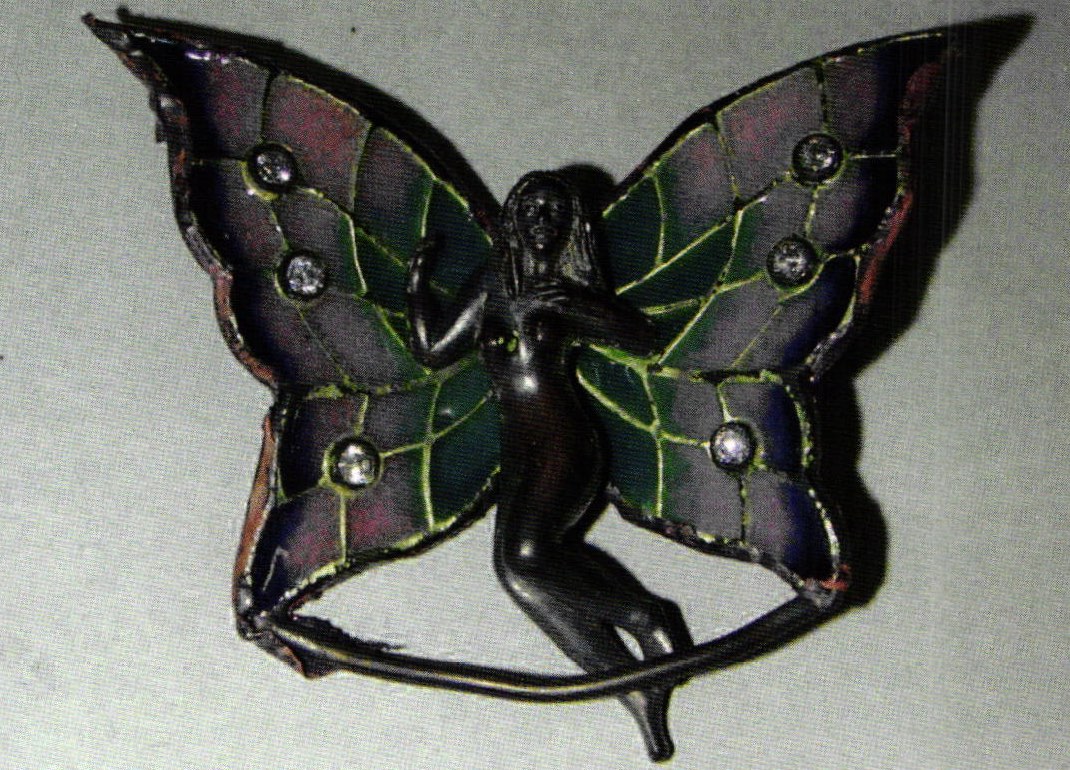
  | Figs.22 & 23 The bottom image was photographed for the enamel, and it shows quite nicely. |
The enamels used in this project are Nitric Blue No. 2660, Opalescent Green No. 2300 and Opalescent White No. 2061 and are available at Thompson Enamels, wwrv. thompsonenamel.com/
Sanding mandrel, diamond burrs and grey rubber wheels were used to finish the back and front of the wings and a 1200 grit sanding mandrel is used prior to final firing.
The piece weighs 20 .5 grams, and took about 60 hours to complete.
Contact information:
Jewelry Studio of Hans Meevis
Airport Boulevard #65
Simpson Bay, Sint Maarten, Netherlands Antilles
Tel: +(599) 522-4433
Fax +(599) 545-2922
E-Mail: jewelry@meevis.com
For more tutorials on jewelry making visit www.meevis.com
Related Articles
Project Management for Jewelers

The Work of Jay Song

Metalsmith ’88 Winter: Exhibition Reviews
Recent Sightings Artlike Jewelry


The All-In-One Jewelry Making Solution At Your Fingertips
When you join the Ganoksin community, you get the tools you need to take your work to the next level.
