
CAD/CAM: Modeling Project in JewelSpace
3 Minute Read
CAD/CAM (Computer Aided Design and Manufacturing) is bringing a new efficiency and profitability to the jewelry workplace. Who is better to use this technology than the bench jeweler with a working knowledge of jewelry construction?
In this situation, a program like Caligari's JewelSpace can be used to replace many jobs that formerly needed to be done by hand. With experience, the process can be faster and easier than ever before.
The following modeling exercise shows how jewel Space can be used to quickly develop a 3D model that is suitable for manufacturing.
Convertible Ring/Pendant Modeling Project in JewelSpace
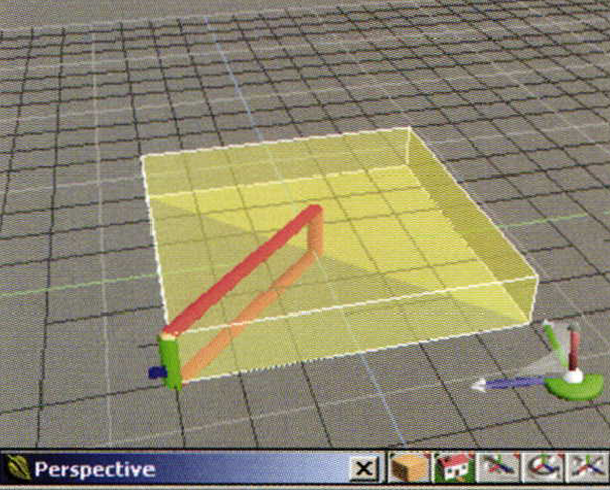 | This convertible ring/pendant begins as a simple flattened cube. Note the multicolored control device on the front left corner. This tool - unique to jewel Space - is called a "magic ring" and allows the cube to be directly manipulated in a variety of ways. |
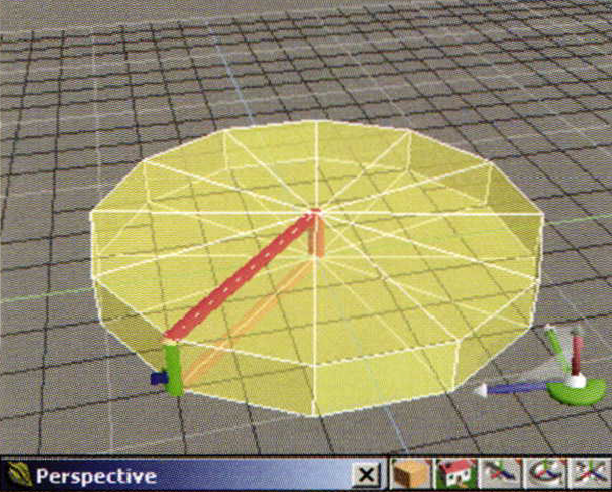 | The magic ring is used to transform the cube into a 12-sided cylinder. All that is needed is to click on the blue handle and move the mouse to the side. This is much quicker than using a conventional dialog box to enter the properties of the shape numerically. |
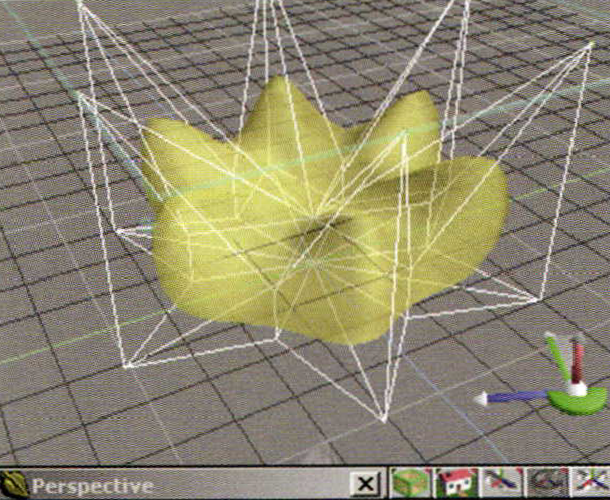
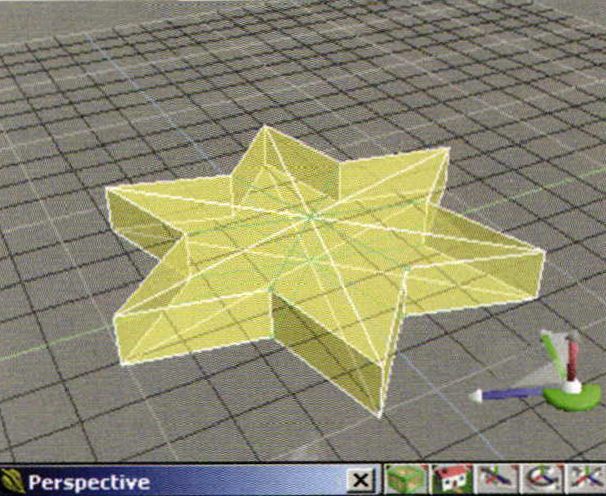 | Alternate edges are selected and shortened to produce a star. Note that the model appears as a transparent solid object. Jewel Space features a variety of ways to see your work as it progresses. As you will see later, this ability is important to the process. |
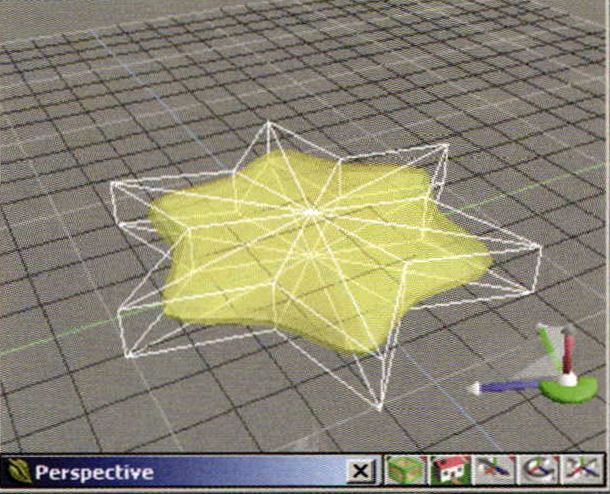 | At this point, the Subdivision Surface tool is applied. This tool instantly creates a smooth model underneath the original one. The subdivided model appears solid, and the original model is seen as a wire frame - just showing the edges of the model. |
 | The Subdivision Surface tool in jewel Space allows you to sculpt a piece and see it change instantly. Here, the tips ofthe stars are selected and moved in an upward direction. Real time shading gives you visual feedback that allows for very subtle control of the design. |
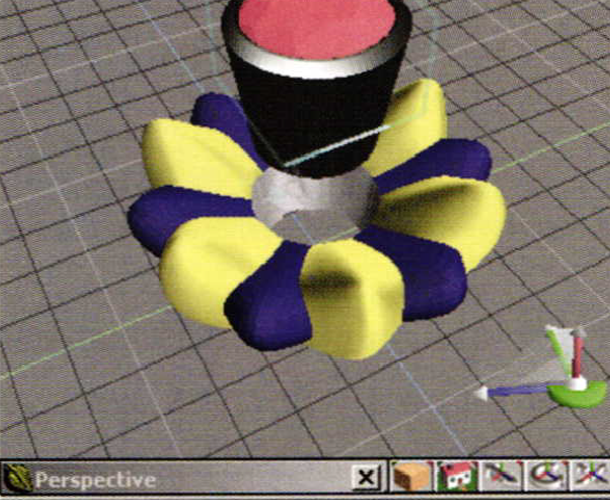
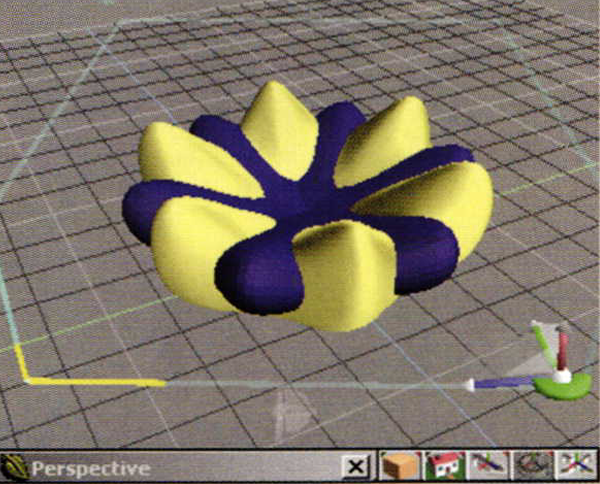 | The modeling of this element is completed. The element is copied, rotated, and painted blue to see the inter relationship of the elements as further work is done. The blue section is then flattened a little and raised up. |
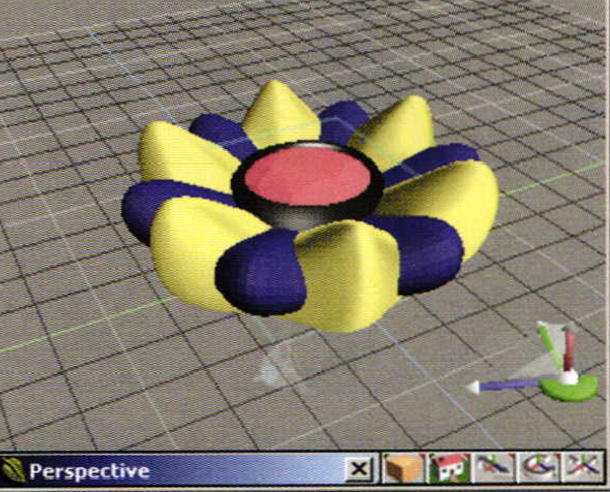 | A stone and bezel is added from the jewel Space setting library. It is scaled to fit and positioned in the center of the piece. |
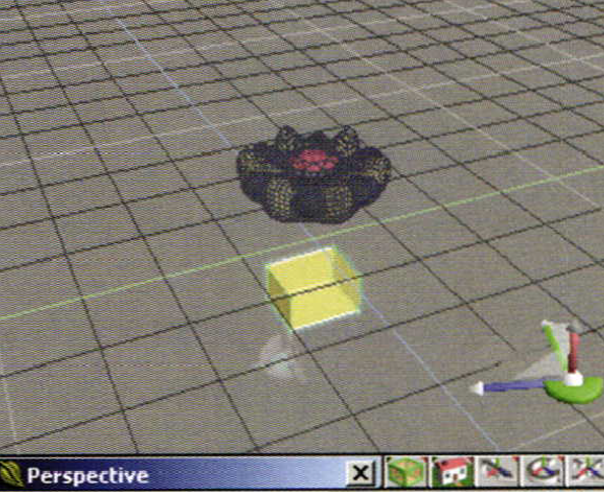
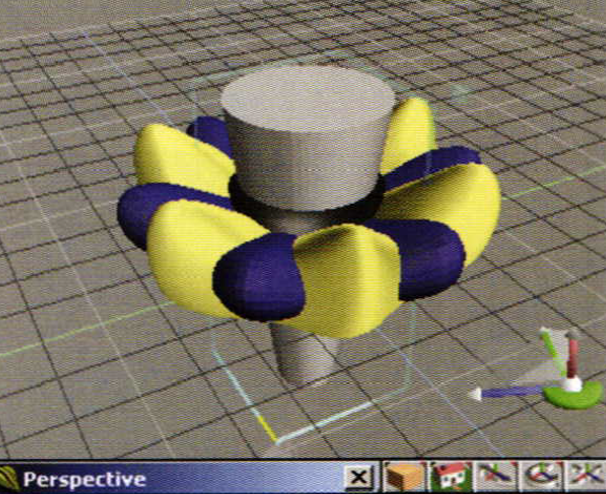 | A hole is needed to fit the bezel in the center of the flower. A cylinder is loaded and its magic ring is used to taper it directly. At this point, we are working in a solid viewing mode instead of the transparent mode used earlier. This makes it much easier to match the cylinder to the bezel. The cylinder is then subtracted from the flower. |
 | Here is the piece with the bezel raised out ofits seat to inspect the seat. |
 | Now we begin on the shank. Like the top, this shank starts with a simple cube. |
 | Here the cube has been scaled and its faces have been swept into the general shape of the band. In jewel Space, the Subdivision Surface tool is very similar to the process of wax carving. Rough out the basic shape first, and refine the detail as you go along. |
| The same piece with the subdivision surface tool applied. One click and you have a smooth curved surface. |
 | Moving just a few edges around adds a more graceful appearance to the shank. This is one ofthe advantages of the subdivision surface tool in jewel space. You can directly manipulate a surface in a direct and intuitive manner. |
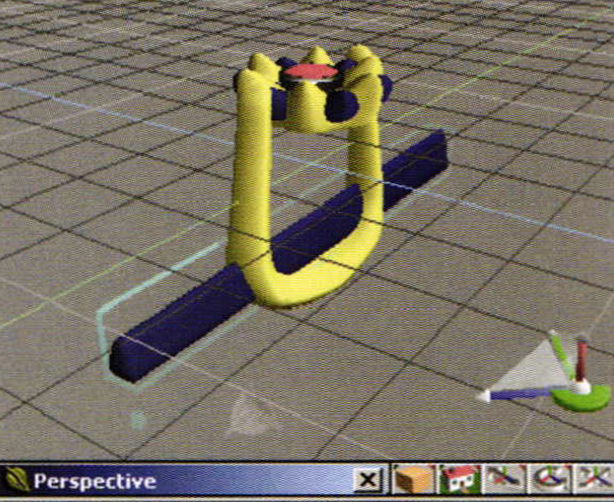 | A long cylinder is positioned and subtracted from the bottom ofthe band. At the bench, we can only drill round holes. Jewel Space allows for any shape drill you want. |
 | Positioning a segment of wire for a hinge allows us to accurately provide for the mechanics of the piece. The pin is then used to cut the hole into which it will be inserted. |
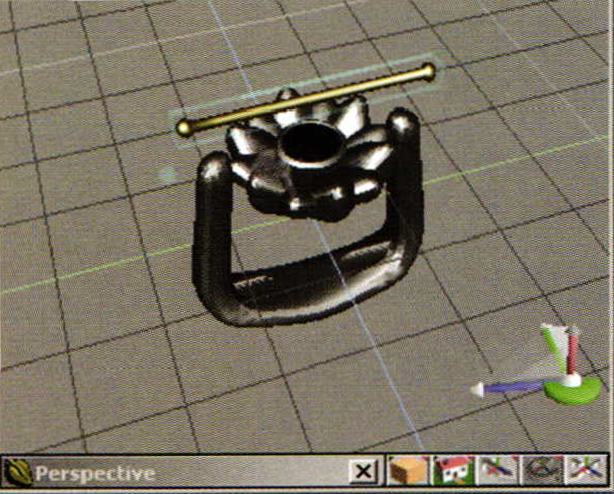
 | Here is the piece before rendering the final image. The precision of the virtual model allows the jeweler to test design features such as hinges, clasps and stone placement before manufacturing is begun. |
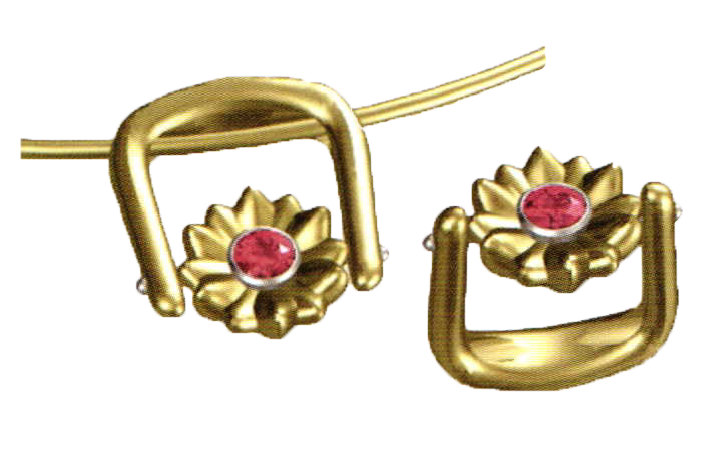 | The finished piece is now ready to show to a customer and for manufacture using milling or rapid manufacturing technology. |
This project was completed in JewelSpace by Caligari. For more information, go to www.jewelspace.net. Randy Hays is the Director of Product Management for Caligari Corporation and can be reached at 800 351-7620
Related Articles
Basic Approach to Product Design

Metalsmith ’87 Winter: Exhibition Reviews

Christine Clark and Dennis Leudeman Exhibition

Jewellery in Transition


The All-In-One Jewelry Making Solution At Your Fingertips
When you join the Ganoksin community, you get the tools you need to take your work to the next level.
