
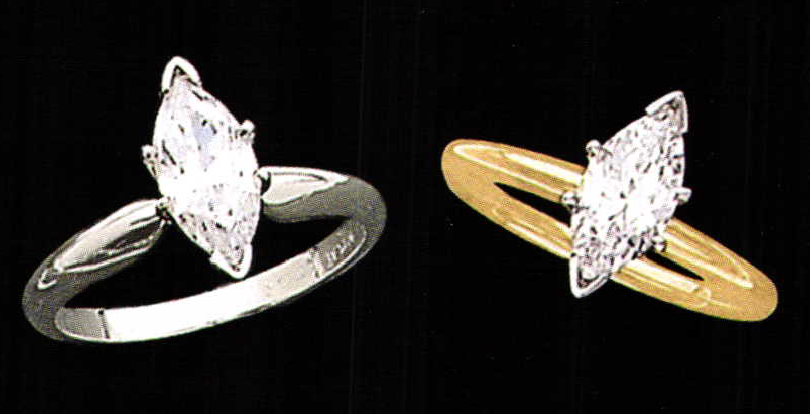
Marquise Diamond Setting
4 Minute Read
This particular setting has two V shaped claws and four regular, holding and protecting claws. I will try to unravel much of the mystery of this setting as easily as possible in this document. In reality there is no mystery in setting these delightful stones.
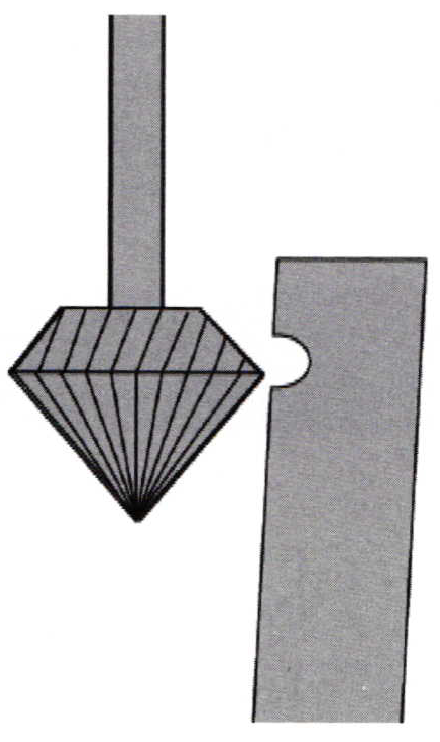
The marquise diamond has two very vulnerable, and easy to break, points. The setting has two end claws in the shape of a V and four other claws, two on either side, to hold and secure the widest part of the stone. I call these four claws the bumper, or protecting claws. They protect any bumping or misuse the client will encounter through normal wear and tear. The end two V-shapes are basically to protect the two pointed ends. These two ends should never be exposed at all! When setting the two pointed ends inside the claws, they should have no contact with any metal during the setting process.
The tools that are needed to set this stone include a pair of small nosed pliers, one metal thin nosed pusher, (with a serrated or a scribed front edge), a #40 flat graver, a #006 bud burs, #007 round bur, and a 90 degree high speed steel undercutting bur.
For easier maneuverability of your tools the first thing to do is to very slightly spread the side claws backward a tad. Move the four singular claws from the base, not from the top working areas. Try not to move them too often as it will cause stress in the metal and could break the prong.
Measure down from the claw tip 1.5 mm, and scribethatmeasurement on the inside of every claw. The 1.5 mm is the "working space" for filing and pushing over the stone.
Then with a # 007 round bur, drill into the V claw horizontally to make a hole to a depth of 33% of the thickness of the claw.
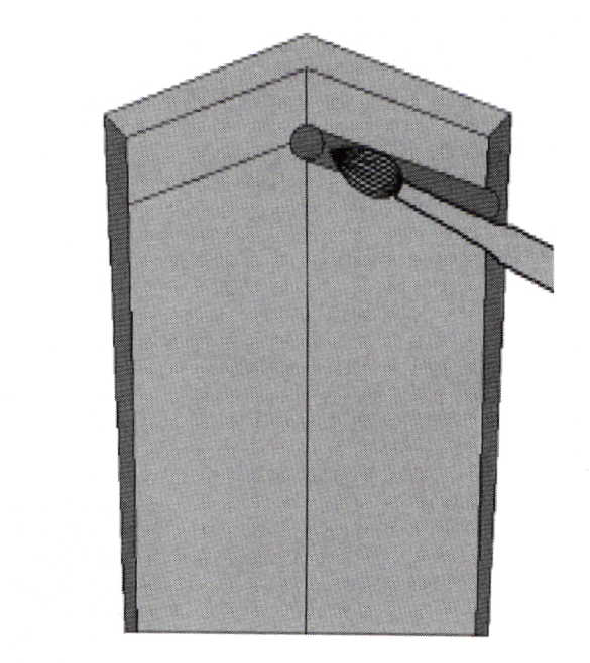
Next, use your #006 bud bur and insert the point of the bur directly into the hole you just made. Cut two grooves at the same height making bearing cuts outwards from that one deep hole toward the end of the V- Shaped claw.
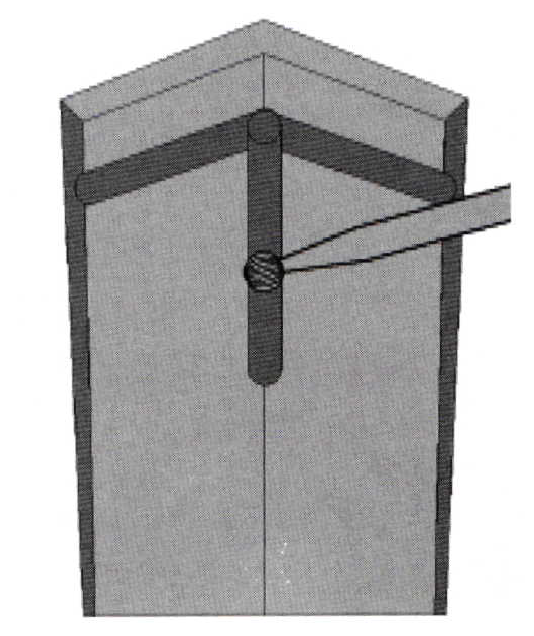
Next go back to using your # 007 round bur and, starting at the hole again, run it down from the original hole letting the bur run down along the inside of the V. Contour it to be at an angle that is comparable to the stones pavilion.
Using the bud bur again, hold the bur horizontally and move downward from the new bearing. Cut downward toward the base in a scooping action. This is to remove any metal that would touch the pavilion hindering the folding over of the claw tips.
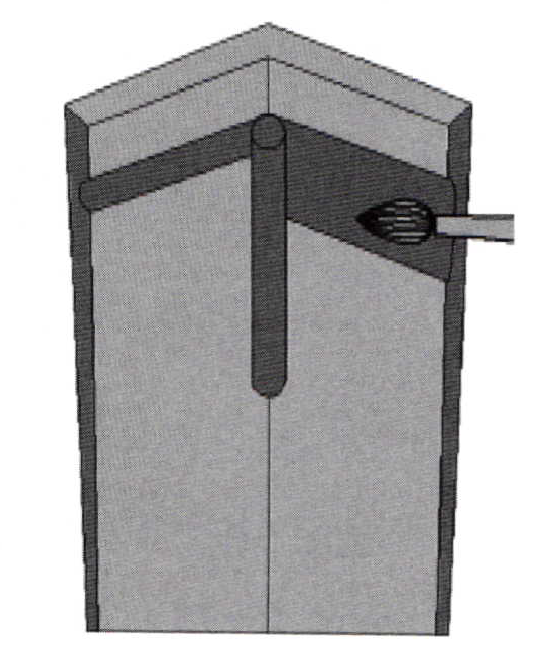
The four remaining side claws are a lot easier to prepare. Using a bud bur again, cut a horizontal groove where the girdle of the stone will lay against the claws. Do not cut in any deeper than 33% of the metal. Once this is done, use your H.S.S. under-cutting bur to prepare a seat for the stone. Place the rotating bur in the line cut and draw the bur downwards, cutting with the underside of the rotating bur. Use the bur as a file to cut a seat that matches the contour of the pavilion.
Clean off the gold shavings and examine the seat. Is the girdle going to be sitting in the same place as the bearing cut? Place the stone inside the head and view the placement of the stone, checking if it's level. If the girdle is a bit thicker, use a wider bud bur and cut the bearing-cut a bit wider.
Remove the stone and use your #40 flat graver to clean away any of the refuse on the side of the claw that is left from cuffing with the burs. This action makes the ring look very clean after the stone is set.
Place the marquise diamond into the head forthe last time and proceed to bend the tips over the top of the stone. The four single claws should be placed over the stone FIRST, and the V shaped end-claws worked over last. When finished there must be no space between the claws and the crown facets. None what so ever!
Tightening the four side claws secures any of the rocking action you might have at this moment in time. Trim the back angle on the end claws to remove some of the thickness to keep from straining as you push the claw tips over. Use a thin nosed metal pusher with a serrated or a scribed front edge to push the claw tips over. The serrated face of the pusher will help you keep from slipping offthe claw while pushing. Make sure that all claws are over and down on the stone. Then the claws should be cup-burred for smoothness using a77B bur. The correct size is the one that extends just a tad larger than the tip of the claw.
Next very carefully push over the end and corner section of the V head. This is the most delicate area of the diamond; make sure that the end of the stone is not touching any metal. Please judge your pushing actions with tenderness and with great care. A little slip will cost you lots of money. Trim all around the claws back sides and the front. Using your flat graver brightcut the very inside edge that is over the stone and trim with a sharp, clean, flat graver. All inside corners should be sharp, clean and brightly-cut.
With your flat edged or tapered pumice wheel, go over every possible flat and recessed edge ofthis fancy cut head. It is not advisable to leave any clean up to the polishing process. I don't want to have any "smoothed-over" rounded corners. If you are doing your own polishing, keep in mind that the edges from the casting must be returned to their exacting design.
Related Articles

Modified Split Mandrel to Bezel-Set Round Stones

Custom Antique Coin Pendant

Bezel Setting Using a Lathe

Recycling High Speed Steel Burs


The All-In-One Jewelry Making Solution At Your Fingertips
When you join the Ganoksin community, you get the tools you need to take your work to the next level.
