
How to Make a Three-Part Silver Ring
Using a relatively inexpensive metal and casting it in an ingot mold, you can create a sophisticated design at the low price point many cash-strapped consumers are looking for these days. Using silver casting grain minimizes costs and maximizes profits.
2 Minute Read
This article describes the steps on how to make a three-part silver ring made of sterling.
Using a relatively inexpensive metal and casting it in an ingot mold, you can create a sophisticated design at the low price point many cash-strapped consumers are looking for these days. Using silver casting grain minimizes costs and maximizes profits.
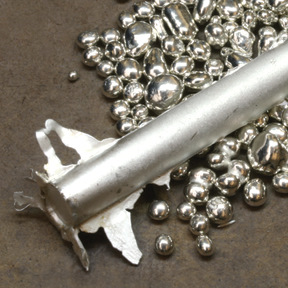 | Take 17.5 dwt of sterling silver casting grain and pour an ingot using an ingot mold. |
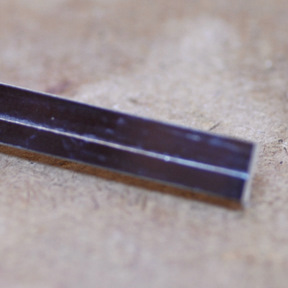 | Anneal and roll out the stock until it is 2 mm in thickness. Anneal it a second time and flatten the stock. Darken it with a Sharpie to help you see the lines that you will scribe in the next step. |
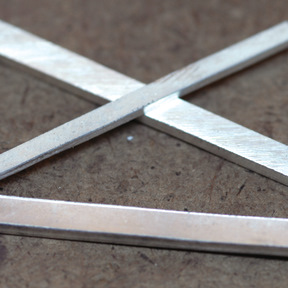 | To create a size 6 three-part ring, cut off two pieces of stock that are 2 mm thick by 3 mm wide by 58.1 mm long. These will be the outside rail bands. You will also need to roll and cut a piece that is 1 mm thick by 3 mm wide by 61.1 mm long for the center band. |
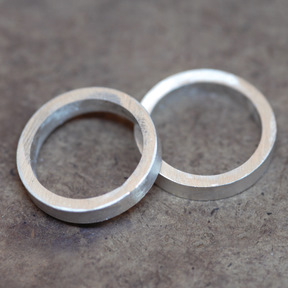 | Take all three pieces of stock and form them into rings. Solder each one and true them on a ring mandrel. Make sure the two outside rail bands are the exact same size. I recommend making the center band a little small and stretching it to fit later. |
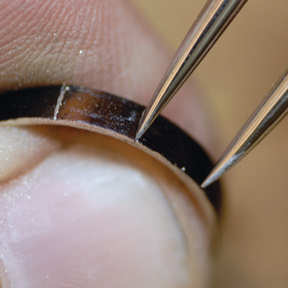
 | Scribe a mark on the top of the outside rail bands 1.5 mm from the edge. |
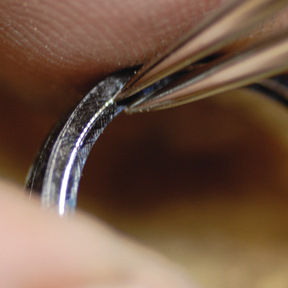 | On the side of the bands, scribe a mark 1 mm from the inside diameter of the ring. These marks will serve as guidelines. |
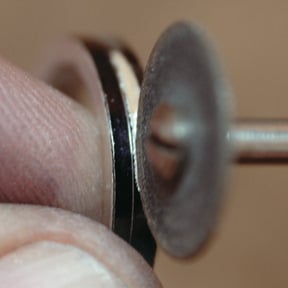 | Use a cut-off disc to cut a groove next to the 1.5 mm line on the side of the ring where you made the second mark. |
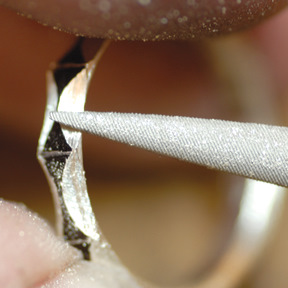
 | Using a rotary file, grind off the excess metal. Use a file to remove the last bit of metal, bringing the level of the metal precisely to the 1 mm mark. Repeat this process for the other 2 mm thick band. When you place the two side by side, you will have a nice groove for the center band to nestle in. |
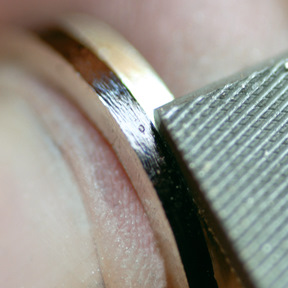
 | Use a half-round file to bevel the inside edge of the center 1 mm thick band. This will make for a better fit and will enable construction to go smoothly. |
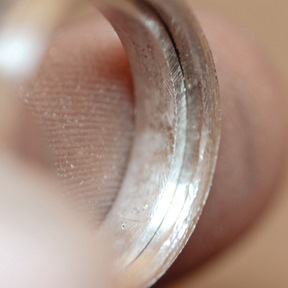
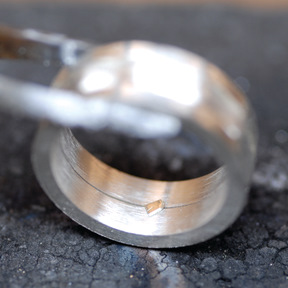
 | Scribe lines that are 6.2 mm apart across the center band, all the way around its circumference. These will be the guidelines for the design. |
 | Using a crossing file, cut small grooves on either side of the center band inside the 6.2 mm marks. You can get creative with any type of repeating design you like on the center band. |
 | Finish the two outer bands to a high polish and sandblast the center band for contrast. Finally, solder or laser weld these parts together and do a final finish. |
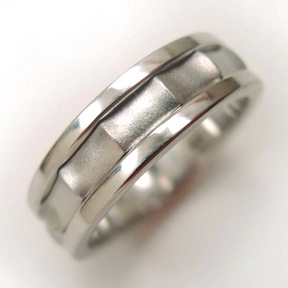 | By constructing the ring in this way, the contrast between the parts is very crisp and it makes it easier to keep the center band's finish clean. |
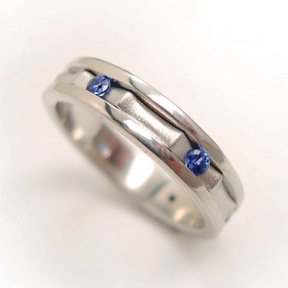 | You can really get creative with this three-part-ring technique. Here, I've channel set blue sapphires to give it more visual interest. |
![]()
In association with
![]()
The award-winning Journal is published monthly by MJSA, the trade association for professional jewelry makers, designers, and related suppliers. It offers design ideas, fabrication and production techniques, bench tips, business and marketing insights, and trend and technology updates—the information crucial for business success. “More than other publications, MJSA Journal is oriented toward people like me: those trying to earn a living by designing and making jewelry,” says Jim Binnion of James Binnion Metal Arts.
Click here to read our latest articles
Click here to get a FREE four-month trial subscription.
Related Articles

Mark Stanitz: Material Evidence

Fads and Fallacies: Renegade Ornament

The Work of Three Contemporary Wire Artists

The Work of Steven Ford and David Forlano


The All-In-One Jewelry Making Solution At Your Fingertips
When you join the Ganoksin community, you get the tools you need to take your work to the next level.

