
How to Make Straight Wire Holders
7 Minute Read
Stuller had the foresight to offer straight wire that we don't have to remove the bend from before we use it for straight projects. I know we have many curved projects also but the wire is never the right curve, so we have to bend it anyway. So why not order the straight wire and be able to keep it neatly in these tubes?
Stuller supplies 6″ and 12″ tubes. So I made these holders for those lengths. I use the 6″ tube on my bench. I used to color code my wire with sharpies so when I rolled out a replacement bezel from wire I would know at a glance what wire I started from. With handling it wears off quickly.
Now all the same gauge wire round or rolled is in the same tube and all the tiny pieces stay put also. Pour it into my hand, take what I want with my tweezers, put the rest back into the tube and back in the rack it goes. No hunting through envelopes littering the bench tray, no more measuring to be sure it's the right wire because your eyes are tired and don't feel like telling you the difference between pieces of wire that are only 1/4 of a mm different in diameter from the other piece.
How to Make Straight Wire Holders | |
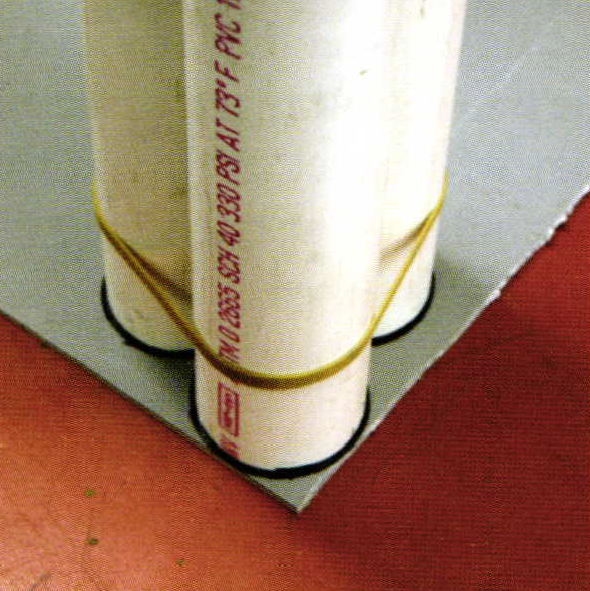 | Cut three pieces of PVC pipe either 11/2″ or 2″ diameter into 11 inch long or 5″ long pieces. Rubber band them together and use as a template to draw on the flat PVC sheet. (Use good ventilation on all cementing steps and no source combustion) |
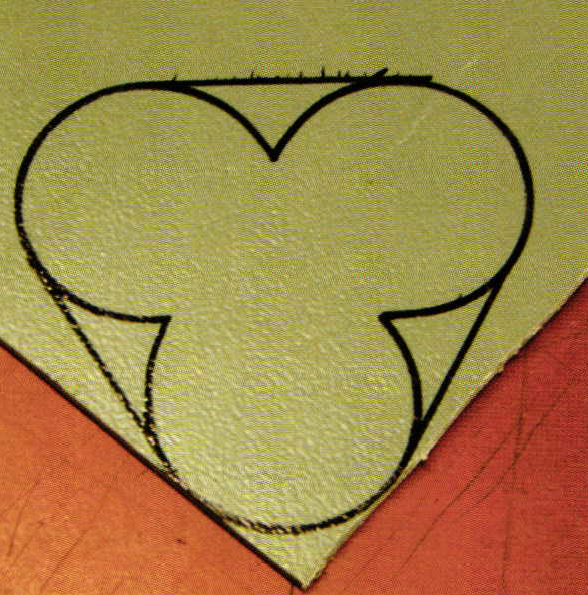 | Cut out your templates. Rough up the surface so the cement will ad here on the base. |
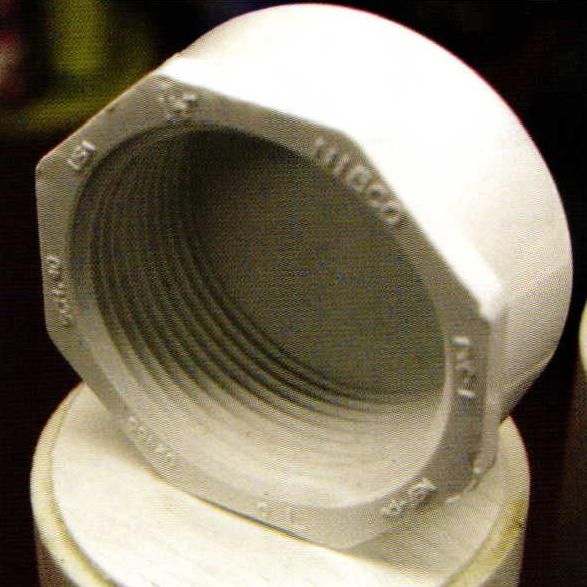
 | If you don't have any flat PVC you can use end caps. Use 1″ end caps for the 1 1/2″ pipe. Apply a small amount of cement to the end of pipe and tap the end cap into the end as pictured with a rubber mallet. Make sure you have a good cement joint. Use a syringe with the needle removed to run a neat bead of cement. Let dry 30 min. |
 | The 2″ pipe uses 1 1/2″ end caps. They will not force into the end like the others did on the 11/2″ pipe, but with a neat bead of cement they will hold well. Let dry for 30 min. |
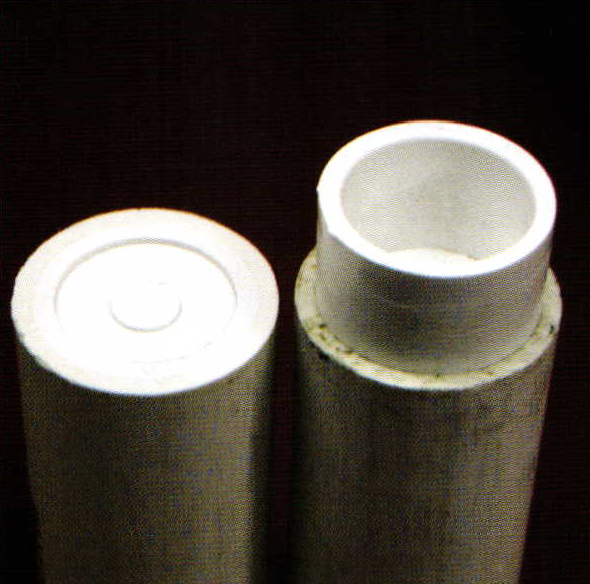 | On the 1 1/2″ pipe use a miter saw to cut off the excess caps that protrude past the end of the pipe. The finished product is a smooth, one piece looking, end cap on the pipe. |
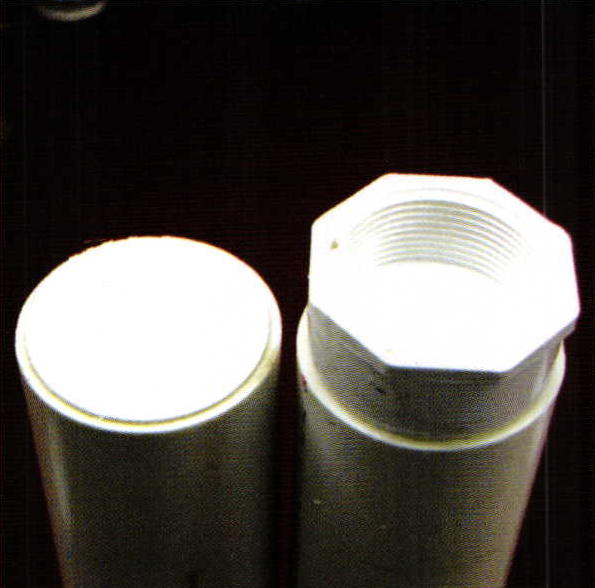 | The 2″ pipe has to be cut 1/8″ past the end of the pipe because the end cap doesn't actually protrude into the pipe. The finished product is still a well-sealed pipe but not as neat looking as the 1-1/2″ pipe. The tubes are now ready to be cemented together. Rubber band them together, fill a syringe with the needle removed with pipe cement, and run a neat bead down all the joints. Wait 30 minutes to dry. If you're doing four tubes, cement them together two at a time. After they dry cement the two sets of two together and they will fit better. If you try to glue all four at once they shift and make a mess. |
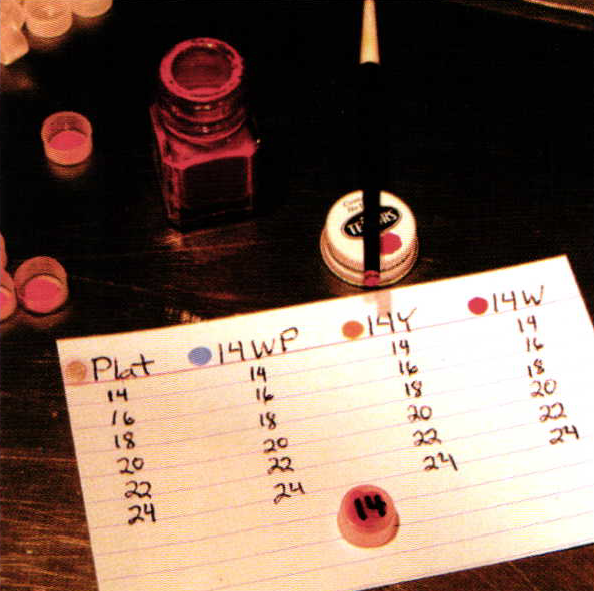 | Decide on colors for your wire tube caps. I used yellow for yellow gold, white for white gold, silver for platinum, and blue for sterling. Write backwards inside the caps the wire gauge sizes. I used 16 to 24 gauge using only even sizes. |
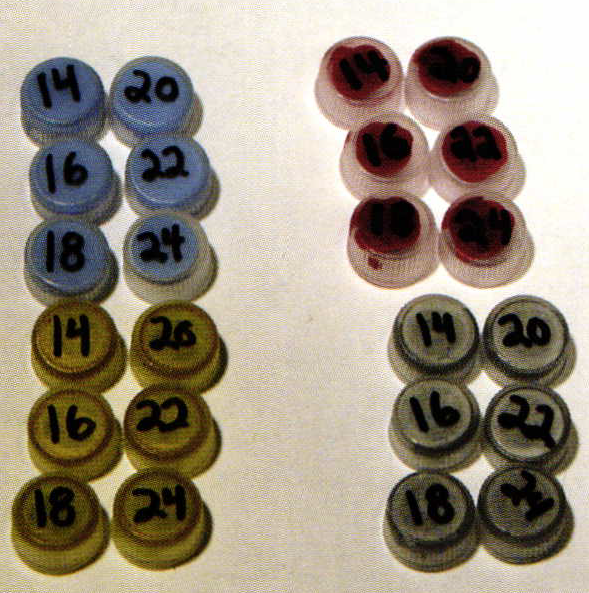 | Then cut a Q-tip in half and dip the end in paint and put a drop in the middle of the cap on the inside. Try not to let it run to the inside edges of the caps as it makes them stick later to the end of the tubes and then peel. If you write on the outside, protect it from wearing off with clear tape. |
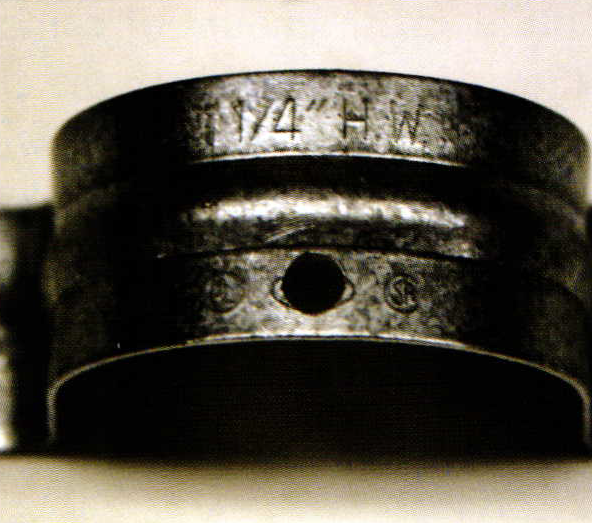 | Drill the top center of either conduit holder on one side of the ridge. You want the ridge to make it tilt to one side when you screw it onto the pipe so it matches the angle of the tilt of the pipes. The conduit holders I bought had a company logo stamped at the top of the strap and made a perfect drill reference. Drill with an 11/64″ drill bit. |
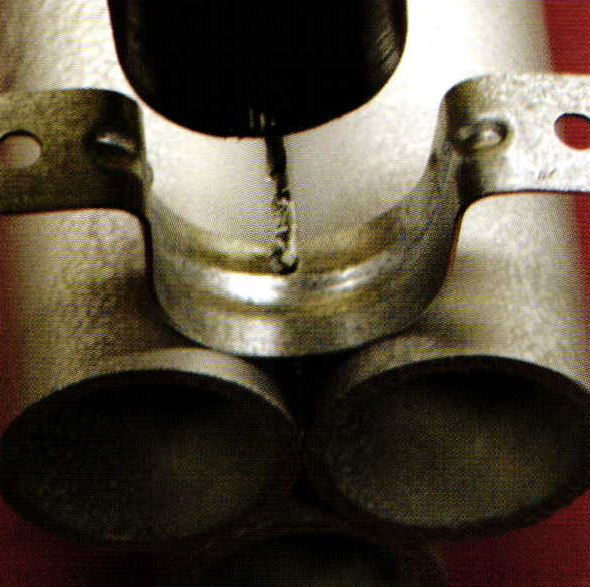 | After drying for an hour your can paint over the glue. If you paint with a glossy paint any drops of cement accidentally spilled on the tubes or any unevenness in joints will show, so I used a hammer finished paint. Allow to set over night for the paint to dry and the glue to completely cure. Next, I laid the conduit strap 1/4-in from the open end of the pipes. The drilled side of the conduit strap was toward the closed end of the pipes. I drilled a pilot hole for the 1 5/8″ dry wall screw with a 7/64″ drill bit. |
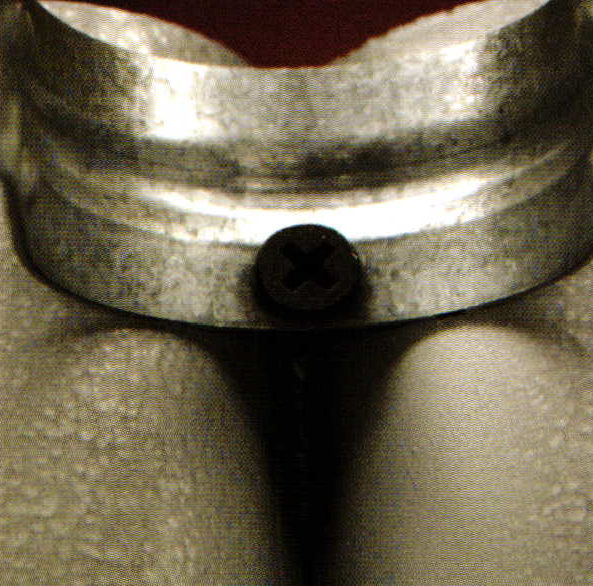 | Gently install the screw till tight. Adjust the feet till the pipes sit perfectly flat and don't rock. |
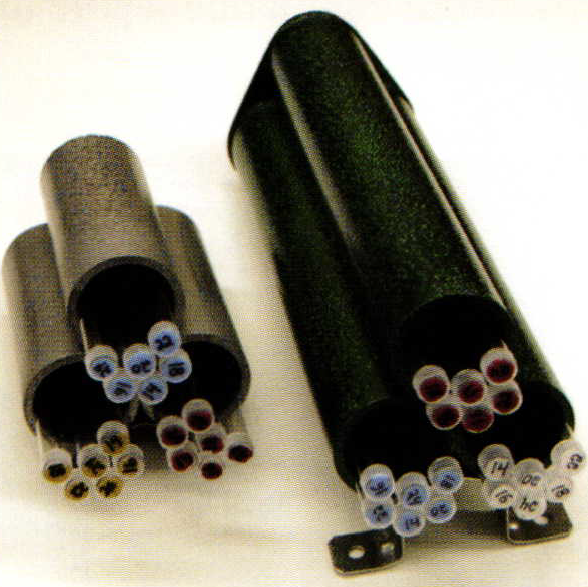 | Your end caps should be dry from the night before. Fill tubes with the right gauge wire and put your tubes into your new wire organizers. Stuller will sell just the empty tubes if you need them. |
Benchmate Lock | |
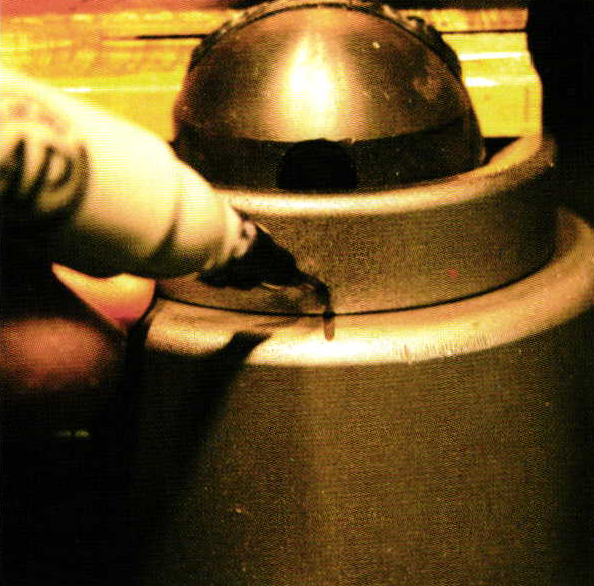
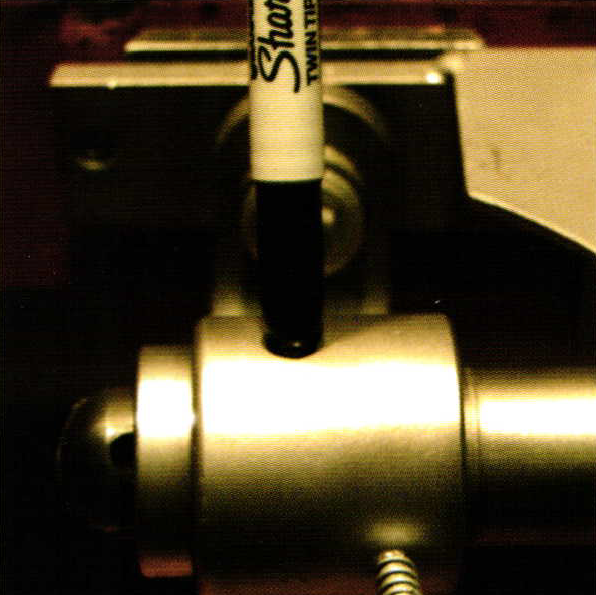 | Tired of having items slip in your Benchmate because you can't make it tight enough? Try this tip. Unscrew and remove the black thumbscrew from the side of your Benchmate. Take a sharpie marker and center it in the hole. Rotate your ring clamp one whole turn. |
 | Pull the ring clamp out of the collar and make sure the marker ring goes all the way around, then remove the ring clamp from the collar. |
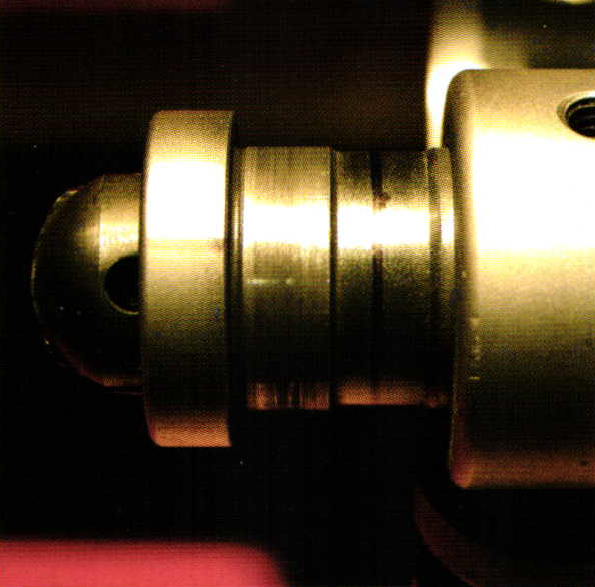
 | Take a marker and mark by eye the middle of the shoulder of the ring clamp. Then grind in a deep nick with a separating disc. (Remember to wear safety glasses). This will be the reference point on the collar. Place the ring clamp back in the collar. |
 | Place a sliding button gauge in the jaws to use as a reference, and then spin the ring clamp until the button gauge is perpendicular to the arm. |
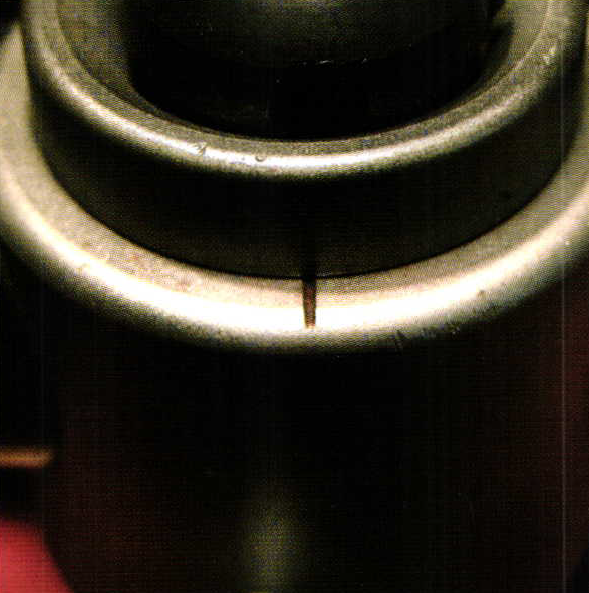
 | Use the reference mark on the collar, and mark the clamp at 12 o'clock, then rotate it 180 degrees and mark the 6 o'clock spot. |
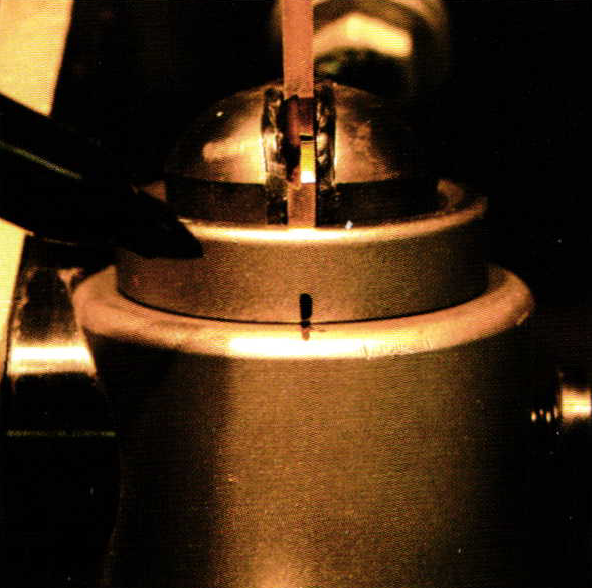 | Spin the ring holder until the button gauge is parallel with the arm. Use the collar mark and mark the 3 o'clock position. Turn it 180 degrees and mark the 9 o'clock position. Notch the marks with a separating disc. Paint all the notches on both pieces using a toothpick with a bright color spot. |
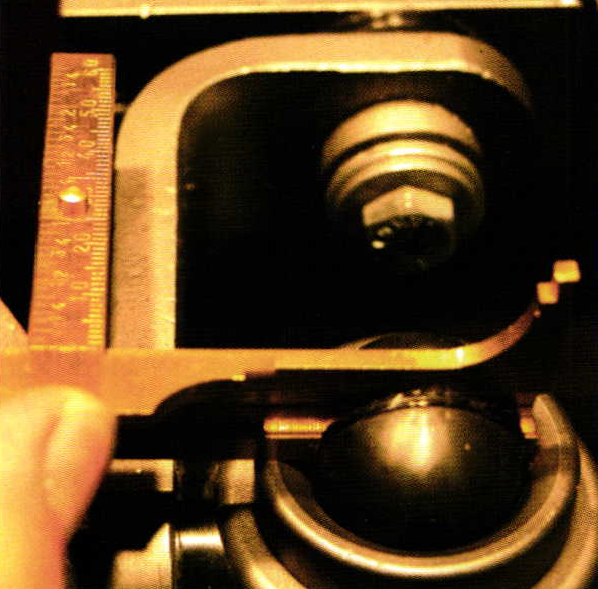
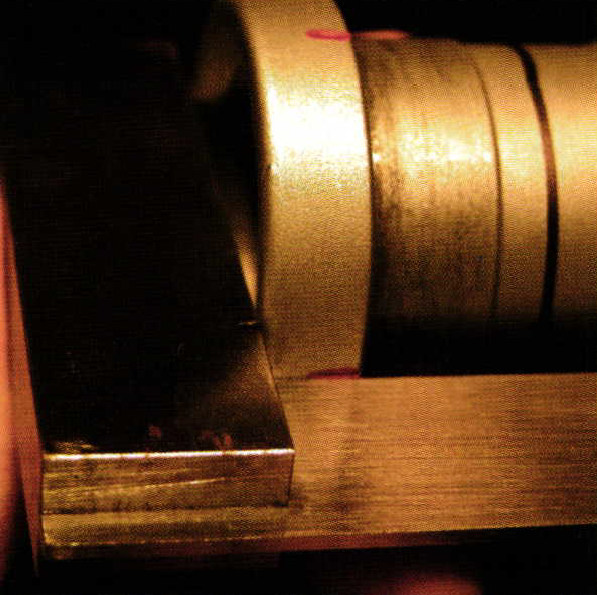 | Transfer the notch location to the line you drew around the ring clamp. |
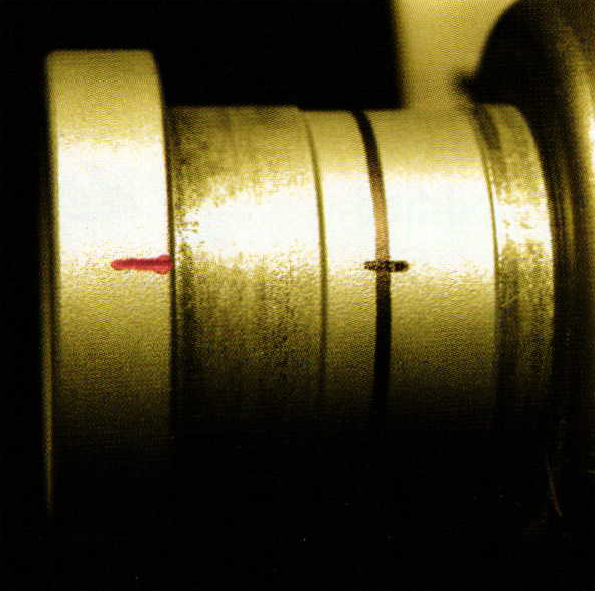 | Use a center punch to make notches to drill out the holes on your marks. |
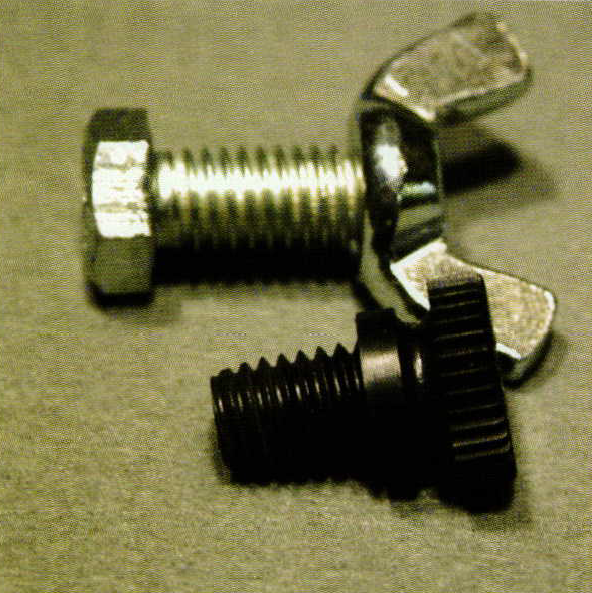 | Now you need a 3/8 in. X 11/2 in. course thread bolt and a matching wing nut. Screw the wing nut on to the end of the bolt and laser weld it into place. You can also use lead solder here to solder it. The capillary action of the lead solder will be more than strong enough. Cut the bolt off so the threads are 1/8 in. longer than the old plastic one. |
 | This extra length will make the tapered tip. Carefully grind the tip to look like the picture with a small flat spot at the tip. It will still do light duty tightening when not engaged in one of the holes as the old plastic one did. |
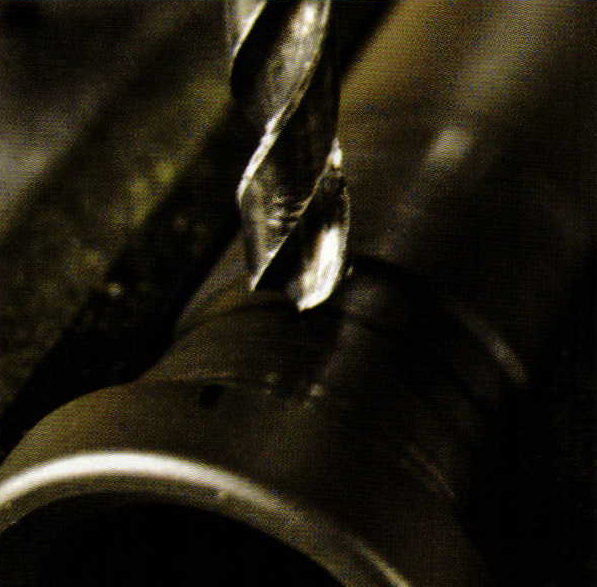 | Remove the insides of the ring holder and mount the tube body in a vise. Drill out the four marks on the ring holder tube body with a 5/16 drill. If you stop just short of going all the way through, there are no burs to cleanup on the inside of the tube. Leave just a tiny rim like in a bezel setting. If you go all the way through, clean up the burs on the inside with a large ball bur. |
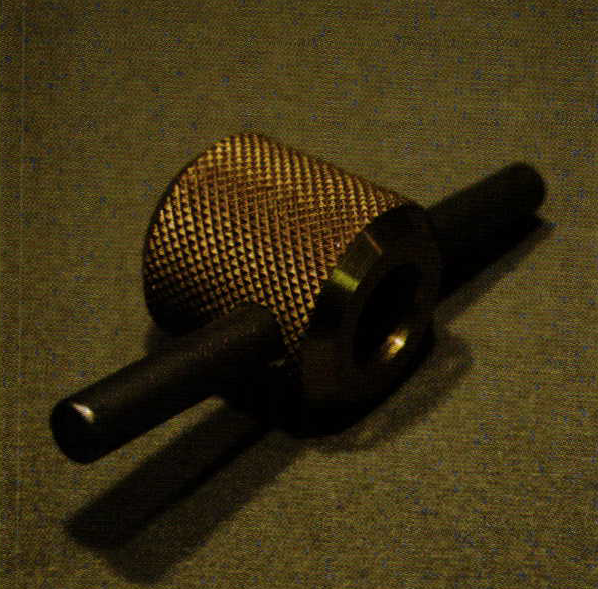 | I used a piece of 1/4-inch rod as a cross grip for tightening the modified benchmate. Cut it to a length that feels good to you. Clamp the hand nut in a vise and drill it so it's about 1/8-inch from the end so you have clearance to tighten it all the way. I welded mine in place but you might want just a tight friction fit. Reassemble your benchmate, and now you have the means to lock and torque the unit as tight as you need. Be careful not to crush light weight mountings after making these modifications. |
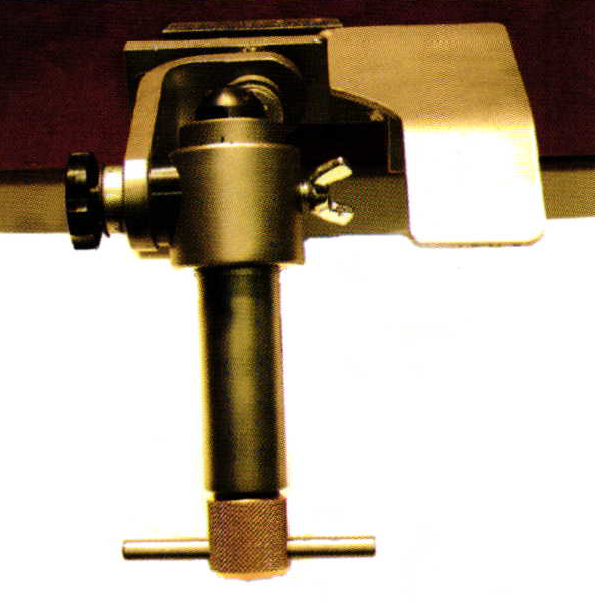 | The finished product allows you to have all the same functions as before, but with much greater tightening power and less chance of the piece slipping and allowing a graver to stab into your hand. |
Related Articles

Grinding and Shaping Onglette Gravers

Customized Robo Grip Pliers

Making Wooden Raising Stakes

Making a Multi-Grit Sanding Stick


The All-In-One Jewelry Making Solution At Your Fingertips
When you join the Ganoksin community, you get the tools you need to take your work to the next level.
