
Laser Welding Channel Repair
2 Minute Read
In previous articles we have looked into the "art" of prong repair using the laser (Full Prong Replacement and Tipping Prongs. This is the final article in the series on laser welding prongs but is by no means the last word on the subject. Each laser technician will, and indeed must, develop his or her own techniques for welding.
These articles are meant to stimulate your thinking when it comes to problem solving in the realm of laser welding. They are suggestions that come out of my own experiences. These suggestions are available for your consideration and adaptation, or quite possibly, your rejection. As always, take great care in your approach and like a good chess player, think several "moves" ahead when laser welding.
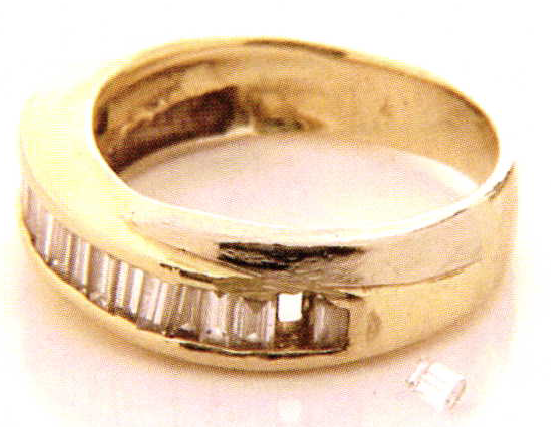
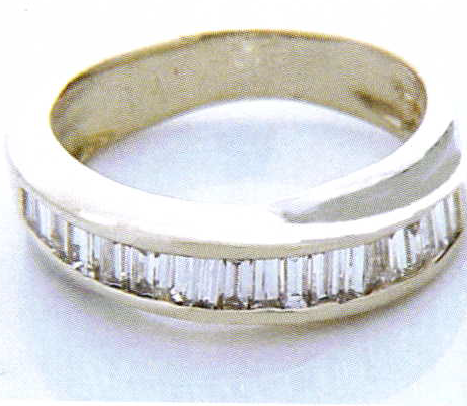
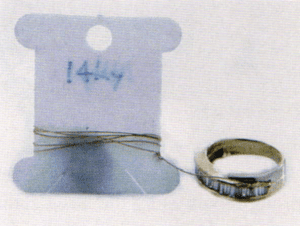
My client sent a two-tone channel set diamond band to me so that I could replace the missing baguette diamond and repair the worn channel. This laser welding project is that repair.
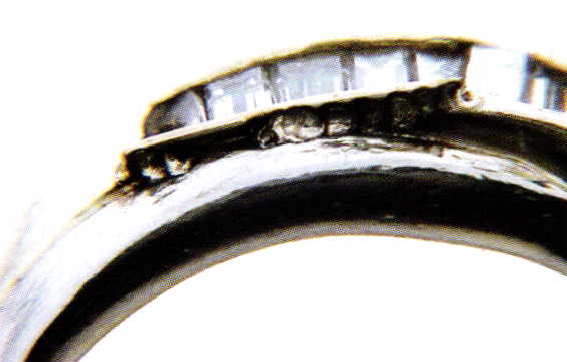
Upon examining the ring, I was able to determine the reason the baguette came out of the channel mounting. The channel wall over the stone was worn down below the girdle of the baguette and the stone simply fell out. After trial fitting the replacement stone, I began to rebuild the channel.
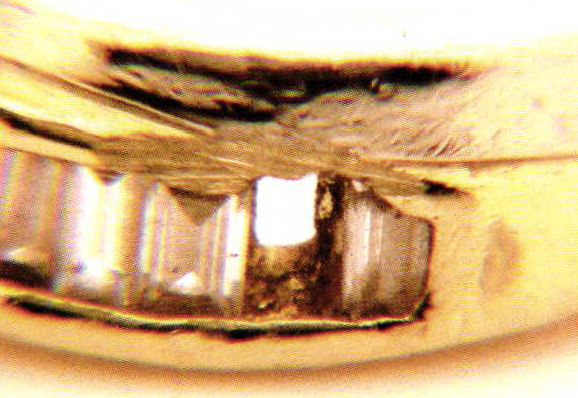
I used a separating disc to clean up the worn channel wall. Then I placed the new baguette in the channel to make sure it was seated properly before rebuilding the channel wall.
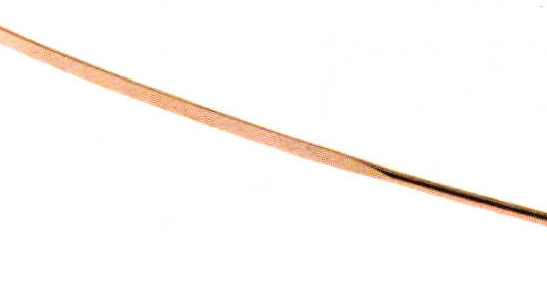
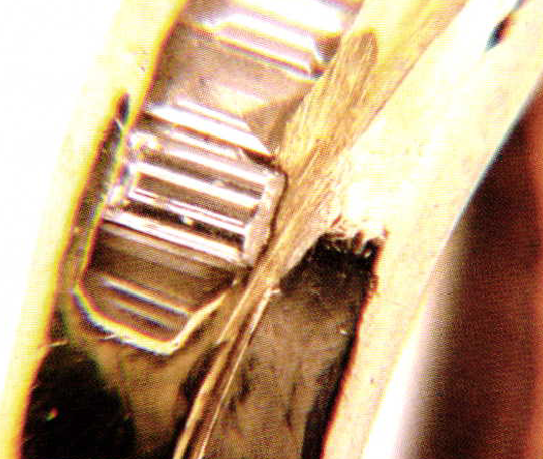
I selected 20 gauge round wire (0.80mm) to rebuild the channel wall. I passed it through my rolling mill to flatten out the wire so that it would lie on the ring properly and increase my surface contact on the channel. This also greatly reduces the need to file the inside channel wall during the finishing phase.
With the replacement stone in the channel, I then proceeded to lay the flattened 20 gauge wire in place and set my laser to tack the wire in place. This 'tack' allows me to check for proper stone seating and alignment of the new channel wall.
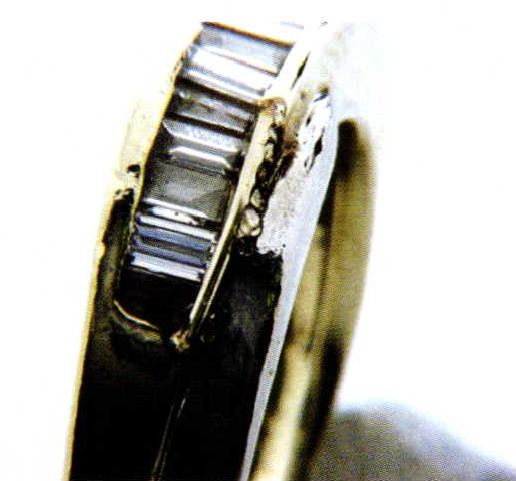
When I determined that the alignment was correct, I proceeded to weld the rest of the new wire channel to the ring base.
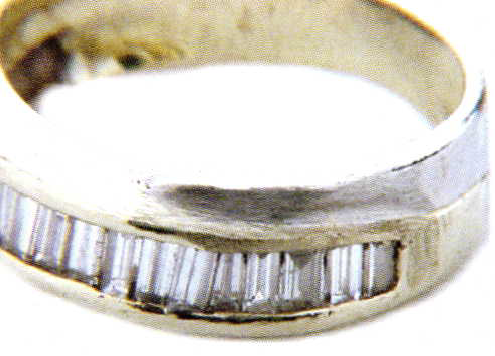
After the new channel wall has been filled, file and finish as usual.
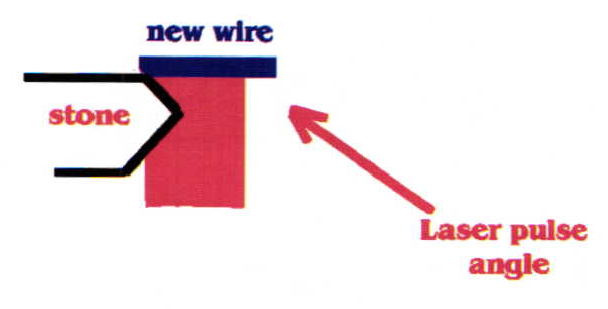
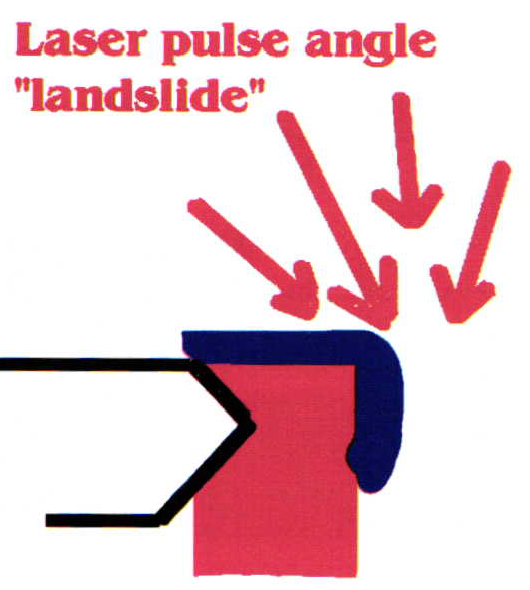
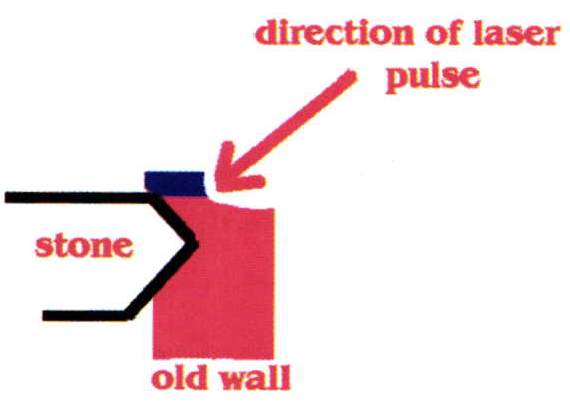
There are at least two ways to position the wire on the ring. One is to leave an overhang ledge with the replacement wire on the outside edge of the existing channel wall laser under the ledge, and landslide the edge of the new wire down the side of the ring.
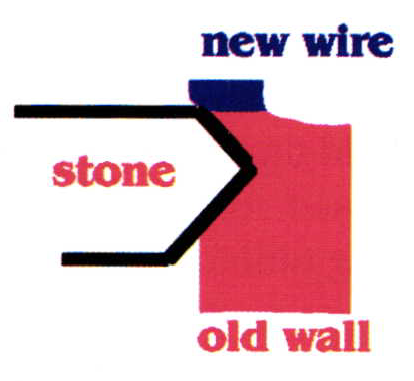
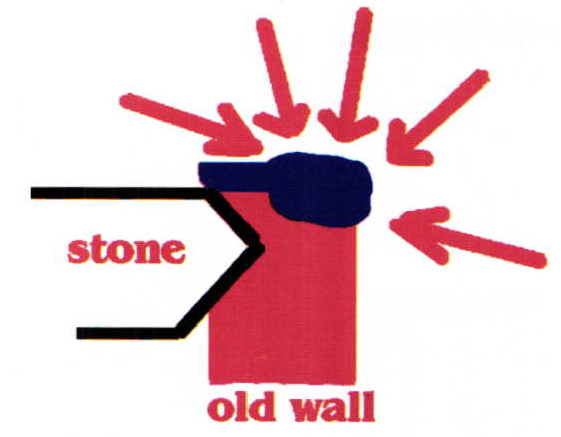
The other way, which is the option I chose for this project is to lay the wire on top of the old channel wall and not allow the wire to completely cover the old channel. Allow the old channel wall to be seen a bit when the new wire is tacked in place.
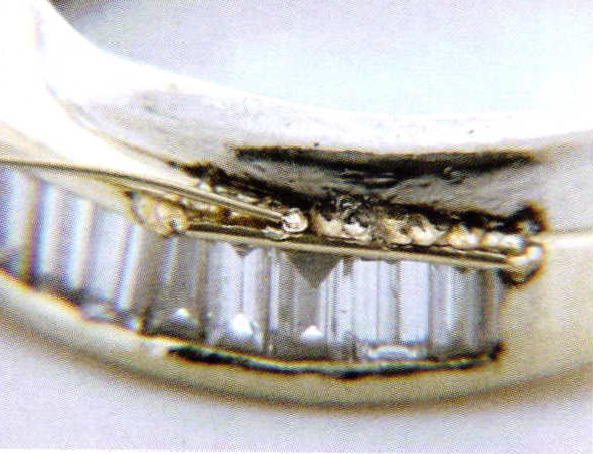
Then using 30 gauge filler wire (same metal type as ring); build up the channel wall to flush.
A tip for storing and using your filler wires efficiently comes from Stephanie Schott of Carol & Co. in Shelbyville, KY, Stephanie uses sewing bobbins to store her wire on. I found these "floss bobbins" to work well for me. They are made of firm but flexible plastic and you can use a permanent marker to label the type of wire. Floss bobbins can be found at your local craft store or at a sewing center.
Related Articles

Goldsmithing: Fusing Technique

Pulse-Arc-Welder: Sterling Silver Bracelet

Welding Technology Tool Modifications Part 2

Jewelry Designs: Maya Pendant


The All-In-One Jewelry Making Solution At Your Fingertips
When you join the Ganoksin community, you get the tools you need to take your work to the next level.
