
Jewelry Designs: Sisters Pendant
7 Minute Read
Sisterhood, however you define it, is the strongest bond. Best friends, mothers and daughters, your own sisters, or anyone very special to you. This necklace was designed as a lasting symbol of friendship, caring, and love. Wear it with pride and show the world the special bond you have with your sisters.
Welcome to Stacey Rhodes Jewelry Designs, where we will detail all of the steps involved in adding a new piece ofjewelry to our line. I'll take you through every phase of production, from the original idea to the showcase. The design we are working with in this article is called "sisters".
The Idea
Let's start with the sketch. This is how almost every piece we produce begins. The first thing that caught my attention was Stacey uttering that dreaded phrase "two-tone". Yikes!
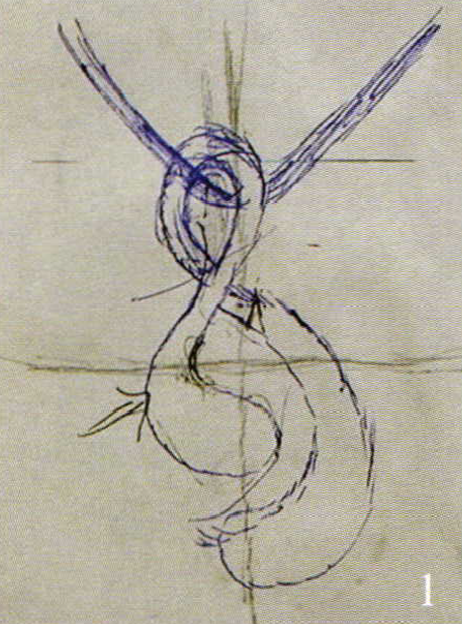
Fortunately, that never materialized in the end, but I could have done it if necessary. That aside, let's see what we have here. There is a crossover effect that has to be dealt with. Another feature that caught my attention was the way the chain will pass through the pendant. The first thing I said to Stacey was; "It'll never hang straight".
But, as the craftsman, you have to make the designer happy. As it turns out, I had a really great idea. Everyone said to me "It'll never hang straight". (Paybacks are tough.) As it turned out the method I used worked so well that we are going to go back and retrofit several of our pieces. We'll talk about that more in my great idea section.
Let's Carve A Wax
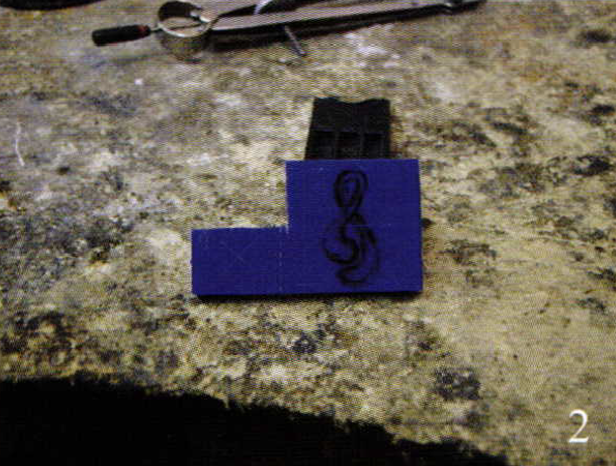
The first thing I do with every wax carving is to file the top of the wax smooth. The wax has a bark finish when it comes out of the box, and it makes sketching or drawing rather difficult.
Look back at the original sketch and notice the faint crossed lines dividing the pendant into four parts. This was paramount in finding the approximate center, which also helped with all of the measurements throughout this project. Next, I drew a duplicate set of crossed lines on the wax, and marked the top and bottom parameters.
Stacey and I agreed that 31mm is the desired height. I have Stacey draw the pendant to scale on the wax, which you can see in photo 2.
Then, I just start removing all material outside the lines. For about an hour, everything went great, then disaster struck; photo 3.
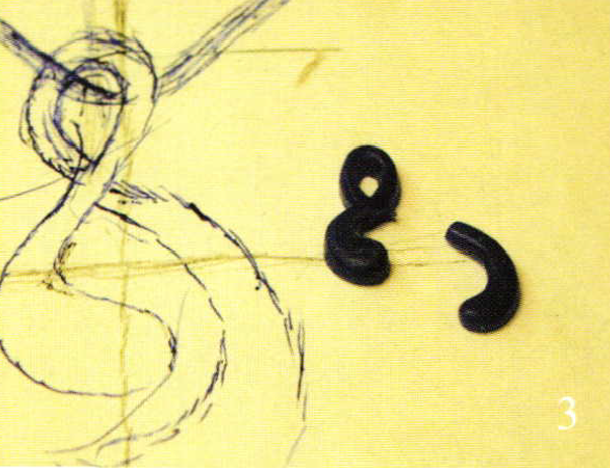
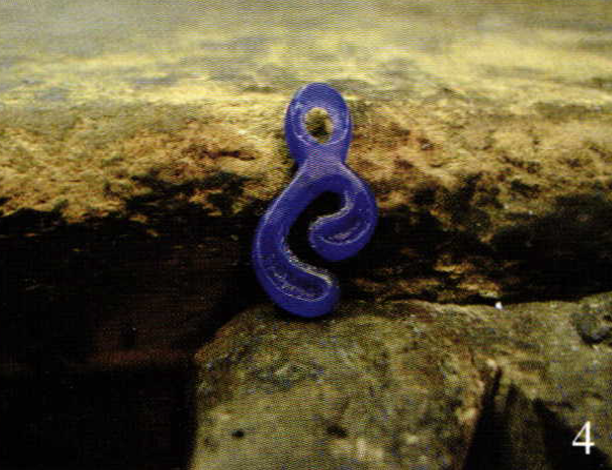
As it turns out, it was a blessing in disguise. With the wax in two pieces, I was able to detail sections I could have never reached otherwise. After hollowing out the back a little, to make setting stones easier, photo 4,
I'm ready to cast. Photo 5 shows the finished original model, ready to cast.
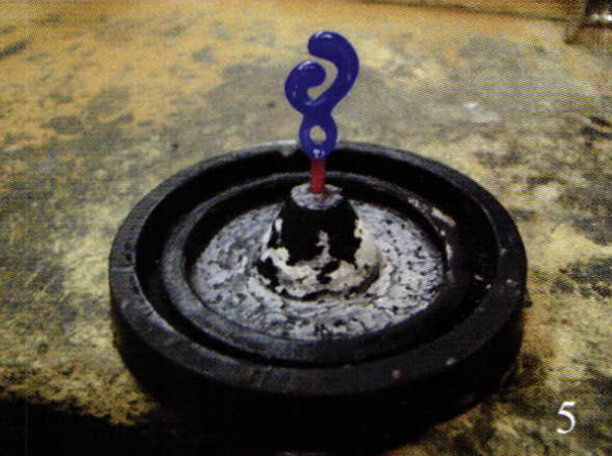
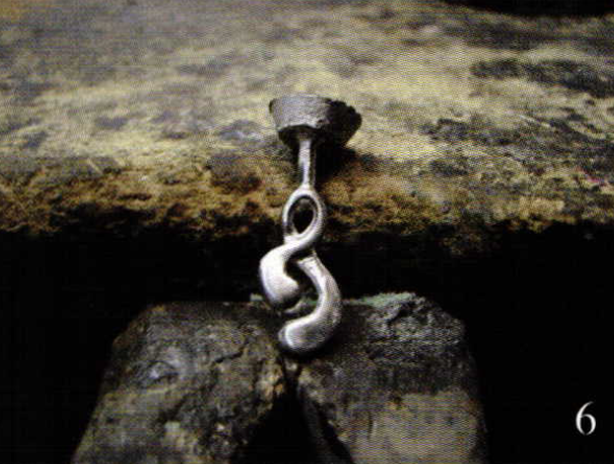
Photo 6 shows the original model cast in Sterling Silver. I always cast my originals in Silver to keep down the cost.
My Great Idea
When people wear a pendant on a chain, where is the clasp most of the time/ Right beside the pendant, that's where. It's never at the back of the neck where it belongs. So instead of allowing this pendant to float on the chain, it's going to be cut in the middle and permanently set in place. And they said it would never work! I'll admit it didn't work the first time out, but after a few adjustments, and a few ruined chains, it works great.
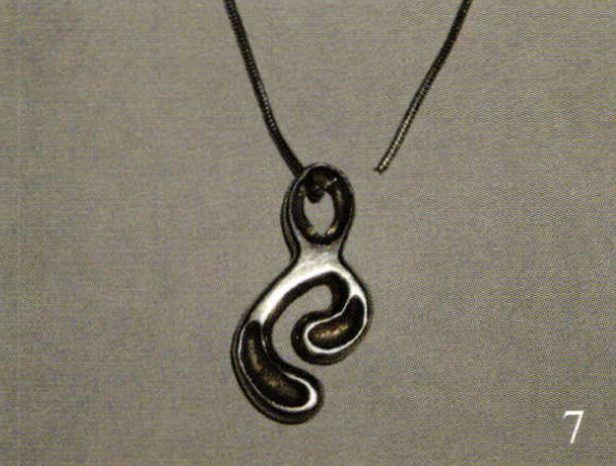
Look at photo 7; there you'll see one half of the chain in place.
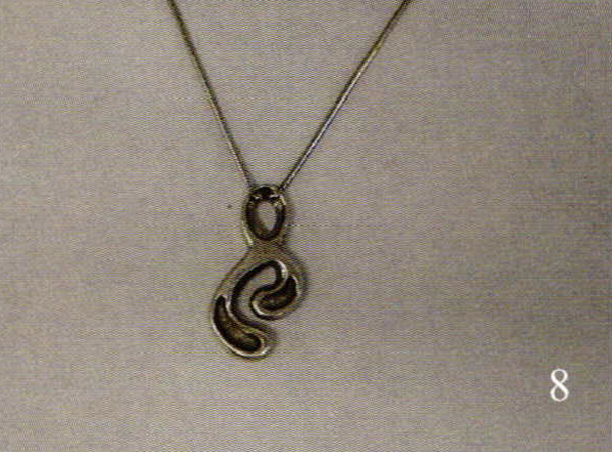
Photo 8 shows both halves installed and set into place. Pretty cool, huh?
So What Went Wrong
You knew it had to happen; it was just a matter of time. Having never suspended a pendant in this fashion, I had a few 'trial and error'mistakes. Without going into all of the problems, I'll just tell you some things to you this at home.
For starters, the hole that is attempt watch out for if drilled into the pendant has to be a very precise diameter. Since the chain is not going to move once it's set, the hole needs to be just large enough for the chain to slip through tightly. I ruined most of the chains trying to build up a bead on the end of the chain that was large enough not to slip back through a hole that was drilled too large.
Secondly, once your holes are drilled, go over the exit of the hole, where the bead is going to rest with a round bur to create an indentation. Otherwise the bead will show from the front.
One last tip; don't try to create the bead by melting the end of the chain. You can't control your heat closely enough to keep from freezing about a half inch of chain. I found a bead of solder, just barely larger than the diameter of the chain applied to the end worked great.
Okay, since you asked, 8 chains. I ruined 8 chains. Are you happy now?
Rubber Mold Time
Sprue (sprooo): l. An opening through which molten metal is poured into a foundry mold. 2. The waste piece of metal cast in such an opening. Or more simply put, it's the passageway for wax to exit the mold, and metal to enter in its place. It'll come up a few times in this section.
The first thing I needed to do was plug the holes I created for the chain. I don't like to leave holes in castings if I can get around it, mostly because it can cause porosity; a condition where there are tiny surface pits making clean up and polishing a nightmare.
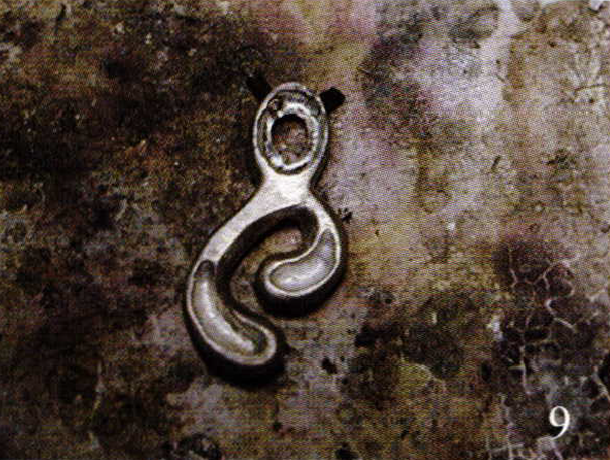
Photo 9 shows the plugs I installed in the holes that were drilled for the chain. The plugs are brass; the original piece is sterling silver.
The reason for the two different color metals is so that after I've filed and polished the plugs, I can easily see where the holes were. I now take a small round bur and grind an indentation into the center of the brass plug to mark the location of the chain. Now every time I make a pendant, I know exactly where to drill my holes for the chain.
Next, I solder a brass sprue to the top of the pendant. You can use other metals but I happened to have brass lying around. I pre-heat my vulcanizer and set my temperature. I put a block of wood between the upper and lower plates, and put a thermometer probe between the wood block and the plate. This is the only way to get an accurate temperature. Remember, you are only concerned about the temperature where the rubber meets the plate, not 6 inches away on the thermometer dial. I use the "No Shrink Pink", pre-cut mold squares.
After I've packed the mold, my procedure is as follows: place the mold in the Vulcanizer and tighten down, then set a timer to two minutes. At two-minute intervals, tighten the plates, for a total of 8 minutes. Since I use 10 pieces of rubber for my molds, I then set my timer for 1 hour and 10 minutes.
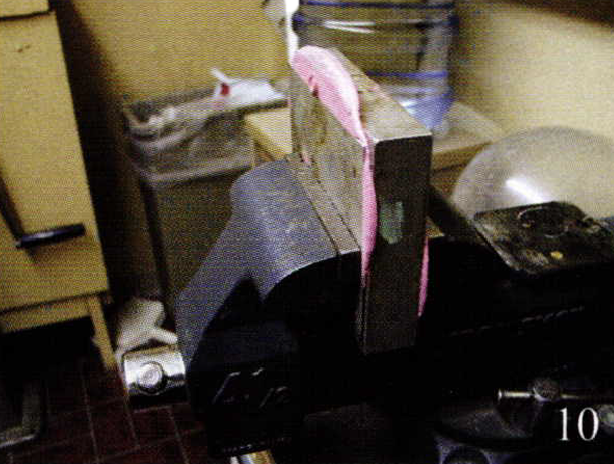
When my timer goes off, I take the mold out of the vulcanizer and place it in a large vice and clamp down, photo 10. The reason is to allow it to cool while still keeping firm pressure on the mold.
Cutting The Mold
I first draw lines on the mold where I want to cut, photo I l. Always plan in advance where you want your mold lines to fall, BEFORE you make your mold. If you really study what you are molding in advance, you can determine where the mold lines will be the easiest to remove.
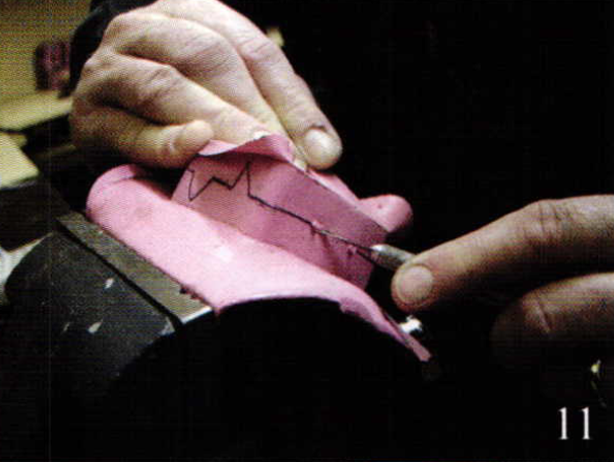
Photo 12 and l3 show the mold during the cutting process.
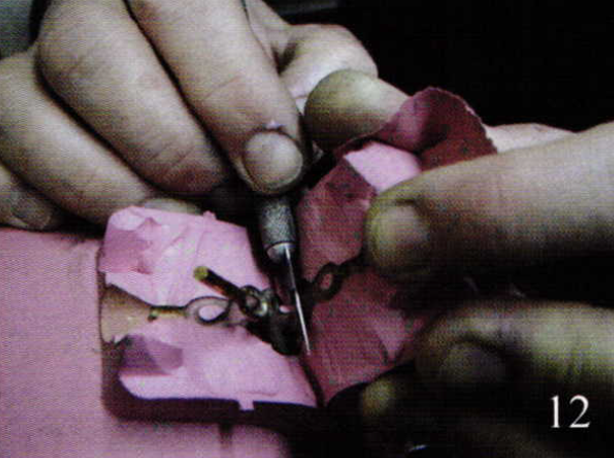
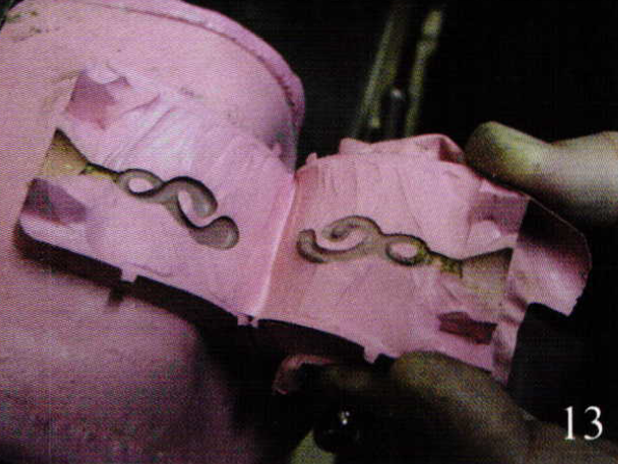
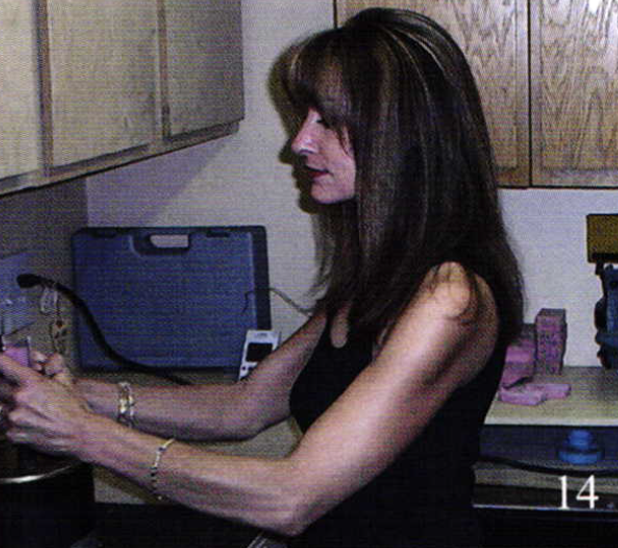
Photo 14 shows Stacey doing the ceremonial first wax injection. (The first one NEVER comes out, so I don't want to do it!)
The First Production Run
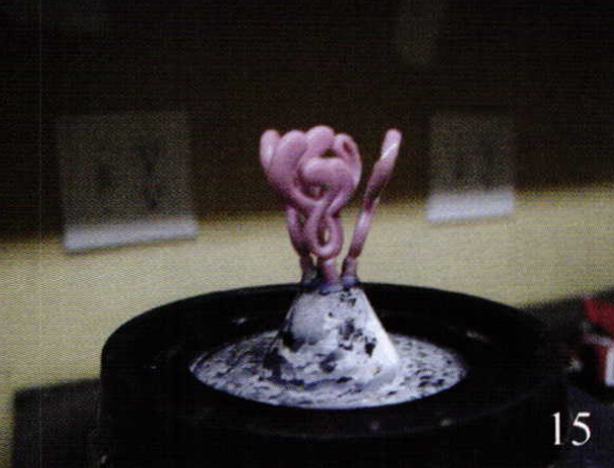
Uneventful. That never happens. So far, I haven't had to go back and make any corrections. Photo 15 shows the first 5 waxes sprued and ready to cast.
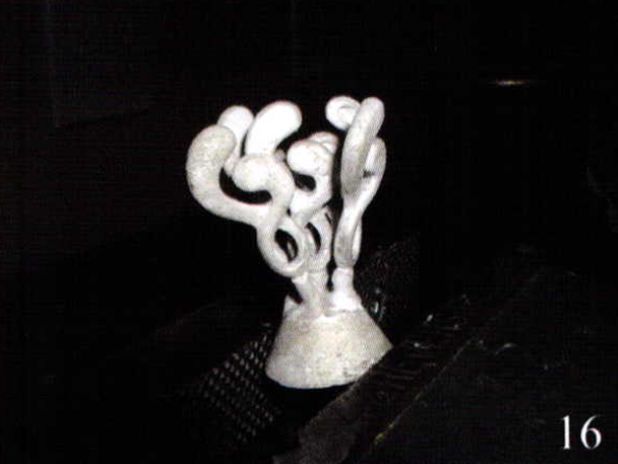
Photo 16 shows the actual casting. It came out fine. The only real problem I had assembling these pendants was learning the new way of installing the chains. As I said before, it didn't work the first time, but by number 6 or 7,I felt like a master chain installer.
In Conclusion
Stacey's happy. We've already sold several, so I'm happy too! I'm mostly just tickled with my new "Pendant Suspension Mechanism". I'm not looking forward to going back and making a bunch of new rubber molds when we retro fit all of our other pieces. But I can't see suspending a pendant any other way now. For everyone that owns the originals, hang on to them. They'll be worth money some day when we're rich and famous.
Related Articles

Designing Contemporary Flatware

Jewelry Designs: Grace Pendant

The Work of Tom Muir

Art and Technics: Act of Technique


The All-In-One Jewelry Making Solution At Your Fingertips
When you join the Ganoksin community, you get the tools you need to take your work to the next level.
