
Fauré Studio Enamel Techniques
8 Minute Read
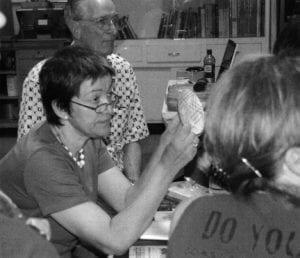
One of the many workshops presented at the 10th Biennial Enamelist Society Conference was The Fauré Studio Enamel Techniques, instructed by Mauricette Pinoteau, and held at the Cultural Arts Center in Columbus, Ohio on August 22-24 and 27-29, 2007.
The Atelier Fauré was an enamel studio in Limoges, France, starting in 1919 and employing various artists through the 1970s, making unique enamel vases and vessels known for their 'built-up' carved textures and wonderful outlined florals with transparent color over foil.
Mauricette Pinoteau is one of only two living enamelists who learned from the masters while working at Atelier Fauré in the 1970s.
Following are workshop notes taken during the class.
We were given the choice of working on a bowl shape enameled with a dark color (in our case, dark blue) back and front, then either cutting foil into shapes, i.e. flowers, which would then be outlined and covered with transparent colors, or to completely cover the entire surface of the bowl with foil and use techniques to create geometric patterns and 3D shapes in color on top of the foil.
To start either the geometric or floral styles, the first step was to apply a coat of enamel to both front and back of the piece for the first fire.
Gum Tragacanth
Mauricette uses powdered gum tragacanth. Grind dry gum powder first. Only use a small amount of powder (2 pinches) placed into a container, add 1/4 cup water, stir, and it will thicken.
Full-strength gum is used for attaching foil and a 50/50 mix of gum and water is used for sifting enamel onto a surface.
To Start the Bowl Form
To prepare copper surface for enameling, anneal to green to remove grease or oil. When cool, dip piece in diluted Nitric acid (1 part Nitric to 3 parts water), remove, rinse well, and dry. (An alternate method is to use Penny Brite to degrease copper.)
For base coat, use a 50/50 mix of clear transparent (flux) and transparent blue.
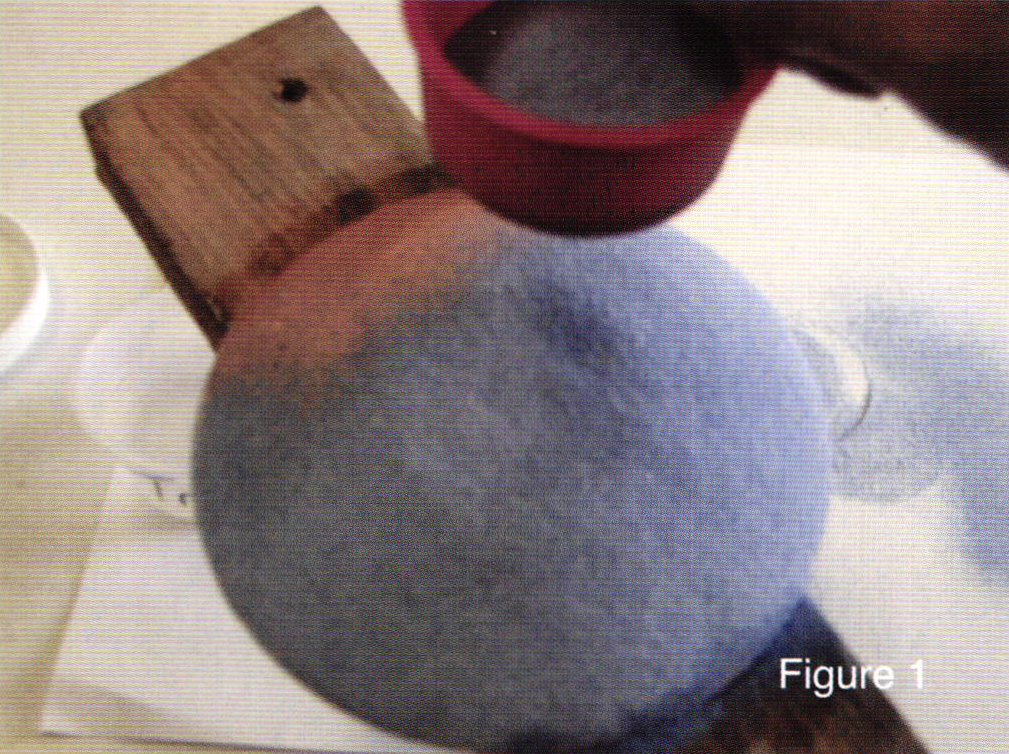
A 2-1/2″ wide by 11″ long lightweight board was used to hold copper form while applying base coats of enamel. Place form on board, right side up.
Paint gum (broad brush) liberally but evenly - sift enamel mix, turn over and place piece on board, upside down. Paint with gum. Sift on enamel. Place upside down on trivet. The piece was fired for 3 minutes at 1450°F. A second coat is applied and fired, same as the first coat. See Figure 1, page 116.
Preparation and Application of Silver Foil
In principle, use thicker foil for large works. Silver foil is normally used, however, gold foil could be used if desired.
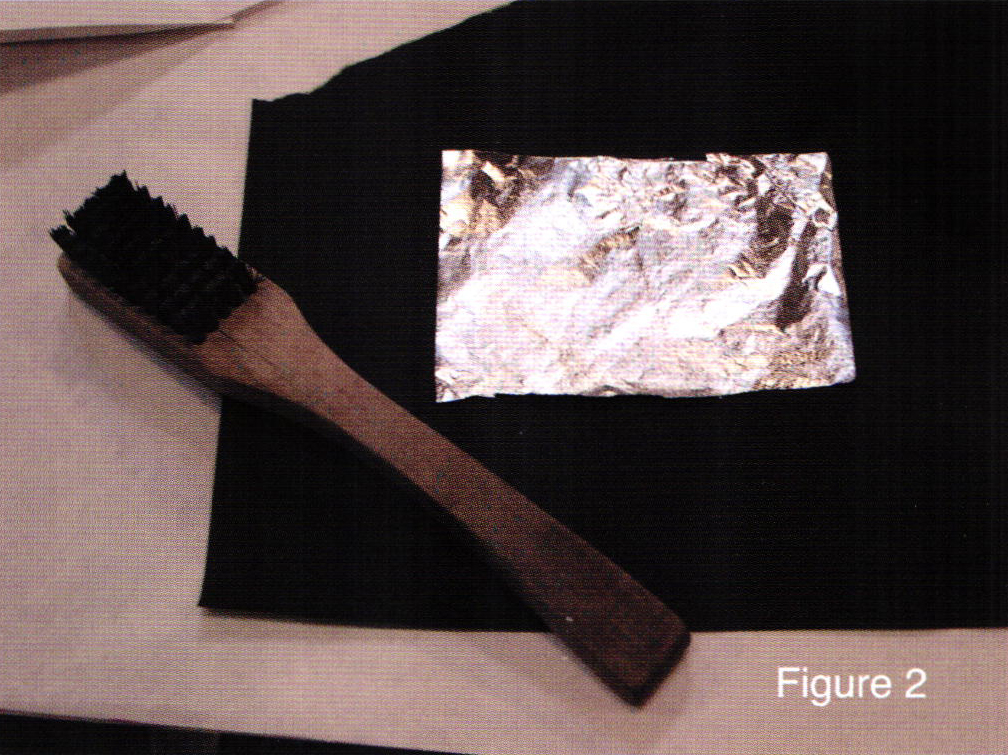
The foil is placed on top of coarse sandpaper. It is then tapped with a wire brush (suede brush or file card) to create tiny holes in the foil. See Figure 2.
Full strength gum tragacanth solution is liberally painted onto the pre-enameled surface. Lay foil down.
Blot up gum coming up from holes. Cut additional pieces of foil, if needed, to completely cover the piece. These additional foil pieces should overlap the original foil by ¼ to ½ inch.
Fold down foil over edge of form. Press air bubbles out with brush. If any air bubbles are created under foil, poke holes in foil, then press with wet gum brush.
After drying foil, use abrasive stick to clean edge (emery board), then scrape off excess on back with sharp blade.
Firing of Foil
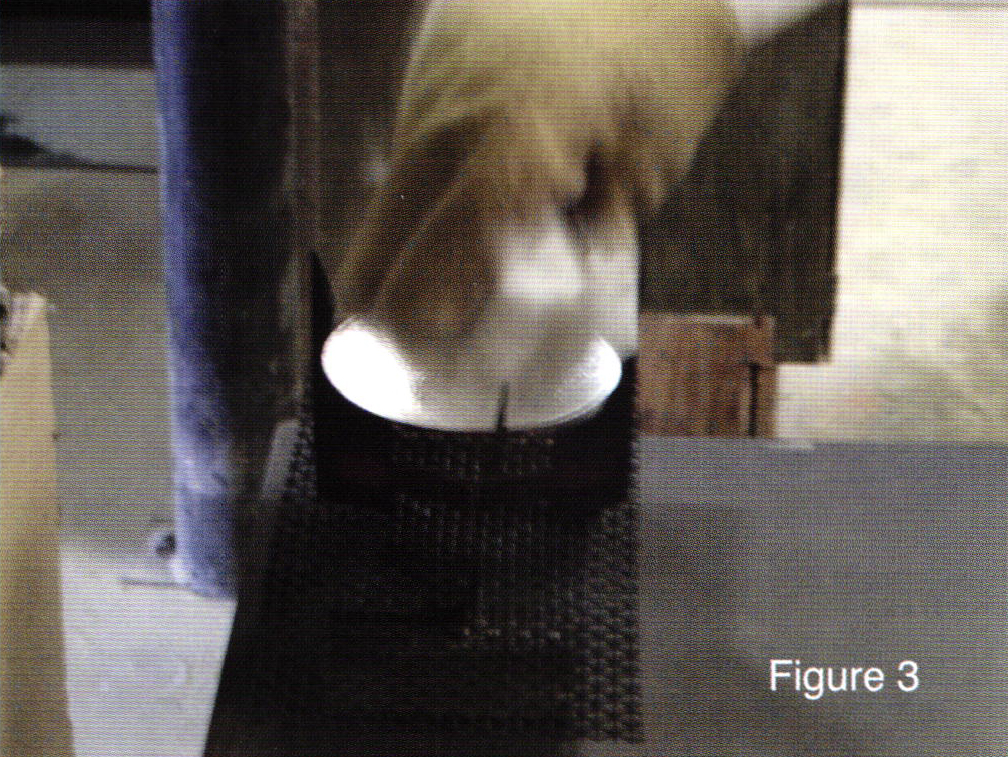
Fire approximately two minutes at 1450-1500° F. With a soft cotton cloth (do not use any synthetic) wadded up into a ball, use a light dabbing motion to press down any air pockets in the foil IMMEDIATELY after coming out of the kiln. The cloth may catch fire - tamp fire out on non-combustible surface. A light touch is needed so as not to warp the piece while hot on the trivet. See Figure 3
Application of Clear Transparent (Flux) on Silver Foil
When cool, brush on gum solution and sift on coat of transparent clear for silver. Don't apply too heavily, or too thin. Make sure fines have been removed prior to application. Wash many times or screen sift. Do not fire too hot or too long. After cooling, stone edges to remove copper oxide. Repeat this procedure after every firing. (Copper oxide that has developed on the copper form's edge in a previous firing may release and land in the enamel on any subsequent firing if it is not removed.)
Traditional Method of Transferring Design Onto Bowl
Vine charcoal is ground into powder over sandpaper to make powder - this is put into cotton cloth, then bundled.
Have extra powder in a pan. Make line drawing with tracing paper. Poke line drawing with a pin. When finished poking, turn paper over and hold the side of paper that pin was pushed through tightly to surface of piece. (Note that your image will be reversed.)
Take bundled powdered charcoal and coat outside of bundle with extra powder in pan. Pounce charcoal onto paper over piece - hold tightly. Pounce-press-push through charcoal in sweeping motions. This should result in a charcoal outline of your drawing.
Alternate methods for transferring design would be to trace design onto enamel surface with greaseless carbon paper. Others have used felt point watercolor pens (freehand) with good success.

China Paint
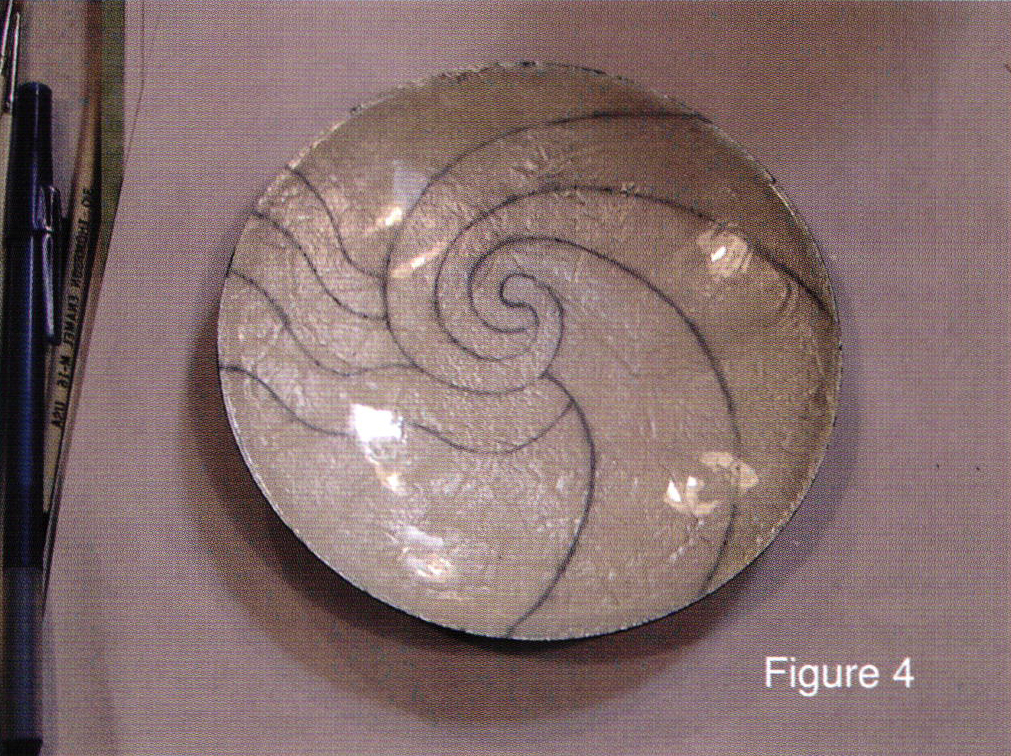
China paint is used to follow the charcoal line and establish a permanent line that will be fired. The fired line will be the guide for applying colors and build-up.
A piece of window glass is taped around the edges, making a palette. Sun-dried turpentine is used to mix with the powdered china paint. You can make sundried turpentine by pouring regular turpentine in a dish and leaving it in the sun to evaporate until it is the consistency of honey.
Any excess charcoal on the line drawing is picked up with a light finger press.
With a fine brush, paint a thin line of the turpentine/china paint mix along the charcoal line. After the china painted line is finished, excess charcoal and a thinning of the original line is achieved using regular turpentine or paint thinner.
If your original china painted line was 1/8″-1/16″ wide - in the cleanup step, the line should be thinned to 1/32″ or less. This results in the china painted line being less obvious, or not obvious at all, in the finished piece.
After drying, fire the line for one minute at 1450°F. Do not overfire. If you do, the line will spread. When cool, stone edge to remove copper oxide. See Figure 4
An alternate method is to use Thompson 911E dry powder overglaze painting enamel. This may be mixed with sun-dried turpentine as above, or mixed with squeegee oil with a spatula, and applied with a crow quill pen or fine brush.
Color Application
(Fauré Studio used enamels manufactured locally. The author used Thompson lead-free enamel on the illustrated piece in this article.)
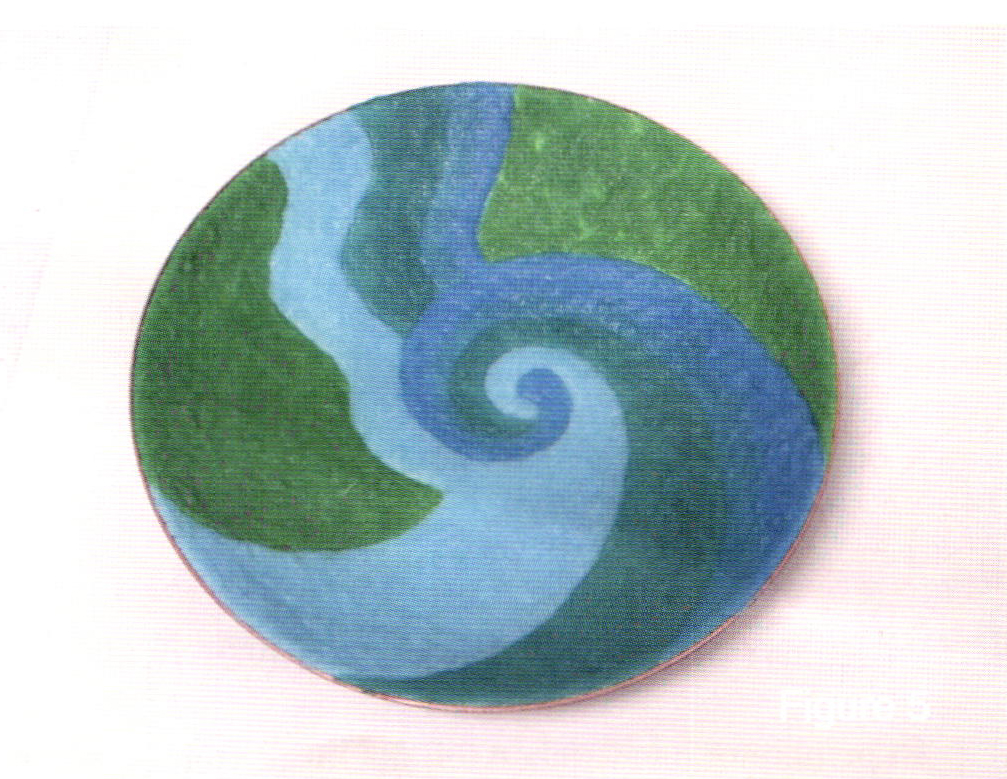
Coat front of piece with gum solution. It is OK if it dries. Pick your color scheme. Choose from 80 mesh transparent colors and wash well before wet packing. When wet packing, it is good to have a container of water and blotting paper handy. You may want to use plenty of water to smooth out the surface, and when mixing two colors. Use blotter paper to remove water when needed. To lighten color, mix 2020 clear transparent flux (Thompson) using lots of water. Ample water allows homogenous mixing of color and flux to create seamless gradation from dark to light. See Figure 5.
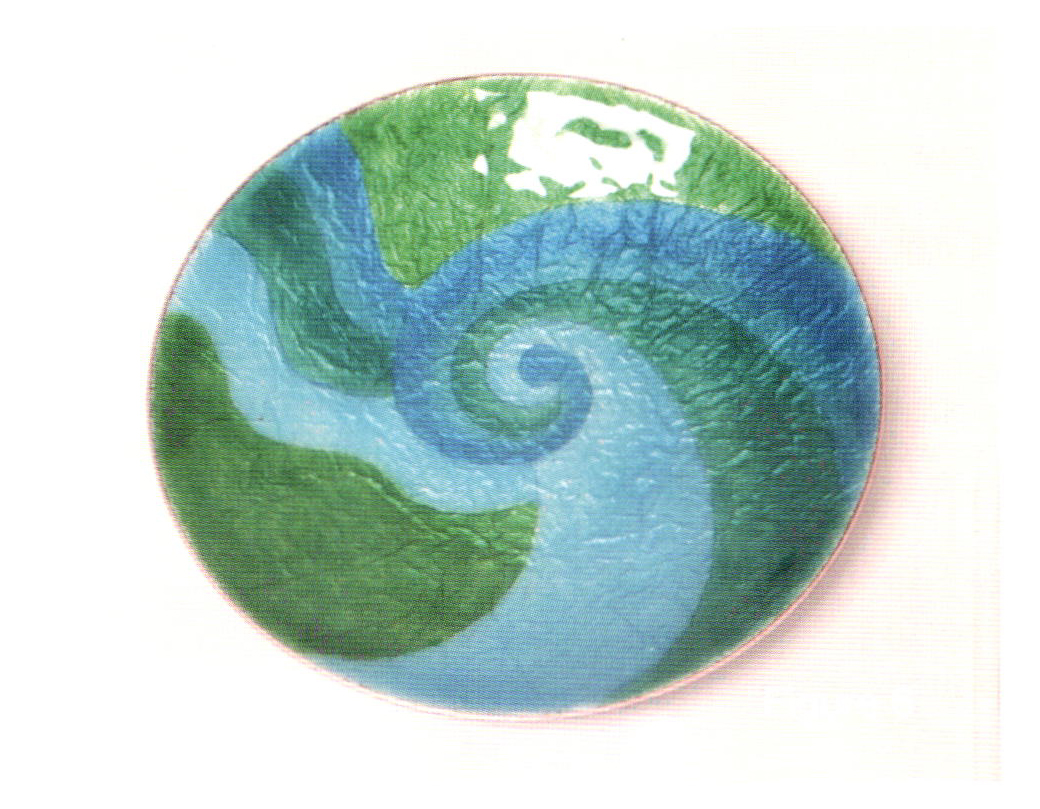
When colors have been wet packed over entire design, remove water with blotting paper. Use your spatula to separate colors according to your design. The application of wet packed colors should be kept thin. Dry and fire for 2-1/2 minutes at 1450°F.
Coat front of piece again with gum solution and wet pack second coat of color as above. Dry and fire as above. See Figure 6.
The Build-Up
The Fauré sculptural/3D quality of transparent color over foil is somewhat an illusion. It is achieved by coating the piece with transparent colors as described above, then creating the sculptural build-up with 40 mesh transparent clear or opalescents on top of the colored enamel design. (40 mesh clear transparent (flux), Thompson 2040, and 40 mesh opalescent, Thompson 2001, were used on illustrated piece in this article.)
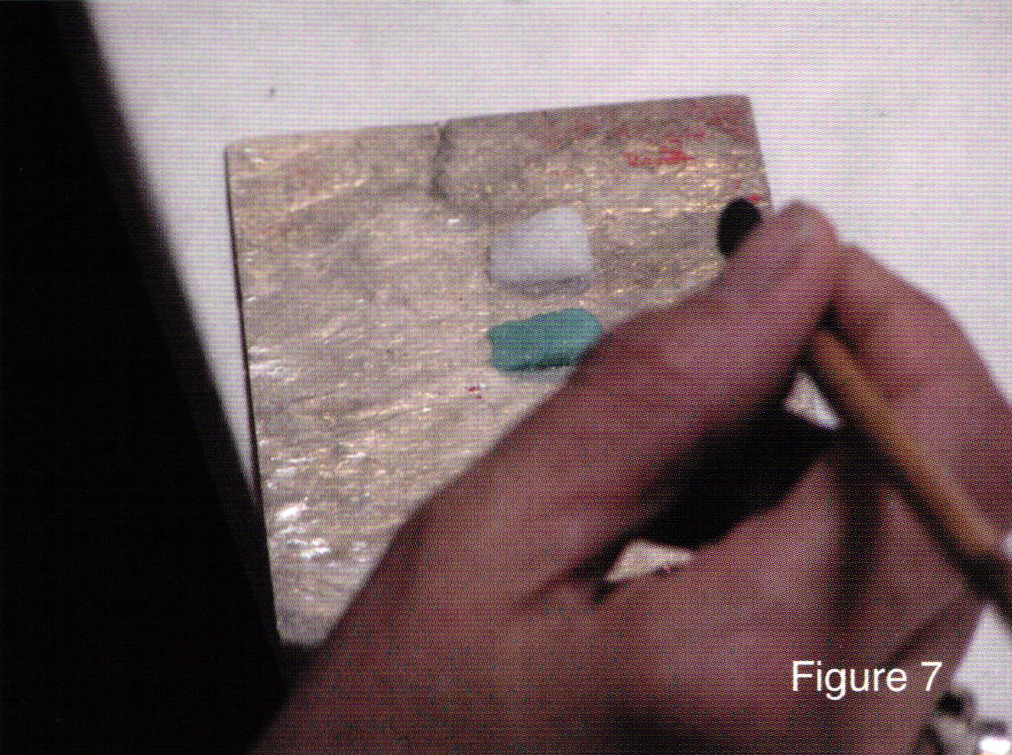
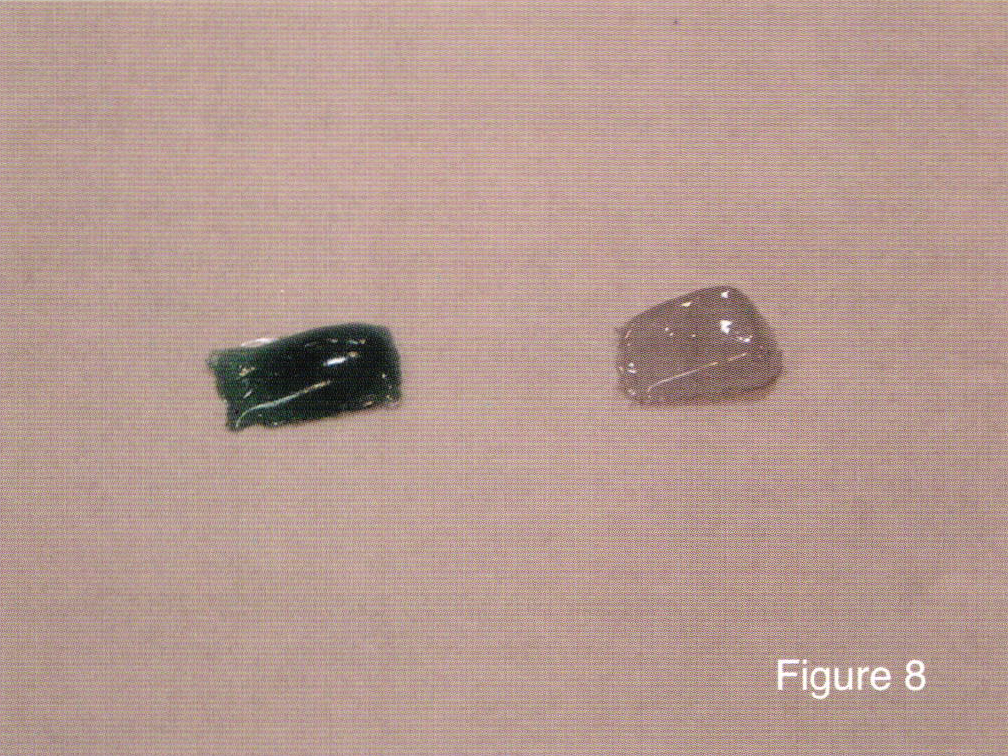
To prepare for wet inlay, pour water in one teaspoon of 40 mesh enamel. Add to this three drops of gum solution and stir. Pour off excess liquid and refill with water. Stir again and pour off excess liquid. Lift out a blob of enamel and drop to see if it falls off in a clump. To test to see if the gum solution is too rich or too diluted, wet pack a wedge shape on mica. Dry and fire to slightly past sugar. See Figures 7 & 8.
If, when cool, the enamel appears cloudy or with too many bubbles, the gum content may be too rich. Wash again with water, pour off liquid, and test again.
Application of Build-Up
Wet pack build-up in shapes you want your finished piece to have. What you wet pack is what you'll get. The more even and uniform the surface is in wet packing, the more even and uniform the fired surface will be. Imagine repeating wave forms or mountain ranges. Again, the correct amount of liquid for maneuvering the 40 mesh enamel is important. Have water and blotter handy to control water content. Too little water and the enamel cannot be manipulated; too much water and flooding will occur. See Figure 9.
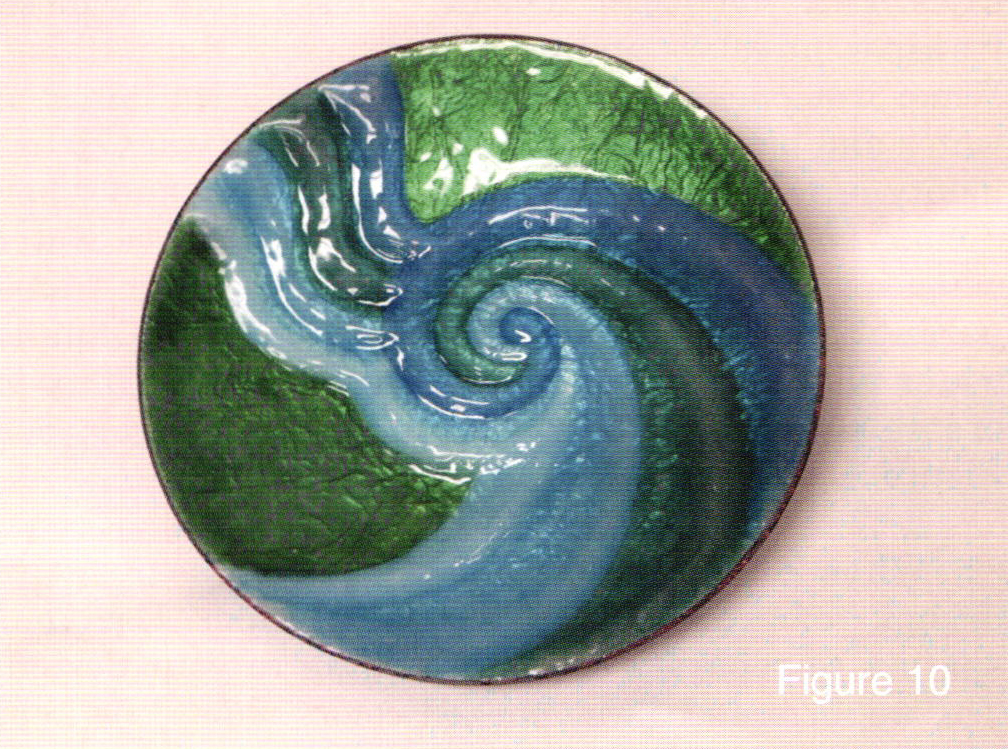
It is best to wet pack build-up in one sitting without drying out or having to re-wet. Once build-up is complete, dry thoroughly. This is your last firing, as you do not want to lose the shape of your build-up with multiple firings. From this point, firing is critical. Fire only to sugar, or slightly past sugar, to the finish you desire. See Figure 10.
I would like to thank Mauricette Pinoteau, who so graciously shared her knowledge, experience and skill. To find out more about her work, see the book Camille Fauré: Impossible Objects by Cork Marcheschi, or she may be contacted via her personal e-mail address at: perlesdekaolin@orange.fr.
Related Articles

Sansone Studio: Ancient Enameling Techniques
Proper Use of Liquid Metals

W.W. Carpenter Enamel Foundation Workshops

How to Make a Plique a Jour Fairy


The All-In-One Jewelry Making Solution At Your Fingertips
When you join the Ganoksin community, you get the tools you need to take your work to the next level.
