
Enameling Care and Considerations
12 Minute Read
The primary reason designer Amy Roper Lyons of Summit, New Jersey, began working in enamels is fairly black and white: her jewelry needed color.
"My first line was made of sterling with other non-precious materials," she says. "It was pretty monochromatic. I worked in that for the first 8 to 10 years of my career, and I eventually got really starved for color."
She first turned to using semi-precious stones to try to bring that color to the work, but wasn't finding the kind of creative freedom she needed. "I was frustrated by the limitations of buying gem materials only in shapes that other people had cut," she says. "Although at that time, in the early '90s, there was some interesting lapidary work being done, I wanted to have more control. My choices came down to doing my own lapidary work or enameling. To be honest, I thought, these are both beautiful, but what would I rather do? Stand in front of a lapidary arbor that is making a lot of noise and spraying water at me all day long, or sit at a desk, be contemplative, listen to classical music, and enamel?"
While Lyons describes the decision to go into enameling as a "no-brainer," it certainly led her toward creating art with plenty of heart and soul.
Just Your Style
The term "enameling" covers a broad spectrum of styles and approaches. What they have in common is that specially formulated colored glass powders are in some way applied to metal and fired, usually in a kiln. When fired, the powders become molten and fuse to the metal surfaces and then, upon cooling, harden. What defines the various techniques is how the enamel is applied.
Perhaps the best known of these, and the one many people associate with enameling, is cloisonné. In this technique, small wires form a pattern of cells within a larger frame, which has a metal backing. The enameling powders are placed within the cells and the piece is fired.
"I started out doing cloisonné," Lyons says. "But my work now is not just about the wire work. I mix in a lot of other techniques as well."
She sometimes incorporates the style called basse-taille, where a metal surface is engraved, chased, or roll-printed to create an interesting texture, then covered with a colored transparent enamel. This lets the pattern on the metal show through the color. Another style, plique-à-jour, is similar to cloisonné, but has no supporting backing and has a beautiful look that resembles stained glass.
"It's set in the openings of a filigree or framework so that light can come through the enamel," she explains. To achieve this effect, the individual cells cannot be much larger than 6 mm by 6 mm. "The enamel is applied in thin layers, then carefully under-fired until just barely starting to melt," Lyons says. After 4 to 10 firings, depending on size and complexity, the openings are thoroughly filled with enamel and the piece can be fired to full maturity. Surface tension keeps the molten glass in place while it is in the kiln. "It's beautiful when it's well lit. The colors seem to glow. I make vessels as well as jewelry, and I use plique-à-jour mostly for the vessel work."
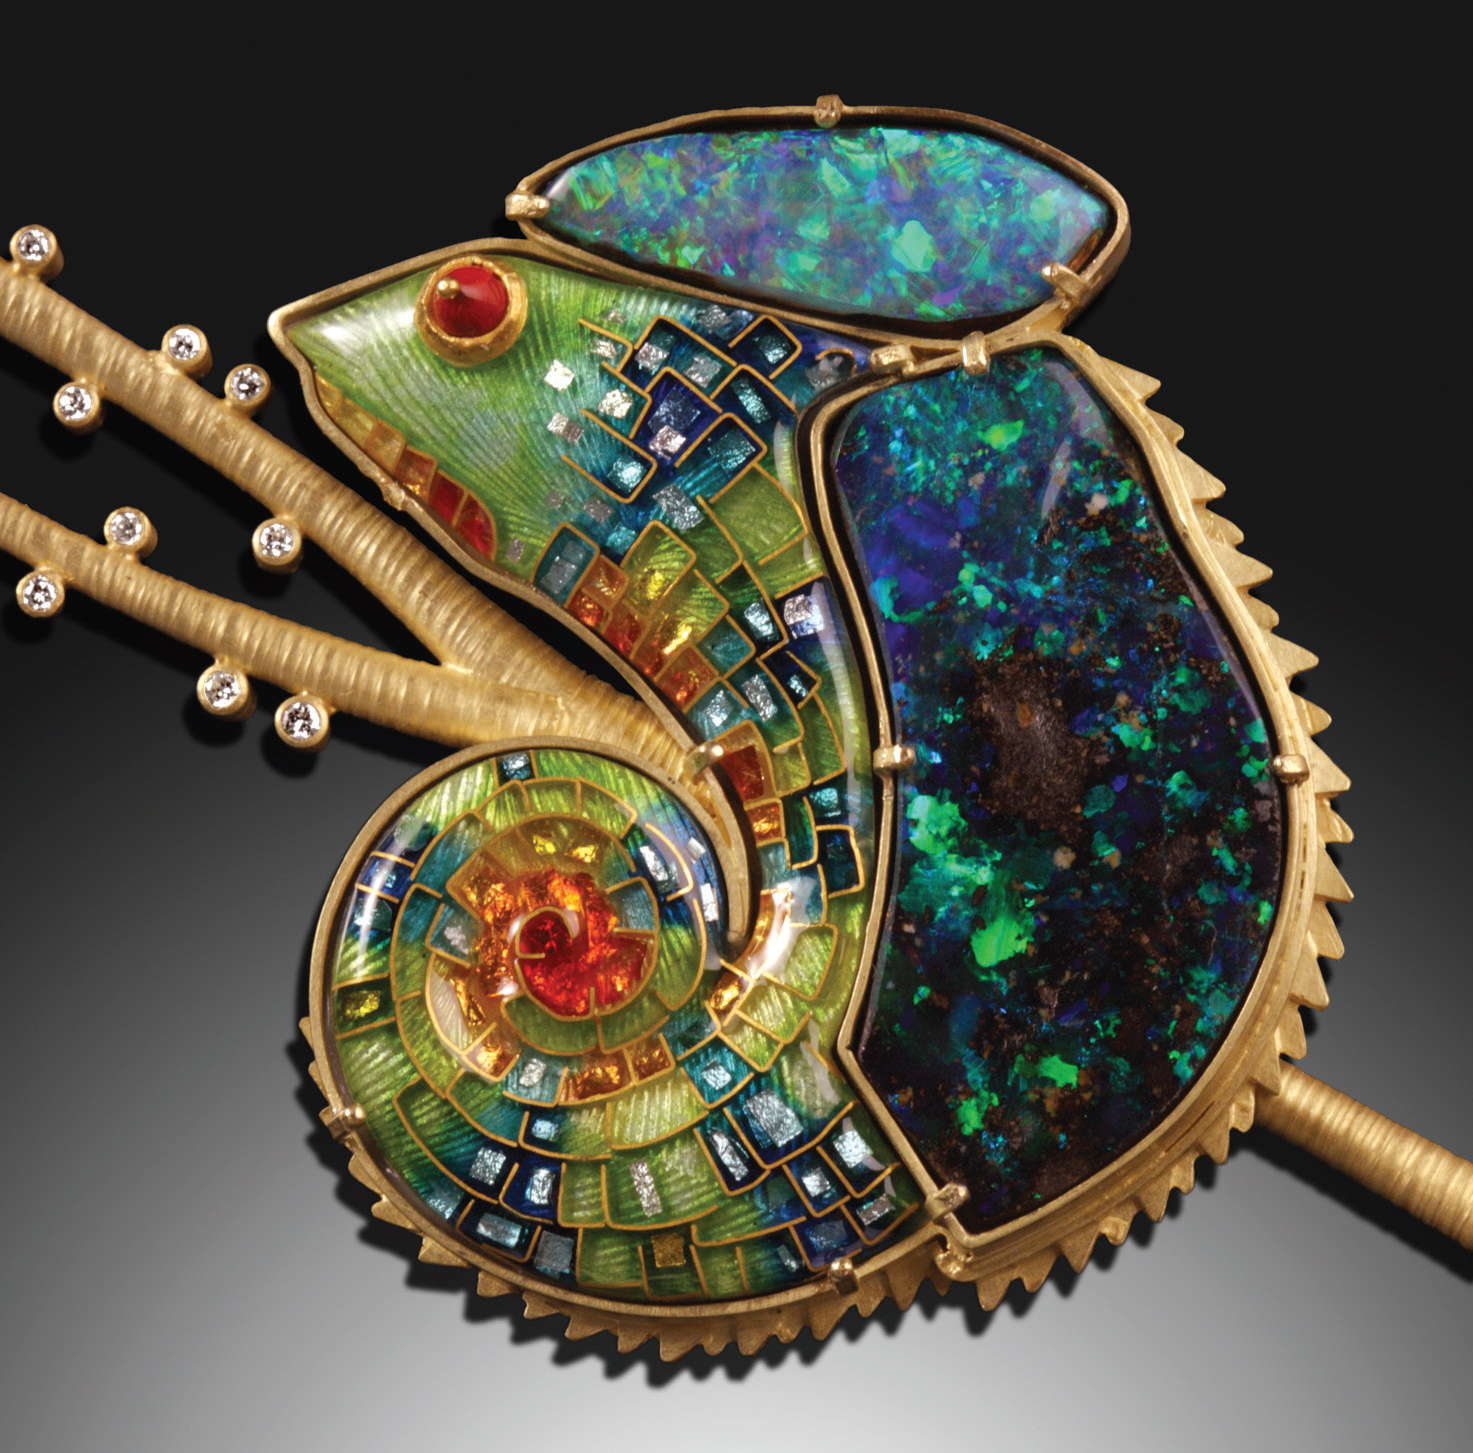
"I like to mix a lot of techniques together so that the first thing you see is the design."
Lyons draws on all these techniques in her enameled pieces, but blends in "informal" methods as well. "I'll embed or inlay enamels into other enamels, carving back into them and filling the voids with other colors. I use oxides or underglaze pencils [often used with ceramics] to make lines and marks. I'll combine transparents and opaques. I don't like doing single techniques where the technique is the first thing you notice. 'Oh, that's cloisonné' or 'oh, that's granulation.' I like to mix a lot of techniques together so that the first thing you see is the design."
To do the inlay work, Lyons uses a diamond bur to grind a round depression, line, or other mark out of the cold enamel. She wet-packs a contrasting color, usually using an opaque enamel, into that space. "During firing, the enamel is viscous and does not move much, particularly on fl at objects," she says. "The inlaid enamel stays pretty much where you put it, and the burred cavity gives the inlaid area a crisp edge, without the need for a cloisonné wire."
Trial and error, and preparing lots of test samples, is the best way to determine which formulations produce the most satisfactory results for you.
From Powder to Perfection
If you're a working jeweler, you likely have many of the tools you need for enameling in your shop already. Standard jewelry tools can be used for creating frames and shaping wires. The missing element, of course, is the enamel powders. Luckily, Lyons says, many of the companies that sell enamels offer small sample packets for just a few dollars. This lets you try your hand at it to see if it's your kind of art.
"The enamels can be a bigger investment than you might think because there are a lot of colors," she says. "You can always start with a very restricted palette. That's what I did in the beginning. I bought maybe 15 colors. But as you get into it, you're going to want all of them! It opens up the possibilities of what can be done."
The samples, she says, are especially good when you're starting out in small-scale jewelry because you don't need much. "I bought the color samples, and when I ran out of a sample I liked, I would buy a small jar. So the colors I didn't like I didn't have to bother purchasing. It's a good way to figure out what colors you want to use before making a bigger investment." A quick online search shows that 2 oz. jars of powder typically cost less than ten dollars. The powders can be applied either by mixing them with a small amount of water and "wet packing" or by laying on the powder with a fine pointed watercolor brush or enamel applicator. For larger areas of a single color, the enamel can also be sifted onto the metal using sifting cups of differing mesh sizes.
A jeweler also needs to take into consideration the metal they're working with. Because the idea is to fuse the metal with the enamel through its heating and cooling phases, it's important to match them closely. "There are enamels that are formulated for different substrates—gold, silver, steel; there's even one formulated for glass," Lyons says. "When you're heating things up and cooling them down, there's expansion and contraction that happens. The enamels are formulated to match the coefficient of expansion of the glass to the coefficient of expansion of the metal. Unlike working with ceramics that are fired slowly in a kiln over many hours, with enamels it's like magic. It takes a minute or two to fire and then you pull it out and cool it for another minute or two. Then you add more enamel, fire it again for another minute or two. If the coefficients don't match because you've used the wrong enamel for the material, it will crack off."
Lyons considers fine silver the best metal to enamel on, especially if you are using transparents. "It gives the widest range of colors," she says. "Copper also works well for opaque enamels since you don't see the metal underneath."
Another plus for beginners is that you don't necessarily need to prepare your metal before working with it—particularly silver. Lyons just makes sure her metal is kept clean and free of scratches. She does, however, pass along this tip from master enamelist Ricky Frank: "Before enameling, I sometimes 'flash' the silver with a torch, flowing the surface of the metal slightly. That helps it to achieve maximum brilliance."
In addition, she says, blending enamels from different companies can affect the outcome of your work. "There are different manufacturers, each of whom has their own formulations, and they can be very different to work with. Some you can use together, but some are so different you can't. They might fire at different temperatures and might not cohabitate in a friendly way." Often, she notes, the difference can primarily be attributed to trying to mix enamels that contain lead with enamels that don't, which Lyons does not recommend.
Although a single enamel formulation may work on both copper and silver, the quality and color of the finished enamel can vary because of the way it interacts with the metal. "Some colors look better on copper, and some look better on silver because a small amount of the metal actually dissolves into the glass when you fire it," she says. "The metals react with the formula of the enamels, and some of them are ruined when the silver comes into solution in the glass. Some are ruined by the copper. The color goes brown, or the transparency gets cloudy." Trial and error, and preparing lots of test samples, she says, is the best way to determine which formulations produce the most satisfactory results for you.
When it comes to color, gold has its benefits, but also presents its own issues, Lyons says. "Gold will not cause colors to become muddy because it is not reactive. But the problem with gold is that it's yellow. When you put gold under these transparent enamels, the red, orange, yellow, and green colors look great, but you can't get pinks or purples because the yellow mixes with them and turns the pinks salmon and the purples brownish."
To combat this issue, she says, you have a couple of choices. Obviously, you can restrict yourself to using the colors that work best over your metal of choice. Another option is to embed silver foil under the areas where you want to achieve a purple or pink hue. (White gold could also be a possible solution but these alloys may have a high zinc content that could cause issues with the enamel adhering to the metal.)
Beyond the enamel powder, other standard enameling equipment includes a trivet and firing screen for holding the piece being fired. The screen allows you to pick up the trivet with a firing form to move it into and out of the kiln. "It is less than $5 and makes things much easier," she says. "For torch work, most heat from underneath, so the screen is important to hold the work yet not block the flame." Along with these, you'll need a kiln—maybe.
"Ten years ago I would have said you definitely need a kiln, but it depends on what kind of work you want to do," she says. "If you're making fine jewelry and you want to add some enamel to gold rings with diamonds in them, you do need a kiln. But some artists exploring a more experimental approach are torch firing their enamels now." This style is less dependent on the kind of precise control and intricate detail that historically has informed, for example, cloisonné, and thus, Lyons suggests, helps make enameling more accessible to a wide range of artists.
In kiln firing, the enamels need to be heated at 1,400°F-1,500°F, depending on the formulation. "In a general sense, they all work the same," she says. "You apply the powders; you put them in a furnace.
Most melt within a fairly narrow range of temperatures." As it fires, the enamel goes through distinct stages. First comes the "sugar stage," where the enamel begins to fuse, but still looks like dry powder. Next is the "orange peel" stage, where the particles become glossy and melt together, but the surface is still bumpy. Finally, the enamel reaches a stage where it is fully fused, and the surface becomes smooth and glossy. "All this happens in only a minute or two, before the enamel is ready to be lifted out of the kiln," she says. "Knowing exactly how much time is enough is something that comes with experience. You can't just pop open the kiln to see how they're doing because the temperature will drop and affect the procedure."
Leaving a piece in too long also has its consequences. "Depending on the specific enamel color, some would turn brownish or cloudy if fired too long. The enamel will creep away from the edges of the piece and thicken up in the middle if severely over-fired. Additionally, there are a number of other problems that could occur, depending specifically on the type of technique and how long the piece was left in the kiln. In general, it is important not to over-fire the enamel."
After firing and cooling, the enamels can be finished. Lyons likes to use this stage to experiment with changing the surface of the enamels to help define the look of the piece. "There are so many ways to finish enamels," Lyons says. "Just like people think that making metal shiny is the default setting for finishing it, as jewelers, we know that there are many other finishes that can help the jewelry have a wider range of interest. The enamels are glossy when they come out of the kiln, unless you purposefully under-fire them to achieve a 'sugar-fired' look. Acid or abrasives can be used to get a matte or frosted finish. They look very beautiful with a semi-gloss look, like beach glass, where you've brought them to maybe 600 grit. That can make the enamels glow internally a little bit."
After firing and cooling, Lyons likes to experiment with changing the surface of the enamels to help define the look of the piece.
Despite the previously mentioned noise and water considerations, Lyons says that if you plan to do a lot of enameling, investing in a lapidary arbor will let you polish pieces quickly. However, she says, finishing can also be done with a fl ex-shaft with sanding disks and bands, or by stoning by hand.
Enameling is an art with a range of possibilities, looks, and choices. It has a degree of instant gratification to it, as the initial results of your efforts can be seen relatively quickly. From those first results, the options available to you can lead you down a variety of roads. And as can be seen in Lyons' work, they all lead to beautiful jewelry.
Also see:
![]()
In association with
![]()
The award-winning Journal is published monthly by MJSA, the trade association for professional jewelry makers, designers, and related suppliers. It offers design ideas, fabrication and production techniques, bench tips, business and marketing insights, and trend and technology updates—the information crucial for business success. “More than other publications, MJSA Journal is oriented toward people like me: those trying to earn a living by designing and making jewelry,” says Jim Binnion of James Binnion Metal Arts.
Click here to read our latest articles
Click here to get a FREE four-month trial subscription.
Related Articles

The Enamelware of Sean Alton
Cloisonne Primer – History of Cloisonne Technique

The Enamelwork of Jamie Bennett

Enamels in Medieval Galleries


The All-In-One Jewelry Making Solution At Your Fingertips
When you join the Ganoksin community, you get the tools you need to take your work to the next level.

