
How to Set Baguettes
5 Minute Read
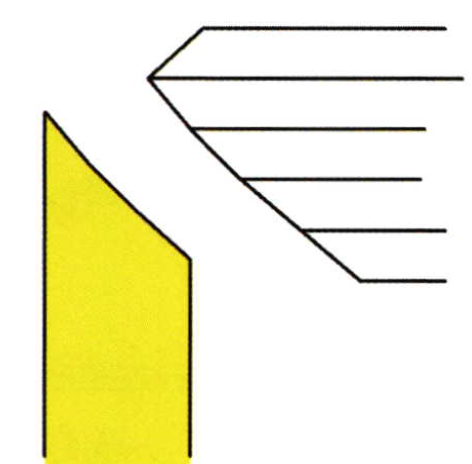
Baguette stones have four corners and a rather deep pavilion. Because of this you must handle these stones with special care at all times. You must make sure that all the bearings being cut are totally in line with the long girdles of this shape of stone.
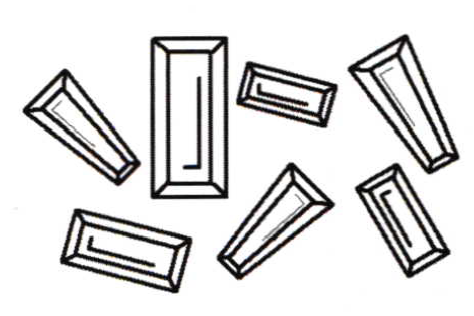
First take a moment to observe the fine details. Are the corners of the stones broken off in shipping (this does occasionally happen)? Are there any inclusions near, or in the way of the setting areas of this stone? How uniform are the four girdles? Is the shape of the stone true on all four sides? Last, but not least, does the stone actually fit the end-bezel? Once you have gathered all of this information in our minds you can compensate for all of these little quirks while setting.
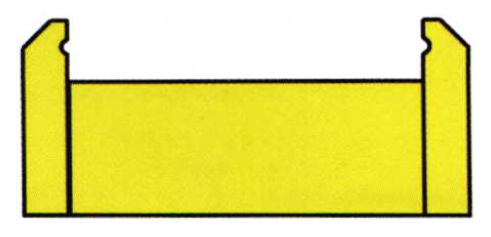
You can now proceed in aligning our end-bezel in our clamp, so that the working area is nicely exposed. It is not necessary to twist or bend your hands with the bur while attempting to set any stone. Keep this working area held in a way in which you are at ease. If you are holding your ring in a very awkward position you won't get a good look at what you are setting, and you will definitely get tired quickly.
Pick up your baguette and see how far the end-bezel is centered to the ends of the stone. At this point, you might have to extend the length to fit the dimensions of the stone. You can do this with a pair of pliers and slightly bend the wall outwards. This will allow you to make the proper bearing cuts and not make them too deep into the gold. Do not grip the metal too tightly as this will leave deep marks in the gold and when you clean after setting the stone you will not only remove the gouges but also thin out the metal that is holding the stone. Again, measure the length of the bezel to the stone length. I am repeating this, as I believe this is the most critical item to observe in the preparation prior to setting this rectangular stone.
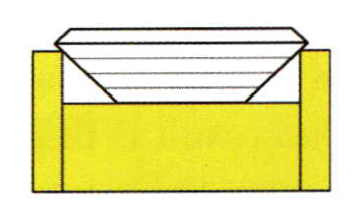
Next, select your fine bud bur #005 to clean the four corners of the inner bezel. You want no metal touching the four corners of the stone, lest one of the corners of the stone will break off or chip. So let's get rid of the metal at the same angle as the pavilion of the stone. You should start at the top of the gallery and work deeper, but not at a vertical angle. The gallery angle must match the same angle as the stone.
I want you to familiarize yourself with the pavilion shaping procedure. Once this is accomplished to your liking proceed to grind out the sides of the gallery at the same angle as the stone. This is accomplished with a size #007 bud bur. Cut away all of the gold from each of the four corners that will hinder the baguette from being lowered into the gallery. After this lower the stone and look for any gold that is preventing the next setting step.
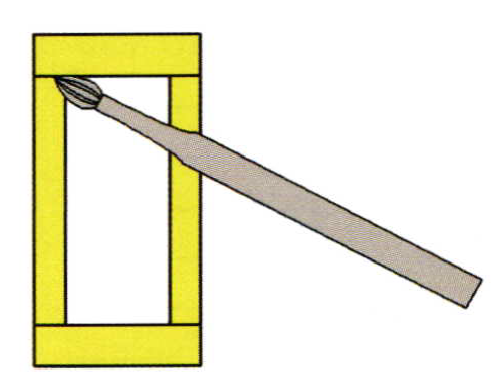
You must use your 10x loupe and observe any protruding shards of metal. If there are any, remove them now! I prefer using a bud bur for cleaning of the gallery because it is almost impossible to use a triangular file for exacting the true and correct inner angle. I use the broad side of the bur to execute this maneuver. I generally use a bud bur for its longer cutting action and make full use of these cutting teeth in contact with the gold.
Some setters prefer using a flat graver. It leaves a nice bright-cut but at times it will also leave a facet edge on the deeper inner gallery base wall. You just have to keep swinging your graver around missing the intended angle you are trying to achieve.
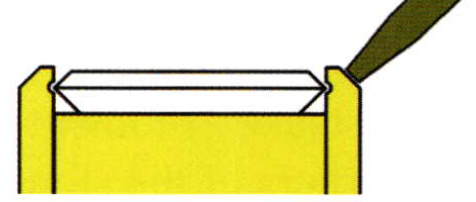
Place the stone in the mounting and observe it. Is the stone sitting level in the gallery? Is it rocking? If so, where is it pivoting? Is it aligned up with the center of the baguette to the center of the end-bezel frame? If you answer yes to all these questions go onto the next step; if not go back and redo the prior steps as necessary.
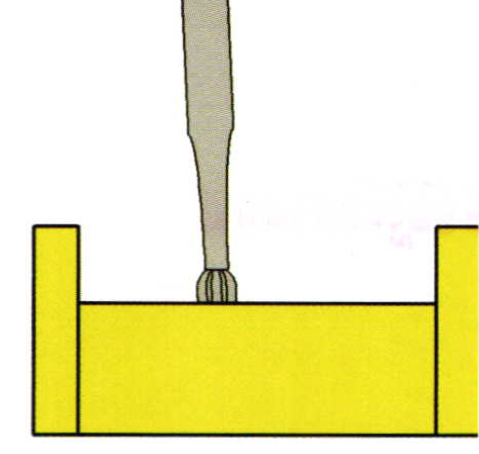
Now observe the end girdle and how it is sitting against the bezel wall. I gently scribe the side of the bezel-wall and ascertain justwhere the bearing cuts will occur. At these two scribed points make a little groove with your#005 bud bur. With your 10x loupe observe if the bearing cuts meet the girdle. If the cuts don't meet the girdle the stone will sit crookedly. Scribe and bur out all of the two end bezels evenly. Observe the depth into the walls to make sure they are at the same depth.
Remove the stone and place it on your bench. You are now going to thin out the tips of the bezel walls. This will make the tips of the walls easier to bend over. If the tips of the walls are thick you might break the stone by applying too much pressure.
Using your #2 triangular file, file offonly the very tip at a 45-degree angle. This is where your hand pusher will rest. This pusher must have a serrated edge with a ## marking, as this will most definitely prevent any slipping of the tool onto the crown facet of the stone.
Place this baguette into the gallery for the final time. You are now ready for the bending of the end bezel walls.
Place your metal pusher on the 45-degree angle you filed and with great care begin to bend over the metal. Apply a forward a rocking motion. This forward rocking motion will slowly move the metal over the stone.
Go to the other side and again rock over the metal. This action must be done with great care. Go back and forth until the entire length on both end walls are down tight on the stone and the metal is over the stone equally. This is very important! The end result is that the stone is now held securely with no chance for any movement.
Use your #4 triangular file and trim the sides, the top, and outside of the bezel walls. Then use your pumice wheel to remove all of the marks left by your pliers and file. Use your flat #40 graver and bright-cut the metal that is lying on the crown facets. This appearance is just a wonderful sight! All the metal is clean, bright, and nicely finished.
Setting these stones is demanding but the results are fantastic when viewed!
Related Articles

Laser Welding Sizing a Two-Tone Band

How to Make a Plique a Jour Fairy
V Prong Setting

How to Modify Separating Tweezers


The All-In-One Jewelry Making Solution At Your Fingertips
When you join the Ganoksin community, you get the tools you need to take your work to the next level.
