
Customized Beading Tool Retipper, Trays & Polisher
2 Minute Read
Steve Satow shares his procedure on how to customize bench tools like a beading tool retipper, small parts trays and hand held polisher, and a tip for your Solder Station.
Beading Tool Retipper
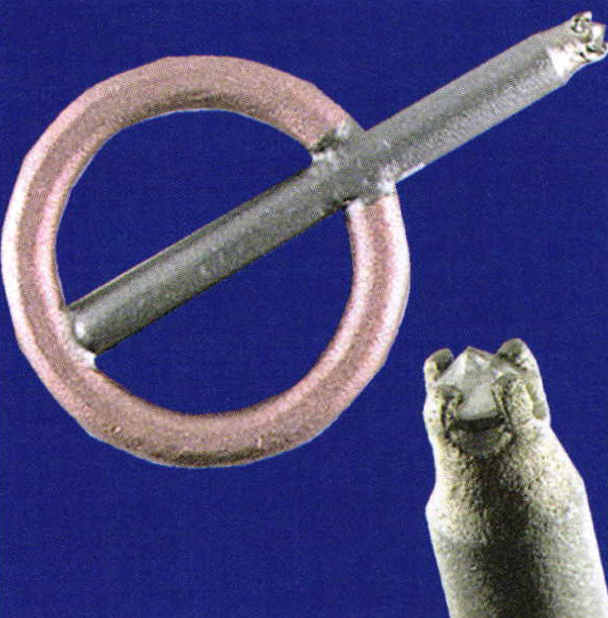
Refinishing beading tools is more convenient and much cheaper then having to stock all the different sizes. I used a steel 1/8 inch diameter rod and the same size in copper wire to make this sharpener. I soldered a head to the end of the rod as pictured. Then I made a ring of the copper wire and soldered the steel wire to it. (This can also all be made from copper wire).
Set the diamond upside down (A synthetic sapphire birth stone will also work but not last as long). This shape allows you to mount it in the Bench Mate to keep your other hands free.
Mount your beading tools into a # 30 hand piece, Put the damaged tip against the tip of the diamond, and slowly spin it. After you've established a slow spinning motion gently rock it side to side to determine the size of the cup being reshaped on the end.
Small Parts Trays
I use these trays all day long and it makes it easier to see metallic parts on them if you paint them flat black. It also makes diamonds show up better.
Solder Station
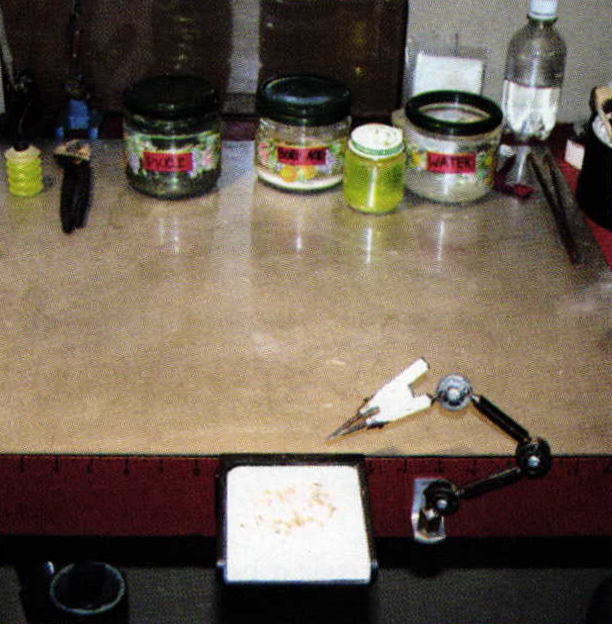
If possible buy a sheet of 1/16 inch stainless steel for your solder area. You will never have small parts roll into burn holes from past jobs etc. Any spilled acid, alcohol, or water will just wipe up later when you have time.
Hand Held Polisher
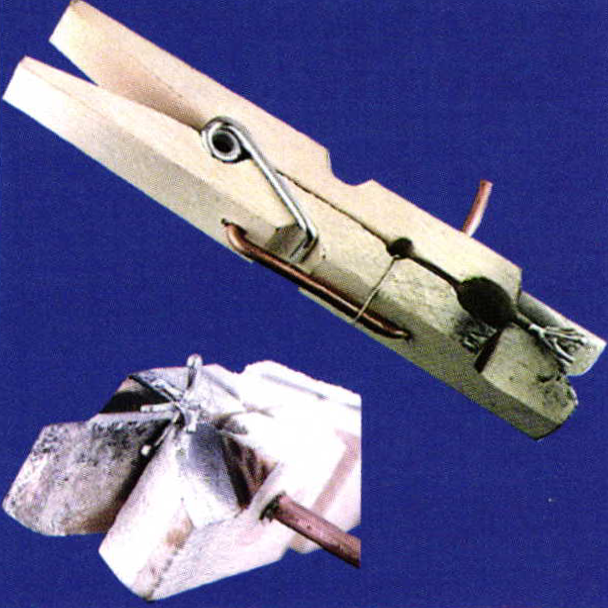
This is a down 3/4 and an end view of a head holder for hand polishing. It allows you to hold platinum heads for hand finishing before soldering them onto a gold ring. It prevents you from wearing away the top of a gold ring trying to polish a poorly polished platinum head after you have soldered iton.
Take a wooden clothes pin. Drill it as pictured and install an approximately 12 gauge copper wire to act as a guide to make the pin open straight and parallel.
Either epoxy the wire into the one side or wrap with wire as pictured to keep the copper wire tight against the one side, so it can slide through the other. Then grind the ends at approximately a45 degree angle so it fits up tight between the prongs.
Now you can hold the ends tight between your finger and thumb and flex-shaft polish the Platinum heads without burning your fingers or breaking the post off. The soft wood will not scratch the prongs that you have already polished as you rotate the head from prong to prong.
Related Articles

How to Make a Tumbler

Tool Alterations

How to Customize Short Insulated Tweezers

Channel Setting Bezels with Customized Pulling Pliers


The All-In-One Jewelry Making Solution At Your Fingertips
When you join the Ganoksin community, you get the tools you need to take your work to the next level.
