
Custom Antique Coin Pendant
This article features manufacturing steps for a custom designed 14-karat yellow gold and diamond coin pendant. The coin pendant featured in this article was designed and rendered by Lainie Mann using Matrix. It will be cast in two pieces because the bail will be movable.
4 Minute Read
Updated on
This article features manufacturing steps for a custom designed 14-karat yellow gold and diamond coin pendant.
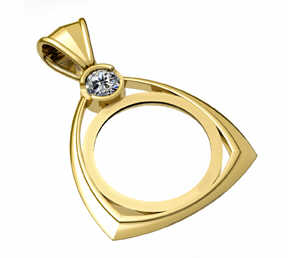 | The coin pendant featured in this article was designed and rendered by Lainie Mann using Matrix. It will be cast in two pieces because the bail will be movable. |
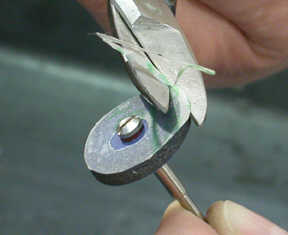
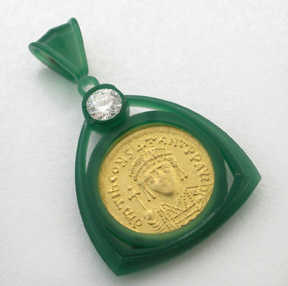 | The wax was carved using the Revo 540 Mill with instructions from Matrix software. In this image, the diamond and antique coin are fit then removed prior to casting. |
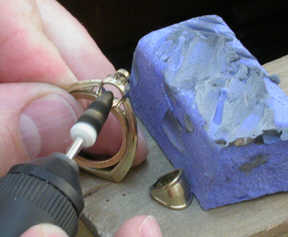
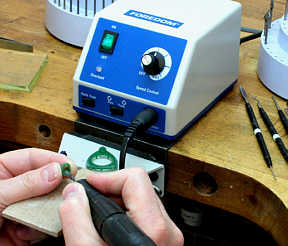 | The Foredom No. 1070 Micro Motor kit was used to remove wax from inside the bail and for the final clean-up of the parts prior to casting. The Micro Motor has good torque and did not bog down or stop when removing the wax core. The unit features both foot and manual control. For this project, the foot pedal option was used. |
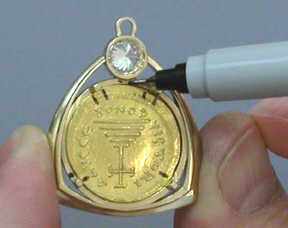
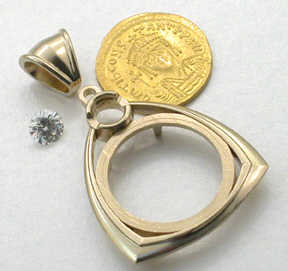 | The piece was cast in 14-karat yellow gold. After casting, the sprues were removed, some pre-finishing done and then it was placed in a magnetic finisher. The parts are ready for assembly. |
 | The bezel for the gold coin has a dead flat top surface. 3 grits of 3M's microfinishing film were used to pre-finish it. The microfinishing film is available in circular discs, but they were too large for the bezel. Foredom's ceramic rubber wheels were used as a base and modified the microfinishing film to fit with a hole-punch and cutters. |
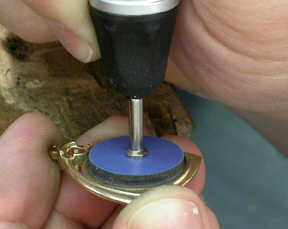 | Here the 1200 equivalent grit of microfinishing film is used to complete the sanding process. The film is mounted on the rubber wheel and Foredom's No. 20 quick-release handpiece is used. |
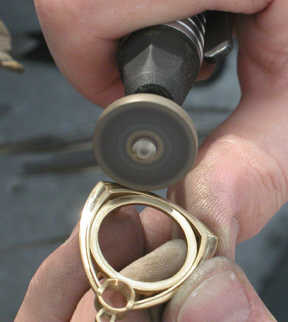 | Foredom's CW Ceramic Impregnated Polishing Wheels are used to precisely pre-finish the pendant frame. They range from 120 to 1500 grit. This one is the green 180 grit. There are six grits in the kit, so using the No. 20 quick release handpiece makes changing the polishing wheels quick and easy while working with the cycle of abrasive wheels. |
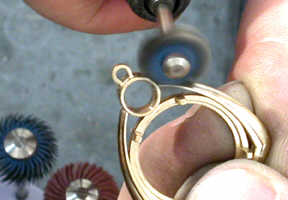 | Next 3M's Radial Bristle Discs are used to get into the crevices and around the contoured areas. There are 6 grits in the kit ranging from 80 to 1 micron. The discs worked nicely for pre-finishing the junction of the pendant wires and bezel as well as the bezel itself. |
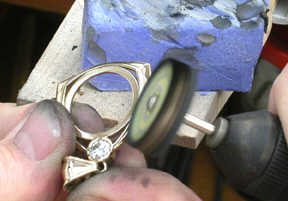
 | The next step in the process is to set the diamond. Prior to setting, a hard felt cone bullet and Foredom's Platinum Blue polishing compound were used to polish the inside portion of the bezel. This compound cuts quickly and leaves a nice luster. |
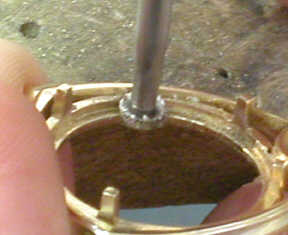
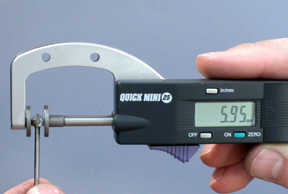 | The diamond measures 6.00 millimeters. A 5.95 millimeter high speed setting bur was selected and used to create the bearing in the partial bezel. |
 | The bur was lubricated and the bearing was finally prepared. There was a bearing in the bezel that was created in the CAD program, so this step was mostly to clean it up for a precise fit of the gemstone. |
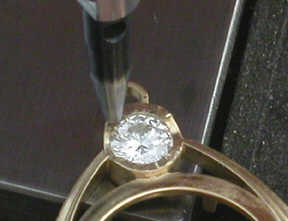 | The diamond was placed in its bearing and the Micro Motor was used with the hammer handpiece to bend the partial bezel over the diamond. Light impact was used for the setting adjustment on the hammer and the central portion was worked, working outward on both sides. After the diamond was locked in its bearing, the impact on the hammer handpiece was increased and then the bezel setting was completed. Notice the bezel is positioned over a metal block to give it proper support through the hammering process. The impact from the hammer is controllable and not activated until the chisel point is placed precisely where you want to hammer. |
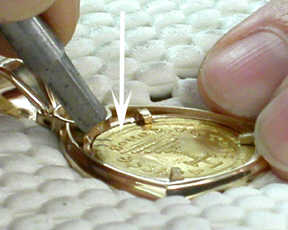
 | After the diamond was set, the bezel was prepared for the antique gold coin, which will be set from the back of the pendant. The coin is naturally out-of-round which helps benefit setting and alignment. The bezel is perfectly round, so it is marked along the wide portion of the coin (on the back side). The wide portion is between the 8:00 and 12:00 o'clock portion of the bezel. |
 | A modified setting bur was used to remove metal from that portion of the bezel. It is smooth on the bottom and has a cutting edge on the side. While cutting away the metal from the side, no metal removal is occurring to the bottom surface of the bezel. The coin fits after several adjustments and modifications to the bezel. It is important that no alterations, tool marks or damage occurs to the antique coin during this process, so the setting is the last step. |
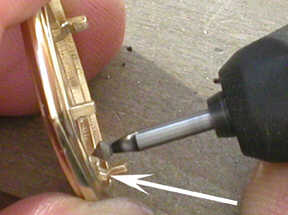 | In the next step, the tabs are prepared for bending. They are about 1.2 millimeters thick so they are relieved just above the thickness of the coin using a 90 degree bearing bur. About 50 percent of the tabs thickness is cut away. |
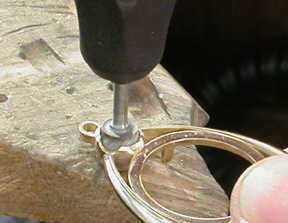
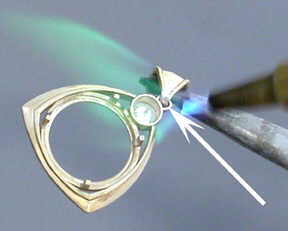 | The bail is cut open and fit to the pendant. Next it's soldered closed. |
 | After cooling, pickling and rinsing the final stages of pre-finishing are begun. First it is tumbled in a magnetic finisher for 40 minutes to give it a bright but soft matte finish. In the end, the bezel and the central portion of the bail will have this finish and the frame and edges of the bail will be high-polished. Here Foredom's Platinum Blue polishing compound is used with a small stitched yellow buff to pre-polish the pendant frame. |
 | With the pendant pre-polished and cleaned, the antique coin is carefully aligned from the front side. Then the coin was set by bending the tabs with a large prong pusher. The tabs are heavy and require a fair amount of pressure. The pendant frame was placed over a small piece of cushioned shelf-liner on the bench so that neither it nor the coin would be scarred in the setting process. With the coin being out-of-round, it will stay aligned in the pendant frame while worn. |
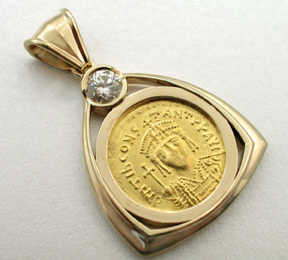 | After bending the tabs, I carefully perform a final polish using Foredom's 8000 grit Platinum White polishing compound. |
By Mark Mann – 2006
Photographs – Mark B. Mann
All rights reserved internationally. Copyright © Mark Mann. Users have permission to download the information and share it as long as no money is made-no commercial use of this information is allowed without permission in writing from Mark Mann.
This installment was sponsored by Foredom, Bethel , CT.
Related Articles

The Importance of Metal Finishes and Surface Treatments in Jewelry Design
Photo Credit: Sergei Elagin/Shutterstock
Jewelry design is a multifaceted art that combines creativity, craftsmanship and an understanding of materials. One...
Read More

Merged Competence
Five designers, five different approaches in the perception of jewelry, five creative providers of ideas: this is the design group...
Read More

Kum-Boo 24K Overlay on Silver
Kum-Boo (rhymes with “loom low”) is a Korean appliqué technique of surface decoration in which pure gold foil is fused...
Read More

Learning Through Jewelry
Gijs Bakker's life is inextricably intertwined with that of Emmy van Leersum (1930-1984), but his work has taken an independent...
Read More


The All-In-One Jewelry Making Solution At Your Fingertips
When you join the Ganoksin community, you get the tools you need to take your work to the next level.
