
Creating Beading Pliers Accessory Bezel Settings
2 Minute Read
Sometimes, holding on to really little parts is the greatest challenge of my day. I use tiny cabochons almost daily for rings and stone-on-stone work, and I can't tell you how many 5 mm bezels I have mangled or lost trying to sand, polish, or prep them for a setting. To solve this problem, I created a set of interchangeable wood mandrels that fit on my beading pliers, allowing me to securely hold the bezels while I work on them.
For this project, you will need wood dowels in a variety of diameters, round wood chopsticks or skewers, rubber or firm plastic earring backs, a circle template, a digital caliper, a Sharpie, a drill bit, beading pliers with a wide opening, a jeweler's saw, a flex-shaft, and a ruler.
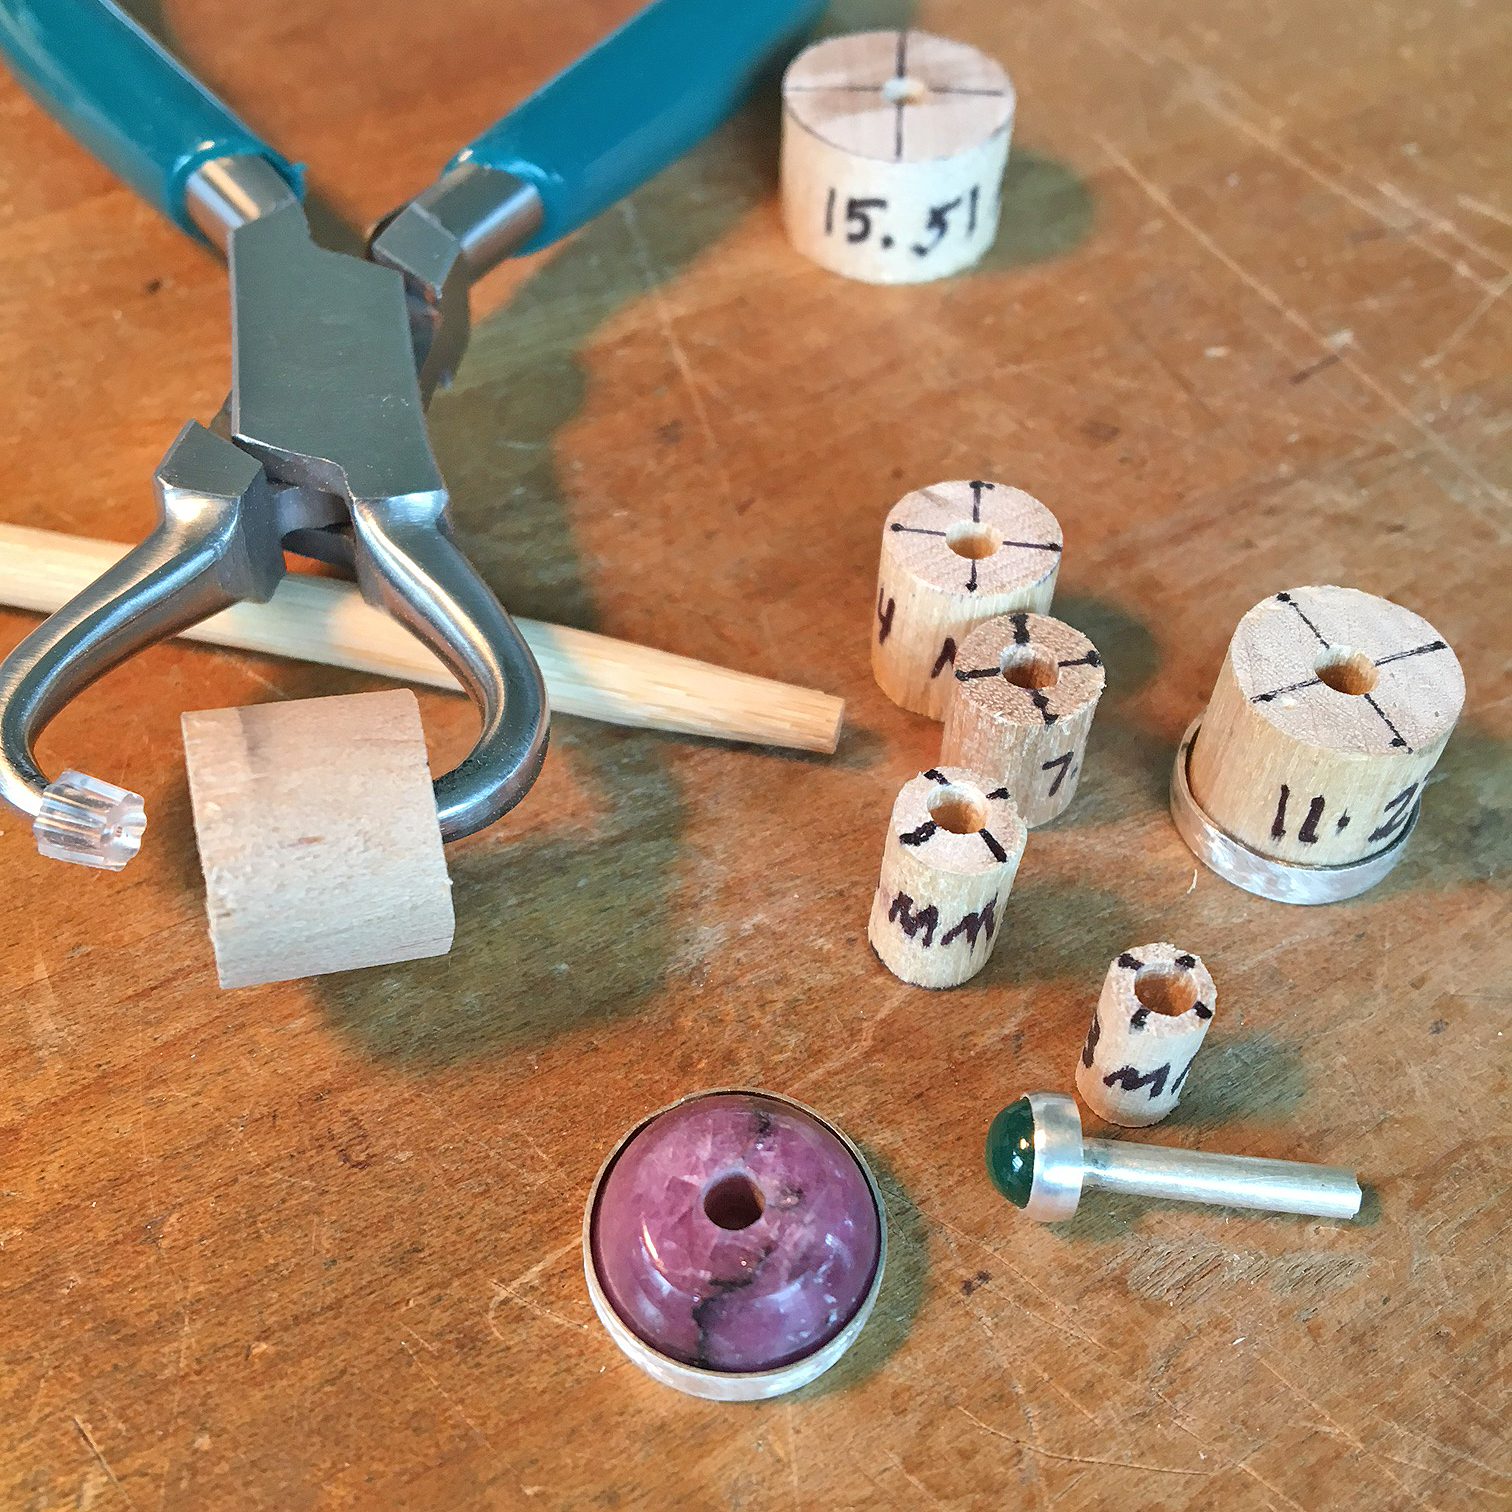
 | Mark a sawing line about 1 cm from the end of the wood dowel, and saw off a section at the line. You can hold the dowel in a tube-cutting jig if you wish, but I have filed a semi-circular "half-pipe" in the surface of my bench pin for this type of task. |
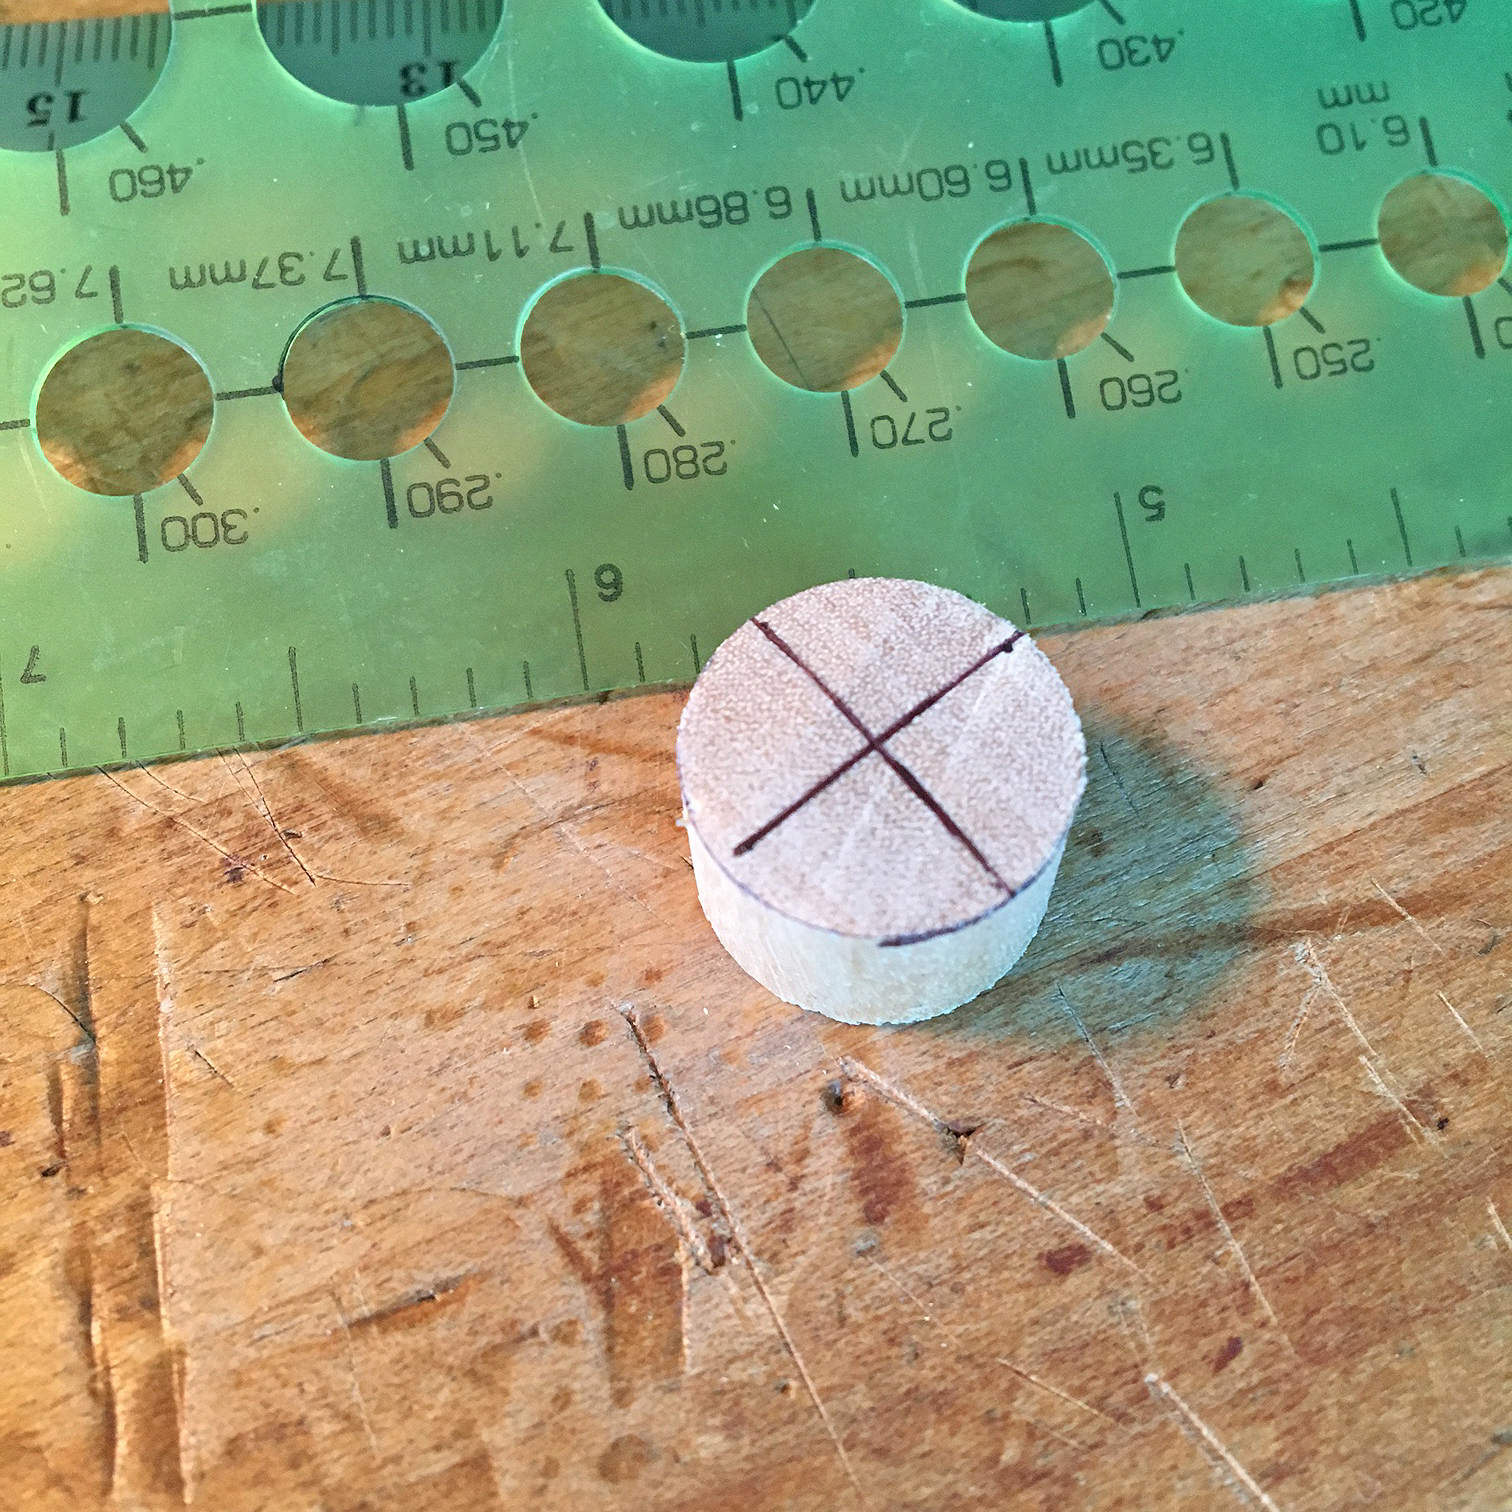 | Find the center of the dowel piece you cut by marking crosshairs. Use whatever means necessary to do so, such as calipers or a compass; I used a millimeter circle template. This is not a hyper-critical measurement, but aim to have the mark centered. |
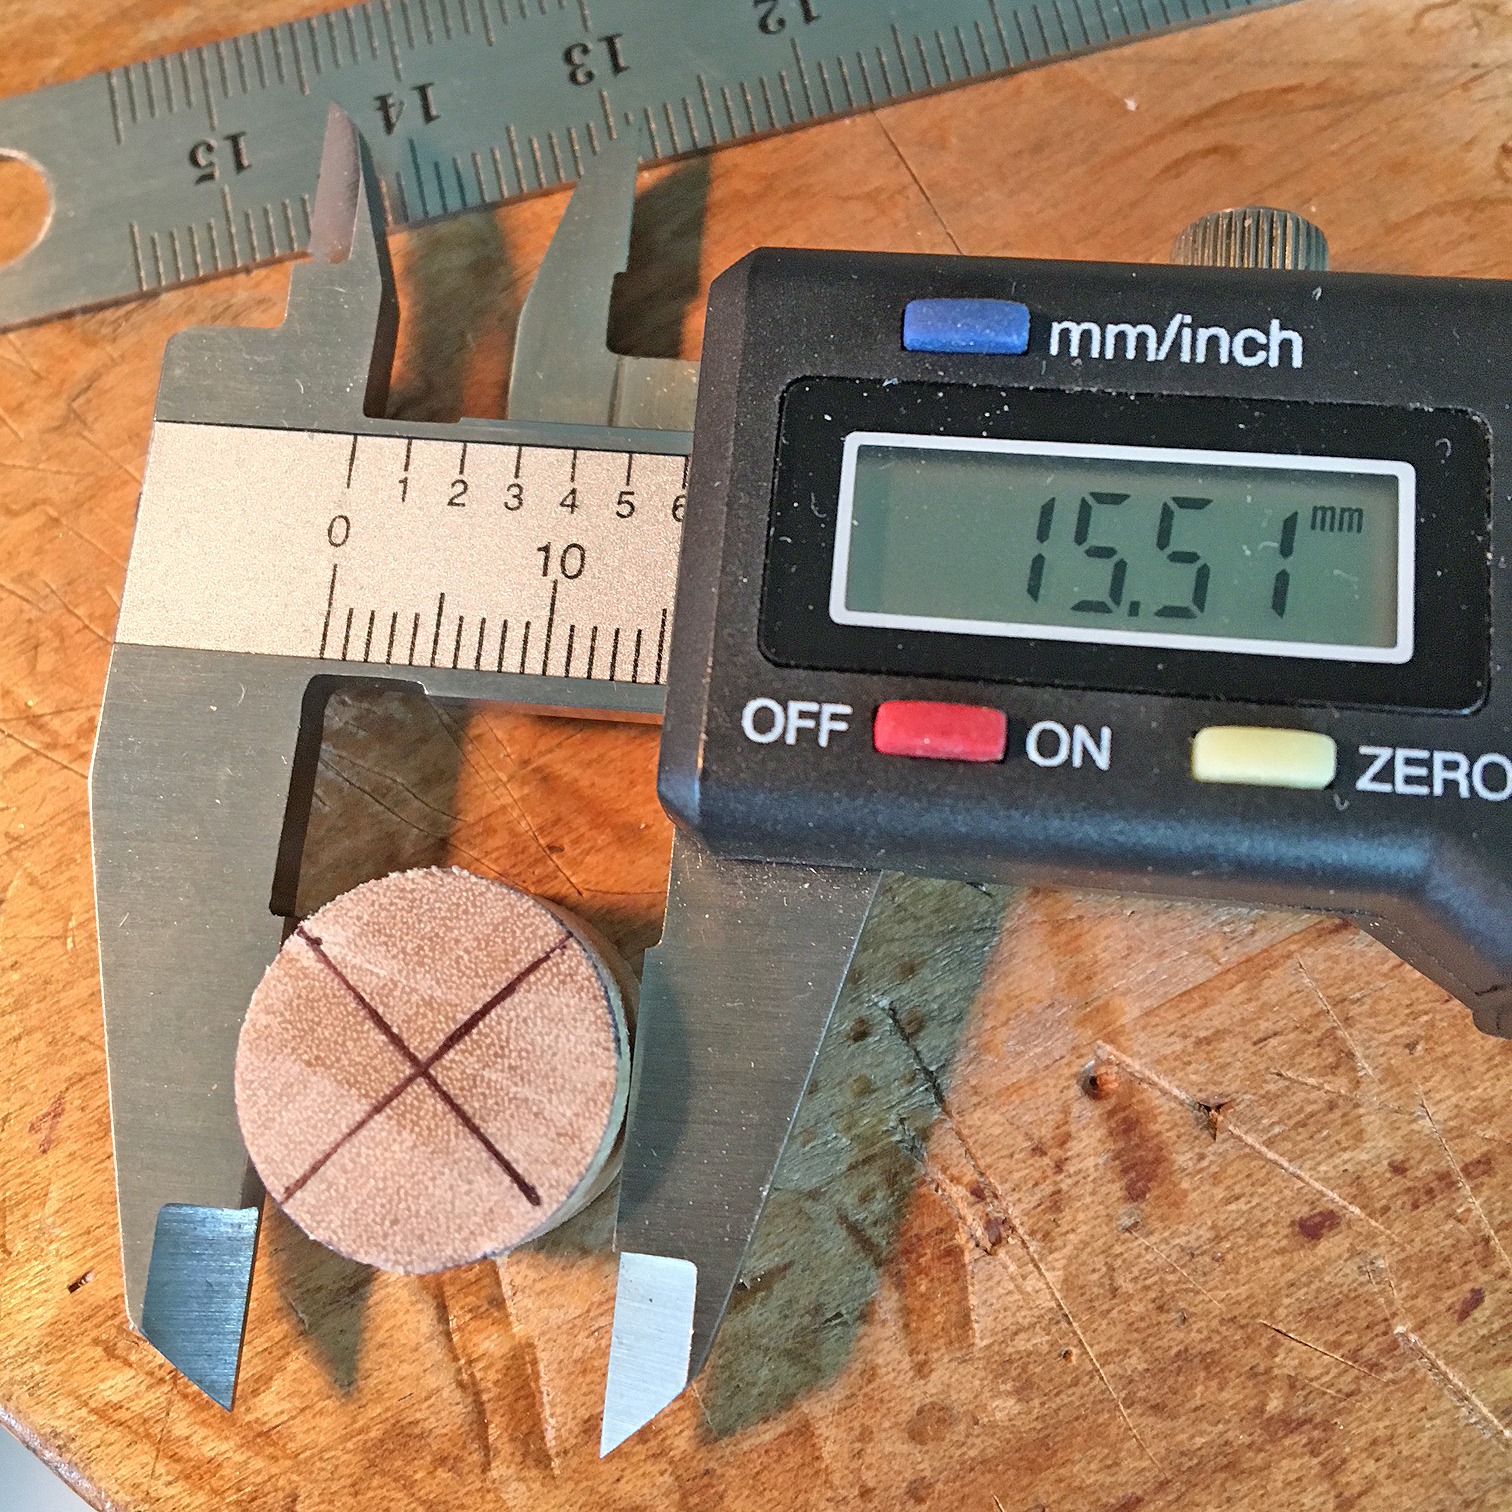 | Measure the diameter of the dowel with digital calipers and then use the Sharpie to indicate the measurement on the side of the dowel. |
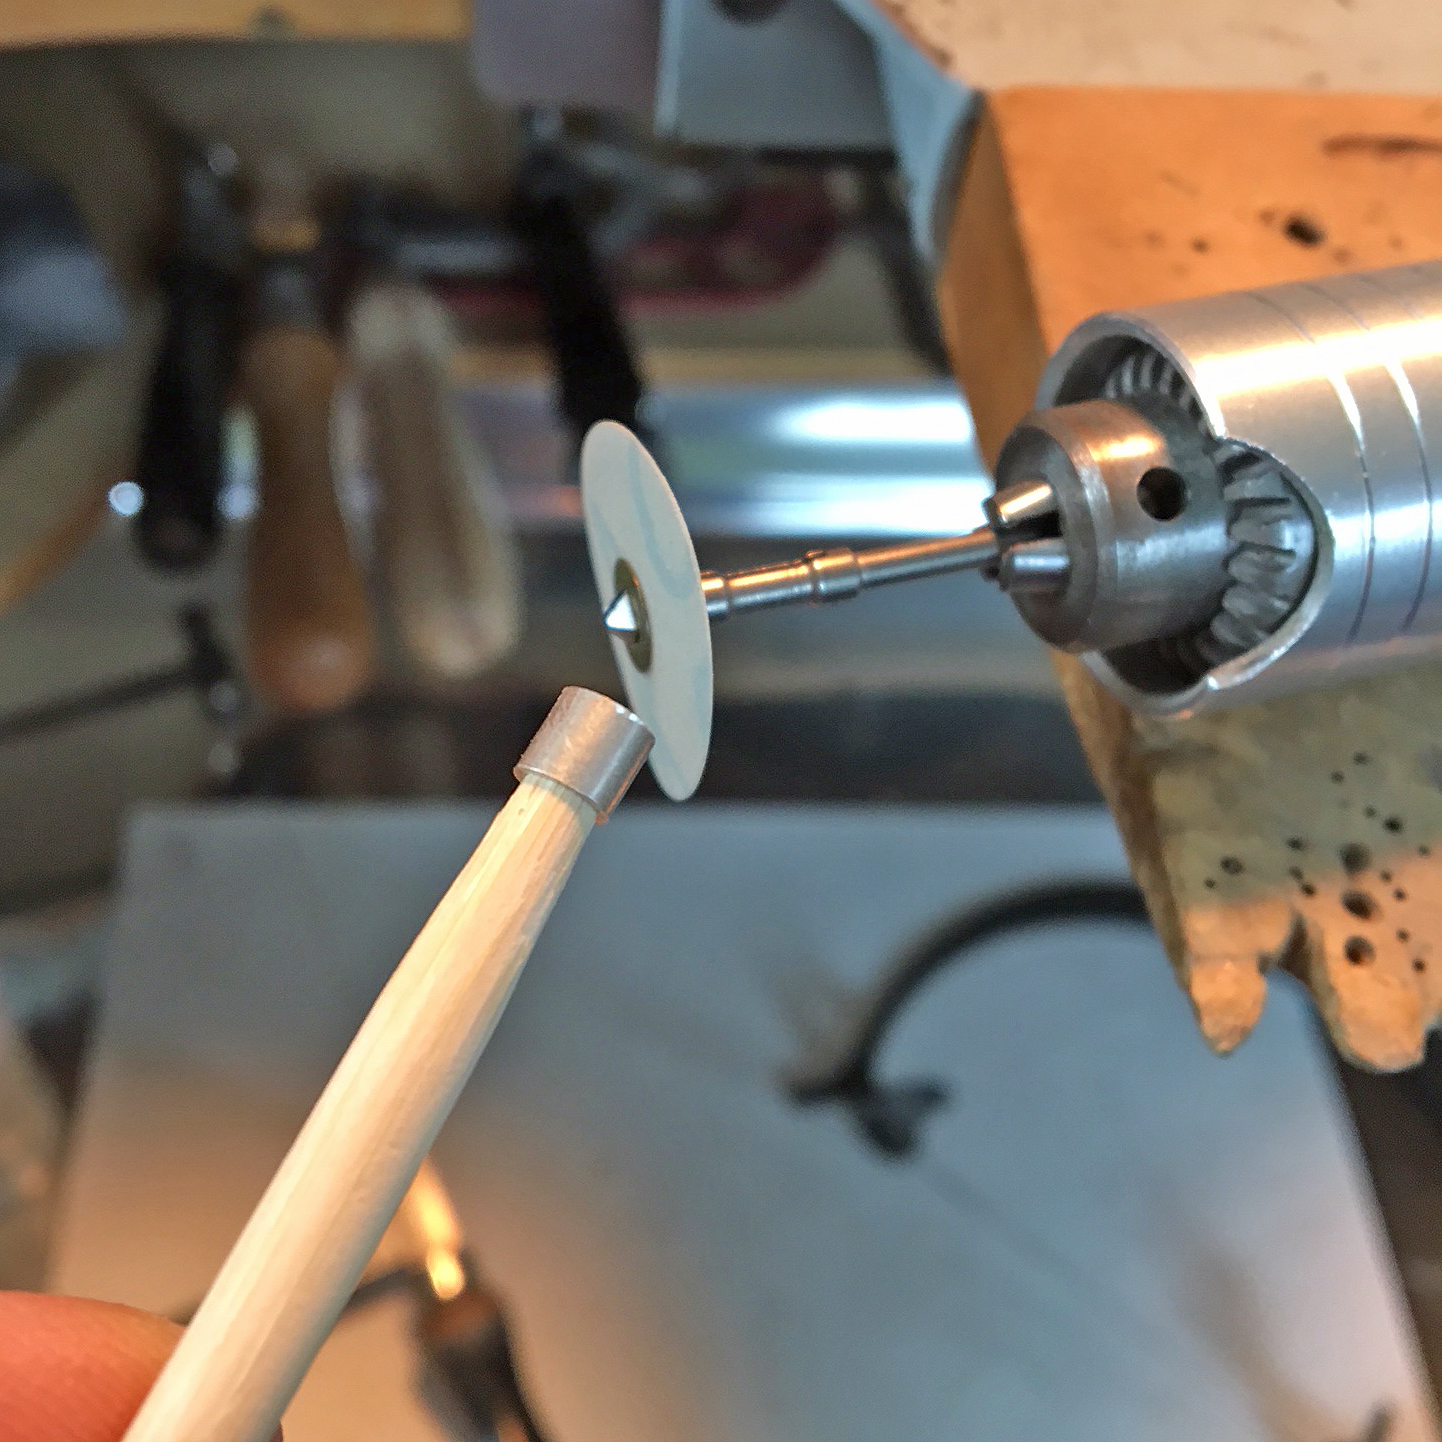
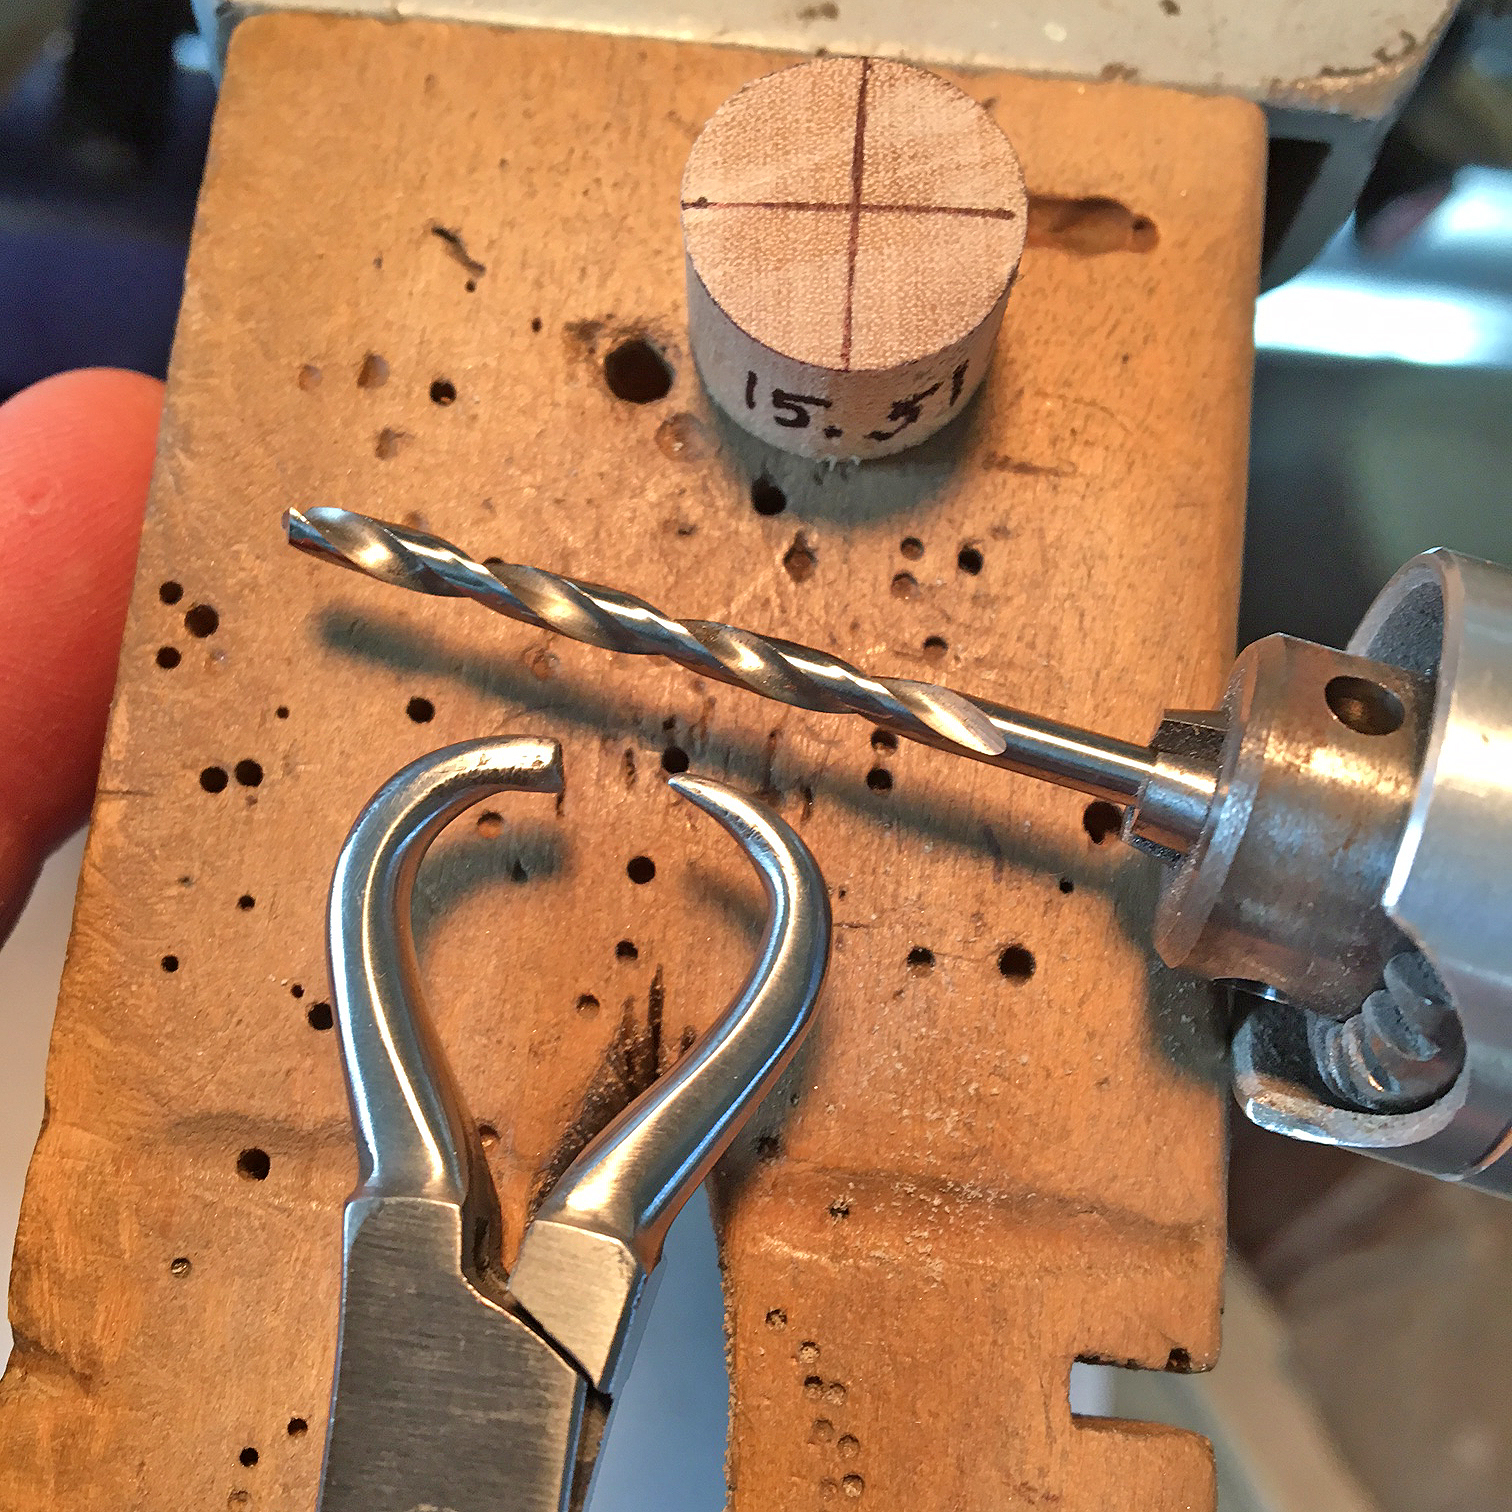 | Choose a drill bit that is as near the diameter of the tip of the socket side of the beading pliers. Err on the side of a smaller drill bit, as the plier jaws are tapered .Use the bit to drill a hole at least 6 mm deep at the center point of the dowel. |
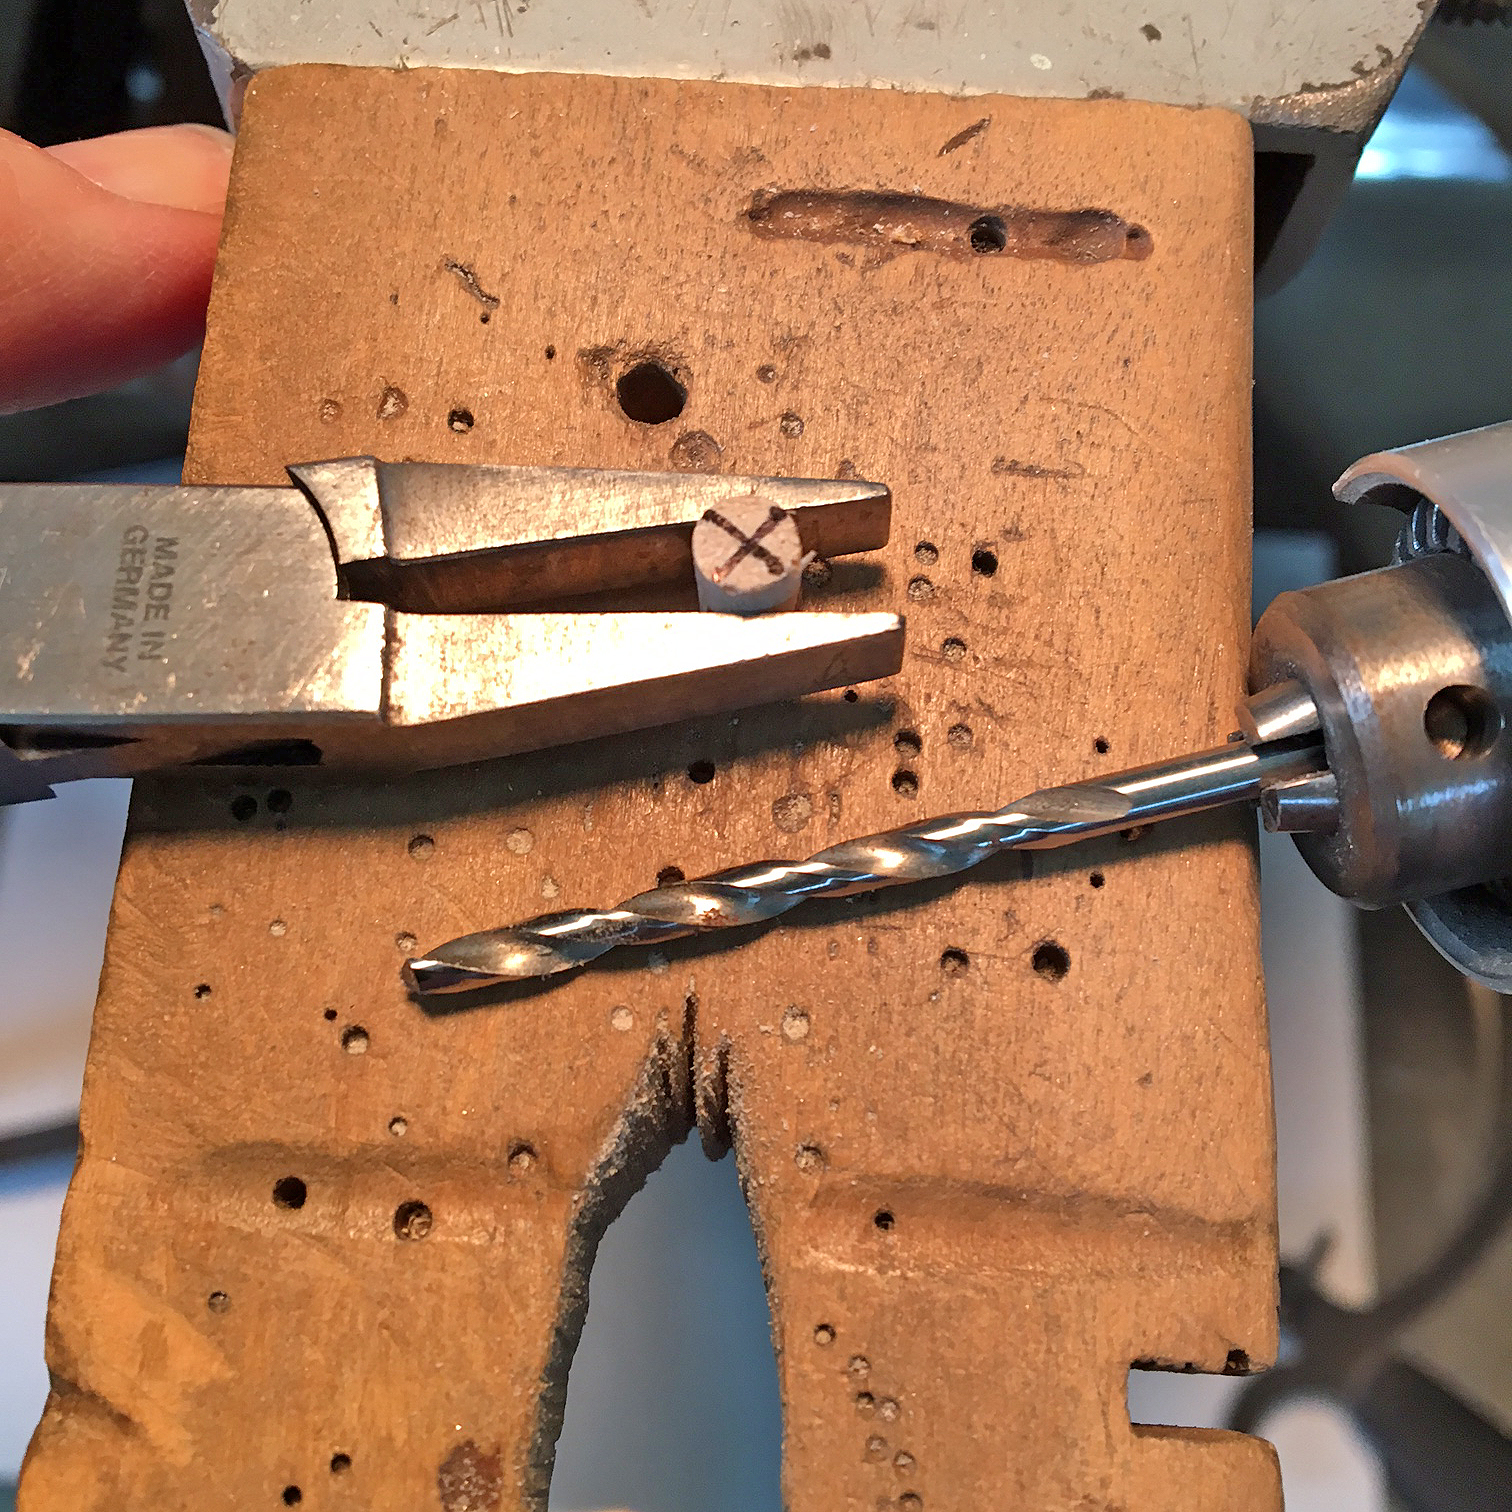 | For drilling smaller diameter dowels, hold the dowel in a set of wide flat nose pliers and first drill a pilot hole with a smaller drill bit. |
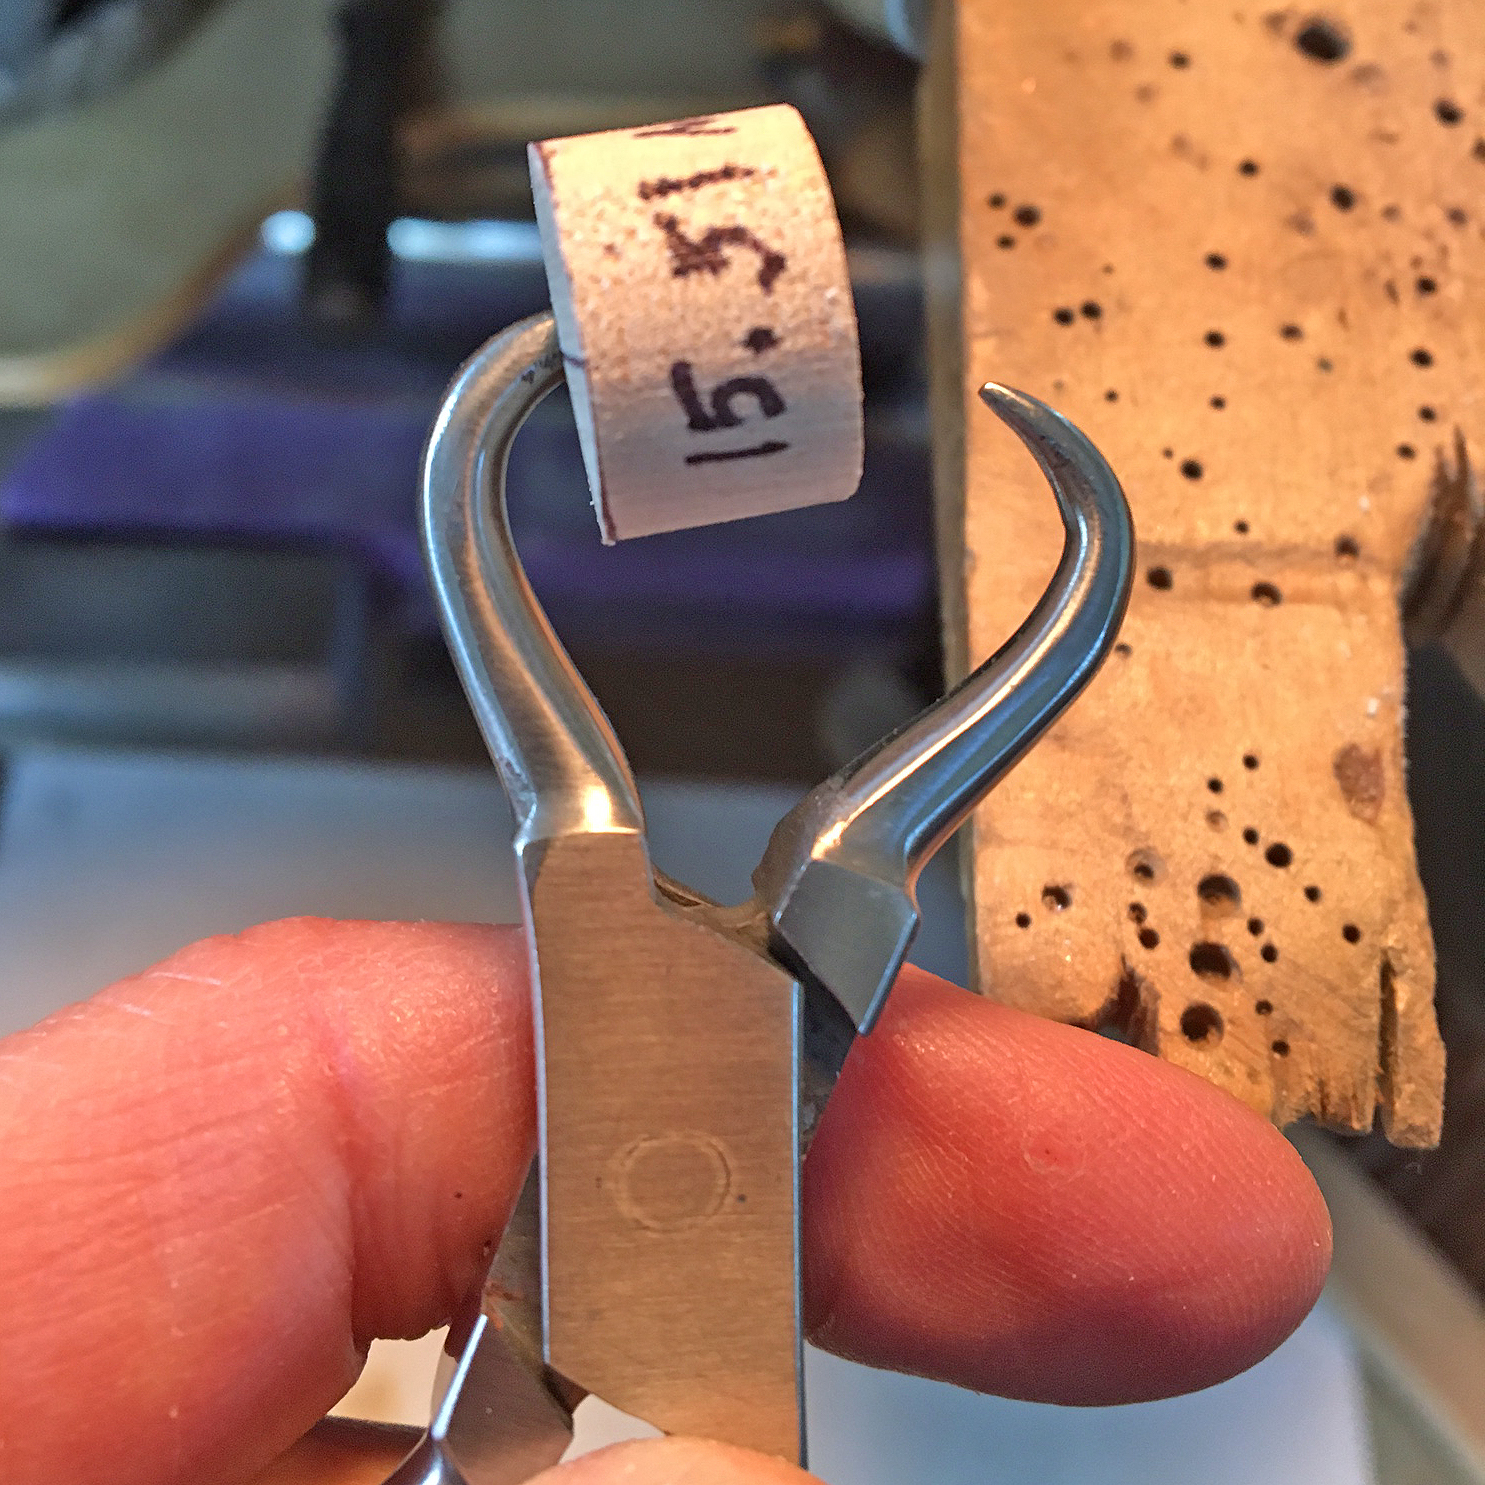 | Test the dowel on the pliers, making sure it's a snug fit. For these particular pliers, I used a #36 drill bit. |
 | To protect the back of the bezel box and prevent the setting from spinning during polishing, push a rigid plastic earring back on the pointed jaw of the pliers. This creates a padded, non-marring, and non-skid solution. |
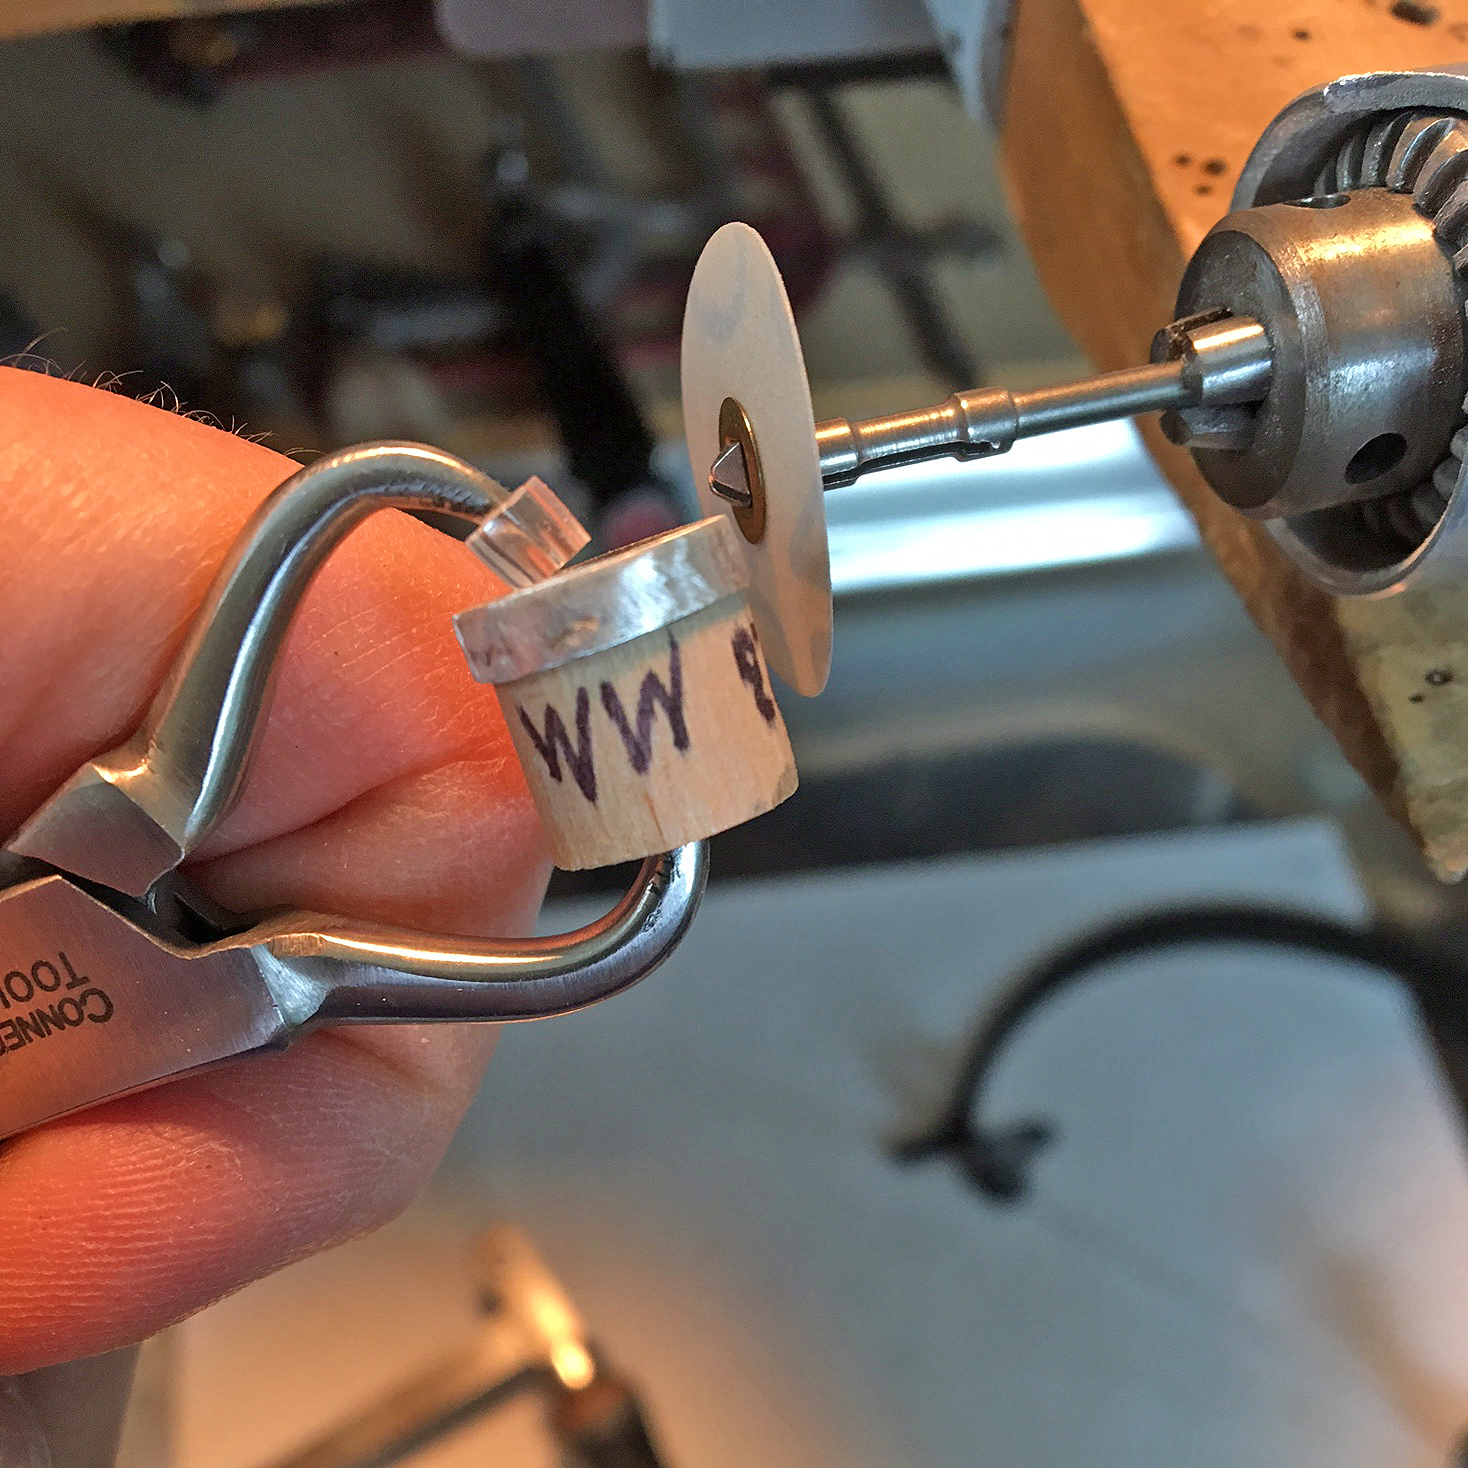 | To use a mandrel, choose a diameter as close to the stone size as possible and slide it on the plier jaw. Attach a plastic earring back on the other plier jaw and then grip the bezel firmly. You can now sand and polish away without worry; the firm backing provided by the wood prevents the bezel from bending, and the non-skid plastic prevents any movement as you work. |
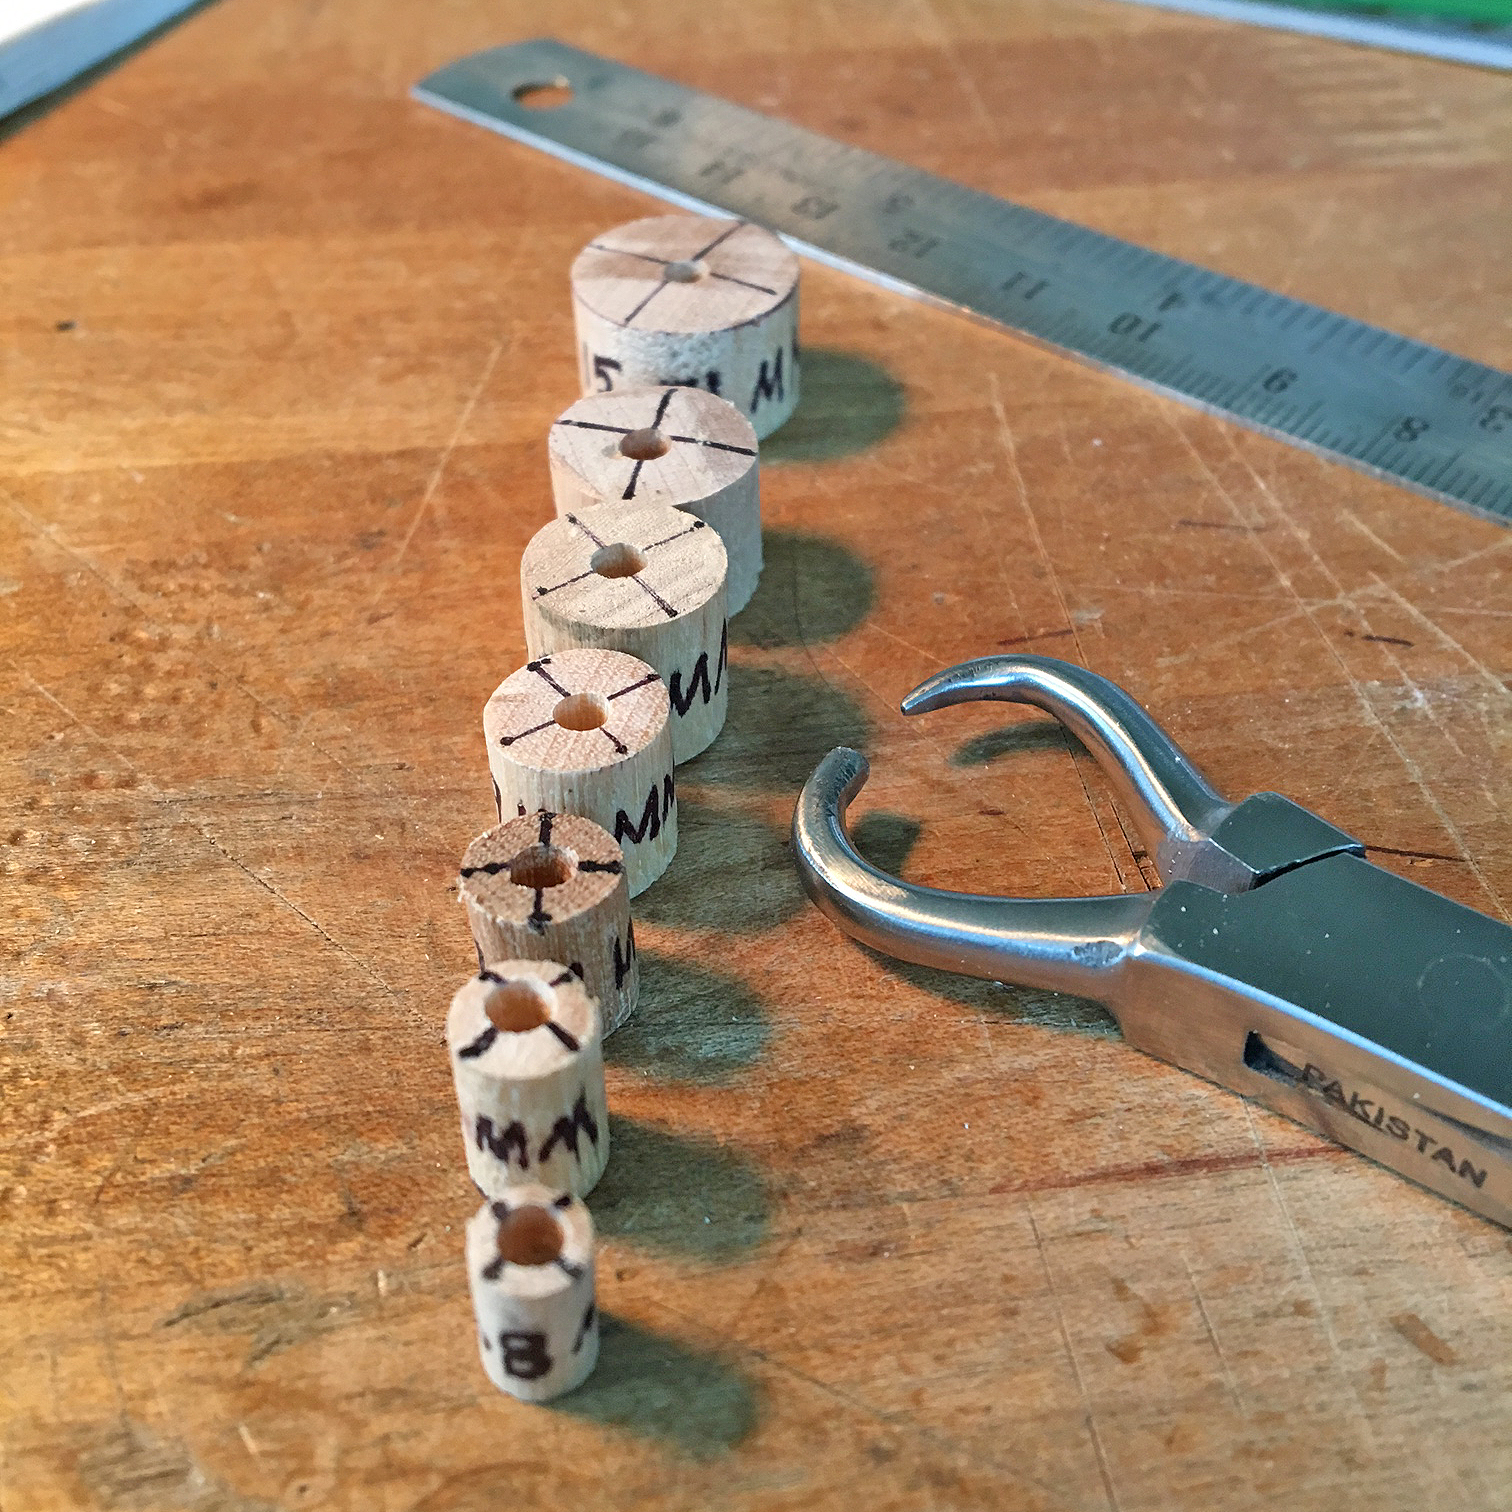 | You'll want to assemble a collection of these dowels in a range of sizes. I keep an eye out for wood dowels whenever I am out and about. My set ranges from 4.8to 15.5 mm and works well for 28-gauge bezels with stones ranging from 5to 16 mm in diameter. |
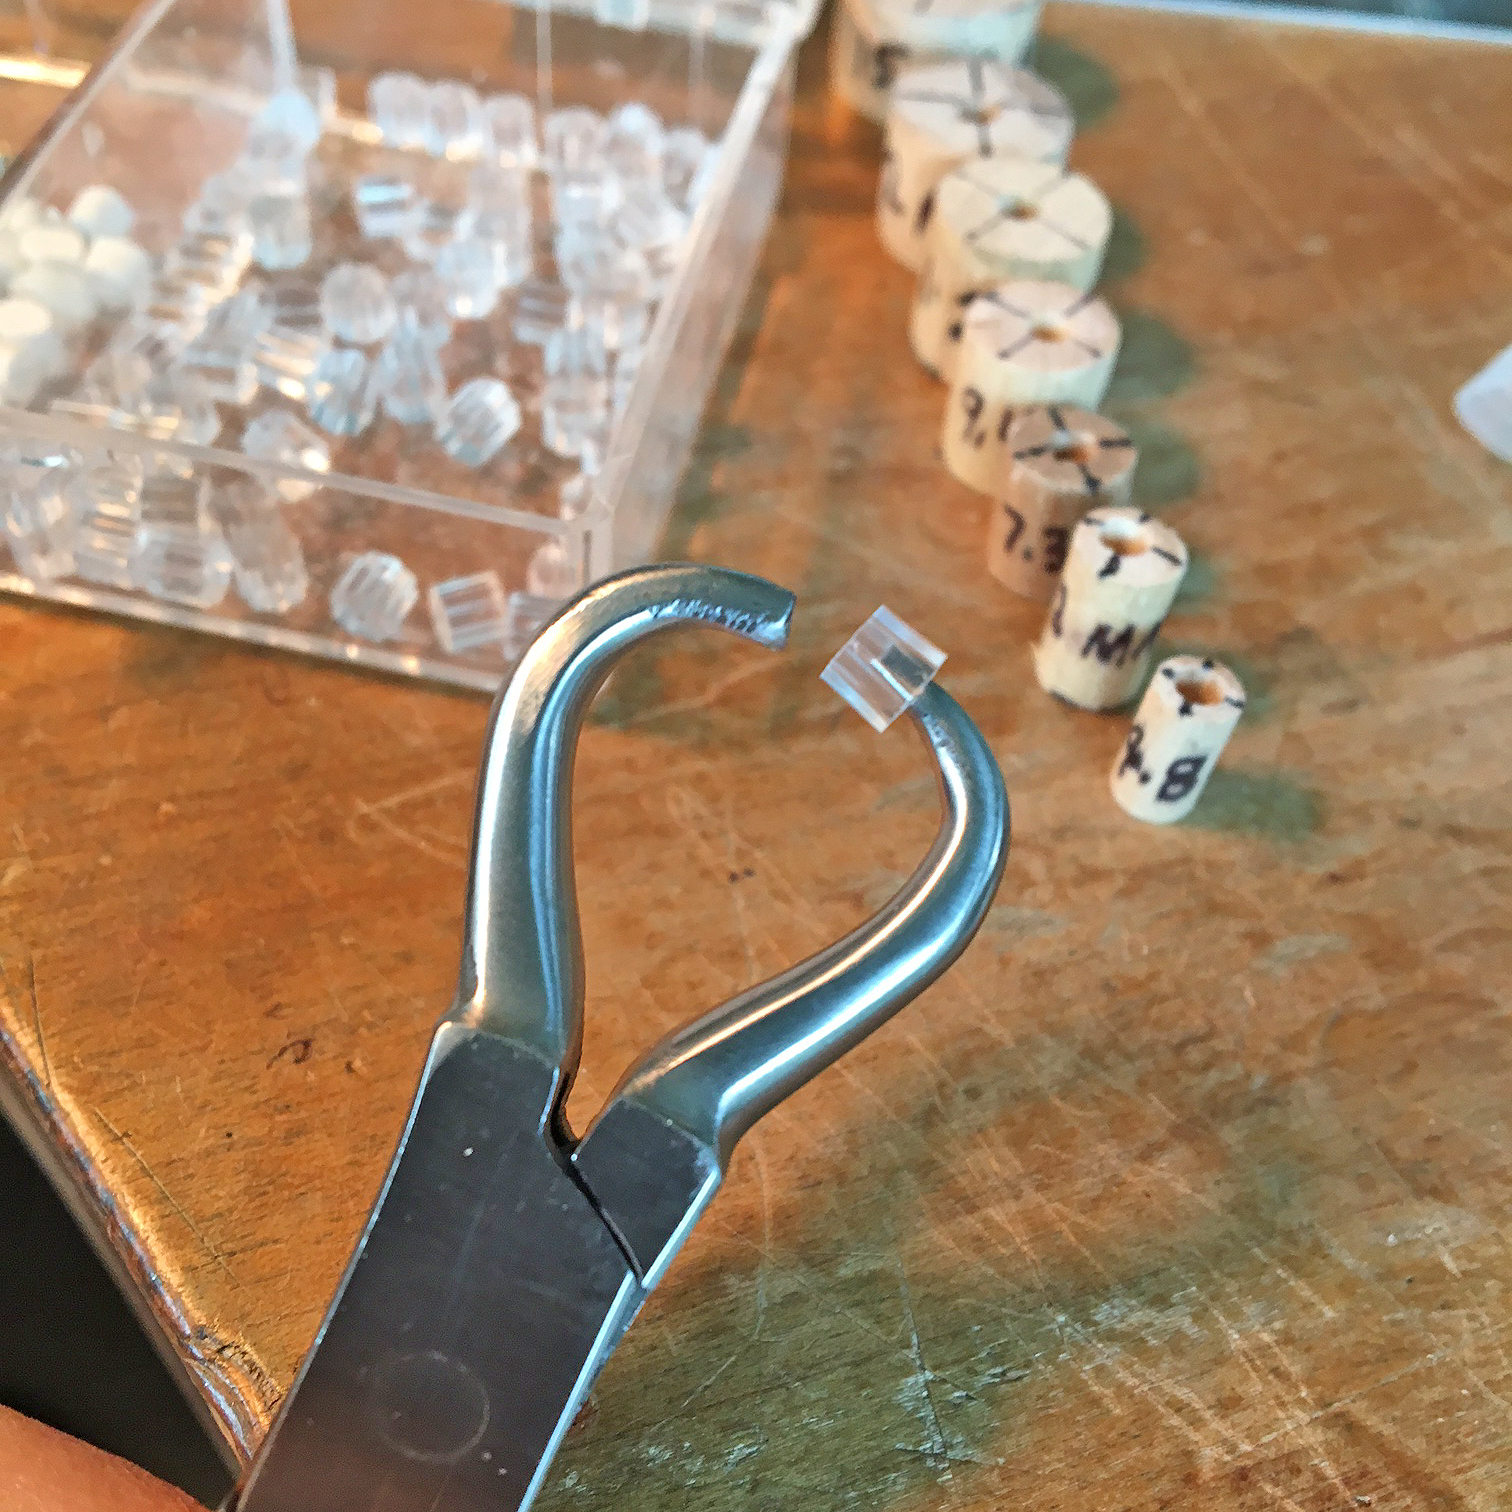
 | For very small settings (less than 5 mm), a tapered chopstick inserted firmly into the round opening of the bezel box works well. |
 | My wood mandrel set is an easy and useful addition to any stone setting toolkit, and does not require altering the beading pliers in any way. If you make lots of tiny bezels, it's worth your time to make some bezel helpers. |
![]()
In association with
![]()
The award-winning Journal is published monthly by MJSA, the trade association for professional jewelry makers, designers, and related suppliers. It offers design ideas, fabrication and production techniques, bench tips, business and marketing insights, and trend and technology updates—the information crucial for business success. “More than other publications, MJSA Journal is oriented toward people like me: those trying to earn a living by designing and making jewelry,” says Jim Binnion of James Binnion Metal Arts.
Click here to read our latest articles
Click here to get a FREE four-month trial subscription.
Related Articles

Optimized Saw Blade for Cutting Wax

How to Modify Separating Tweezers

Tips for Modifying Vises

Customized Mini Clamp Tool


The All-In-One Jewelry Making Solution At Your Fingertips
When you join the Ganoksin community, you get the tools you need to take your work to the next level.

