
Carpenter Enamel Foundation Workshops
5 Minute Read
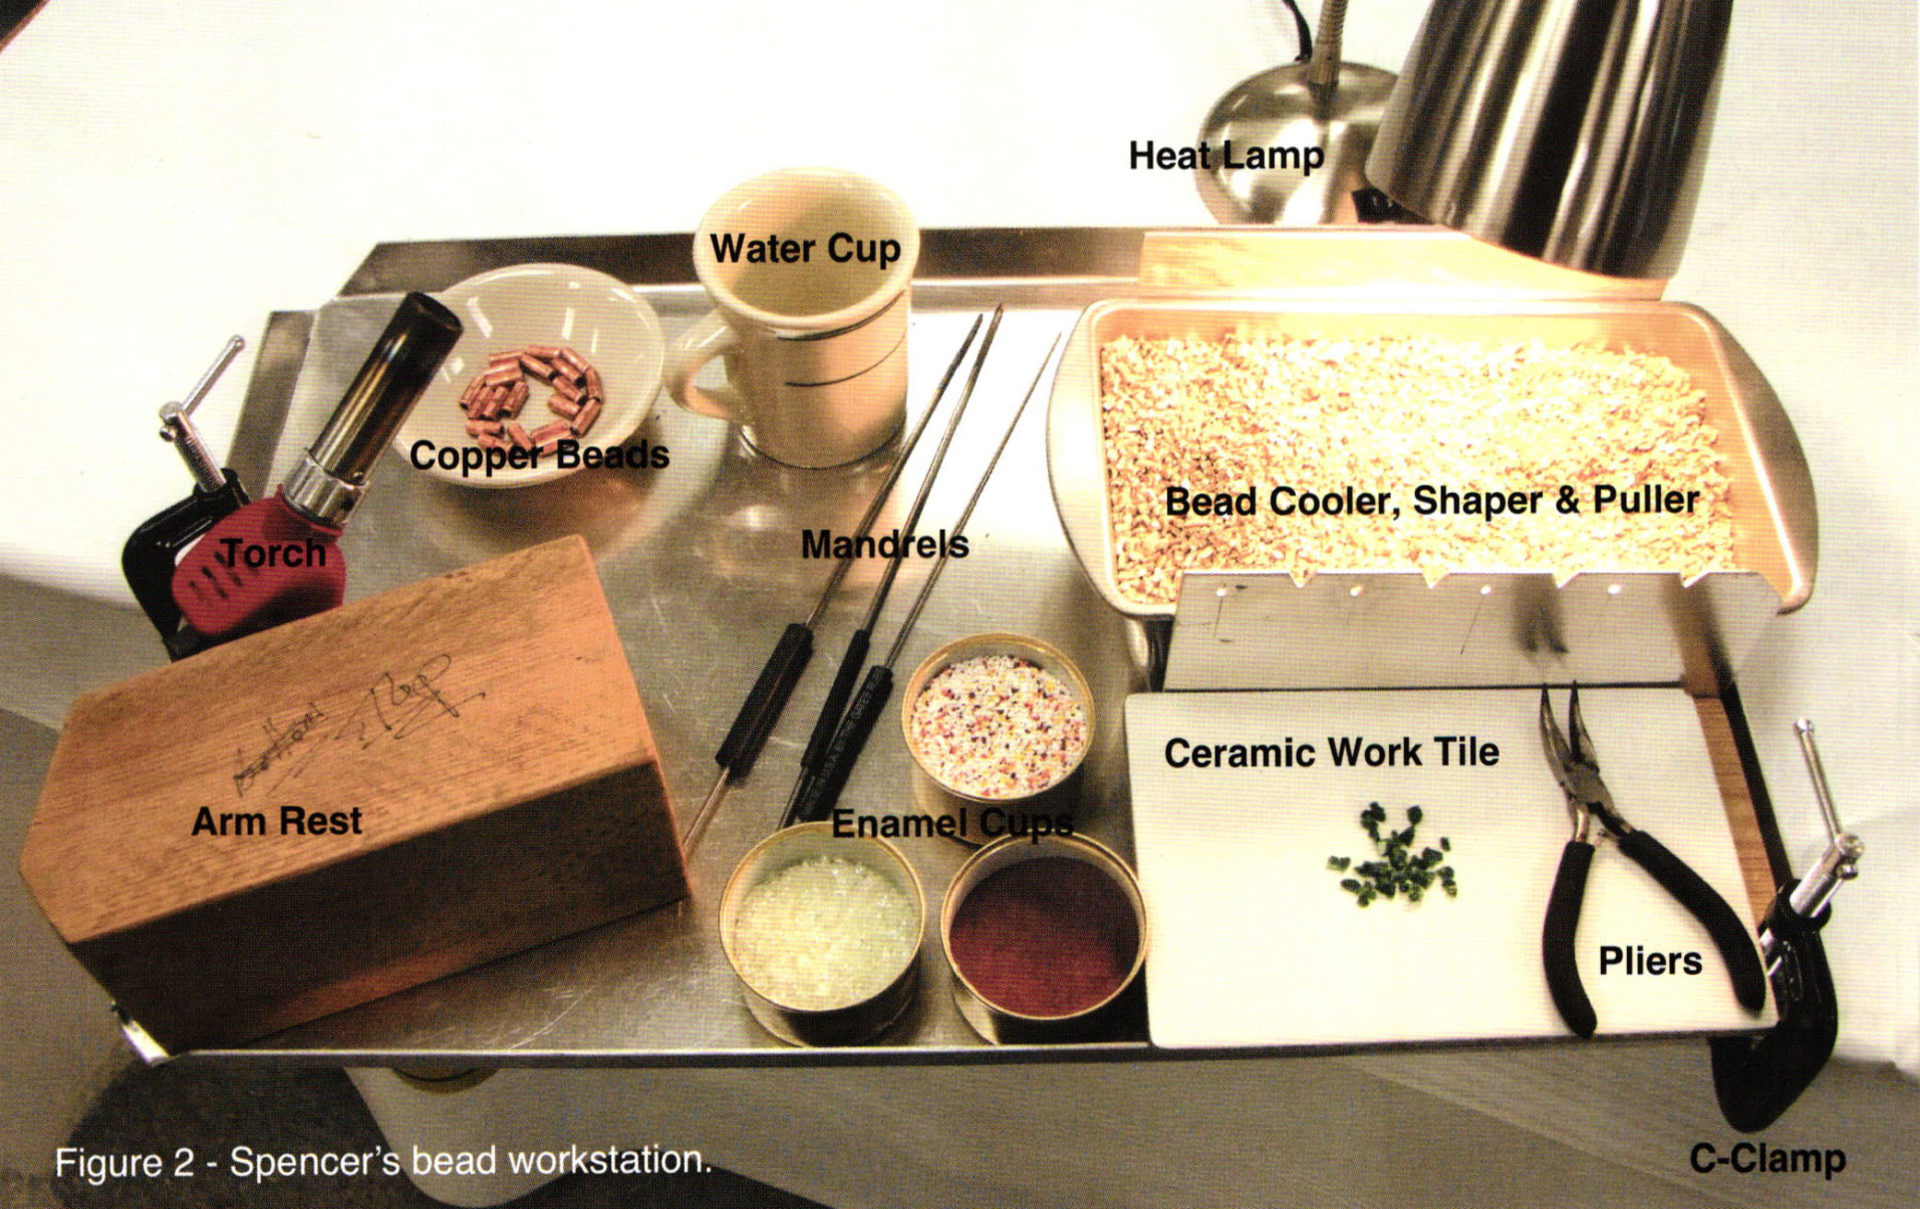
Joe Spencer Bead Workshop
On November 17, 2007, Joseph Spencer taught one of the best workshops we have seen. There were nine students, each working at their own workstation, designed and built by Joe. Each student made 68 enameled copper beads in the six-hour workshop. The workstation makes bead making a productive operation, and still permits artistic freedom.

First, the raw copper beads were supplied. Students did not spend time with tube cutters; they enameled. Joe forges the ends of his raw beads prior to enameling for better quality. He demonstrated how easy it is to remove the bead from the mandrel - no need to struggle. And, the ends of the beads are completely enameled, not left bare or half-enameled. He shared many secrets learned from more than 40 years at the torch, making and selling beads for a living.
If you are interested in beads, we strongly recommend you book Joe and his workstations for a workshop. Second best, purchase his workstation shown in Figure 2. You can stop by his studio and retail store at 111 5th Ave. N. in Safety Harbor, Florida, or give him a call at (727) 725-1562. Third best is to purchase his book from Thompson Enamel, Torches and Glass Enamel with Spencer - Glass Enamel Bead Making by Joseph Spencer, TEP-035.
At the end of Joe's class, there was a real testimonial. Four of the nine students purchased the workstations they had been working with and took them home.
Glass Fusing and Slumping Workshop
January 12, 2008, we taught our first glass fusing and slumping class. We have manufactured enamels for glass for many years, and have talked about doing glass workshops, but never got around to it. Late November, Molly Mount of Delaware, Ohio called, saying she and three friends would like a glass fusing and slumping workshop. Our reply was, "give us about a month." It was natural to select some 'enameling on metal' procedures to adapt for enameling ordinary single strength window glass. Considerable time was spent testing procedures, firing times and mold materials. Four our of many, procedures (described below) and two mold shapes were selected. Being brave, the workshop was listed on our website. As a result, we ended up with 16 students. The writer taught the first two procedures, and Tom Ellis taught the second two procedures.
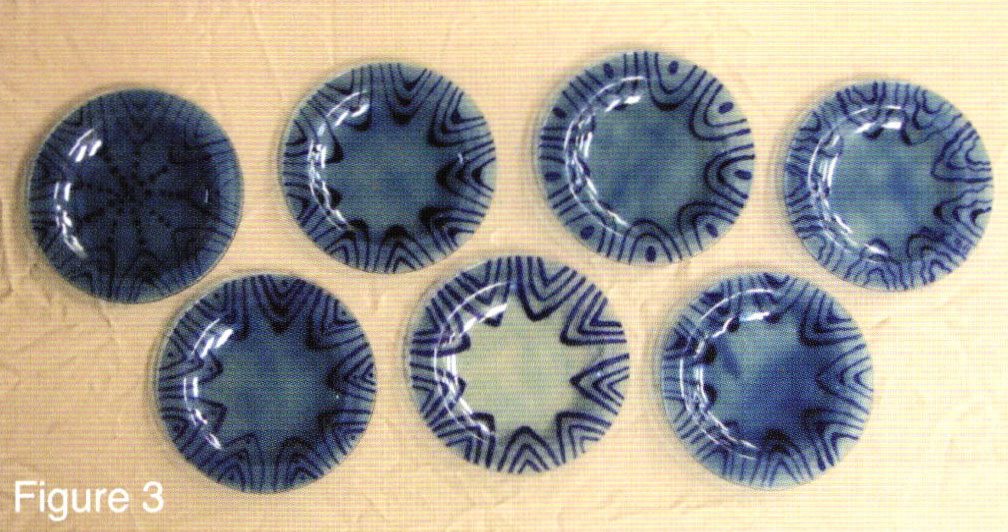
The first procedure was brushing on a design with a holding agent, sifting with enamel, and after setting a few seconds, dumping off. Since it would take some time to brush the design onto a 7-1/2″ round glass disk, squeegee oil was used as the holding agent rather than Klyr-Fire, which would dry too fast. 6680 Dark Blue (minus 325 mesh) was sifted over the brushed design and dumped off. The final step was to dry sift 6605 (a lighter transparent blue) over the entire glass circle. Figure 3 shows some of the student's work with this procedure.
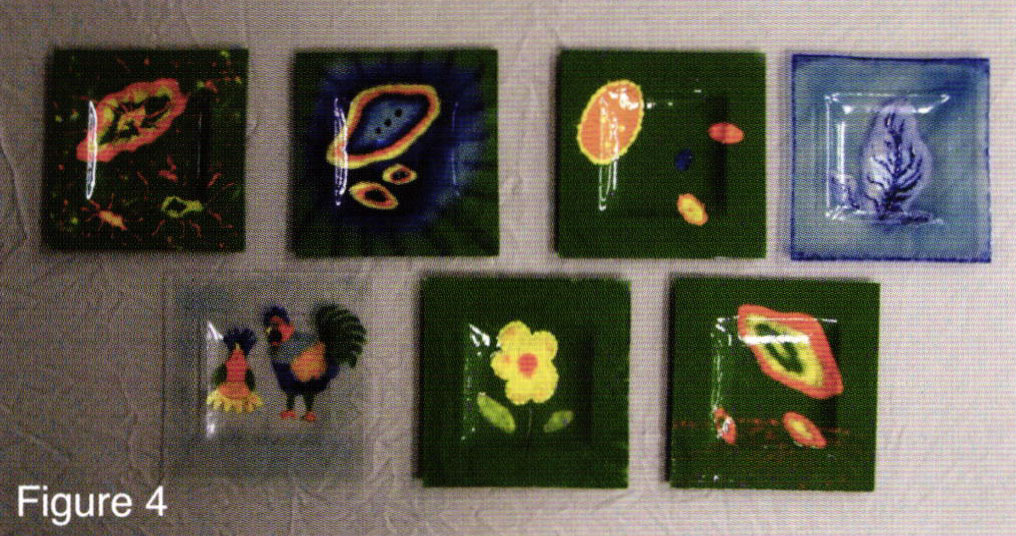
The second procedure was using stencils cut from a file folder. Klyr-Fire was brushed onto the top surface of a 9″ x 9″ square glass, the stencils were positioned, and a coat of enamel was sifted over the entire surface. The stencils were removed. Remaining decoration was done with a 1/2″ sifter and a 1/16″ fine line sifter. Figure 4 shows some of the student's work with this procedure.
The third procedure was a large-scale version of Stell Shevis' Drop Cookie' technique, which is a form of wet charging (see Glass on Metal Vol. 19, No. 2, pg. 43, and also Stell's first DVD). Start with a few opaque colors, each in a plastic spoon. To each spoon, add a few drops of diluted Klyr-Fire (1 to 3 or more parts water). Enamel should be wet enough so it may be picked up with a tiny spatula without dropping. Work with a tiny spatula in one hand and a pointed tool or spreader in the other. Push the enamel off the spatula into place and push it into any shape you want. Continue adding colors to complete the image. Vibrate the piece by rubbing up and down on one edge of the piece with the handle of a sifter. Blot any excess moisture with Kleenex, dry, and it is ready to fire.
The fourth procedure was from "The Enamelist" by Kenneth Bates, published in 1967. On pages 95 and 96 is a Jackson Pollock-style "painting with enamel" procedure which Mr. Bates titled, "Dropping." Recently, we introduced this at a meeting of The Ohio Valley Enamel Guild. Everyone had so much fun with it that we hope to popularize it. We quote Mr. Bates: "One effective way of working that produces a quality unlike any other (colors blended abstractly, with very soft edges) is to discard the spatula and the dusting basket altogether. Place several clean white papers on the bench and pour heaps of selected (we used only opaques) dry enamel on them. On a fired base of flux or almost any background color, spray or brush the surface with gum tragacanth (we used Klyr-Fire). Now, take pinches of the dry enamels in your forefinger and thumb and try dropping them or spreading them on the surface. This becomes much like painting with colored sand and can produce most expressive results.."
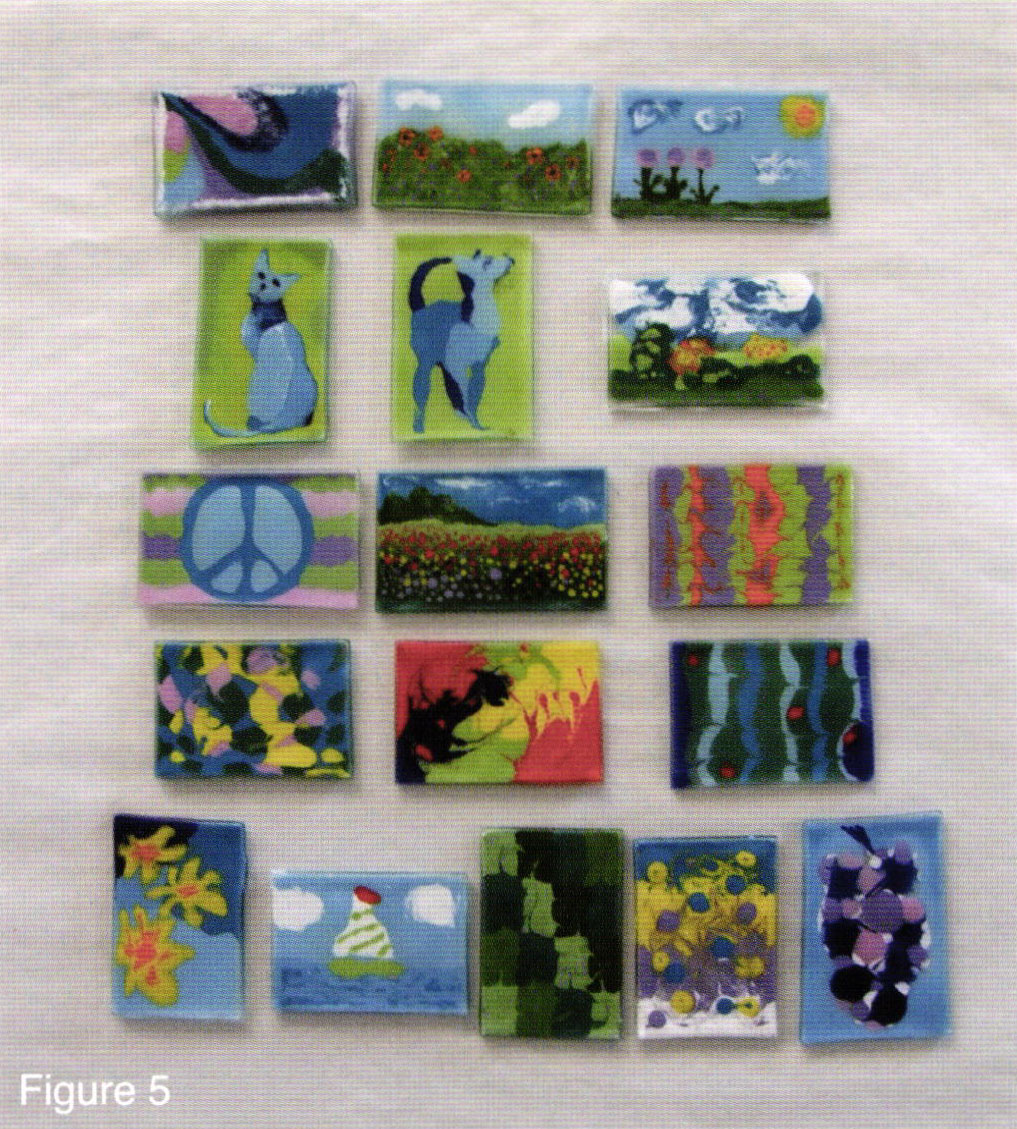
After demonstrating both procedures three and four, the students were given small pieces of window glass for a practice run. Figure 5 shows some of the student's practice pieces.
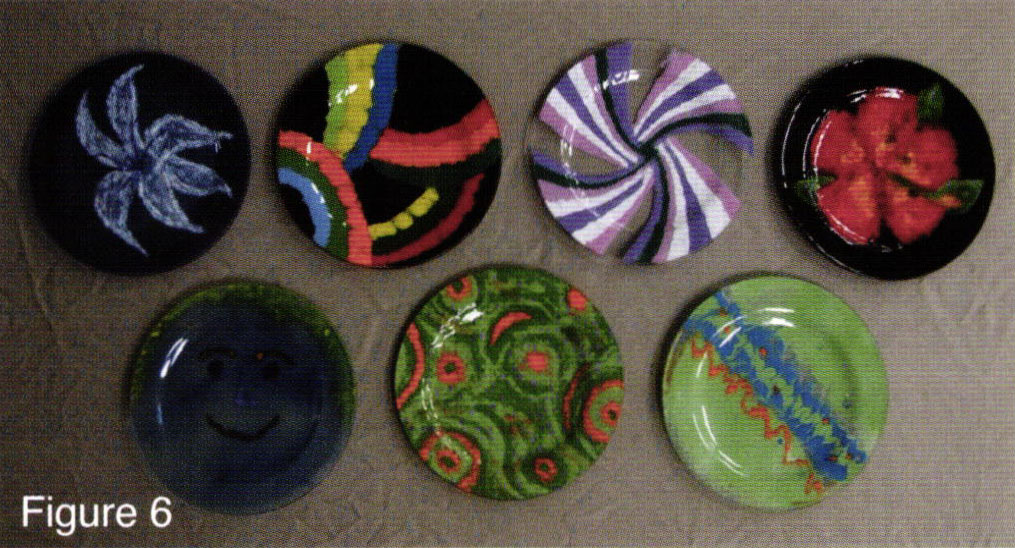
The final project was a 9″ round glass disk enameled using any, or a combination of any of the four procedures.. Figure 6 shows some of the student's work for this project.
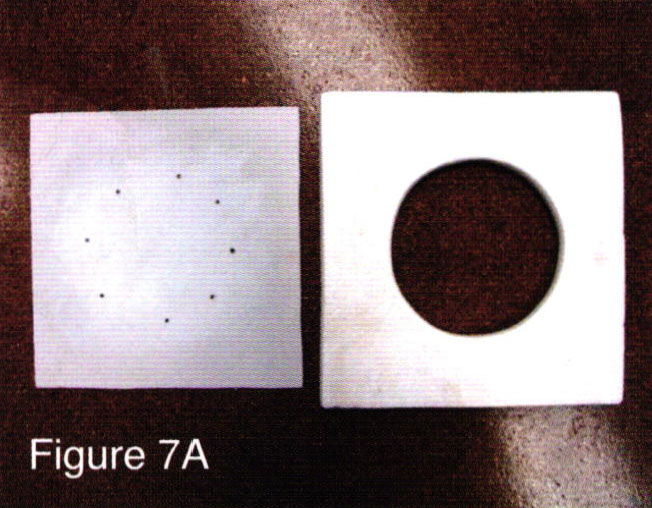
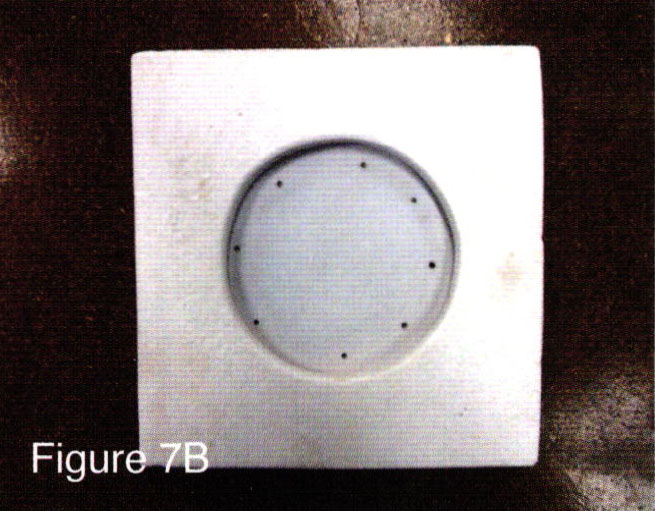
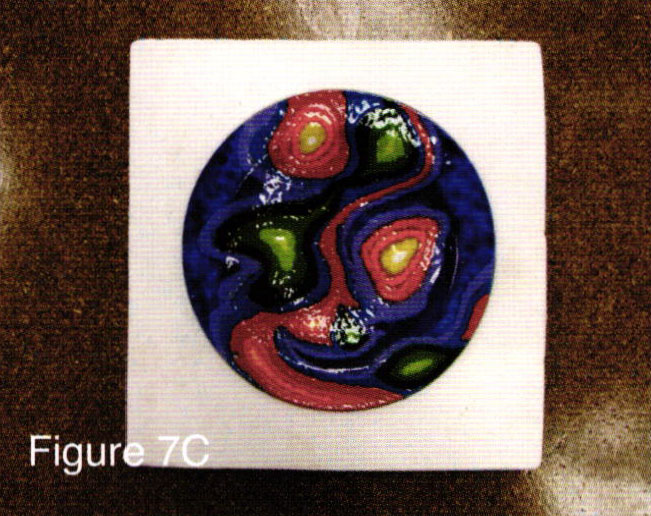
Figures 7A, 7B and 7C shows one of two mold shapes used in the workshop. Two materials were used - marinite and ceramic fiber board. Both can be cut to size with a wood saw and the holes cut with a jigsaw. The frames were placed onto a ceramic fiber pad (PH-3 Hot Pad, listed in Thompson's catalog) to complete the mold.
Pieces were fused and slumped in one firing, using a Paragon Model E-14ALT. The firing schedule was to go from room temperature to 1475°F in 1-1/2 to 2 hours. We used six Model E furnaces. Two would reach the desired temperature within this time frame if the variable control was set on medium. The others had to be set slightly above or below medium. If it takes longer than 2 hours no harm is done. We feel you are at risk if 1475°F is reached in less than an hour. When 1475°F was reached, the furnace was shut off and allowed to cool to 200°F before opening the door.
About half of the students were seasoned enamel on metal artists, and were delighted to find another use for their enameling furnace. They also were impressed that window glass, cut to size from the local glass dealer, is about one tenth the cost of sheet copper.
Related Articles

AHCI: The Tinkerers’ Club

Simplicity That Speaks

The Work of Yuyen Chang

Fads and Fallacies: Post Modern Collection


The All-In-One Jewelry Making Solution At Your Fingertips
When you join the Ganoksin community, you get the tools you need to take your work to the next level.
