
Bezel Setting Method
6 Minute Read
Bezel setting is one of the most secure methods of setting a gemstone into a mounting, but one of the most difficult to do cleanly. Bezel setting, by its very nature, requires you to deform and wrinkle the metal around a stone causing uneven variations in the bezel.
Once you achieve a level of skill to be able to do a competent job on a bezel setting, the trick becomes making it cleaner than the last one you set. I'm going to cover a few techniques that I've developed through the years that I hope you can use to increase your skill level.
Occasionally pieces come into my store that I made 10 or 20 years ago. It's like going back in time (and skill) to see how much you've improved through the years. I recently saw a bezel set pendant that I made in 1993 that prompted me to write this article.
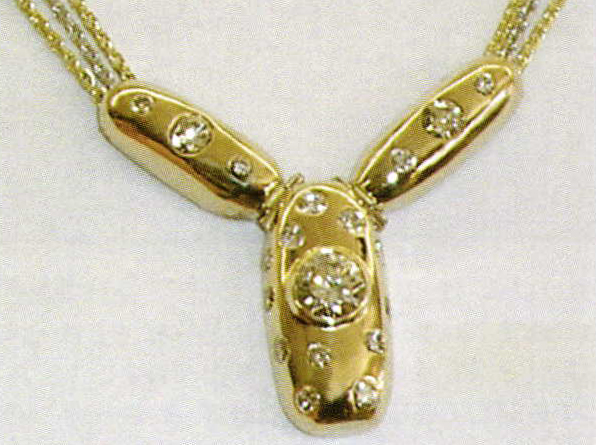
I remember that I struggled with the stone back then because it had a thick girdle and a fat pavilion. Looking at it 13 years later. I was actually surprised at how good it looked. All I remember was how much trouble it was, and I was never really happy with it…. but it was part of a wedding the next day and I had to let it go. (Oh, by the way, the chain broke which is why it was back in my shop…the stone did not fall out!) It's funny how when you're working on a piece, all you notice is what's wrong, not what's right. If you put it down and look at it a week later, all you notice is what's right and don't even notice anything wrong. As I was looking at this pendant. I realized that I set bezels much better now and that I use a few different techniques that I didn't know in 1993.
The Three Biggest Problems
Most problems with bezel settings fall into three categories. The most common is an uneven, out-of-round bezel. The second is the metal flashings that are against the stone that you can't remove without scratching the stone. And lastly the dreaded "bezel tear" where the metal was too thin in one part of the bezel and tore away. Anyone that's ever set a bezel has had a bezel tear…and you know it's almost impossible to fix invisibly. Here's how I've solved those three problems.
Getting Started
The bezel I'm setting is part of a custom diamond necklace. The diamond is a 1.07 ct., VVS2. G-color, which I am going to bezel set into 14KYG.
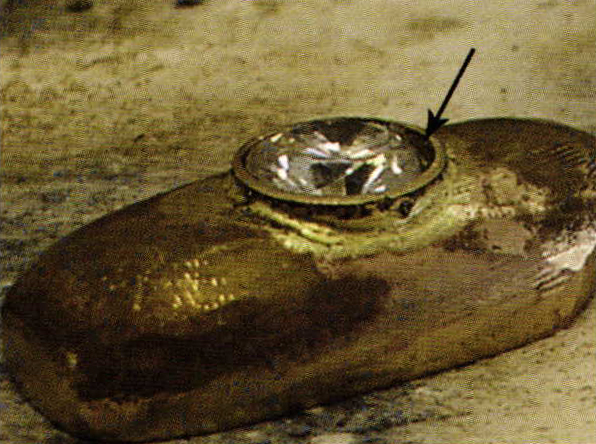
After I cast the piece and solder the hand made bezel in place, I used a standard stone setting bur to remove the metal inside the bezel and seat the stone. The photo shows the stone in place before setting. If you use your optivisor, you can see the metal wall before moving it to its new home over the stone. The table of the stone is slightly higher than the bezel wall.
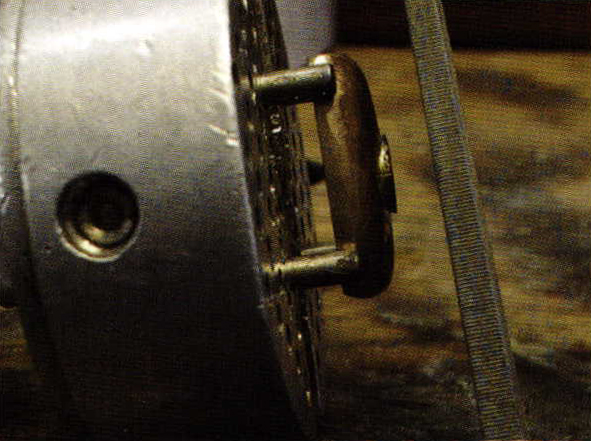
Next, the photo will show how I file the top of the bezel flat to remove any flashings and to give me a good picture of the top of the bezel. It allows me to see any variations in the thickness of the bezel wall.

And lastly, just before I put the stone in the mounting for the actual setting, I run a 45 degree undercut bur along the seat just to give the metal a little extra room to move.
Probing the Bezel
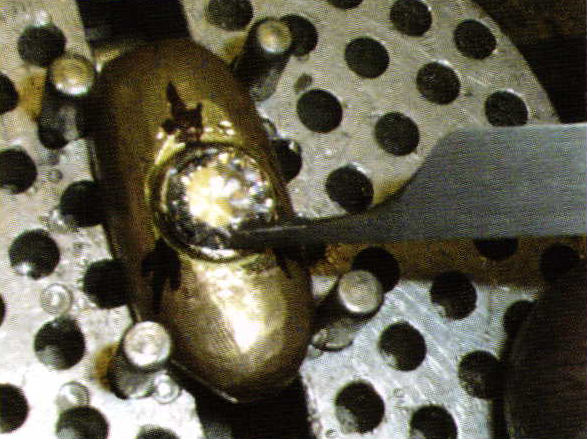
I've found through the years, that no two bezels are ever alike, and no two stones are alike, so no two bezel settings are identical. That fact makes me do what I call 'probe the bezel'. One of the problems I mentioned earlier that is inherent in bezel settings is uneven bezels. This is usually caused by one part of the bezel wall being thinner and moving easier and faster than another part of the bezel wall. Almost every bezel setting job has this issue. When one area moves out of sequence with another area, the metal will get out of round and cause the bezel to be uneven. Looking closely at this photo you can see that I've begun to move the metal over the stone because of the crinkling of the metal.
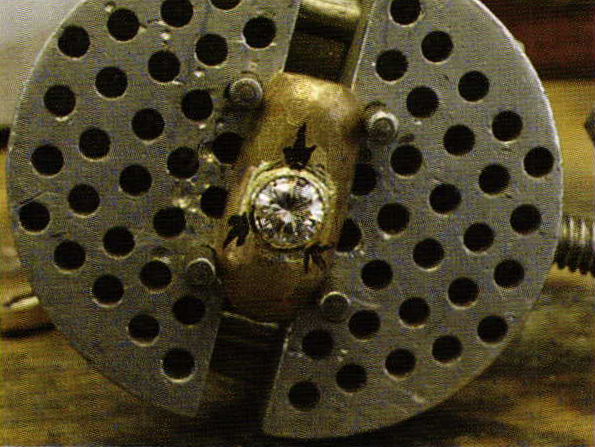
All I've done at this point is very lightly, using a hand held prong pusher, moved the metal trying to find its weak points. On this particular setting job, there were three. I used a sharpie to mark these three areas so I know where they are. Now as I actually start the setting process and I'm going to be applying a significant amount of pressure to move the metal over the stone, I'm going to be extremely careful in those three areas because I know that the metal will move much faster and collapse onto the stone well before I'm ready for that to happen.
The #40 Graver Trick
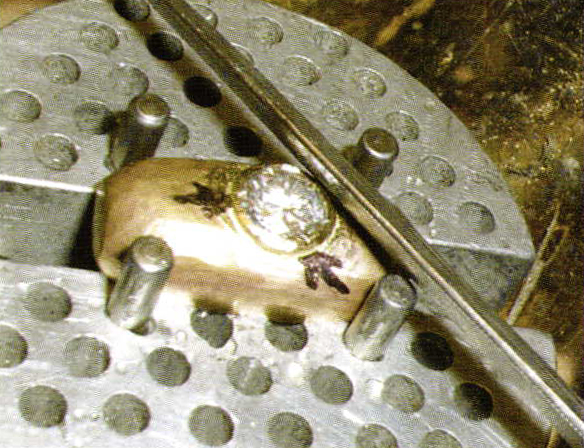
Now that I know how the metal around the bezel is going to act I do something that I learned about 15 years ago that is a real time saver. Looking at that last photo where the metal is beginning to wrinkle on the outside, use your optivisor and notice the metal crinkling on the inside of the bezel as well. Since it only moved a tiny bit, it's still mostly round with just a slight deformity. Here I take the #40 graver and clean up the inside of the bezel since it's not anywhere close to touching the stone yet.
Next I'll use my prong pusher (or a hammer handpiece) and move the metal a little more. Since I'm trying to move the metal down evenly, I keep the piece rotating and apply a little pressure; then rotate the piece and do it again. It's now, while you're rotating the piece, that your marks come in handy because you always know where you are in relation to the weaker areas of the bezel. After I've worked my way around the bezel one or two times, I'll run my #40 graver around the inside again and clean it up. Over the course of setting this particular stone, I noted that I stopped and used my graver 7 times. The metal never had a chance to get too deformed, so once it was firmly against the diamond, it was perfectly clean, round, and flashing free.
Cleaning the Outside
This is usually easier than cleaning up the inside of the bezel (unless you did like I said and used your #40 graver), but here's how I do it every time. Every time I stop to use my graver, I take a small barrette file and very lightly knock off the high spots. I'm not really trying to remove any metal, I'm just really trying to keep the outside of the bezel uniform and clean as I force it over the stone. The photo shows how I just lightly brush it across the surface and, just like on the inside, I never allow the metal to get too deformed.
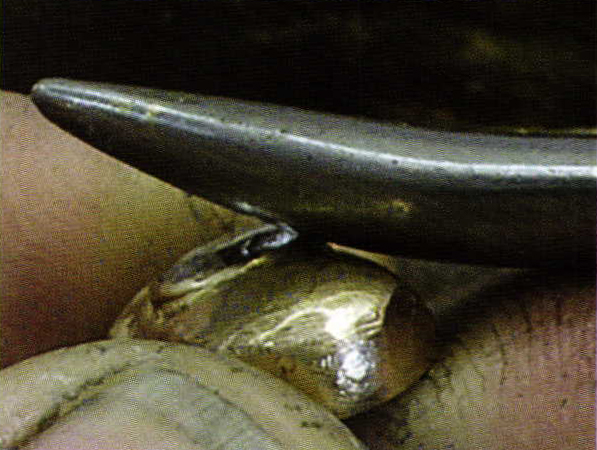
Once I've moved the metal as far down as I'm going to go, I take a burnisher and burnish over the bezel 3-4 times. The photo shows the bezel is now securely over the diamond and has now taken on the same contour as the crown of the diamond.
A quick clean-up with some sandpaper and a cratex wheel and I'm calling this job finished.

Final Thoughts
Bezel setting is hard. Period! It is a very difficult style of setting that will test your patience and your skill level for years before you develop your own techniques. If you're having problems with bezel setting, know that you're not alone. Remember it's not you. Bezel setting is just plain hard. And when you finally master bezel setting round stones, there are marquise, pear, oval, princess, and emerald cuts to learn. It never ends…
Related Articles

Copper Granulation Technique

Bezel Setting Using a Lathe

Tips for Avoiding Meltdown

Single File


The All-In-One Jewelry Making Solution At Your Fingertips
When you join the Ganoksin community, you get the tools you need to take your work to the next level.
