
A Crowning Achievement Part 2
4 Minute Read
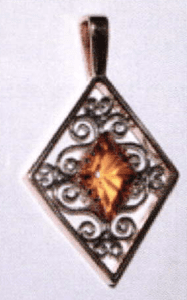
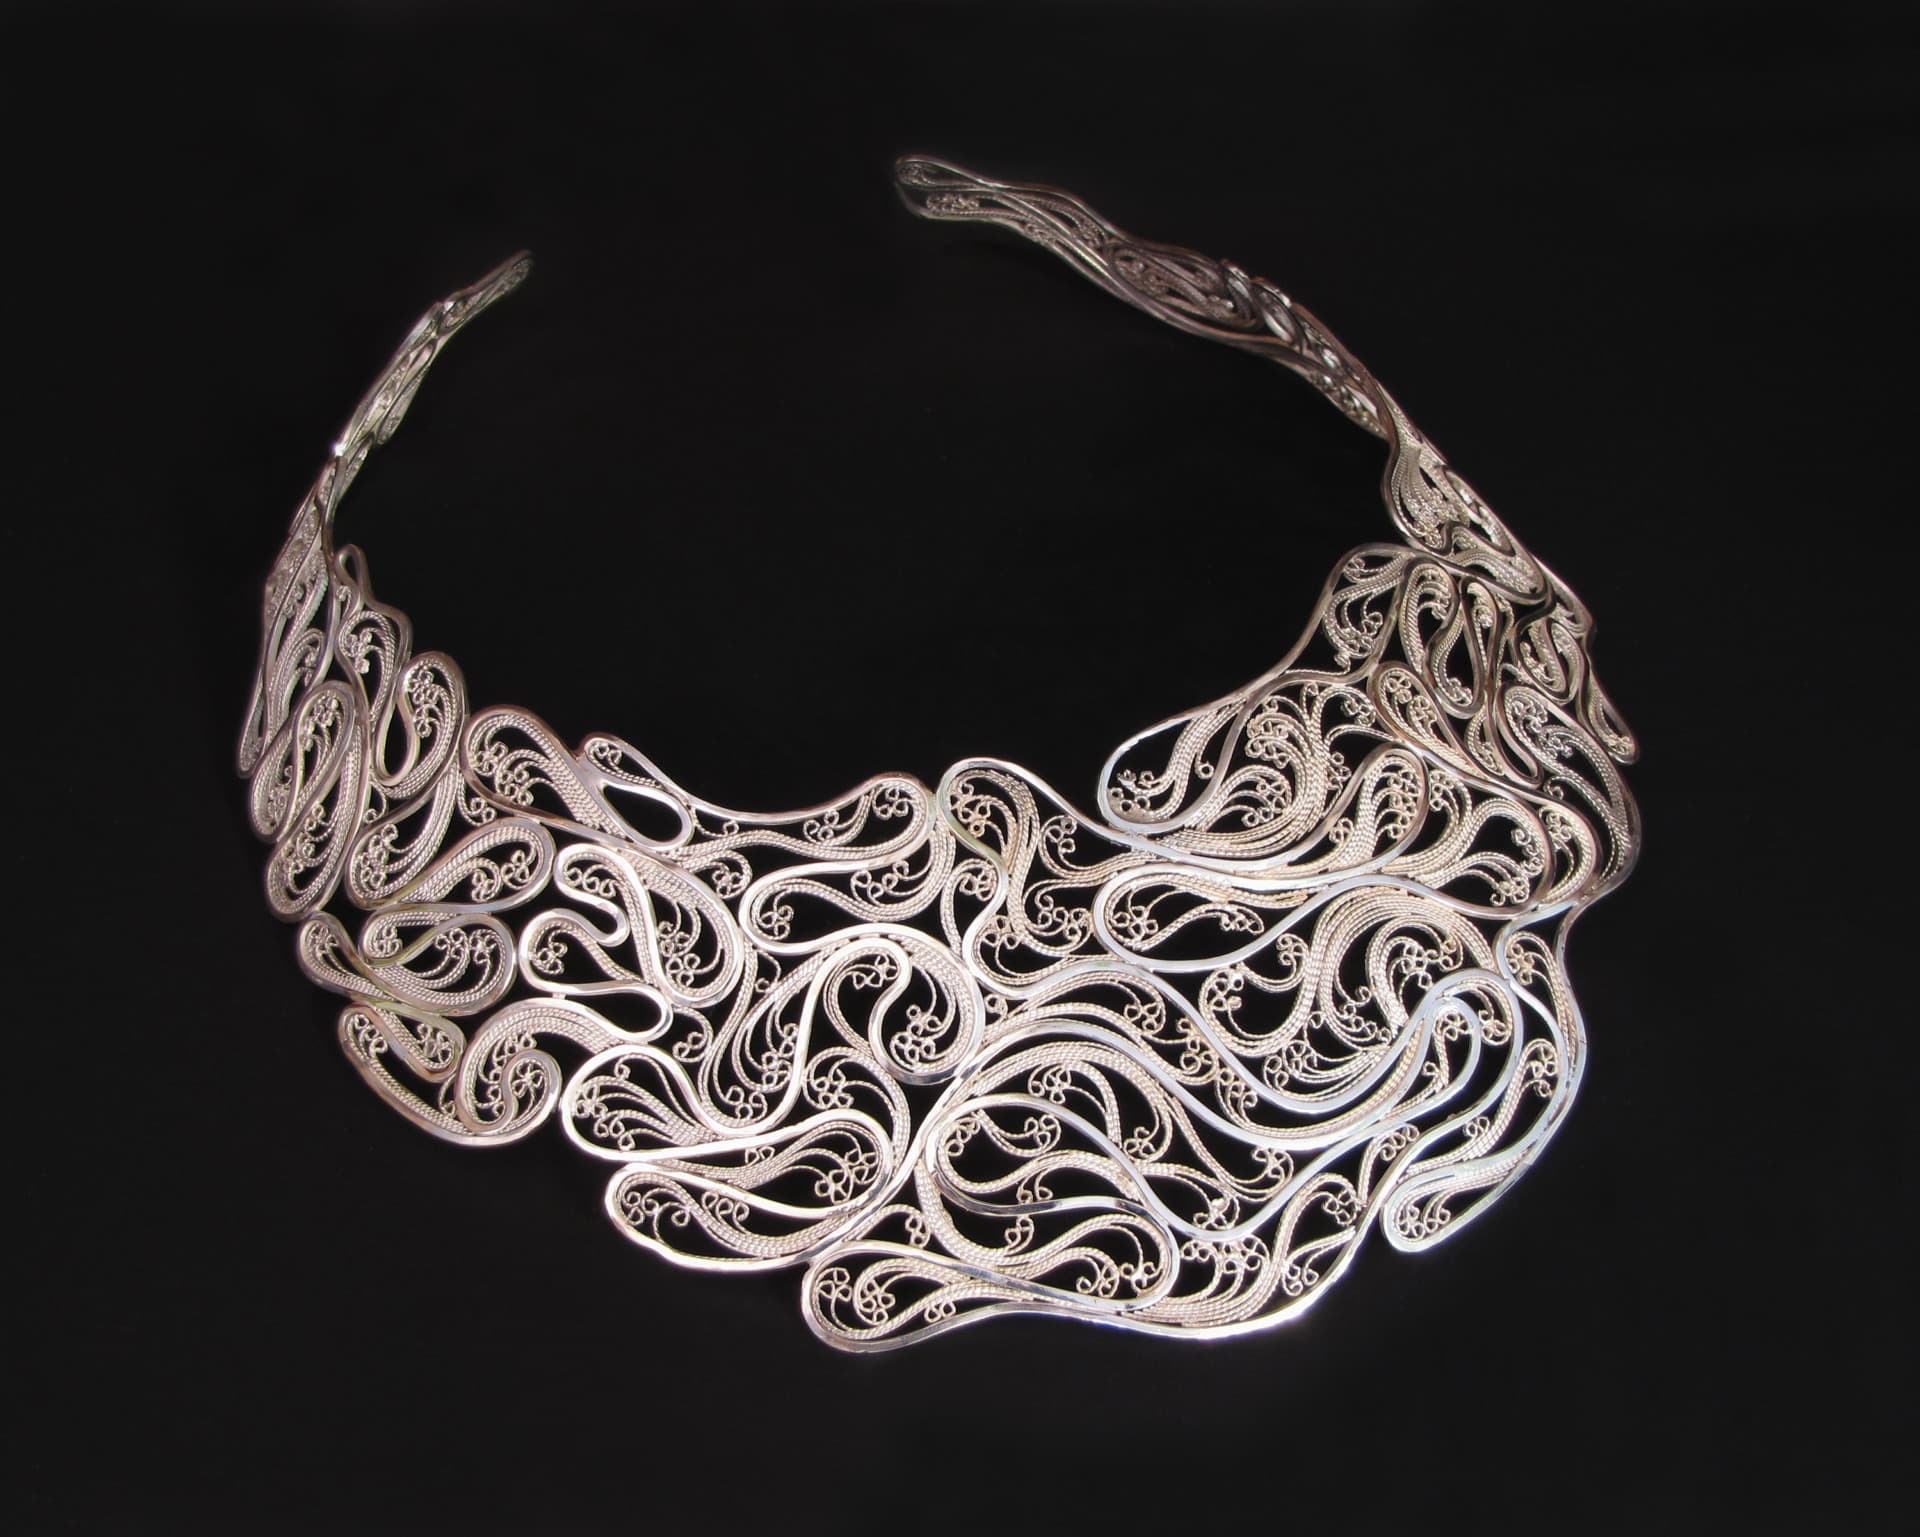
In the last issue we looked at making a basic basket crown. In this article we will fabricate a more advanced crown. One of the most versatile crowns to make is a half-basket crown. This crown can be used for diamonds or colored stones and generally soldered into a piece of jewelry where stones or additional metal surrounds and supports it, as in this filigree pendant.
In this project we will be making a half-basket crown for a diamond shaped citrine.Because of the shape of the stone we cannot buy a crown from a findings house so we must hand make a crown to fit. For this crown we will use 1mm by 2mm rectangular gold stock. This is a good size to use for stones up to 15mm in length. On larger stones I prefer to use 1mm by 3mm gold stock.
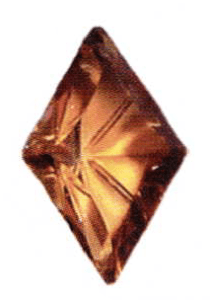
The first part to make is the under-bezel. To begin, measure the length of each of the four sides of the stone. This stone measures 7.5 mm on all four sides. When the stone is set you do not want to see the under-bezel under the stone, so we will make each of the sides 7mm. Cut the gold stock to 28mm and mark 7mm increments along one side. We need to bend the stock at each of these marks for the corners of the stone. To make a sharp bend we need to notch the gold using a saw.
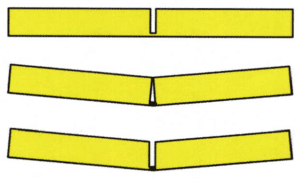
Use a hand file to file the ends to the correct angle to match the stone. Then, carefully saw into the gold stock on the three marks making certain that you DO NOT cut all the way through. The further you saw the saw sharper the corner will be. However, if you cut all the way through, it will be difficult to align the small parts correctly to solder. Once you have completed the saw cut, bend the gold stock to close the saw kerf, and then saw through again opening up the kerf.

Continue sawing and bending until you reach the correct angle to match the stone. Repeat the process on each of the marks, and then solder the seams closed with medium solder to strengthen the bends. Since these seams are not cut all the way through they can not move during later soldering, so medium solder is fine to use here.
Use a #6 cut needle file to clean up the solder joints, and then lay the stone on the under-bezel to make certain the angles are all correct and the stone is slightly larger than the under-bezel. If necessary make any corrections to the under-bezel before going any further.
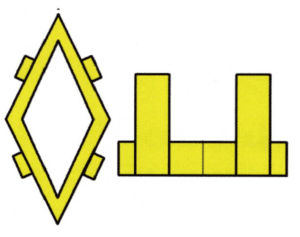
Next cut 4 prongs from the 1mm by 2mm gold stock. The prong length needs to be at least as long as the stone is deep. Solder the prongs to the sides of the under-bezel with the prong even with the bottom of the under-bezel. Make certain the prongs are perpendicular to the under-bezel. Then file the bottom of the prongs flush with the bottom of the under-bezel.
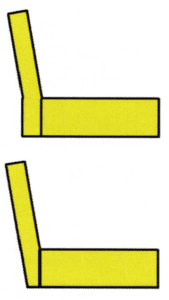
Next, grasp the top of the prong with your pliers and bend outward. Bend the prong to about a 15-degree angle. This will result is an angled prong with a bend at the under-bezel. Use your hand file to file the bottom of the prong until the prong forms a straight line.
You could accomplish this by filing this angle on the prong before soldering. Then solder the filed angle against the under-bezel to create the properly angled prong. However, I find it easier and more accurate to solder the prong on straight first, and then bend it to reach the proper angle and file away the excess.
The final step is to shape the prongs. Because we used a flat rectangular wire for the prongs we have a number of options to finishing the prongs depending on the final look we want for the finished piece of jewelry. The prongs can be left flat and polished to create a heavy looking prong, or hand engraved or small diamonds set into them.
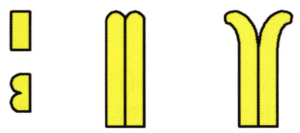
For this pendent we are going to cut and round them off to create a look of two round wires. To do this, begin by sawing down the length of the prong until you reach half way through the prong. Then using a triangular needle file, file down the length of the cut and on the outside ofthe prongs rounding the gold off. The prong can be left straight or you can cut through the top of the prongs and spread out the two wires. This method of creating a two-wire prong is easier than trying to solder two wires together. In addition, the inside of the prong is flat rather than scalloped which makes cutting the seat for the stone easier.
Ifyou used #6 cut needle files you can go straight to polishing. If coarser files were used, emery the file marks out with emery paper or rubber wheels. Polish the crown, and you are ready to add your new crown to your piece of jewelry.
Now that's truly a Crowning Achievement!
Related Articles
Victoria Lansford on the Art of Filigree

An Interview with Leila Tai

Fish Tail Setting

Making a Filigree Wire


The All-In-One Jewelry Making Solution At Your Fingertips
When you join the Ganoksin community, you get the tools you need to take your work to the next level.
