
Vertical Photography Set
2 Minute Read
This vertical photography set can be constructed inexpensively to photograph small objects such as jewelry and vessels from high angles. Make the modified box of ¾" plywood, about 12 inches wide and 16 inches deep, with a height of 12 to 16 inches. Leave the top and one end open. Point the interior walls white, or tape white paper to them, to reflect into the sides of your subjects (such as ring shanks), so that their original colors are not contaminated with background reflections.
Cut a piece of background material (paper, cloth or tile) to fit snugly inside the bottom of the box. Raise or lower it for the desired textural effect. Place a piece of nonglare picture glass, slightly larger than box, on the open top above the background. Tape the edges of the glass for safety.
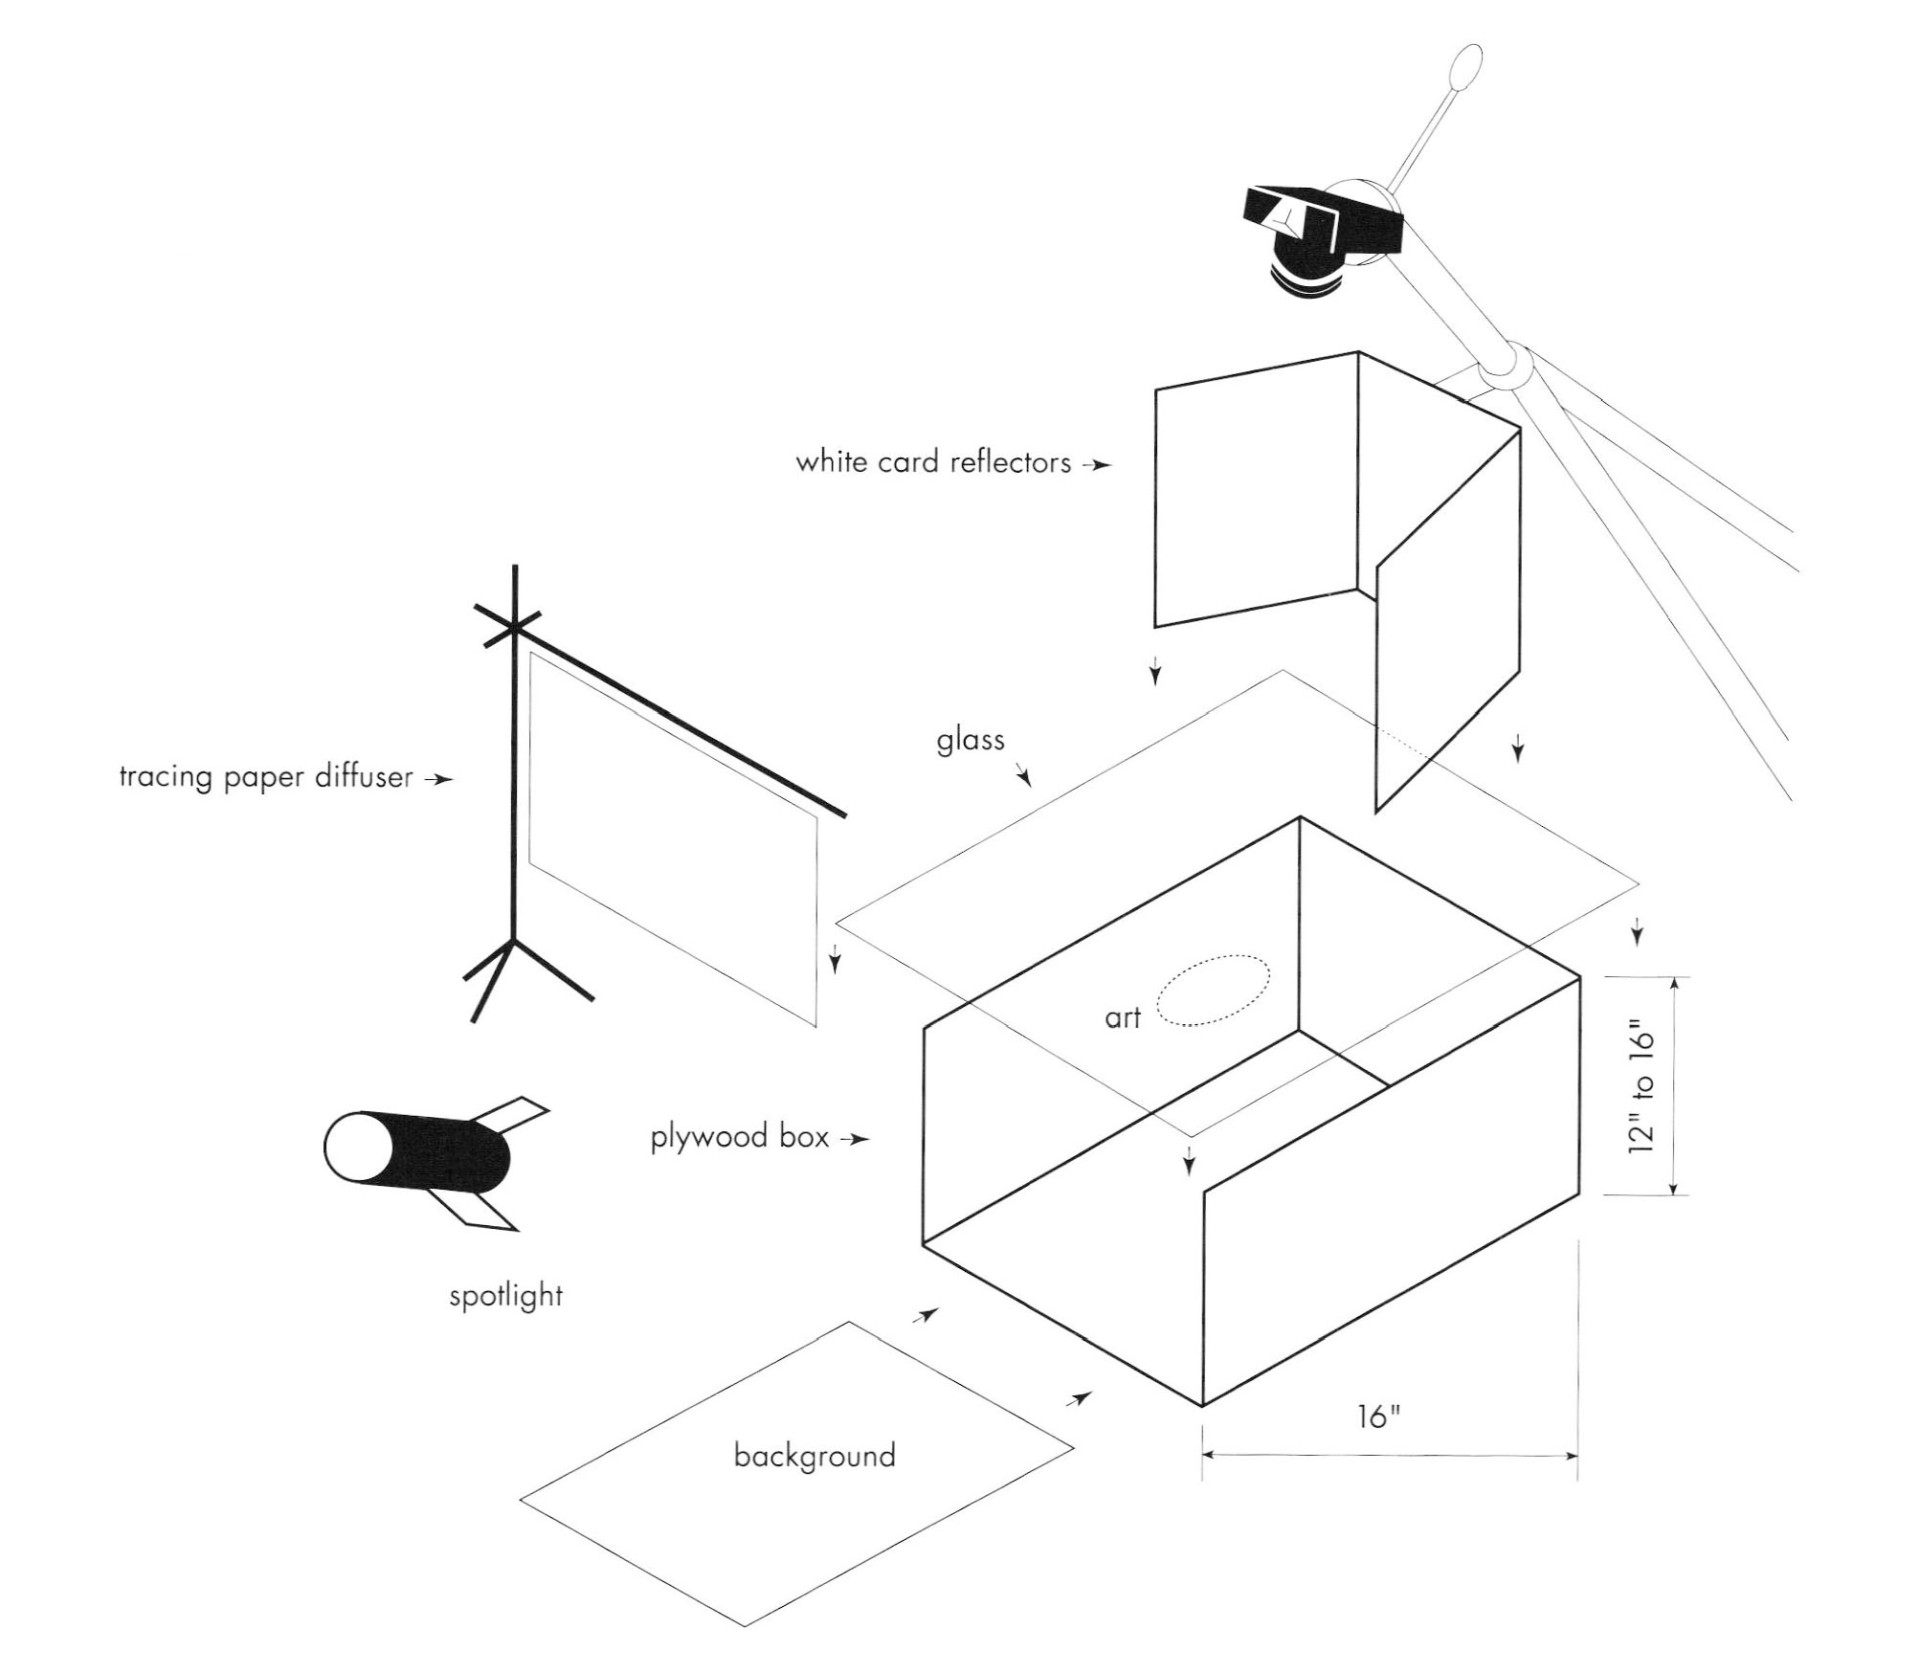
Place your subject on the gloss, and frame it in your camera viewfinder. Make a reflector by taping together three pieces of stiff, pure white cardboard, and place it near the subject. Depending on the focal length of your lens and the sizes of your subjects, you may need reflectors in a couple of heights, say, 6 inches and 14 inches. Aim a focusing spotlight (or pan light) at the subject from a distance of about 4 feet, and diffuse it with a sheet of 100% cotton rag tracing paper taped to a boom placed near the open end of the box. Take care not to ignite the paper with the light. This paper diffuser is now the light source; raising and lowering it and moving it nearer to or farther from the subject will affect the lighting quality. Keep it for enough from the subject to prevent glare in the glass. To make the background lighter, let raw light spill under the diffuser; to make the background darker, double the paper hanging below the glass.
You con odd fill light from the "top" by laying another stiff white cord, 11 x 14″ (not illustrated), on top of the three-sided white card reflector. Cut a peephole just large enough for the lens to see through. A second boom may be needed to hold this card. Open the barndoor on the spotlight and tilt the cord to catch light spilling onto it. If your background is very dark, this cord may create glare in the glass, so use it with discretion. If this cord is not used, close the top barndoor to keep camera reflections off the glass.
For further lighting refinement, cut small rectangles of various sizes from shiny silver cord and place them on the glass, leaning against the three-sided reflector card. Angled properly, these shiny cards will add sparkling highlights to your subject.
Some finesse is needed to get the tripod legs out of the way: make the back leg longer to tilt the tripod over the set, and secure it with a counterweight such as a sandbag, or the camera may smash through the glass (and your subject)! To get the set to a comfortable working height, you may wont to raise it on another box or stool.
Related Article:
Related Articles
Lighting for Jewelry Photography

Small Objects Photography Check Lists

Holding Objects for Photography

Testing the MK Gem eBox


The All-In-One Jewelry Making Solution At Your Fingertips
When you join the Ganoksin community, you get the tools you need to take your work to the next level.
