
Universal Expanding Ring Mandrel
The other week a friend came by the shop for some jewelry related lathe help. She was using a ring holder meant for benchwork (GRS Benchmate) to chuck her rings, both waxes and metal) for turning. While her holder worked, I thought I could come up with something better. Based on the Taig #1132 Blank Arbor, the mandrel shown here could be made with a straight shank as well, for mounting on a variety of lathes. As shown it will work on the Taig lathe, and if you turn down the end of the blank arbor for about 1/8", on the Sherline lathe as well. If you want to make it with a straight shank, you should chuck up some 1/2" rod in your lathe chuck, turn the end down to 1/4" dia for about 1" to 1-1/2", then chuck that 1/4" shank in a 1/4" collet on your lathe (Taig, Sherline and watchmakers collets all are available in 1/4" internal diameter).
4 Minute Read
The other week a friend came by the shop for some jewelry related lathe help. She was using a ring holder meant for benchwork (GRS Benchmate) to chuck her rings, both waxes and metal) for turning. While her holder worked, I thought I could come up with something better.
Based on the Taig #1132 Blank Arbor, the mandrel shown here could be made with a straight shank as well, for mounting on a variety of lathes. As shown it will work on the Taig lathe, and if you turn down the end of the blank arbor for about 1/8″, on the Sherline lathe as well. If you want to make it with a straight shank, you should chuck up some 1/2″ rod in your lathe chuck, turn the end down to 1/4″ dia for about 1″ to 1-1/2″, then chuck that 1/4″ shank in a 1/4″ collet on your lathe (Taig, Sherline and watchmakers collets all are available in 1/4″ internal diameter)
A note on materials, the 1132 is made from free machining steel, I also made the two conical washers of free machining steel. You could use any metal you wanted for the conical washers. The expanding arbor is made of Delrin, but again you could use any plastic, metal or even a hard urethane rubber.
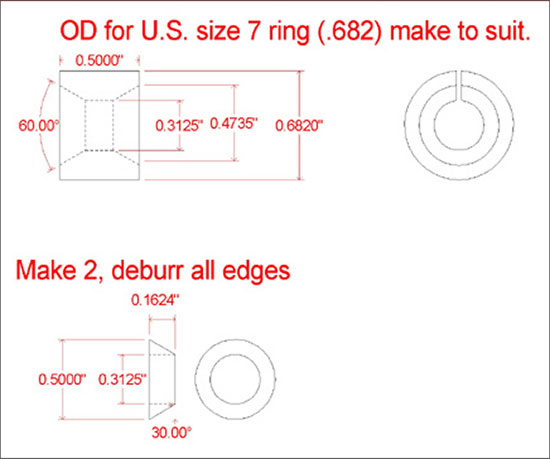
The Blank arbor. The 30 deg taper is mostly for tool clearance, it is not critical. Try and hold the diameter of the .3125 spigot to about +0/-.001 if you can. Hold the length of the spigot to about +/-.020. Nothing is that critical. The end of the 1132 is already tapped for the Taig spindle.

Make 2 of the conical washers. Try and get the angle as exact as you can. During and after turning break (deburr) all the sharp edges. It should be a slip fit on the mandrel spigot.
The expanding arbor hole should be a good clearance fit on the spigot, the hole diameter isn't critical as the conical countersinks center the arbor.
Make the conical countersink to fit whatever countersink you have one hand, there is no reason for it to be 60 degrees instead of 82 or 90 or whatever you have on hand.
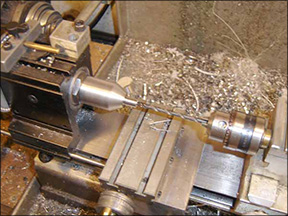
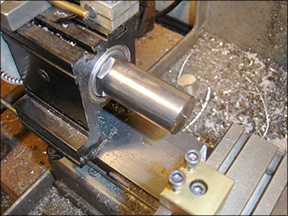 | The 1132 blank arbor mounted on the lathe |
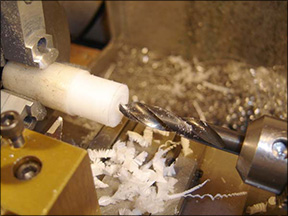
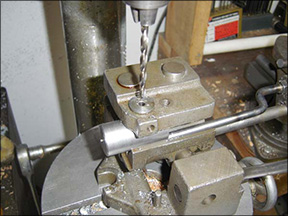 | Drilling a 3/16″ cross hole in the arbor, for a spanner to tighten and loosen. You could also mill flats for a wrench if you wanted. I did this on the drill press but it could be done on the lathe. |
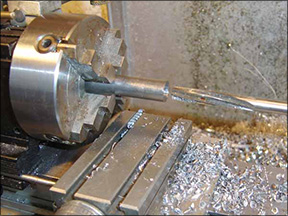
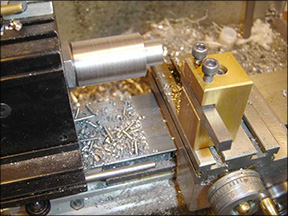 | Starting to turn the spigot. |
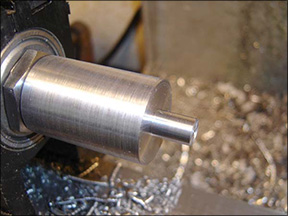 | The spigot finished. |
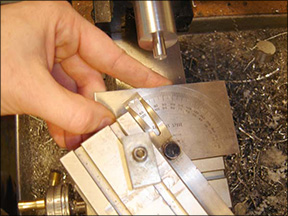 | Setting the compound. |
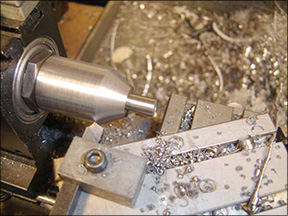 | Turning the conical relief on the blank arbor. |
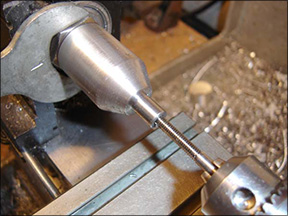
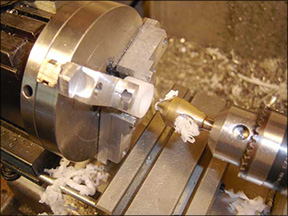
 | Center drill the spigot. |
 | Drill the spigot #21 for a #10-32 tap, as deep as you can (I drilled an inch deep) |
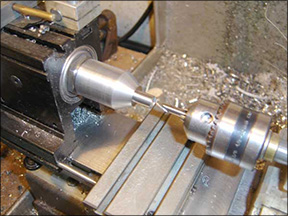
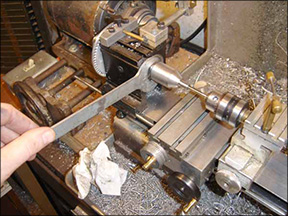 | Tapping the end of the spigot. I used a "gun" tap which is preferable for a through hole. The Taig tailstock ram slides so I was able to chuck up the tap and turn the spindle with a wrench. The tailstock kept the tap aligned. |
 | Closeup of the tapping. |
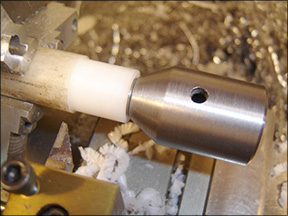
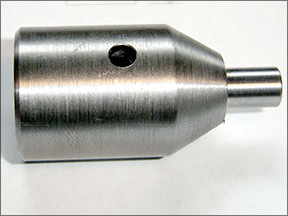 | The finished arbor. |
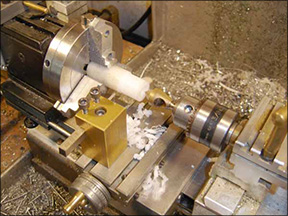
 | Chuck up a length of 1/2″ rod, center drill, drill and ream for a sliding fit on the arbor spigot. I used a .3135″ reamer to get a good sliding fit. You could also bore it to size if you don't have an oversize reamer, or you could turn the spigot .001″ undersize. Up to you. |
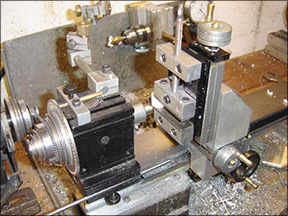
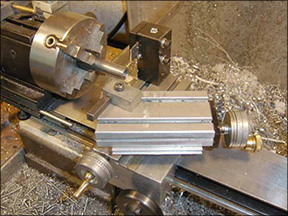 | The compound is set to turn the taper and the back parting toolpost is set to the rear. If you don't have the parting toolpost you will have to turn one washer, part or saw off, then set the compound again and repeat. |
 | Turning the conical washer. You can make the taper to match whatever countersink you have on hand, 82 degree, 90 degree, whatever is easiest and you have on hand. |
 | Parting off the washer |
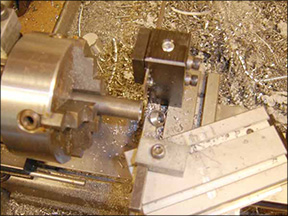 | The washer drops off. Make two of these and deburr. |
 | Turn the arbor to the desired diameter, in this case I turned it to hold a U.S. size 7 ring. Center drill and drill the expanding arbor, it should be a slip to loose fit on the spigot. |
 | Use a 60 degree countersink to make the tapered hole. As I say above, if you have a different countersink on hand, make the tapered washers to suit that angle. |
 | Use the completed arbor and a washer as a gage to see how deep you have to make the countersink. You can just eyeball this. |
 | Cut the expanding arbor off, to length. |
 | Rechuck and put the other countersink in. As an alternative method, you can drill, counterbore and cut off the blank first, then chuck it up in the arbor and turn the outer diameter before slitting. This may give more precise results. |
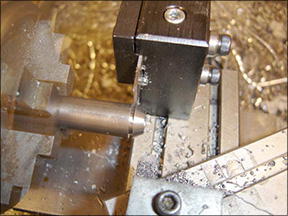
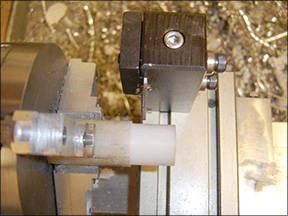
 | A convoluted milling attachment setup for putting the slit in the expanding arbor. You can just saw it with a hacksaw, jewelers saw or whatever is easiest. It isn't critical. |
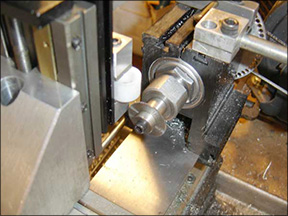 | Another view of the setup. |
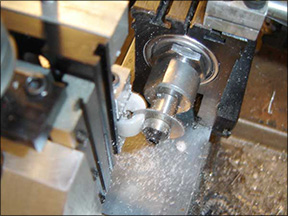 | Sawing the slit. |
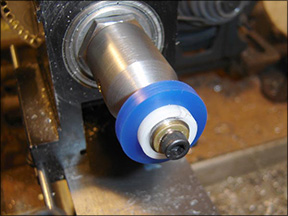
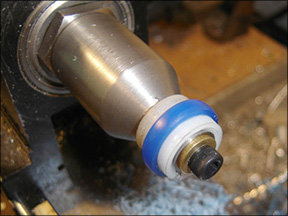
 | The completed universal expanding ring mandrel. I added a washer and a #10-32 screw to complete the mandrel. You can make slit expanding arbors for any size ring, and machine steps, grooves, etc to suit your work. |
 | A blank ring chucked up. |
 | Turned down. (Tip: I used a machinists radius gage to form the profile in the wax, just holding it by hand) |
Related Articles

Customized Steamer Bucket Enclosure

How to Make a Wax Injector

Customized Robo Grip Pliers

Homemade Flex-Shaft Guard


The All-In-One Jewelry Making Solution At Your Fingertips
When you join the Ganoksin community, you get the tools you need to take your work to the next level.
