
Transferring Patterns to Wax
Starting out with clear layout lines is essential with any wax-carving project. If you're creating a design from scratch, it's easy enough to clearly scribe your lines directly onto the wax block. But what if a customer has a design or image they want you to turn into a piece of jewelry? How can you accurately recreate that same design on a block of wax? Transfer it. Here are some quick tips for transferring a pattern onto wax.
2 Minute Read
Starting out with clear layout lines is essential with any wax-carving project. If you're creating a design from scratch, it's easy enough to clearly scribe your lines directly onto the wax block.
But what if a customer has a design or image they want you to turn into a piece of jewelry? How can you accurately recreate that same design on a block of wax? Transfer it.
Here are some quick tips for transferring patterns to wax.
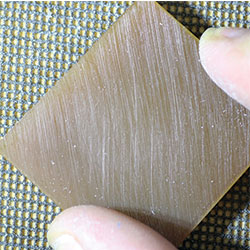 | To begin, mill or file a wax sheet or block so that it is just a millimeter or two thicker than the desired size of the finished wax. On a flat surface, sand the carving/milling wax on 80 and then 180 grit drywall-sanding screen to create a smooth and even work surface. Available at hardware stores, drywall-sanding screen is fantastic for working with wax because it doesn't clog. |
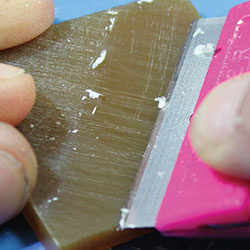 | Using a single-edge razor blade, drag the blade toward yourself, turning the wax and scraping it from different directions until the surface is smooth. Handle the razor blade carefully! |
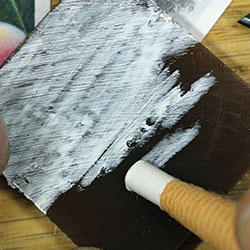 | With a China Marker (a white grease pencil), evenly coat the surface of the wax. The white color will allow you to easily see the layout lines you're going to transfer to the wax. Then use a 6B pencil to densely cover the back of the pattern. This very soft pencil will create a heavy coating of graphite. |
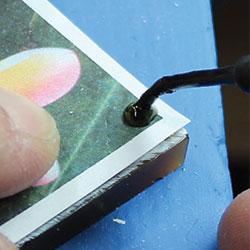 | Position the image so the graphite side of the paper is against the grease pencil side of the wax. Around the outside of the pattern, poke three holes through the paper with a wax pen or heated dental pick. Hold the paper down, close to the hole. When you pull up the pen, molten wax will come up through the hole and secure the paper to the wax. |
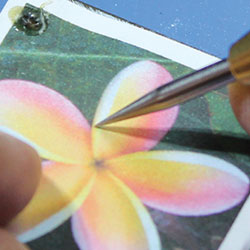 | Use a sharp scribe to go over all the lines on the paper pattern, which will transfer the graphite onto the grease pencil surface. Before removing the paper, lift up one corner to check that you have transferred the entire pattern. The pattern will be clear, but use caution as it can easily smear off. |
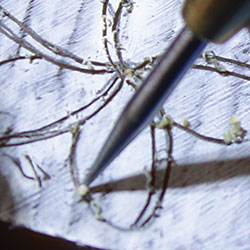 | Once satisfied with the design transfer, remove the paper and use the scribe to go over all the graphite lines on the wax. This makes the lines incised, so they are crisp and can be filled in with marker. |
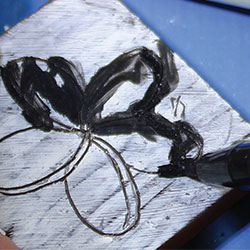 | Use a black brush marker to fill in the scribed lines on the wax. This soft-tipped marker allows you to get ink down into the scribed lines, but it needs to be prepped before using or the ink will bead up on the surface and won't fill the lines. Wipe the brush marker across a bar of soap—this will allow the ink to stick to the wax. Be careful not to overdo the soap or you will gum up the marker. Fill in all the incised lines with the marker. (If you're using a dark-colored carving wax, fill in the scribed lines with white tempera paint mixed with a drop of dish soap.) |
| With the razor blade, carefully scrape off the grease pencil and excess brush marker from the wax surface. Now you have a clear crisp pattern with which to work. |
![]()
In association with
![]()
The award-winning Journal is published monthly by MJSA, the trade association for professional jewelry makers, designers, and related suppliers. It offers design ideas, fabrication and production techniques, bench tips, business and marketing insights, and trend and technology updates—the information crucial for business success. “More than other publications, MJSA Journal is oriented toward people like me: those trying to earn a living by designing and making jewelry,” says Jim Binnion of James Binnion Metal Arts.
Click here to read our latest articles
Click here to get a FREE four-month trial subscription.
Related Articles

Identifying and Preventing Wax Defects

Tips for Avoiding Meltdown
Slicing Wax Slabs

How to Modify Tools for Carving Wax


The All-In-One Jewelry Making Solution At Your Fingertips
When you join the Ganoksin community, you get the tools you need to take your work to the next level.

