
Single File
3 Minute Read


A step-by-step guide to single-row pavé settings
Single-row pavé, which consists of a single row of small diamonds set into a narrow strip of metal, is a beautiful use of melee and one of the most popular setting styles today. While more difficult than prong or bezel setting, it is a great first step for learning bead or pavé setting.
- The strip of metal must be slightly wider than the diamonds you are setting. You will need at least 0.5 mm extra on each side of the stone to account for the bright cut. To begin, smear beeswax on the surface of the metal. After applying the wax, I like to blot it with a beeswax stick to ensure an even level of wax. You want the wax just thick enough to hold the stones.
Begin placing the stones along the metal upside down and aligning them so there is enough space between them. I recommend leaving enough space that would allow you to slide a piece of paper between the girdles. This will give you an ideal minimum amount of space. You can also spread the stones out a little more if you need to cover more distance with fewer stones. Slide the stones around until you are happy with the spacing and layout.
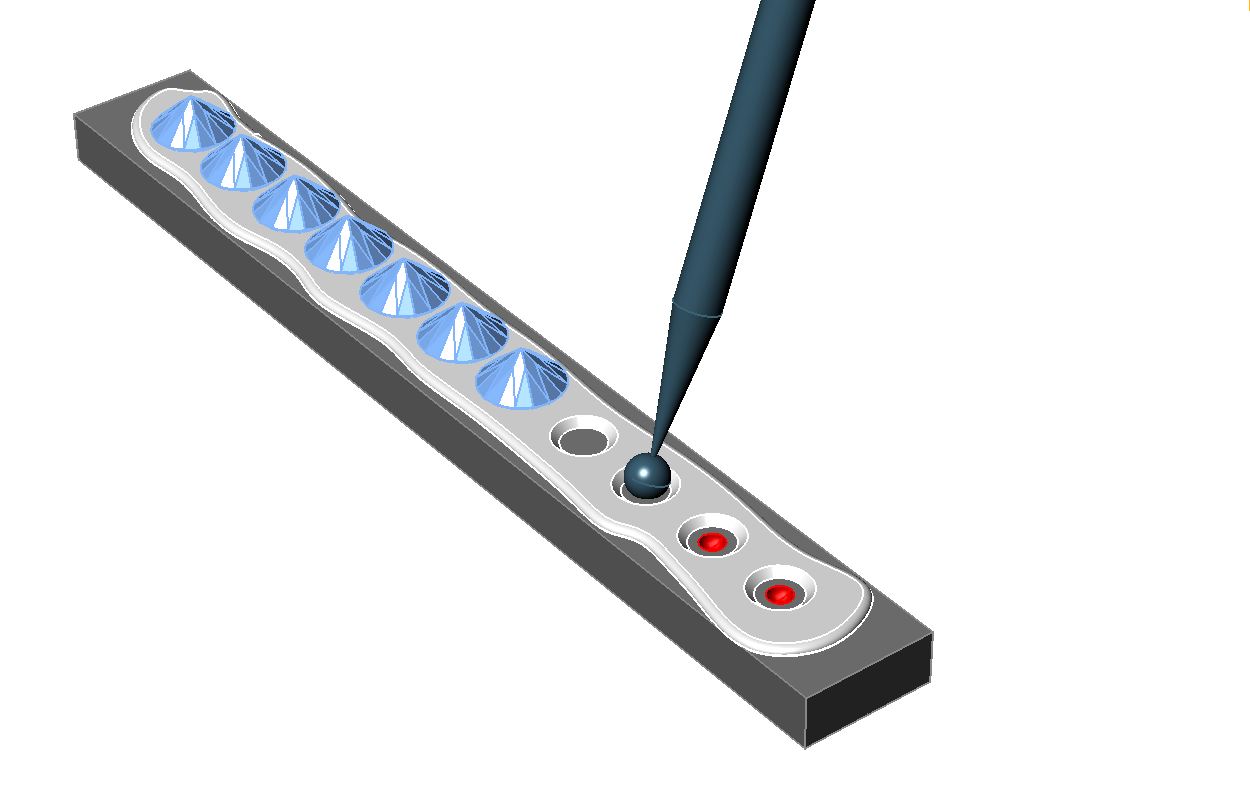
Then carefully pull each stone off of the metal by picking it straight up with a pair of tweezers. This will leave a nice round spot in the wax where the table was. Use a small (less than 1 mm) ball bur and cut a small divot in the metal in the center of the spot left in the wax to create the pilot holes for your settings. Use a small (0.5 mm) drill bit to drill out the pilot holes. Drill all the way through the metal but be careful that the drill bit doesn't come out through the sidewall.
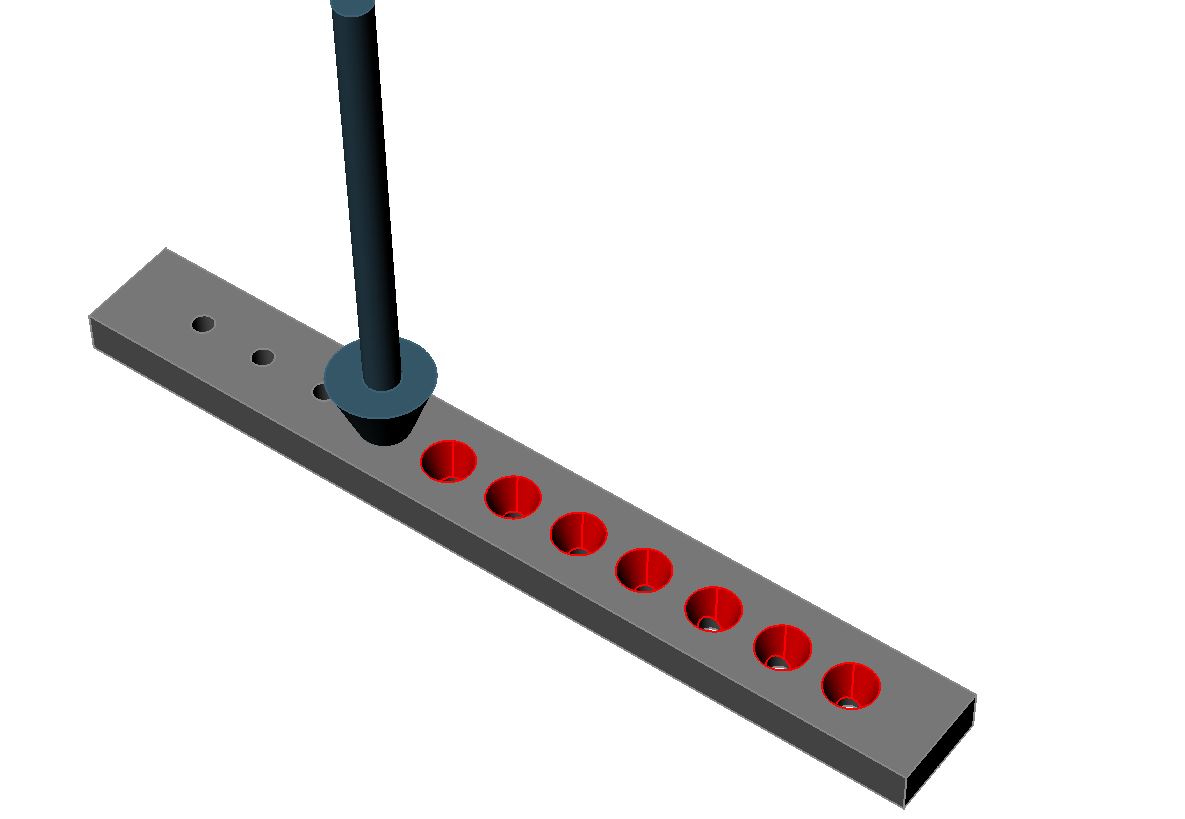
- Next, use a Krause bur or cone bur to open up the tops of the holes to about 75 percent of the diameter of the stones. The bottoms of the holes can remain the size of the drill bit.
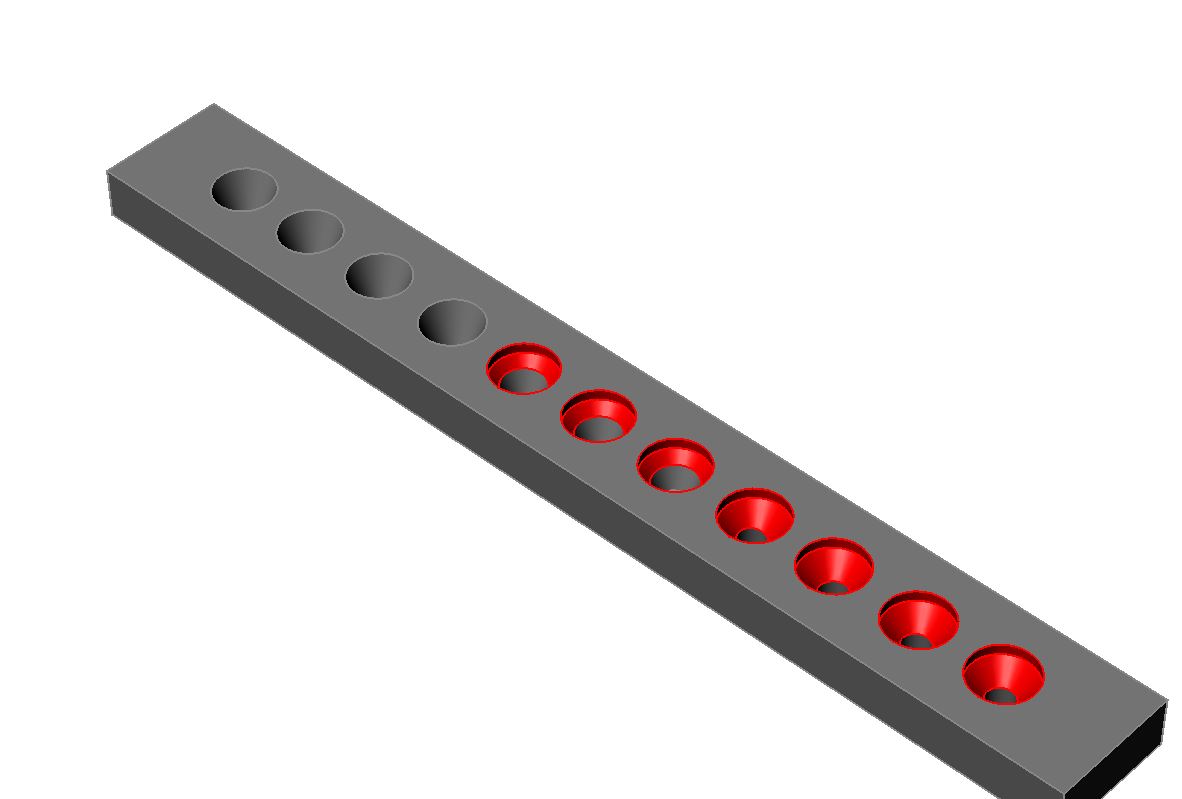
- Using a setting bur that is 90 percent of the diameter of the stone, drill out the hole and set the depth. You want the stone to be girdle level with the metal so you'll need to eyeball the measurement.
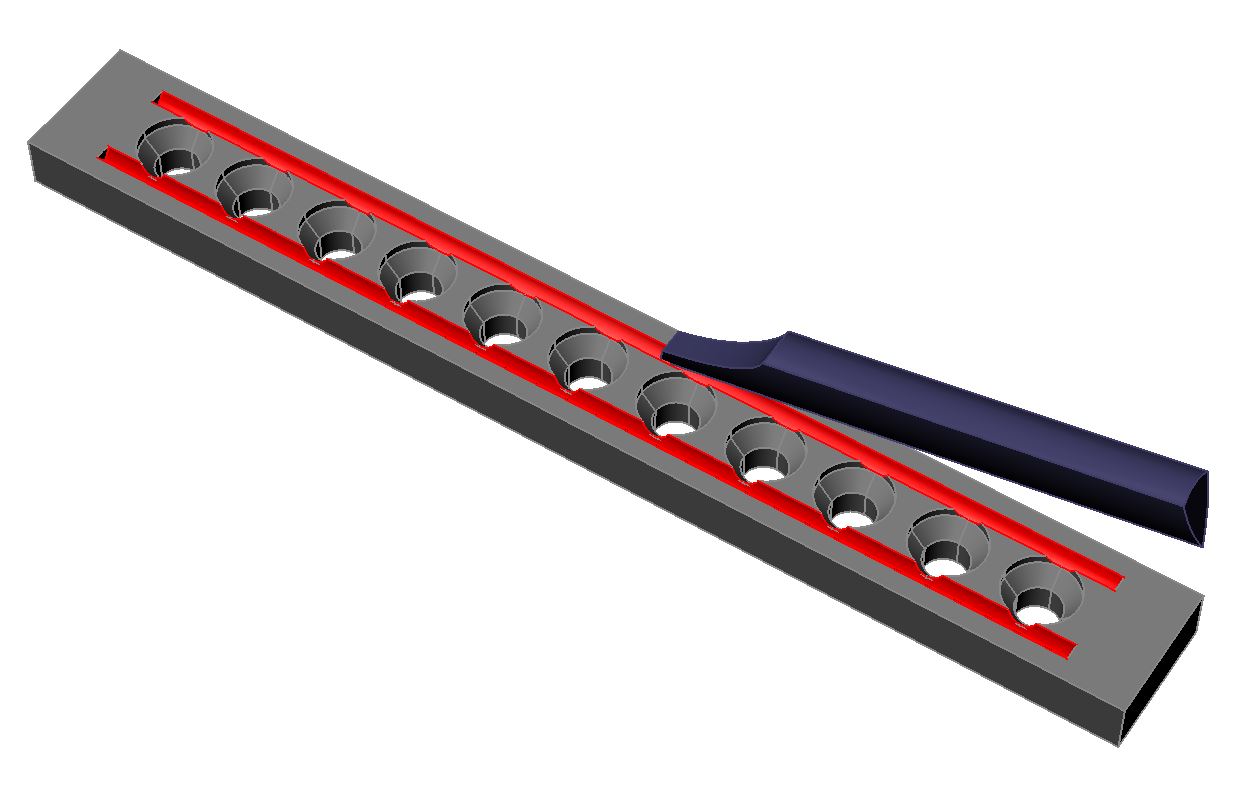
- Now it's time to create the bright cuts that will border the stones. Use an onglette or a knife graver to make the cuts from the edge of each hole, just nicking the edge. You want to lean the graver away from the center of the bar to create the bright cut. Cut the depth to just below where the girdle of the stone will sit.
- Next, make the center line relief cut that will make the stones appear to float in the prongs. Use an onglette or round bottom graver and cut a centerline from hole to hole along the entire length of the pavé run. The depth should be just below where the girdles of the stones will be.
- Now it's time to make the knockouts, which are cuts that will separate the prongs along the 90-degree axis. Drop a round bottom graver into the bright cut at a 90-degree angle, and then make one short cut to the right to the center of the hole where the stone will go. At this point, you have created the prongs that will hold the stones. You may need to do some re-cutting to even out the prongs.

- Use a heart bur the same size of the stones you're setting and open up all of the seats to 100 percent. Drop each stone in place; they should fit snugly.

- With a graver, nudge the prongs tight on the stones. You want to move the prongs toward the center space between the stones. All but the final set of prongs on either end should be contacting and holding two stones. Round off the top of each prong with the proper size beading tool. Ideally, the tool should just cover the entire prong. Once complete, your single-row pavé piece will be ready to go.

In association with
The award-winning Journal is published monthly by MJSA, the trade association for professional jewelry makers, designers, and related suppliers. It offers design ideas, fabrication and production techniques, bench tips, business and marketing insights, and trend and technology updates—the information crucial for business success. “More than other publications, MJSA Journal is oriented toward people like me: those trying to earn a living by designing and making jewelry,” says Jim Binnion of James Binnion Metal Arts.
Click here to read our latest articles
Click here to get a FREE four-month trial subscription.
You assume all responsibility and risk for the use of the safety resources available on or through this web page. The International Gem Society LLC does not assume any liability for the materials, information and opinions provided on, or available through, this web page. No advice or information provided by this website shall create any warranty. Reliance on such advice, information or the content of this web page is solely at your own risk, including without limitation any safety guidelines, resources or precautions, or any other information related to safety that may be available on or through this web page. The International Gem Society LLC disclaims any liability for injury, death or damages resulting from the use thereof.
Related Articles

Jewelry Rendering Tools and Projects
Making a Platinum Wire Setting
Custom Antique Coin Pendant

A Faberge Inspired Mechanical Jewelry Egg

The All-In-One Jewelry Making Solution At Your Fingertips
When you join the Ganoksin community, you get the tools you need to take your work to the next level.

Trusted Jewelry Making Information & Techniques
Sign up to receive the latest articles, techniques, and inspirations with our free newsletter.